
|
|
|
Performing a Manual Uninstall for OEDS
The manual uninstall procedure is ONLY necessary when upgrading from versions lower than 3.0.0e4 or 2.6.2e16.
When performing the manual uninstall process, you must perform these procedures in the following order:
The first step in the performing a manual uninstall process is the stop all services related to Gaming, GWIZ, and OAP. To stop the services, follow these steps:
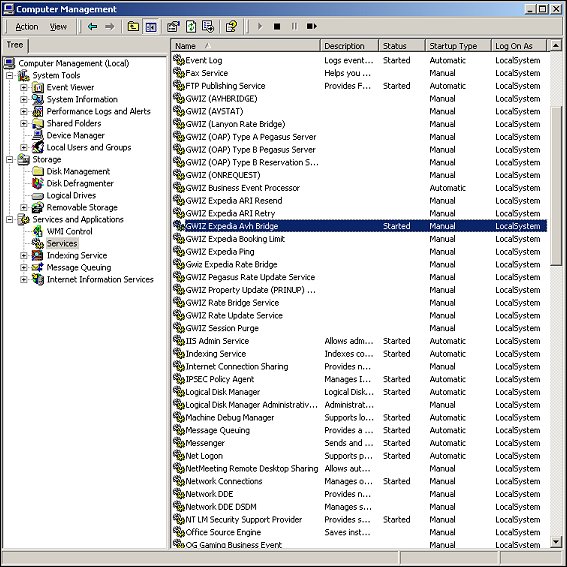
Tip: The word "Started" appears in Status column for the Services that are currently running.
Once the Gaming, GWIZ, and OAP services have been stopped, they must all be uninstalled. To uninstall the services, select Start>Run, and type cmd in the Open field. The command prompt appears.
At the command line, type installutil -u, followed by the path to the executable service. For example, to uninstall the Expedia AVH Bridge, type C:\WINNT\Microsoft.NET\Framework\v2.0.50727>installutil -u "C:\Program Files\Micros Systems\OEDS\GWIZ\AvStat2.exe".
Repeat this step until all necessary services have been uninstalled. Verify that all Gaming, GWIZ, and OAP Services have been removed from the PC/Server by right-clicking on My Computer, selecting Manage>Services and Applications>Services, and performing a visual inspection.
After uninstalling the services, back-up all existing 2C, FDB, Gaming, OAP, and OWS_WS folders. An easy way to backup your files is to just rename them with _old in the file name. For example, if the folder was named Micros, you can rename the folder as Micros_old.
Note: It is extremely important to have a backup of these files, as you may need to reference the existing configuration files during the new installation.
Once the files and folders have been renamed, you should delete the original files and folders associated with the OEDS install.
After backing-up and deleting the original files, proceed to Performing a New Installation.
|
See Also |