
|
|
|
Issuing E-Certificates
Prerequisites
From the Profile Options menu, select OCIS E-Certs to open the OPERA E-Certificate screen and issue E-Certificates to the profile. When issued, the E-Certificate number will be placed on the member's profile and will remain on the profile until consumed. Once issued, the E-Certificate may be consumed by the guest or by a fixed list of people associated with the guest. This guest list is defined by setting the Profile>Setting>Maximum Allowed E-Certificate Guest List application setting to the number of people allowed on a guest's list. For more information, see E-Certificate Guest List.
In addition to issuing the E-Certificate to the profile, you can use this screen to print a voucher for the E-Certificate, verify its number, define where it can be consumed, and view its details.
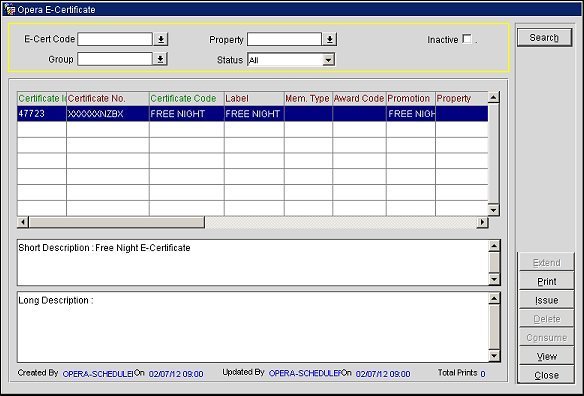
Select from the following criteria to refine your search results.
E-Cert Code. Select the down arrow and choose an E-Certificate code from the list of values.
Property. Select the down arrow and choose a property from the list of values.
Group. Select the down arrow to filter the search results based on E-Certificate Group.
Status. Select the down arrow to filter the E-Certificates by status (All, Canceled, Consumed, Deleted, Expired, Issued, Reserved).
Inactive. Select to display only inactive E-Certificates.
Certificate Id. The E-Certificate Id number.
Certificate No. The E-Certificate number.
Note: If the e-certificate is not consumed and the user does not have the OCIS E-Certificate Number View permission granted, the e-certificate number will be masked.
Certificate Code. The code used to identify the E-Certificate.
Label. The display label for the E-Certificate.
Membership Type. The membership type linked to the E-Certificate.
Award Code. The award code linked to the E-Certificate.
Promotion. The promotion code attached to the E-Certificate.
Property. The property attached to the E-Certificate.
Expiry Date. The expiration date for the E-Certificate.
Value. The value of the E-Certificate.
Cost. The cost in membership points for consumption of the E-Certificate.
Reservation Certificate. A "Y" indicates the E-Certificate can be consumed against reservations.
Web Consumed. A "Y" indicates the E-Certificate can be consumed on the web.
PMS Consumed. A "Y" indicates the E-Certificate can be consumed in PMS.
Verify. A "Y" indicates the E-Certificate has been verified through the E-Certificate Consumption screen.
Issue Type. The issue type for the E-Certificate is displayed in this column. This is either "Assigned," "Opt-In," or "Purchased."
Group. Group the E-Certificate is referenced in.
Consumer Last. The last name of the guest who will consume the E-Certificate.
Consumer First. The first name of the guest who will consume the E-Certificate.
Consumer Email. The email address of the guest who will consume the E-Certificate.
Consumed At. The property or hotel chain where the E-Certificate can be consumed.
Short Description. A short description of the E-Certificate.
Long Description. A long description of the E-Certificate.
Search. Select to begin the search and display results.
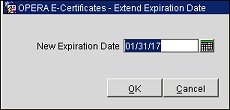
Extend. (Profiles>OCIS E-CERTIFICATE EXTEND permission must be granted to the user for this button to be available. In addition, the e-certificate must be issued to the profile.) Select to open the E-Certificates - Extend Expiration Date screen to extend the expiration date for the e-certificate. The new expiration date will auto-populate based on the value for the "Expiry Months" field on the E-Certificate Type screen. For example, if the value for Expiry Months is "12" and you select the Extend button, the new expiration date will be one year from the current business date. You can manually change the new expiration date by selecting the calendar button and choosing a new date. Select OK to save the new expiration date.
Note: The date that auto-populates into the New Expiration Date field will always default to the last day of the month.
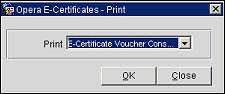
Print. Select to open the E-Certificates- Print screen and choose an E-Certificate voucher type to print. Available options are E-Certificate Voucher Consumed (only consumed vouchers will be printed) or E-Certificate Voucher Issued (only issued vouchers will be printed). To Print an e-certificate, you must first have the Print Task OCIS ECERTIFICATES configured as well as the customizable reports e-certificate_voucher and e-certificate_voucher_issued. OCIS E-Certificates may only be issued in ORS, but they can be printed in PMS. Printing of e-certificates will generate an entry in the User Activity Log under the Activity Group Miscellaneous.
Note: After printing off an E-Certificate, the total number of certificates that have been printed off per schema can be seen in the lower right hand corner of the OPERA E-Certificate screen when the E-Certificate is highlighted in the grid. Each time an E-Certificate is printed, the Total Prints count will be incremented by 1.
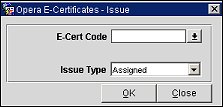
Issue. Select to open the E-Certificates - Issue screen and select an E-Certificate code and issue type to issue to the profile. Select the E-Cert Code down arrow and choose an E-Certificate code from the list of values. Select the Issue Type down arrow and choose an issue type from the list of values. Available issue type options are "Assigned," "Opt-In," or "Purchased."
Delete. Select to delete an E-Certificate that has been issued to the profile.
Consume. Select to open the E-Certificate Consumption screen and verify the E-Certificate, define where it can be consumed, or attach it to a profile.
View. Select to open the E-Certificate View screen and view read-only detailed information about the E-Certificate.
See Also