
|
|
|
Creating or Editing Channel Conversion Rate Codes for ADS/OWS/WEB Channels
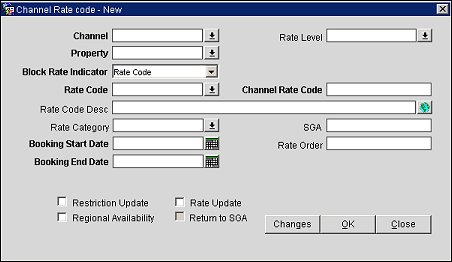
To create new channel conversion rate codes for ADS, OWS or WEB channels, select the New button from the Rate Code tab on the Channel Conversion screen. To edit a channel conversion rate code, select the Edit button. The Channel Rate Code - New or Edit screen will open.
Note: For OCM users, the Channel Rate Code - New or Edit screen will be accessed from the Rates screen by selecting the New or Edit button in the Channel Management grid area.
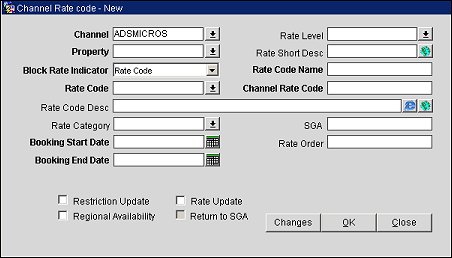
Note: When the "Enable Text Editor" check box is selected on the Channel Setup screen, an Internet Explorer button will be displayed next to the Rate Code Desc field, and the Channel Rate code - New screen will appear as in the image below:
Complete the following fields and then select the OK button to add a new channel rate code or save changes to an existing one:
Channel. (This field cannot be edited once the channel conversion rate code is saved.) Select the down arrow and choose a channel from the list of values. This is the channel in which the rate code will be distributed.
Rate Level. Select the down arrow and choose a rate level for the rate code.
Property. (This field cannot be edited once the channel conversion rate code is saved.) Select the down arrow and choose a property from the list of values. This is the property set up for this channel and associated with the channel rate code.
Rate Short Desc. Enter a short description for the rate.
Tip: Select the ![]() globe button next to this field to enter multiple language descriptions for the rate. From the Multilanguage Descriptions - New screen, select the Language down arrow to choose a language and enter your description in the Description field. Select the edit button next to the Description field to open the HTML Editor and add formatting to your language description.
globe button next to this field to enter multiple language descriptions for the rate. From the Multilanguage Descriptions - New screen, select the Language down arrow to choose a language and enter your description in the Description field. Select the edit button next to the Description field to open the HTML Editor and add formatting to your language description. 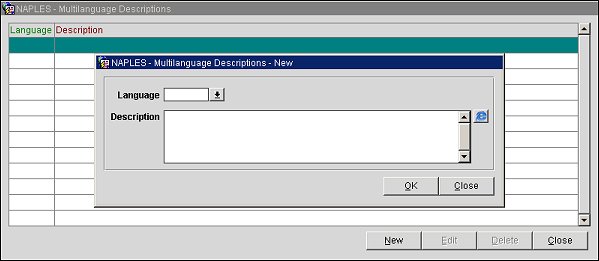
Block Rate Indicator. (This field cannot be edited once the channel conversion rate code is saved.) The block rate indicator identifies if the channel rate is from the block rate code or the name of the block itself.
Rate Code Name. Enter a name for the rate code.
Rate Code. (This field cannot be edited once the channel conversion rate code is saved.) The Opera rate code that is mapped to the channel rate code.
Channel Rate Code. Enter a user-defined rate code to correspond to the Opera rate code that is used in the channel for availability and sell messages.
Rate Code Desc. This description is automatically entered from the rate header once the rate code is selected. You can modify this description if it is required for channel customization.
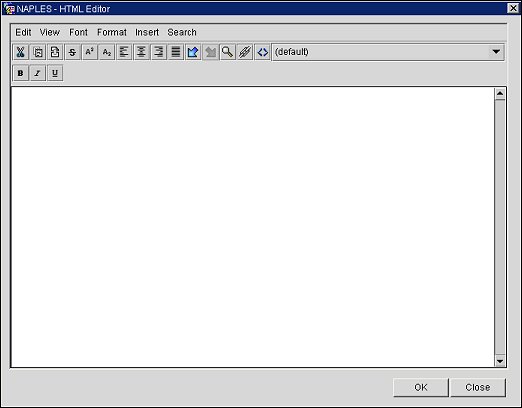
Tip: If the Enable Text Editor check box is selected on the Channel Setup screen, you can add a rate code description for display on the channel by selecting the ![]() button next to this field. The following HTML Editor will open:
button next to this field. The following HTML Editor will open:
Rate Category. Select the down arrow and choose a rate category for the rate code. This field will be required if the Channel Rate Category check box is selected for the channel in Channel Setup.
SGA. Enter the signature airline code (SGA). Use the SGA to filter rate codes for specific sources of business. This field can also be used to exclude specific sources of availability and bookings from the selection of rates.
Booking Start Date. (required) Enter the date this rate becomes available through the channel.
Rate Order. Enter the order the rate code will display in a list of seamless availability returns. Type "1" to have this rate code returned first. You can use the same number multiple times to indicate that a group of rates should be returned within the same sequence. The rate will be auto arranged based on the number that is entered here. When an existing rate’s order is changed to the next higher or lower value, the rate order that directly precedes or follows will automatically adjust. For example, if the order is arranged as 1, 2, 3, 4, 5 and 5 is changed to 6, the new order will be 1, 2, 3, 4, 6 with position 5 open for assigning to a rate.
Booking End Date. (required) Enter the last date to which this rate will be available to the channel. You can modify this field or delete it after configuration. Ensure the room type relations are in effect.
Rate Tier. (Only available if the BBAR Tier Y/N check box is selected on the Channel Setup screen) Select the down arrow and choose a rate tier to associate with the channel's rate code conversion.
Restriction Update. Select this check box if restrictions will be sent to an ADS, GDS, or ODS partner, such as Expedia, via the AVH messaging functionality.
Note: This check box must be selected when setting up an ADS channel.
Rate Update. Select this check box if this rate is to participate in Rate Update processing.
Note: This check box must be selected when setting up an ADS channel.
Regional Availability. Select this check box if this rate will participate in Regional Availability processing.
Return to SGA. Select this check box only when you wish to return the signature airline code.
Changes. Select to open the User Activity Log and view changes channel users have made to the channel conversion rate codes.
To create new or edit existing channel rate code descriptions, select the Global Descriptions button from the Rate Code – New or Rate Code – Edit screen. Global descriptions on either the Rate conversion are applicable to all instances of the finding the channel value. This value is automatically updated by Opera.
Note: Global channel rate code descriptions should only be created for ODS and GDS channels.
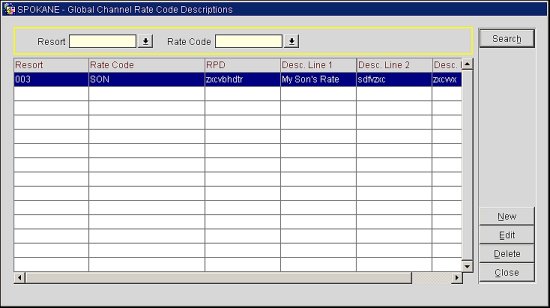
Select the New or Edit buttons to create new or edit existing global channel rate code descriptions. Select the Delete button to delete an existing channel rate code description.
Resort. Select the resort to which the global channel rate code descriptions will be applied.
Rate Code. Select the rate code.
RD1 (Rate Description Line 1). Enter the first line of the rate description. This field is limited to 30 characters (including spaces).
RD2 (Rate Description Line 2). Enter the second line of the rate description. This field is limited to 45 characters (including spaces).
RD3 (Rate Description Line 3). Enter the third line of the rate description. This field is limited to 45 characters (including spaces).