
|
|
|
ORMS Configuration Booking Class
Note: This topic applies to ORMS ADF11.
The Booking Class Dashboard allows you to configure Booking Classes for each Yield Category. Booking classes allow forecasts in ORMS to be tailored to specific customer segments. This makes forecasts more precise and the expected price-level more differentiated. ORMS provides the possibility to choose the most appropriate from a number of ‘classifiers’ such as Market Code, Market Group, Source Code, Source Group and Channel to help focus on your specific market. This helps ORMS identify how your booking behavior is determined.
Access this screen by selecting Configuration>Booking Class.
Note: Booking Classes are not currently displayed in the ORMS Home or Hurdle Recommendation screens, but will be in a future version.
Users must be granted permissions to configure, delete, or edit booking classes.
Revenue Management>CONFIG BOOKING CLASS - When this permission has been granted, the user will be able to access the Booking Class screen as well as set up and change the Booking Class Type. If the user is not granted this permission, the Booking Class screen is grayed out.
Revenue Management>CONFIG BOOKING CLASS DELETE - This permission grants users the ability to delete existing Booking Class Codes.
Revenue Management>CONFIG BOOKING CLASS EDIT - This permission grants all users the ability to create or edit Booking Class Codes.
Your objective is to configure at least one booking class for each yield category by identifying within the customer segments (Booking Class Types), such as Marketing Codes, those that have similar reservation pace statistics. You will first identify your search criteria in the Search Tab and then after analysis configure the Booking Classes on the Configuration Tab (Please note that after Modelization, the Configuration Tab is view-only).
You will set up and select the booking class type and its booking class codes and attributes for the selected yield category. These will be used for forecasting. When the Booking Class Dashboard first opens, you will see two tabs: one for the Search Criteria and one for Configuration. The Search Tab is the first tab that displays when opening the Booking Class Configuration Dashboard.
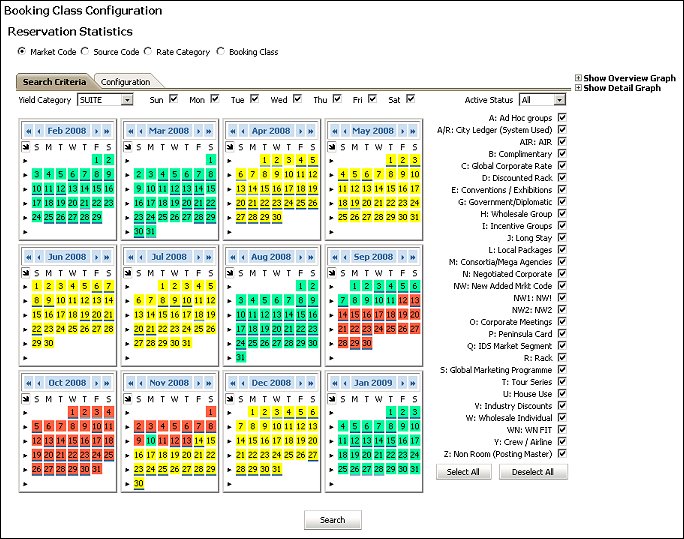
The Search Criteria Tab contains filters you can use to view pace reservation behavior that exists in OPERA. The criteria you select appears in the two graphs (Overview Graph and Detail Graph) on the right-side of the screen. Always select the Search button when you have made your selections
The calendar displays 12 months where the last month is the current month in PMS. Select any date in the past on the calendar from where you want to start viewing the reservation pace statistics, i.e. 30 days, 60 days, 6 months, etc. The amount of time will give you an average in the graphs.
If you want to display a different set of twelve months, click on the (back) << < or (forward) > >> arrows at the top of the selected calendar month. The double arrow moves the calendar back twelve or forward twelve months, respectively. The single arrow moves the calendar back or forward one month, respectively. All other calendar months in the grid appear in sequence.
![]()
Depending on the active dashboard, various dates are already highlighted as configured:
Individual Days - To select one day, simply click the one day. For several individual days not in a sequence (i.e. Monday Wednesday, and Friday) use Ctrl and click the separate days.
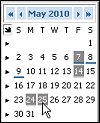
Same Days of the Week for the Month - To select a specific day of the week for the entire month, for example all Thursdays, simply place the cursor at the top of the day of the week (i.e. T) and click. You can also use Ctrl and select more than one day of the week for the entire month, for example, all Saturdays and Sundays.
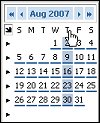
Entire Week - To select the entire week, click the pointer for the appropriate week.
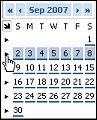
Entire Month - To select the entire month, click the arrow at the top of the month.

There are two graph types, Overview and Detail. These can both be viewed by selecting the display button (+) for Show Overview Graph and Show Detail Graph. You may leave the graphs open while you select your search criteria and select Search. The charts immediately display the existing data for Class Codes that produced bookings. In both charts, if none of the selected Class Codes or criteria have any bookings for the time period, they do not appear on the graph.
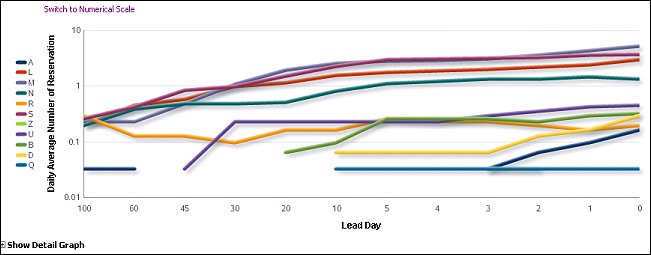
The Overview Graph initially provides a numeric scale where you can compare the color-coded Class Codes and number of average daily reservations over the selected period of time, up to the day of arrival. There are two views: Numeric (default) and Logarithmic.
In the example below,

The Logarithmic Scale Graph provides smaller increments in the left axis for viewing Daily Average Number of Reservations. This provides a more expansive and detailed view of the lines for the Lead Day axis.
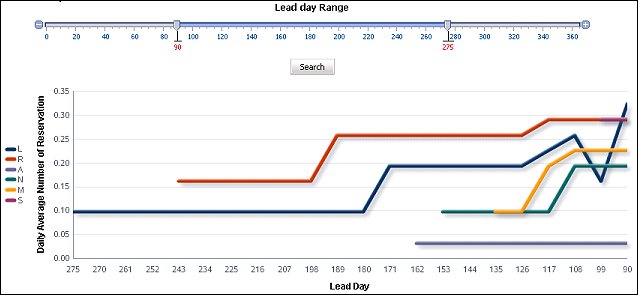
The Detail Graph provides a dynamic lead time bar that you can maneuver to change the number of lead days. When you select Search on this screen, the graph changes to your specifications. Additionally, this graph displays more detail in the left axis for percentages in Daily Average Number of Reservations and Lead Day.
As with the other graphs, you may hover the cursor over the line you are interested in and the other lines fade and a popup window appears with more details.
Sample Scenario
This scenario depicts users selecting the filters and graphs to find similar behavior among the Class Code to create a Booking Class, using MC (Marketing Code) as the example.
Before modelization, and after you have determined your needs for Booking Class Types, Booking Class Codes, and Attributes, go to the Configuration Tab.
(After modelization, the Configuration tab is view-only.)
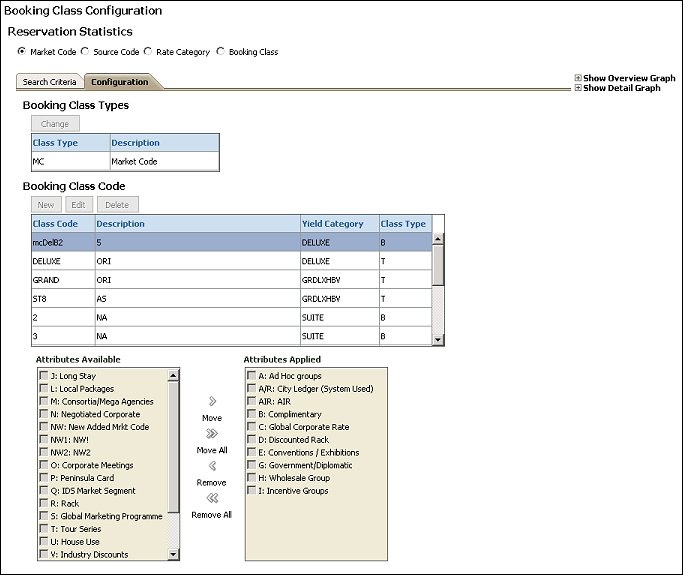
This section displays the selected Booking Class type which is the Booking Class used for forecasting. The displayed Booking Class type shows the configured Booking Class codes associated with it in the Booking Class Codes grid below and the associated Attributes.
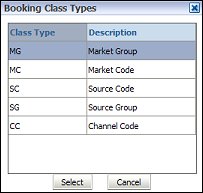
Change. Select this button during first time setup or if after setup you want to change the Booking Class Type from the displayed booking class. This allows you to add class codes to the newly selected booking class and for ORMS to build (model) a new booking class table used for forecasting.
After selecting Change, the Booking Class Types screen appears. At this screen, you can select (highlight) one of the existing Booking Class Type options that will represent your selection of identifiers by which you want to define your Booking Class. The Booking Class Codes will be used to build a new booking class table for forecasting.
Please note, that when you select the button Change Class Type after your initial configuration and prior to Modeling, all booking class codes for the previously selected/displayed booking class will be deleted. The new booking class type and new booking class codes will now be used for recalculation and forecasting, based on the modelization process.
At this screen, if you change your mind about selecting one of the existing booking class types, simply select the button Cancel Changes.
This section lets you create, edit, and delete booking class codes for the selected/displayed Booking Class Type.
Note: You must create booking class codes for all yield categories.
Select. Select the radio button to specify the booking class code that will be edited or deleted.
Edit. Select this button to make modifications to the booking class code, description, or yield category.
Delete. Select this button to delete the selected booking class code.
New. Select this button to create a new booking class code. Enter the Class Code, Class Description, and select the Yield Category from the drop-down list.
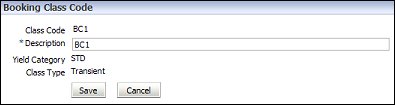
Class Code. The Class Code for the Booking Class. The Booking Class Code should not exceed 20 characters.
Description. The description of the Class code. The Booking Class Description should not exceed more than 80 characters.
Yield Category. Select the Yield Category from the LOV for which this Booking Class Code applies.
Class Type. Indicates whether the Class Type is Transient (T) or Blocks (B) (Transient Blocks only).
Prior to Modelization, select and apply the Attributes to a Class Code for each Yield Category. All available attributes should be applied to a Class Code, for each Yield Category. This step needs to be repeated until all required Class Codes have been set up. There is no limit as to how many Class Codes can be configured. However, the following rules apply:
Note: While 15 arrivals is the minimum, this is the level where forecasts begin to show decent results. For even better forecasting, create Booking Classes with 25 to 30 average daily arrivals.
As soon as an available attribute has been selected it will disappear from the 'Available Attributes' list, even though it may still be visible when selecting a Class Code for another Yield Category.
Attributes that are available to be assigned to the booking class code for the selected yield category. Move the Attributes Available back and forth to the Attributes Assigned by selecting the Move, Move All, Remove, Remove All buttons.
Attributes displayed here have been assigned to the booking class code that is selected in the top portion of the screen. Move the Attributes Assigned back and forth to the Attributes Available by selecting the Move, Move All, Remove, Remove All buttons.