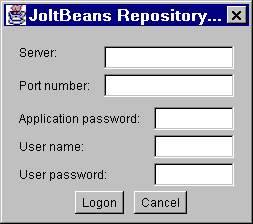
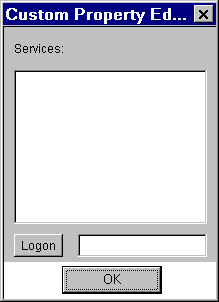
Table of Contents Previous Next PDF


Using JoltBeans

Using JoltBeans
Formerly available as an add on, JoltBeans are included in Oracle Jolt and are as easy to use as JavaBeans. They are JavaBeans components you use in Java development environments to construct Jolt clients.
You can use popular Java-enabled development tools such as Symantec Visual Café to graphically construct client applications. JoltBeans provide a JavaBeans-compliant interface to Oracle Jolt. You can develop a fully functional Oracle Jolt client without writing any code.
This topic includes the following sections:
Overview of Jolt Beans
JoltBeans consists of two sets of Java Beans. The first set, the JoltBeans Toolkit, is a beans version of the Jolt API. The second set consists of GUI beans, which include Jolt-aware AWT beans and Jolt-aware Swing beans. These GUI components are a “Jolt-enabled” version of some of the standard Java AWT and Swing components, and help you build a Jolt client GUI with minimal or no coding.
You can drag and drop JoltBeans from the component palette of a development tool and position them on the Java form (or forms) of the Jolt client application you are creating. You can populate the properties of the beans and graphically establish event source-listener relationships between various beans of the application or applet. Typically, the development tool is used to generate the event hook-up code, or you can code the hook-up manually. Client development using JoltBeans is integrated with the Oracle Jolt Repository, providing easy access to available Oracle Tuxedo services.
Note:
To use the JoltBeans Toolkit, it is recommended that you be familiar with JavaBeans-enabled, integrated development environments (IDEs). The walkthrough in this chapter is based on Symantec’s Visual Café 3.0 IDE and illustrates the basic steps of building a sample applet.
JoltBeans Terms
You will encounter the following terms as you work with JoltBeans:
JavaBeans
Portable, platform-independent, reusable software components that are graphically displayed in a development environment.
JoltBeans
Two sets of Java Beans: JoltBeans toolkit and Jolt aware GUI beans.
Custom GUI element
A Java GUI class that communicates with JoltBeans. The means of communication can be JavaBeans events, methods, or properties offered by JoltBeans.
Jolt-Aware Bean
A bean that is the source of JoltInputEvents, listener of JoltOutputEvents, or both. Jolt-aware beans are a subset of Custom GUI elements that follow beans guidelines.
Jolt-Aware GUI Beans
Two packages of GUI components Abstract Window Toolkit (AWT) and Swing, both containing the JoltList, JoltCheckBox, JoltTextField, JoltLabel, and JoltChoice components.
JoltBeans Toolkit
A JavaBeans-compliant interface to Oracle Jolt, which includes the JoltServiceBean, JoltSessionBean, and JoltUserEventBean.
Wiring
The process of connecting beans together so that one bean is registered as a listener of events from another bean.
Adding JoltBeans to Your Java Development Environment
Before you can use JoltBeans, set up your Java development environment to include JoltBeans:
Set the CLASSPATH in your development environment to include all Jolt classes.
The method of setting the CLASSPATH can vary, depending on the development environment you use.
JoltBeans includes a set of .jar files containing all of the JoltBeans. You can add these .jar files to your preferred Java development environment so that JoltBeans are available in the component library of your Java tool. For example, using Symantec Visual Café, you can set the CLASSPATH so that the .jar files are visible in the Component Library window of Visual Café. You only need to set the CLASSPATH of these .jar files in your development environment once. After you place these .jar files in the CLASSPATH of your development environment, you can then add JoltBeans to the Component Library. Then you can simply drag and drop any JoltBean directly onto the Java form on which you are developing your Jolt client application.
To set the CLASSPATH in your Java development environment, follow the instructions in the product documentation for your development environment. Navigate from the IDE of your development tool to the directory where the jolt.jar file resides. The jolt.jar file is typically found in the directory called %TUXDIR%\udatadoj\jolt. The jolt.jar file contains the main Jolt classes. Set the CLASSPATH to include these classes. The JoltBean .jar files do not need to be added to the CLASSPATH. To use them, you only need to add them as components in your IDE.
After you have set the CLASSPATH to include the Jolt classes, you can add JoltBeans to the Component Library of your development environment. See the documentation for your particular development environment for instructions on populating the Component Library.
When you are ready to add JoltBeans to the Component Library of your development environment, add only the development version of JoltBeans. Refer to “Using Development and Run-time JoltBeans” for complete details.
Using Development and Run-time JoltBeans
The .jar files containing JoltBeans contain two versions of each JoltBean, a development version and a run-time version. The development version of each JoltBean name ends with the suffix Dev. The run-time version of each class name ends with the suffix Rt. For example, the development version of the class, JoltBean, is JoltBeanDev, while the run-time version of the same class is JoltBeanRt.
Use the development version of JoltBeans during the development process. The development JoltBeans have additional properties that enhance development in a graphic IDE. For example, the JoltBeans have graphic properties (“bean information”) that allow you to work with them as graphic icons in your development environment.
The run-time version of JoltBeans does not have these additional properties. You do not need the additional development properties of the beans at run time. The run-time beans are simply a pared down version of the development JoltBeans.
When you compile your application in your development environment, it is compiled using the development beans. However, if you want to run it from a command line outside of your development environment, it is recommended that you set the CLASSPATH so that the run-time beans are used when compiling your application.
Basic Steps for Using JoltBeans
The basic steps for using JoltBeans are as follows:
1.
2.
3.
4.
These steps are explained in more detail in later sections. The JoltBeans walkthrough demonstrates each of these steps with an example.
JavaBeans Events and Oracle Tuxedo Events
JavaBeans communicate through events. An event in an Oracle Tuxedo system is different from an event in a JavaBeans environment. In an Oracle Tuxedo application, an event is raised from one part of an application to another part of the same application. JoltBeans events are communicated between beans.
Using Oracle Tuxedo Event Subscription and Notification with JoltBeans
Oracle Tuxedo supports brokered and unsolicited event notification. Jolt provides a mechanism for Jolt clients to receive Oracle Tuxedo events. JoltBeans also include this capability.
Note:
The following procedure illustrates how the Oracle Tuxedo asynchronous notification mechanism is used in JoltBeans applications.
1.
Use the setEventName() and setFilter() methods of the JoltUserEventBean to specify the Oracle Tuxedo event to which you want to subscribe.
2.
3.
The subscribe() method is called on JoltUserEventBean.
4.
When the actual Oracle Tuxedo event notification arrives, JoltSessionBean sends a JoltOutputEvent to its listeners by calling serviceReturned() on them. The JoltOutputEvent object contains the data of the Oracle Tuxedo event.
When the client no longer needs to receive the event, it calls unsubscribe() on the JoltUserEventBean.
Note:
If the client will only subscribe to unsolicited events, use setEventName ("\\.UNSOLMSG"), which can be set using the property sheet. EventName and Filter are properties of the JoltUserEventBean.
How JoltBeans Use JavaBeans Events
A Jolt client applet or application that is built using JoltBeans typically consists of Jolt-aware GUI beans, such as JoltTextField or JoltList, and JoltBeans, such as JoltServiceBean and JoltSessionBean. The main mode of communication between Beans is by JavaBeans events.
Jolt-aware beans are sources of JoltInputEvents or listeners of JoltOutputEvents or both. JoltServiceBeans are sources of JoltOutputEvents and listeners of JoltInputEvents.
The Jolt-aware GUI Beans expose properties and methods so you can link the beans directly to the parameters of an Oracle Tuxedo service (represented by a JoltServiceBean). Jolt-aware beans notify the JoltServiceBean via a JoltInputEvent when their content changes. The JoltServiceBean sends a JoltOutputEvent to all registered Jolt-aware beans when the reply data is available after the service call. The Jolt-aware GUI Beans contain logic that updates their contents with the corresponding output parameter of the service.
Figure 6‑1 represents the possible relationships among the JoltBeans.
Figure 6‑1 Possible Interrelationships Among JoltBeans
 
 
The JoltBeans Toolkit
The JoltBeans Toolkit includes the following beans:
These components transform the complete Jolt Class Library into beans components, with all of the features of any typical JavaBean, including easy reuse and graphic development.
Refer to the online Oracle Jolt API Reference for specific descriptions of the JoltBeans classes, constructors, and methods.
The following sections provide information about the properties of each bean.
JoltSessionBean
The JoltSessionBean, which represents the Oracle Tuxedo session, encapsulates the functionality of the JoltSession, JoltSessionAttributes, and JoltTransaction classes. The JoltSessionBean has properties that you use to set session and security attributes, such as sending a timeout or an Oracle Tuxedo username, as well as methods to open and close an Oracle Tuxedo session.
The JoltSessionBean sends a PropertyChange event when the Oracle Tuxedo session is established or closed. PropertyChange is a standard bean event defined in the java.beans package. The purpose of this event is to signal other beans about a change of the value of a property in the source bean. In this case, the source is the JoltSessionBean; the targets are JoltServiceBeans or JoltUserEventBeans; and the property changing is the LoggedOn property of the JoltSessionBean. When a logon is successful and a session is established, LoggedOn is set to true. After the logoff is successful and the session is closed, the LoggedOn property is set to false.
The JoltSessionBean provides methods to control transactions, including beginTransaction(), commitTransaction(), and rollbackTransaction().
Table 6‑1 shows the JoltSessionBean properties and descriptions.
 
Indicate true or false depending if a transaction has been started and not committed or aborted.
Indicate true or false if an Oracle Tuxedo session does or does not exist.
JoltServiceBean
The JoltServiceBean represents a remote Oracle Tuxedo service. The name of the service is set as a property of the JoltServiceBean. The JoltServiceBean listens to JoltInputEvents from other beans to populate its input buffer. JoltServiceBean offers the callService() method to invoke the service. JoltServiceBean is an event source for JoltOutputEvents that carry information about the output of the service. After a successful callService(), listener beans are notified via a JoltOutputEvent that carries the reply message.
Although the primary way of changing and querying the underlying message buffer of the JoltServiceBean is via events, the JoltServiceBean also provides methods to access the underlying message buffer directly (setInputValue(…), getOutputValue(…)).
Table 6‑2 shows the JoltServiceBean properties and descriptions.
 
Set to true if this JoltServiceBean is to be included in the transaction that was started by its JoltSessionBean.
JoltUserEventBean
The JoltUserEventBean provides access to Oracle Tuxedo events. You define the Oracle Tuxedo event to which you subscribe or unsubscribe by setting the appropriate properties of this bean (event name and event filter). The actual event notification is delivered in the form of a JoltOutputEvent from the JoltSessionBean.
Table 6‑3 shows the JoltUserEventBean properties and descriptions.
 
Jolt-Aware GUI Beans
The Jolt-aware GUI Beans consist of Java AWTbeans and Swing beans, and are inherited from the Java Abstract Windowing Toolkit. They include:
Note:
JoltTextField
This is a Jolt-aware extension of java.awt.TextField and Swing JTextfield. JoltTextField contains parts of the input for a service. A JoltServiceBean can listen to events raised by a JoltTextField. JoltTextField sends JoltInputEvents to its listeners (typically JoltServiceBeans) when its contents changes.
JoltTextField displays output from a service. In this case, JoltTextField listens to JoltOutputEvents from JoltServiceBeans and updates its contents according to the occurrence of the field to which it is linked.
JoltLabel
This is a Jolt-aware extension of java.awt.Label and Swing JLabel that is linked to a specific field in the Jolt output buffer by its JoltFieldName property. If the field occurs multiple times, the occurrence to which this textfield is linked is specified by the occurrenceIndex property of this bean. JoltLabel can be connected with JoltServiceBeans to display output from a service. A JoltLabel listens to JoltOutputEvents from JoltServiceBeans and updates its contents according to the occurrence of the field to which it is linked.
JoltList
This is a Jolt-aware extension of java.awt.List and Swing Jlist that is linked to a specific Jolt field in the Jolt input or output buffer by its JoltFieldName property. If the field occurs multiple times in the Jolt input buffer, the occurrence this list is linked to is specified by the occurrenceIndex property of this bean. JoltList can be connected with JoltServiceBeans in two ways:
JoltCheckbox
JoltCheckbox is a Jolt-aware extension of java.awt.Checkbox and Swing JCheckBox that is linked to a specific field in the Jolt input buffer by its JoltFieldName property. If the field occurs multiple times, the occurrence to which this checkbox is linked is specified by the occurrenceIndex property of this bean.
JoltCheckbox can be connected with JoltServiceBeans to contain parts of the input for a service. A JoltServiceBean listens to events raised by a JoltCheckbox. JoltCheckbox sends JoltInputEvents to its listeners (typically JoltServiceBeans) when the selection in the checkbox changes. The JoltInputEvent in this case is populated with the TrueValue property of data type String (if the box is selected) or FalseValue (if the box is unselected).
JoltChoice
JoltChoice provides a Jolt-aware extension of java.awt.Choice and Swing JChoice that is linked to a specific field in the Jolt input buffer by its JoltFieldName property. If the field occurs multiple times, the occurrence to which this choice is linked is specified by the occurrenceIndex property of this bean.
JoltChoice can be connected to JoltServiceBeans to contain parts of the input for a service. A JoltServiceBean can listen to events raised by a JoltChoice. JoltChoice sends JoltInputEvents to its listeners (typically JoltServiceBeans) when the selection in the choicebox changes. The JoltInputEvent in this case is populated with the single value of the selected item.
Note:
Using the Property List and the Property Editor to Modify the JoltBeans Properties
The values of most JoltBeans properties can be modified by editing the right column of the Property List in your integrated development environment (IDE), such as Visual Café, as shown in the following figure “Property List: Ellipsis Button.”
Custom property editors are provided for some properties of JoltBeans.
The custom property editors, accessed from the Property List, include dialog boxes that you use to modify the property values. You can invoke the custom property editors from the Property List by clicking the button with the ellipsis ( “...”) that is next to the value of the corresponding property value.
Figure 6‑2 Property List: Ellipsis Button
When you click the ellipsis button, the Property Editor shown in Figure 6‑3 is displayed.
Figure 6‑3 Custom Property Editor Dialog Box
.
The Custom Property Editor of JoltBeans reads cached information. Initially, no cached information is available, so when the Property Editor is used for the first time, the dialog box is empty. Log on to the Jolt Repository and load the property editor cache from the repository.
For details about the logon and using the Property List and Property Editor, see “Using the Jolt Repository and Setting the Property Values” on page 6‑41.
JoltBeans Class Library Walkthrough
This walkthrough describes how to build an applet that you use to:
Figure 6‑4 shows an example of a completed Java form containing JoltBeans. The applet implements the client functionality for the INQUIRY service of the BANKAPP sample that is included with Oracle Tuxedo. To run this sample, the Oracle Tuxedo server must be running.
Figure 6‑4 Sample Inquiry Applet
 
Refer to the figure “Visual Café 3.0 Form Designer” on page 6‑18 for an example of each item required by the Java form. Each item in that figure is described in the following table “Required Form Elements”.
 
Building the Sample Form
The sample form is created using an integrated development environment (IDE), in this example, Visual Café 3.0. The example demonstrates how to build an applet that allows you to enter an account ID and use an Oracle Tuxedo service to get and show the account balance.
Follow the basic steps below to create this sample.
1.
In Visual Café, choose FileNew Project and select either JFC Applet or AWT application. This step provides you with the basic form designer on which you drop the JoltBeans.
2.
3.
4.
5.
These steps are described in detail in the following sections.
Note:
Placing JoltBeans onto the Form Designer
1.
Choose FileNew Project, and choose JFC Applet.
2.
Figure 6‑5 JoltBeans and the Form Designer in Visual Café
The following figure “Visual Café 3.0 Form Designer” illustrates how JoltBeans appear when they are placed on the palette of the Form Designer.
Figure 6‑6 Visual Café 3.0 Form Designer
3.
The following figure,“Example of JoltTextField Property List and Custom Property Editor,” shows how selecting the JoltFieldName of the button property list displays the Custom Property Editor.
4.
Note:
Table 6‑5 specifies the property values that should be set. Values specified in bold and italic text are required, and those in plain text are recommended.
 
Note:
Refer to the following figure “Example of JoltTextField Property List and Custom Property Editor”and “Using the Jolt Repository and Setting the Property Values” on page 6‑41 for general guidelines about JoltBean properties.
Figure 6‑7 Example of JoltTextField Property List and Custom Property Editor
 
5.
The Custom Property Editor is displayed.
6.
The change is reflected in the Property List shown in the following figure “Revised JoltFieldName in the JoltTextField Property List”and on the text field shown on the figure “Example of JoltBeans on the Form Designer with Property Changes” on page 6‑21.
Note:
Figure 6‑8 Revised JoltFieldName in the JoltTextField Property List
 
 
The following figure “Example of JoltBeans on the Form Designer with Property Changes” illustrates how the text on the button and the textfield changes after the text is added to the property list fields for these beans.
Figure 6‑9 Example of JoltBeans on the Form Designer with Property Changes


7.
After you set the properties to the right values (refer to the table “Required and Recommended Property Values” on page 6‑18 for additional information), define how the beans will interact by wiring them together using the Visual Café Interaction Wizard. Refer to “Wiring the JoltBeans Together” for details.
Wiring the JoltBeans Together
After all the beans are positioned on your form and the properties are set, you must wire the beans and their events together. The following figure “Sequence in Which JoltBeans Are Wired” illustrates an example of the flow to help you determine the correct order in which to wire the beans.
Wiring the beans allows you to establish event source-listener relationships between various beans on the form. For example, the JoltServiceBean is a listener of ActionEvents from the button and invokes callService() when the event is received. Use the Visual Café Interaction Wizard to wire the beans together.
Figure 6‑10 shows the sequence in which you will wire the beans together to create this sample applet. The numbers in this figure correspond to the numbered steps that follow.
Figure 6‑10 Sequence in Which JoltBeans Are Wired
The steps below correspond to the callouts shown in the figure “Sequence in Which JoltBeans Are Wired” on page 6‑23. Each of the steps below is detailed in the sections that follow.
Step 1: Wire the JoltSessionBean Logon
Step 2: Wire JoltSessionBean to JoltServiceBean Using PropertyChange
Step 3: Wire the accountID JoltTextField as Input to the JoltServiceBean Using JoltInputEvent
Step 4: Wire Button to JoltServiceBean Using JoltAction
Step 5: Wire JoltServiceBean to the Balance JoltTextField Using JoltOutputEvent
Step 6: Wire the JoltSessionBean Logoff
Step 7: Compile the Applet (not shown as a callout)
Step 1: Wire the JoltSessionBean Logon
1.
2.
 
 
Figure 6‑11 Wire the Applet to the Jolt Session Bean
 
The Interaction Wizard window is displayed as shown in the figure “Select ComponentShown Event” on page 6‑25, with the prompt:
What event in JApplet1 do you want to start the interaction?
3.
Figure 6‑12 Select ComponentShown Event


4.
The Interaction Wizard window is displayed, as shown in the figure “Select Logon to the Tuxedo System Action” on page 6‑26, with the prompt:
What do you want to happen when Japplet1 fires componentShown event?
5.
With the Perform an action radio button enabled, select the action Logon to the TUXEDO system, as shown in Figure 6‑13.
Figure 6‑13 Select Logon to the Tuxedo System Action
 
6.
Click Finish.
Completing “Step 1: Wire the JoltSessionBean Logon” enables the logon() method of the JoltSessionBean to be triggered by an applet (for example, ComponentShown) that is sent when the applet is opened for the first time.
Step 2: Wire JoltSessionBean to JoltServiceBean Using PropertyChange
1.
2.
Figure 6‑14 Wire the JoltSessionBean to the JoltServiceBean
 
The Interaction Wizard window is displayed as shown in the figure “Select propertyChange Event” on page 6‑28, with the prompt:
What event in joltSessionBean1 do you want to start the interaction?
3.
Select propertyChange as the event that starts the interaction, as shown in Figure 6‑15.
Figure 6‑15 Select propertyChange Event
 
4.
The Interaction Wizard window is displayed as shown in the figure “Select Handle a Jolt property change event...” on page 6‑29, with the prompt:
What do you want to happen when joltSessionBean1 fires propertyChange event?
5.
Select Handle a Jolt property change event as the method, as shown in Figure 6‑16.
Figure 6‑16 Select Handle a Jolt property change event...
 
6.
Click Next.
The Interaction Wizard window is displayed as shown in the figure “Select joltSesssionBean1” on page 6‑30, with the prompt:
How do you want to supply the parameter to this method?
and a list of available objects and actions from which to choose.
7.
Select joltSessionBean1 as the object that supplies the action, as shown in the following figure.
8.
Select Get the current Property Change Event object as the action, also as shown in Figure 6‑17.
Figure 6‑17 Select joltSesssionBean1
 
9.
Completing “Step 2: Wire JoltSessionBean to JoltServiceBean Using PropertyChange”enables the JoltSessionBean to send a propertyChange event when logon() completes. The JoltServiceBean listens to this event and associates its service with this session.
Step 3: Wire the accountID JoltTextField as Input to the JoltServiceBean Using JoltInputEvent
1.
2.
Select the accountID JoltTextField bean and drag a line to the JoltServiceBean.
The Interaction Wizard window is displayed, as shown in the following figure, with the prompt:
What event in accountId do you want to start the interaction?
3.
Select dataChanged as the event, as shown in Figure 6‑18.
Figure 6‑18 Select dataChanged Event
4.
Click Next.
The Interaction Wizard window is displayed as shown in the figure “Select inquiry Object and Handle a Jolt input event Action” on page 6‑32, with the prompt:
What do you want to happen when accountId fires dataChanged event?
5.
Select the joltServiceBean inquiry as the object supplying the parameter, as shown in the following figure.
6.
Select Handle a jolt input event as the action, also as shown in Figure 6‑19.
Figure 6‑19 Select inquiry Object and Handle a Jolt input event Action
 
7.
Click Next.
The Interaction Wizard window is displayed as shown in “Select accountId Object and Get the current Jolt Input Event Action” on page 6‑33, with the prompt:
How do you want to supply the parameter to this method?
and a list of available objects and actions from which to choose.
8.
Select accountId as the object, as shown in the following figure.
9.
Select get the current Jolt Input Event as the action, also as shown in Figure 6‑20.
Figure 6‑20 Select accountId Object and Get the current Jolt Input Event Action
10.
Click Finish.
Completing “Step 3: Wire the accountID JoltTextField as Input to the JoltServiceBean Using JoltInputEvent” enables you to type the account number in the first text field. The JoltFieldName property of this JoltTextField is set to “ACCOUNT_ID”. Whenever the text inside this text box changes, it sends a JoltInputEvent to the JoltServiceBean. (The JoltServiceBean listens to JoltInputEvents from this text box.) The JoltInputEvent object contains the name, value, and occurrence index of the field.
Step 4: Wire Button to JoltServiceBean Using JoltAction
1.
2.
The Interaction Wizard window is displayed as shown in the following figure, with the prompt:
What event in button1 do you want to start the interaction?
3.
Select actionPerformed as the event, as shown in Figure 6‑21.
Figure 6‑21 Select action Performed Event
4.
The Interaction Wizard window is displayed, as shown in the figure “Select inquiry Object and Invoke the TUXEDO Service... Action” on page 6‑35, with the prompt:
What do you want to happen when button1 fires actionPerformed event?
5.
Select inquiry as the object, as shown in the following figure.
6.
Select Invoke the TUXEDO Service represented by this Bean as the action, also as shown in Figure 6‑22.
Figure 6‑22 Select inquiry Object and Invoke the TUXEDO Service... Action
7.
Click Finish.
Completing “Step 4: Wire Button to JoltServiceBean Using JoltAction” enables the callService() method of the JoltServiceBean to be triggered by an ActionEvent from the Inquiry button.
Step 5: Wire JoltServiceBean to the Balance JoltTextField Using JoltOutputEvent
1.
2.
The Interaction Wizard is displayed, as shown in the following figure, with the prompt:
What event in inquiry do you want to start the interaction?
3.
Select serviceReturned as the event, as shown in Figure 6‑23.
Figure 6‑23 Select ServiceReturned Event
4.
The Interaction Wizard window is displayed, as shown in the figure “Select balance Object and Handle a service returned event Action” on page 6‑37, with the prompt:
What do you want to happen when inquiry fires serviceReturned event?
5.
Select balance as the object, as shown in the following figure.
6.
Select Handle a service returned event... as the action, also as shown in the following figure.
Figure 6‑24 Select balance Object and Handle a service returned event Action
7.
Click Next.
The Interaction Wizard window is displayed, as shown in the figure “Select inquiry Object and Get the JoltOutputEvent object Action” on page 6‑38, with the prompt:
How do you want to supply the parameter to this method?
8.
Select inquiry as the object, as shown in the following figure.
9.
Select Get the JoltOutputEvent object as the action, also as shown in Figure 6‑25.
Figure 6‑25 Select inquiry Object and Get the JoltOutputEvent object Action
10.
Click Finish.
Completing “Step 5: Wire JoltServiceBean to the Balance JoltTextField Using JoltOutputEvent”allows the JoltServiceBean to send a JoltOutputEvent when it receives reply data from the remote service. The JoltOutputEvent object contains methods to access fields in the output buffer. The JoltTextField displays the result of the INQUIRY service.
Step 6: Wire the JoltSessionBean Logoff
1.
2.
The Interaction Wizard is displayed, as shown in the following figure, with the prompt:
What event in JApplet1 do you want to start the interaction?
3.
Select componentHidden as the event, as shown in Figure 6‑26.
Figure 6‑26 Select componentHidden Event
4.
The Interaction Wizard window is displayed, as shown in the figure “Select joltSessionBean1 Object and Logoff from the Tuxedo System Action” on page 6‑40, with the prompt:
What do you want to happen when JApplet1 fires componentHidden event?
5.
Select joltSessionBean1 as the object, as shown in the following figure.
6.
Select Logoff from the TUXEDO system as the action, also as shown in Figure 6‑27.
Figure 6‑27 Select joltSessionBean1 Object and Logoff from the Tuxedo System Action
7.
Click Finish.
Completing “Step 6: Wire the JoltSessionBean Logoff” enables the logoff() method of the JoltSessionBean to be triggered by an applet (for example, componentHidden) that is sent when the applet gets hidden.
Step 7: Compile the Applet
After wiring the JoltBeans together, compile the applet. It is also recommended that you fill in the empty catch blocks for exceptions. Check the message window for any compilation errors and exceptions.
For additional information see the following section “Using the Jolt Repository and Setting the Property Values.” Also refer to the table “JoltBean Specific Properties” on page 6‑41 and the figure “JoltServiceBean Property Editor” on page 6‑42.
Running the Sample Application
To run the sample application, you must have the Oracle Tuxedo server running. Then enter an account number in the Account ID textfield. You can use any of the account numbers included in the BANKAPP database. Following are two examples of account numbers you can use to test the sample application:
Using the Jolt Repository and Setting the Property Values
Custom Property Editors are provided for the following properties:
The Property Editor, accessed from the Property List, includes dialog boxes that are used to add or modify the properties. You can invoke the boxes from the Property List by selecting the button with the ellipsis (...) that is next to the value of the corresponding property value.
Some JoltBeans require input to the Property List field. The beans are listed in Table 6‑6.
 
e.g., //host:port
Set to true if the service needs to be executed within a transaction. Set isTransactional to false if the service does not require a transaction.
Refer to the Oracle Tuxedo tpsubscribe calls.
The property editor reads cached information from the repository and returns names of the available services and data elements in a list box. An example of the ServiceName property editor is shown in the following figure “JoltServiceBean Property Editor.”
To add or modify a property bean, follow these steps:
1.
Figure 6‑28 JoltServiceBean Property Editor
The Custom Property Editor for ServiceName shown in Figure 6‑29 is displayed.
Figure 6‑29 Custom Property Editor for ServiceName
 
Note:
2.
The JoltBeans Repository Logon shown in Figure 6‑30 is displayed.
Figure 6‑30 JoltBeans Repository Logon
3.
4.
The Custom Property Editor loads its cache from the repository and is displayed, as shown in the following figure “Property Editor with Selected Service.”
5.
6.
A text box is provided.
7.
Click OK in the Custom Property Editor dialog.
The bean property is set with the contents of the text box.
Figure 6‑31 Property Editor with Selected Service
 
8.
Click OK in the Custom Property Editor dialog box again.
JoltBeans Programming Tasks
Additional programming tasks include:
Using Transactions with JoltBeans
Your Oracle Tuxedo application services may have functionality that updates your database. If so, you can use transactions with JoltBeans (for example, in the sample, BANKAPP, the services TRANSFER and WITHDRAWAL update the database of BANKAPP). If your application service is read-only (such as INQUIRY), you do not need to use transactions.
The following example shows how to use transactions with JoltBeans.
1.
The setTransactional (true) method is called on the JoltServiceBean. (isTransactional is a Boolean property of the JoltServiceBean.)
2.
The beginTransaction() method is called on the JoltSessionBean.
3.
The callService() method is called on the JoltServiceBean.
4.
Depending on the outcome of the service call, the commitTransaction() or rollbackTransaction()method is called on the JoltSessionBean.
Using Custom GUI Elements with the JoltService Bean
JoltBeans provides a limited set of Jolt-enabled GUI components. You can also use controls that are not Jolt-enabled together with the JoltServiceBean. You can link controls to the JoltServiceBean that display output information of the service represented by the JoltServiceBean. You can also link controls that display input information.
For example, a GUI element that uses an adapter class to implement the JoltOutputListener interface can listen to JoltOutputEvents. The JoltServiceBean as the event source for JoltOutputEvents calls the serviceReturned() method of the adapter class when it sends a JoltOutputEvent. Inside serviceReturned(), the control’s internal data is updated using information from the event object.
The development tool generates the adapter class when the JoltServiceBean and the GUI element are wired together.
As another example, a GUI element can call the setInputTextValue() method on the JoltServiceBean. The GUI element contains input data for the Oracle Tuxedo service represented by the JoltServiceBean.
As a third example, a GUI element can implement the required methods (addJoltInputListener() and removeJoltInputListener()) to act as event sources for JoltInputEvents. The JoltServiceBean acts as an event listener for these events. The control sends a JoltInputEvent when its own state changes to keep the JoltServiceBean updated with the input information.

Copyright © 1994, 2017, Oracle and/or its affiliates. All rights reserved.