3 Actions A Through G
This chapter covers ME actions from A through G in alphabetical order. For actions from H to Z, see "Actions H Through Z." An action immediately acts on ME and effects one of the components (manipulates data), whereas objects and properties describe the configuration. Actions are only available at the top-level prompt of the CLI (or through the ME Management System Actions tab).
Most actions become available when ME starts, but some may only become available when the corresponding service or provider registers with ME. The registration is dependent on the configuration. For example, the directory-reset action cannot register if the directory service is not configured.
accounting
Sets up and debugs a remote accounting database. These are the databases identified with the accounting database object.
-
contact: Contacts the specified server to verify connectivity.
-
create: Creates the accounting table on the specified server. You can select, also, whether to execute the command. If true, ME executes the command and creates the table. If false, ME returns the SQL statement to create the table, but it does not actually create it. Use this, for example, to create the table using another tool.
-
count: Returns a count of the number of accounting records on the specified server.
-
query: Queries the server using any SQL query you enter. Optionally, define the number of rows you'd like to query.
-
clear: Deletes a range of accounting records from the specified server. Define the range using the format hh:mm:ss yyyy-mm-dd. If you do not enter a range, ME deletes all records.
-
reset: Resets the connection to the specified server.
-
flush: Flushes an accounting target
-
purge: Forces an immediate run of the purge process and cleans up all CDRs on the file system that are eligible for deletion. See the purge-criteria property of the accounting object for information on eligibility.
Syntax
accounting database contact accountingServerReference
accounting database create accountingServerReference [true | false]
accounting database count accountingServerReference
accounting database query accountingServerReference query [rows]
accounting database clear accountingServerReference [from] [to]
accounting database purge
Example
In the following examples, the actions first check connectivity to the server and then try to create a table in the database. The error indicates that the table already exists. The final example illustrates a query.
NNOS-E> accounting-database contact vsp accounting database group Boston server Boston
Success!
NNOS-E> accounting database create ”vsp accounting database group Boston server Boston”
ERROR: relation ”acctcallstruct” already exists
Failed to create table on server
NNOS-E> accounting database query ”vsp accounting database group Boston server Boston” ”select count (*) from acctcallstruct”
<ResultSet><header>count</header><row><ResultSetRow><column>0</column></ResultSetRow></row></ResultSet>
accounting flush
The accounting flush action allows you to override existing configuration settings to manually purge accounting files. The results of this operation are logged and you can view the logs to obtain more information on files that have been flushed. These are the targets identified with the accounting object that can be specified:
-
file-system: A rollover is performed when the flush is executed. This means the current file is closed and a new file has automatically been created. In the case of a postgresql file, the trailer is written to the temp file and renamed in the proper format.
-
external-file-system: A file whose send has failed previously retries the flush immediately when this action is executed before waiting for the retry interval to try again.
accounting reapply
Re-exports accounting entries from one target to another. Use this, for example, if the connection is broken or in any event that prevented accounting records from being written to the external target. When you execute this action, ME returns the qualifying records on the file system to an unprocessed state. As a result, the records are resubmitted to the selected accounting targets. This action is limited to data that falls within the time frame set with the accounting object retention-period property.
Enter the begin and end time of the period for which you want to copy records. Enter the times in the format hh:mm:ss yyyy-mm-dd. If you do not enter the full format, the system completes the entry with the current date. For example, if on April 16 of 2007 you enter simply ”1:00,” the system uses 01:00:00 2007-04-16. Also enter a reference to one or more previously configured targets.
add-device
Mounts or remounts data drives on to the system. You may want to use this in cases when you do a system upgrade or if you are moving a hard drive from one ME device to another. When upgrading software, data drives will no longer be mounted after the upgrade. Run this action after the restart to restore the data drives to operate with the new software. Specify the drive to add and the file system in use by that drive.
Note that the format action automatically performs the equivalent of the add-device and mount actions. If you have data on a drive that you want to maintain, be sure to manually execute these two actions. Do not use format as it will remove all data from the drive. See the Net-Net OS-E – USB Creation and Commissioning Instructions for a complete description of system drives and partitioning.
announce
Plays the specified .WAV file on a connected/anchored call. Use show active-calls (the sessH field) to retrieve the session handle. You can specify in which direction to insert file, either in the inbound direction (for the caller), outbound (for the callee), or both. Additionally, you can specify when the call should terminate. If termination is set to true, ME hangs up the call after playing it. By default, ME does not hang up the call (terminate set to false). (By contrast, the file-play action establishes a call and hangs up after the .WAV file is finished playing.)
Example
NNOS-E> show active-calls

Active Calls:
----------------------------------------------------------------------
SessionID: 04c298ee0bdbe1f6
From: ”rick” <sip:3933@barry.acmepacket.com>;tag=102949606215911
To: <sip:1234@barry.acmepacket.com>
CallID: 34990D8B-7B2F-4E47-BFD3-BA1808A6835E@172.30.1.6
State: B2B_CONNECTED
sessH: E33E6C12
Connect:
Duration: 12 seconds
In Conn:
Out Conn:
----------------------------------------------------------------------
Total Active Calls: 1

NNOS-E> announce 0xE33E6C12 /cxc_common/media/greeting.wav both
Success!
archive
Saves stored sessions for the specified VSP. The archiving action archives all data that has not been successfully archived previously. You can archive a specific session or sessions that occur between specified times using the archive specific action.
Use this action to initiate the backup immediately; use the task object to schedule automated backups. You must enable archiving with the archiving object for this action to succeed. Use the show archive-result command to view the outcome of archiving operations.
Note:
If you have record-based archiving configured, manual archive operations will fail. You must set the record-count property of the archiving object to 0 for this archive action to work.If you do not enter a VSP name, the ME archives the default VSP.
Example
NNOS-E> archive
The specified vsp is not configured for archiving
NNOS-E> config vsp accounting
config accounting> config archiving
config archiving> set admin enabled
config archiving> top
config> exit
Do you want to update the startup configuration (y or n)? y
NNOS-E> archive
Success!
NNOS-E>
archive specific
Saves specific sessions for later retrieval. You can archive either a specific session, or a range sessions that occur between specified times. (Use the archive action to archive all sessions.) You must enable archiving with the archiving object for this action to succeed.
When you execute the action, ME creates temporary files based on the session ID, and writes them to either the file displayed in the response message (session) or the specified directory (between). Once the files are archived to ME, you can move the file(s) off the device (using TFTP, PSCP, etc.).
Select one of the following operations:
-
session: saves a specific session, identified by its session ID number, to a system-assigned temporary file name. Or, you can specify a file name. Use the ME Management System Call Logs page to determine the session ID. In the CLI, there are various status providers that display the session ID as part of their output.
-
between: saves all sessions in the specified time range to a file. Enter a time in the format hh:mm:ss yyyy-mm-dd. If you do not enter the full format, the system completes the entry with the current date. For example, if on April 16 of 2006 you enter simply ”1:00,” the system uses 01:00:00 2006-04-16. In addition, you must enter a directory to which the files can be written.
arp
Manages the ARP cache.
-
delete: Removes either a specific IP address or, if no address is specified, all entries from the ARP cache. Use the show arp command to view the contents of the cache.
-
request: Generates an ARP request directed to the specified IP address. This option is analogous to the ping action; both verify connectivity to an address.
-
reply: Generates an ARP reply for an interface (also known as a gratuitous ARP). The arp reply action broadcasts the specified interface to all hosts in the network. Use this to force a broadcast notifying of a change to the interface.
Example
NNOS-E> show arp
ip-address      type     flags                mac-address       interface
----------      ----     -----                -----------       ---------
172.26.0.1      ETHER    COM                  00:13:1a:73:d1:c2 eth0
172.26.0.189    ETHER    COM                  00:04:23:b2:fa:8a eth0
172.26.0.252    ETHER    COM                  00:04:23:b2:f6:c6 eth0

NNOS-E> arp request 172.26.0.252
172.26.0.252 is 00:04:23:b2:f6:c6

NNOS-E> arp delete 172.26.0.252
Success!

NNOS-E> arp request 172.26.0.252
Did not receive an ARP response

NNOS-E> show interfaces
interface  name            ip-address         op-state         type
---------  ----            ----------         --------         ----
eth1       b               192.168.216.210/24 up               public
eth1.5     one             192.168.216.200/24 up               public

NNOS-E> arp reply eth1.5
Success!
auth request
Tests validity of a variety of different authentication types. Note that this command tests a RADIUS group; to test credentials on an individual server, use the radius test action.
Note:
This command is available for the CLI only.Enter the following:
-
-t: Specifies authentication type to test, which can be one of the following:
Local: Perform local authentication
RADIUS: Perform RADIUS authentication
DIAMETER: Perform DIAMETER authentication
Directory: Perform Directory authentication
Accept: Accept all authentication attempts
Reject: Reject all authentication attempts
-
-g Configuration reference (”vsp\radius-group Boston”, etc. Overrides -t.
For RADIUS and DIAMETER, must specify a group, not a server.
-
-n: User name
-
-p: Password
-
-c: Request count. Default is 1 request.
-
-r Rate, in requests/second. Default is no delay between requests.
-
-u User name/password authentication. This is the default.
-
-d Digest authentication. Default is user name/password authentication.
-
-dr Digest realm. Default is 'testrealm'; implies '-d'.
-dm Digest method. Default is 'INVITE'; implies '-d'.
-du Digest URI. Default is 'sip:5555551212@example.com'; implies '-d'.
-q Quiet mode.
Syntax
auth request -t [type] -g [config reference] -n [name] -p [password] -c [count] -r [rate] -u -d -dr [realm] -dm [method] -du [URI] -q
Example
NNOS-E> auth request -g ”vsp\radius-group East” -n user1 -p pswd1

Provider type:     RADIUS
Config reference:  vsp\radius-group East
User name:         user1
Password:          pswd1
Request type:      Password
Request count:     1
Rate:              0/second
Period:            0 seconds
Initiated          1 requests
Received           1 successes in 0.002 seconds (500.0/second).
Received           0 failures.
authentication-cache-flush
Removes all entries from the ME authentication cache, used for re-authenticating REGISTER requests.
autonomous-ip
Reports whether two endpoints are within the same autonomous-ip-group. Use this action to test your autonomous IP configuration and connectivity. Note that when supplying fields for this action, you must supply all values that are configured for the endpoint. Otherwise, evaluation results will be inaccurate. For example, if the source endpoint has an associated routing-tag, you must supply that value for the srcTag field. Enter the following values, as applicable:
-
address(required): Specifies the public IP address for the endpoints. This is the address of the firewall (e.g., router) or, if directly connected, the endpoint itself.
-
public-ip: Specifies the private IP address for the endpoints. If sip nat-translation is enabled, this is the IP address of the phone in the private network. If nat-translation is disabled, this value should be 0.0.0.0 (the default).
-
srcTag and destTag: Specifies the routing tag associated with the endpoint. This is a tag derived from either the ip routing-tag property for an interface or the routing-settings ingress- and/or egress-classification-tag in the session configuration.
The results of this action are either release or anchor. Release indicates that the endpoints are both part of a group and therefore need not be anchored. Anchor indicates that they are not part of a group so ME must anchor the call media.
Syntax
autonomous-ip-evaluate srcPublicIP destPublicIP [srcPrivateIP] [destPrivateIP] [srcTag] [destTag]
Example
NNOS-E> show autonomous-ip-group

group-name   gateway   connected selfConnected
----------  -------   --------- -------------
group-1                 true      true
group-2                 true      true

NNOS-E> show autonomous-ip-route

name     match         hits
----     -----         ----
group-1  10.10.10.0/24  4
group-2  192.168.1.0/24 4
NNOS-E> autonomous-ip-evaluate 10.10.10.5 192.168.1.5
Result is anchor

NNOS-E> autonomous-ip-evaluate 10.10.10.5 10.10.10.6
Result is release
bandwidth-calculate
Calculates the amount of bandwidth required for a single RTP stream. You can change the overhead of the optional fields to more closely match your network scenario, and use the output for network planning. Use the show codec-info status provider to determine the ptime and payload for the CODEC in use. Enter the following fields:
-
packetInterval: Enter the ptime for the CODEC in use.
-
rtpPayload: Enter the bytes of RTP payload per packet.
-
rtpOverhead: Enter the bytes of RTP overhead per packet. Additional overhead might be the result of SRTP authentication or MKI.
-
ipOverhead: Enter the bytes of IP overhead per packet. Additional overhead might be the result of running IPsec or other IP options.
-
ethOverhead: Enter the bytes of IP overhead per packet. Additional overhead might be the result of using VLAN tags.
base-64
Encodes a data string into base-64 or decodes a data string from base-64. You can select to encode a hexadecimal or text string or decode a base-64 string into hex or text. In other words, the encode option indicates how to treat the input (as hex or a string of characters). The decode option specifies the output type.
call-accept
This action may be initiated in response to either a call-connecting-event or after a call-create has completed. The ME injects the initial-answer-SDP media specification into the media session and the provides the resulting actual-answer-SDP to the peer endpoint.
call-alerting
This action may be initiated after call-create has completed. In the case of a multi-protocol session, this action is invoked to alert the destination endpoint that an incoming call is being received.
call-control
Sets up and manages calls that are originated via ME. To do this, you must first create the call using the call-control call action. That action results in ME creating a handle for the call. That handle is then used to identify the call in all further call control actions.
The call-control action has been deprecated and exists for backwards compatibility only. Use the following actions to control a call:
-
call: Creates a call. Specify the destination (to) and originating (from) SIP or TEL URI. This action results in a call handle. Optionally you can enter any of the following fields:
-
Optionally enter a request ID. This value is returned in any generated events for the call.
-
Specify whether to ring originator first (enabled, the default). If disabled, ME rings the terminator first.
-
Specify whether to place the call asynchronously. If enabled, ME returns an action response before the call is connected. If disabled, the default, the action does not return until the call connects.
-
Specify a transport protocol or use the default of any.
-
Reference a saved session configuration to apply to the call.
-
-
hold: Places the call on hold. Specify the ME-created handle.
-
retrieve: Reactivates a call that was placed on hold. Specify the ME-created handle.
-
transfer: Rransfers a call to a new destination. Enter the handle to identify the call and a SIP or TEL URI to identify the destination.
-
disconnect: Ends an active call. Specify the ME-created handle of the call.
-
join: Performs an ”announced transfer” of a call to another call. For example, if you have a phone that has placed a call to two different destinations, ME assigns each its own handle. You can then join the two calls, letting the original originating phone drop out.
-
loop: Places a loopback call, which loops back RTP media, allowing ME to gather call quality statistics.
-
annotate: Attaches an annotation (text description) to the call identified by the specified call handle. Use the get-annotation option to retrieve the text on ME. This data is also available to other systems.
-
get-annotation: Retrieves and displays an annotation (text description) attached to the call identified by the specified call handle. Use the annotate option to attach the text.
-
park: Places a call to the specified endpoint (a single-sided phone call). Using that call handle at a later time, you can use the connect option to connect it to another endpoint. Optionally, specify whether to perform this action asynchronously (see the call option for a description of asynchronous). You can also reference a saved session configuration to apply to the call.
-
connect: Using the call handle of a previously parked call, connect that call to the specified endpoint. Optionally, specify whether to perform this action asynchronously (see the call option for a description of asynchronous). You can also attach a request ID to be included in related events.
-
terminate: Disconnects the specified call. The other end of the call is left on hold.
-
memo-begin: Begins recording a voice memo, which is saved as a WAV file to the specified file name. Use this with the play option. The system records anything spoken into the phone until the memo-end action occurs or the phone hangs up.
-
memo-end: Ends recording of a voice memo that was started with the memo-begin option. Until you end the memo, the WAV file created cannot be used.
-
play: Plays the indicated WAV file on the call specified by the call handle.
-
drop-file: Plays the indicated WAV file on the call specified by the call handle, and parks the originator.
-
notify: Sends the specified SIP notify message to the endpoint.
-
message: Connect to an endpoint, play a file, and terminate the call.
Syntax
call-control call to from [requestId] [enabled | disabled] [enabled | disabled] [any | UDP |TCP |TLS] [SessionConfigReference]
call-control hold handle
call-control retrieve handle
call-control transfer handleto
call-control disconnect handle
call-control join handle1 handle2
call-control loop handle
call-control annotate handletext
call-control get-annotation handle
call-control park endpoint [enabled | disabled] [SessionConfigReference]
call-control connect handle endpoint [enabled | disabled] [requestId]
call-control terminate handle
call-control memo-begin handle filename
call-control memo-end handle
call-control play handle filename
call-control drop-file handle filename
call-control notify handle event
call-control message filename endpoint [from] [requestID] [enabled | disabled] [sessionConfigReference]
call-control-accept
Accepts an incoming call from an offering endpoint.
Note:
You must specify content-type as application/sdp and body as the SDP for the call.Enter the following arguments:
-
<handle>: Identifies the leg of a session. Handles are returned as part of the <info> element of call-control results and can be used to manipulate each leg of a call independently.
-
[content-type]: Specifies the Content-Type: for the indication.
-
[body]: Specifies the body for the indication.
call-control-annotate
Annotates the text you specify to a call leg.
Enter the following arguments:
-
<handle>: Identifies the handle of the call to which you want to add annotated information.
-
<text>: The annotated text you are providing to the call leg.
call-control-attach
Attaches a call leg to an existing SIP session.
Enter the following arguments:
-
<handle>: The handle of the endpoint to be attached.
-
<session-id>: The session to which the endpoint is being attached.
call-control-call
Initiates a call using To and From SIP URIs you provide.
You can set the ME to add post-dial digits to a call-control call action. Append the string postd=digits to the user portion of the to parameter. The following example shows the ME adding post-dial digits 12345@acmepacket.com to a call.
Enter the following arguments:
-
<to>: The destination SIP URI of the call.
-
<from>: The originating SIP URI of the call.
-
[requestId]: A unique identifier provided by an external application. This value can be used to identify the call in subsequent events and actions. If a requestId is specified, there is a corresponding XML element in the event messages generated for the session.
-
[originatorFirst]: When enabled (the default), the originating party is connected first. When disabled, the called party is connected first.
-
[async]: When enabled, causes the ME to return a response immediately without waiting for the action to complete. When disabled (the default), the ME waits for the action to complete before returning a response.
-
[transport]: The transport method to use for the call. This can be set to any, TCP, UDP, or TLS.
-
[config]: The session-config on the ME to use to process a call. Use the full path to the session-config. For example:
vsp\session-config-pool\entry MyConfig
Enclose the value in quotation marks when using the CLI.
call-control-call-to-session
Initiates a call to an existing session.
Enter the following arguments:
-
<to>: The destination SIP URI of the session.
-
<from>: The originating SIP URI of the session.
-
<session-id>: The optional session ID for the session.
-
[requestId]: A unique identifier provided by an external application. This value can be used to identify the call in subsequent events and actions. If a requestId is specified, there is a corresponding XML element in the event messages generated for the session.
-
[originatorFirst]: When enabled (the default), the originating party is connected first. When disabled, the called party is connected first.
-
[async]: When enabled, causes the ME to return a response immediately without waiting for the action to complete. When disabled, (the default) the ME waits for the action to complete before returning a response.
-
[transport]: The transport method to use for the call. This can be set to any, TCP, UDP, or TLS.
-
[config]: The session-config on the ME to use to process a call. Use the full path to the session-config. For example:
vsp\session-config-pool\entry MyConfig
-
[content-type]: Specifies the Content-Type: for the indication.
-
[body]: Specifies the body for the indication.
call-control-create-session
Creates a rendezvous session to which you can then add call-legs, add named-variables, or destroy the session. The ME automatically assigns the session a unique 64-bit session ID.
Enter the following arguments:
-
[requestId]: A unique identifier provided by an external application. This value can be used to identify the call in subsequent events and actions. If a requestId is specified, there is a corresponding XML element in the event messages generated for the session.
-
[to]: The To URI for the rendezvous session.
-
[from]: The From URI for the rendezvous session.
call-control-connect
Connects an existing parked call leg to a given endpoint. If the called party ends the call, the original call reverts back to a parked state.
Enter the following arguments:
-
<handle>: Identifies the leg of a call. Handles are returned as part of the <info> element of call-control results and can be used to manipulate each leg of a call independently.
-
<endpoint>: The URI of the call's destination.
-
[async]: When enabled, causes the ME to return a response immediately without waiting for the action to complete. When disabled, (the default) the ME waits for the action to complete before returning a response.
-
[requestId]: A unique identifier provided by an external application. This value can be used to identify the call in subsequent events and actions. If a requestId is specified, there is a corresponding XML element in the event messages generated for the session.
-
[park]: When enabled, the outgoing call leg persists and reverts to a parked state when its peer is terminated.
-
[config]: The session-config on the ME to use to process a call. Use the full path to the session-config. For example:
vsp\session-config-pool\entry MyConfig
call-control-custom
Creates and controls established calls and overrides specific session configuration settings.
Enter the following arguments:
-
<call>: Initiates a call using provided To and From SIP URIs.
-
<to>: The To URI for the session.
-
<from>: The From URI from the session.
-
[requestId]: A unique identifier provided by an external application. This value can be used to identify the call in subsequent events and actions. If a requestId is specified, there is a corresponding XML element in the event messages generated for the session.
-
[originatorFirst]: When enabled (the default), the originating party is connected first. When disabled, the called party is connected first.
-
[async] : When enabled, causes the ME to return a response immediately without waiting for the action to complete. When disabled, (the default) the ME waits for the action to complete before returning a response.
-
[transport]: The transport method to use for the call. This can be set to any, TCP, UDP, or TLS.
-
[config]: The session-config on the ME to use to process a call. Use the full path to the session-config. For example:
vsp\session-config-pool\entry MyConfig
Enclose the value in quotation marks when using the CLI.
-
[session-id] : The optional session ID for the session.
call-control-destroy-session
Destroys a rendezvous session.
Enter the following arguments:
-
<session-id>: The session-id for the rendezvous session you are destroying. This is the unique 64 bit session ID given to the session by the ME when it was created.
call-control-detach
Detaches a call leg from an existing SIP session. If you do not specify a session ID, the ME creates a new parked session with that call leg. If you specify a session ID, the ME parks the call leg to that existing session.
Enter the following arguments:
-
<handle>: The handle of the endpoint to be detached.
-
<session-id>: The optional session ID to which you are parking this call leg. If you do not specify a session ID, the ME creates a new session.
call-control-detach-to-session
Detaches a call leg and parks it to an existing specified session.
Syntax
Enter the following arguments:
-
<handle>: The handle of the endpoint from which you are detaching.
-
<session-id>: The session ID to which you are parking this call leg.
call-control-detach-to-session <handle> <session-id>
call-control-disconnect
Disconnects all legs of a call. The handle parameter can be the handle of either call leg.
Enter the following arguments:
-
<handle>: Identifies the leg of a call. Handles are returned as part of the <info> element of call-control results and can be used to manipulate each leg of a call independently.
call-control-drop-file
Plays the specified audio file to the party connected to the call leg. When finished, the ME terminates the call leg.
Enter the following arguments:
-
<handle>: Identifies the leg of a call. Handles are returned as part of the <info> element of call-control results and can be used to manipulate each leg of a call independently.
-
<filename>: The name of the audio file where a message is recorded or from where a message is played. Audio files must be .wav files in 44.1 kHz, 16-bit mono PCM format. If you give an invalid filename, it is placed in or taken from the /cxc directory.
-
[async]: When enabled, causes the ME to return a response immediately without waiting for the action to complete. When disabled (the default), the ME waits for the action to complete before returning a response.
call-control-fork
Adds a new endpoint's SIP URI to the parked call. The endpoint can receive media but cannot send it. Multiple endpoints can be added using this action.
Enter the following arguments:
-
<handle>: Identifies the leg of a call. Handles are returned as part of the <info> element of call-control results and can be used to manipulate each leg of a call independently.
-
<endpoint>: The URI of the call's destination.
-
[async]: When enabled, causes the ME to return a response immediately without waiting for the action to complete. When disabled (the default), the ME waits for the action to complete before returning a response.
-
[requestId]: A unique identifier provided by an external application. This value can be used to identify the call in subsequent events and actions. If a requestId is specified, there is a corresponding XML element in the event messages generated for the session.
-
[config]: The session-config on the ME to use to process a call. Use the full path to the session-config. For example:
vsp\session-config-pool\entry MyConfig
Enclose the value in quotation marks when using the CLI.
call-control-get-annotation
Retrieves the annotated text given to the call leg.
Enter the following arguments:
-
<handle>: Identifies the leg of a call. Handles are returned as part of the <info> element of call-control results and can be used to manipulate each leg of a call independently.
call-control-hold
Places the specified call leg on hold. This puts the media of that call leg into send-only mode. The media of the other call leg, if present, is put into receive-only mode.
Enter the following arguments:
-
<handle>: Identifies the leg of a call. Handles are returned as part of the <info> element of call-control results and can be used to manipulate each leg of a call independently.
call-control-info-request
Sends an INFO on an existing call.
Enter the following arguments:
-
<handle>: Identifies the leg of a call. Handles are returned as part of the <info> element of call-control results and can be used to manipulate each leg of a call independently.
-
[info-package]: The INFO message to send to the existing call.
-
[content-type]: Specifies the Content-Type: for the indication.
-
[body]: Specifies the body for the indication.
call-control-insert-dtmf
Inserts DTMF digits into the call leg. DTMF is inserted only into the call leg specified; the other party does not hear it.
Note also that DTMF insertion is currently only supported for two-legged calls, not parked calls.
Enter the following arguments:
-
<handle>: Identifies the leg of a call. Handles are returned as part of the <info> element of call-control results and can be used to manipulate each leg of a call independently.
-
<digits>: Specifies the digits inserted into the call leg.
-
[volume]: The volume of the DTMF digits, in decimals from -36 to 0. The value 1 is the default.
-
[duration]: The duration of each digit in milliseconds, from 100 to 10000. The value 0 is the default.
call-control-intercept
Connects an incoming call to an existing parked call.
Enter the following arguments:
-
<handle>: Identifies the leg of a session. Handles are returned as part of the <info> element of call-control results and can be used to manipulate each leg of a call independently.
-
<target>: The handle of the parked call.
call-control-join
Connects the parties of two separate calls together. The original call legs, identified by handle1 and handle2, are disconnected.
Enter the following arguments:
-
<handle1>: Identifies the leg of the first call. Handles are returned as part of the <info> element of call-control results and can be used to manipulate each leg of a call independently.
-
<handle2>: Identifies the leg of the second call. Handles are returned as part of the <info> element of call-control results and can be used to manipulate each leg of a call independently.
call-control-media-resume
Resumes the playing of an audio file on an active call leg.
Enter the following arguments:
-
<handle>: Identifies the leg of a call. Handles are returned as part of the <info> element of call-control results and can be used to manipulate each leg of a call independently.
call-control-media-scanner-start
Attaches a media scanner to a call-leg (in-leg or out-leg) and begins analyzing the signal strength of the received audio. The media scanner reports events when the signal strengths detected cross from the low-threshold property settings to the high-threshold property settings, or vice-versa, and based on the configuration for the media-scanner settings. The media-scanner configuration is retrieved from the session-config associated with the target call. You can specify a named session config, which overrides the session config. The media-scanner settings configuration applied is based on the following precedence:
-
in-media-scanner-settings: media scanner settings per in-leg call
-
out-media-scanner-settings: out media scanner settings per out-leg call
-
session-config-media-scanner-settings: media scanner settings per session-config
-
default-media-scanner-settings: default property settings
The media scanner will report one of the following events when a transition has occurred:
-
Short-pause: When a transition (for example, from stable tone to quiet) takes less time than the low-long-duration property setting, such as less than 200 milliseconds
-
Long-pause: When a transition (for example, from stable tone to quiet) takes more time than the low-long-duration property setting, such as more than 200 milliseconds
-
Short-talk: When the media-scanner detects talk less than the high-long-duration property setting, such as less than 900 milliseconds
-
Long-talk: When the media-scanner detects talk longer than the high-long-duration property setting, such as longer than 900 milliseconds
-
Stable-tone: When the media-scanner detects a constant signal over a sample interval as determined by the averaging window
Enter the following arguments:
-
<handle>: Identifies the leg of a session. Handles are returned as part of the <info> element of call-control results and can be used to manipulate each leg of a call independently.
-
[config]: The session-config on the ME to use to process a call. Use the full path to the session-config. For example:
vsp\session-config-pool\entry MyConfig
call-control-media-scanner-stop
Detaches a media scanner from a call leg.
Enter the following arguments:
-
<handle>: Identifies the leg of a session. Handles are returned as part of the <info> element of call-control results and can be used to manipulate each leg of a call independently.
call-control-media-seek
Seeks a specific point in a monitored recording file.
Enter the following arguments:
-
<handle>: Identifies the leg of a session. Handles are returned as part of the <info> element of call-control results and can be used to manipulate each leg of a call independently.
-
<seek-offset>: The offset, in milliseconds, to begin seeking. A negative value seeks backwards. Seeking starts at the spot specified by the position parameter.
-
[position]: Indicates the position to begin seeking:
-
start: Seek from the start of the file. This is the default behavior.
-
current: Seek from the current position of the file.
-
end: Seek from the end of the file.
-
call-control-media-stop
Stops the playing of an audio file on an active call leg.
Enter the following arguments:
-
<handle>: Identifies the leg of a call. Handles are returned as part of the <info> element of call-control results and can be used to manipulate each leg of a call independently.
call-control-memo-begin
Records a message from the parked party, identified by a call leg handle, and stores it in a file you specify.
Note:
When cluster is enabled, master-service > file-mirror must be enabled for it to work properly.Enter the following arguments:
-
<handle>: Identifies the leg of a call. Handles are returned as part of the <info> element of call-control results and can be used to manipulate each leg of a call independently.
-
<filename>: The name of the audio file where a message is recorded or from where a message is played. Audio files must be .wav files in 44.1 kHz, 16-bit mono PCM format. If you give an invalid filename, it is placed in or taken from the /cxc directory.
-
[greeting]: A greeting file that may be applied first as a prompt.
-
[cluster]: When enabled, the file is available to all MEs in the cluster. When disabled (the default), the file is only available on the local ME.
call-control-memo-end
Ends a recording on the specified call leg.
Enter the following arguments:
-
<handle>: Identifies the leg of a call. Handles are returned as part of the <info> element of call-control results and can be used to manipulate each leg of a call independently.
call-control-message
Connects to a given endpoint, plays the file you specify, then disconnects the call. If you specify a From URI, that appears in the From header as the calling party; if no URI is specified, the To URI is used as the From header.
Enter the following arguments:
-
<filename>: The name of the audio file where a message is recorded or from where a message is played. Audio files must be .wav files in 44.1 kHz, 16-bit mono PCM format. If you give an invalid filename, it is placed in or taken from the /cxc directory.
-
<endpoint>: The URI of the call's destination.
-
[from]: The originating SIP URI of the call.
-
[requestId]: A unique identifier provided by an external application. This value can be used to identify the call in subsequent events and actions. If a requestId is specified, there is a corresponding XML element in the event messages generated for the session.
-
[async]: When enabled, causes the ME to return a response immediately without waiting for the action to complete. When disabled (the default), the ME waits for the action to complete before returning a response.
-
[config]: The session-config on the ME to use to process a call. Use the full path to the session-config. For example:
vsp\session-config-pool\entry MyConfig
Enclose the value in quotation marks when using the CLI.
call-control-media-pause
Pauses the playing of an audio file on an active call leg.
Enter the following arguments:
-
<handle>: Identifies the leg of a call. Handles are returned as part of the <info> element of call-control results and can be used to manipulate each leg of a call independently.
call-control-message-request
Sends a MESSAGE on an existing call.
Enter the following arguments:
-
<handle>: Identifies the leg of a session. Handles are returned as part of the <info> element of call-control results and can be used to manipulate each leg of a call independently.
-
[content-type]: Specifies the Content-Type: for the indication.
-
[body]: Specifies the body for the indication.
call-control-modify
Sends a re-INVITE on an existing call leg.
Enter the following arguments:
-
<handle>: Identifies the leg of a session. Handles are returned as part of the <info> element of call-control results and can be used to manipulate each leg of a call independently.
-
[content-type]: Specifies the Content-Type: for the indication.
-
[body]: Specifies the body for the indication.
call-control-monitor-file
Attaches a monitor session to a recording file. A recording file can be a live session currently being recorded, an old session that was recorded, an on-demand recording of a session, or a memo actively being recorded.
Enter the following arguments:
-
<handle>: Identifies the leg of a session. Handles are returned as part of the <info> element of call-control results and can be used to manipulate each leg of a call independently.
-
<session-id>: The optional session ID for the session.
-
<monitor-target>: The filename of the file to be played. This can be:
-
session: A session recording file is going to be monitored.
-
memo: A memo actively being recorded is going to be monitored.
-
name: The on-demand filename specified in the call-control-record-start action is being monitored.
-
-
[seek-offset]: The offset, in milliseconds, to begin seeking. A negative value seeks backwards. Seeking starts at the spot specified by the position parameter.
-
[position]: Indicates the position to begin seeking.
call-control-monitor-session
Attaches a monitor session to a live target session. The monitor session must join the target session in-progress as it has no ability to seek forward or backward during a live recording.
Enter the following arguments:
-
<handle>: Identifies the leg of a session. Handles are returned as part of the <info> element of call-control results and can be used to manipulate each leg of a call independently.
-
<session-id>: The optional session ID for the session.
call-control-mute-off
Turns off the mute functionality for a call leg.
Enter the following arguments:
-
<handle>: Identifies the leg of a session. Handles are returned as part of the <info> element of call-control results and can be used to manipulate each leg of a call independently.
call-control-mute-on
Turns on the mute functionality for a call leg.
Enter the following arguments:
-
<handle>: Identifies the leg of a session. Handles are returned as part of the <info> element of call-control results and can be used to manipulate each leg of a call independently.
call-control-notify
Causes a SIP NOTIFY message to be sent to the party you specify in the handle parameter, with the value of the Event header set by the event parameter.
Enter the following arguments:
-
<handle>: Identifies the leg of a call. Handles are returned as part of the <info> element of call-control results and can be used to manipulate each leg of a call independently.
-
<event>: The content of the Event header.
call-control-notify-request
Sends a NOTIFY on an existing call.
Enter the following arguments:
-
<handle>: Identifies the leg of a session. Handles are returned as part of the <info> element of call-control results and can be used to manipulate each leg of a call independently.
-
<event>: The content of the event header.
-
[async]: When enabled, causes the ME to return a response immediately without waiting for the action to complete. When disabled, (the default) the ME waits for the action to complete before returning a response.
-
[content-type]: Specifies the Content-Type: for the indication.
-
[body]: Specifies the body for the indication.
call-control-options-request
Sends an OPTIONS on an existing call.
Enter the following arguments:
-
<handle>: Identifies the leg of a session. Handles are returned as part of the <info> element of call-control results and can be used to manipulate each leg of a call independently.
-
[content-type]: Specifies the Content-Type: for the indication.
-
[body]: Specifies the body for the indication.
call-control-park
Creates a call to an endpoint from a given SIP URI. If you specify a From URI, it is used as the From URI in the SIP message; if you specify no From URI, the From URI is that of the given endpoint.
Enter the following arguments:
-
<endpoint>: The URI of the call's destination.
-
[from]: The originating SIP URI of the call.
-
[requestId]: A unique identifier provided by an external application. This value can be used to identify the call in subsequent events and actions. If a requestId is specified, there is a corresponding XML element in the event messages generated for the session.
-
[async]: When enabled, causes the ME to return a response immediately without waiting for the action to complete. When disabled (the default), the ME waits for the action to complete before returning a response.
-
[sessionId]: The optional session ID for a rendezvous session.
-
[persist]: When enabled, a connected session remains parked even when the remote endpoint disconnects.
-
[config]: The session-config on the ME to use to process a call. Use the full path to the session-config. For example:
vsp\session-config-pool\entry MyConfig
Enclose the value in quotation marks when using the CLI.
call-control-park-to-session
Parks a call to an existing session.
Enter the following arguments:
-
<endpoint>: The handle of call leg on the existing session.
-
<session-id>: The optional session ID for the session.
-
[from]: The From URL of the parked call.
-
[requestId]: A unique identifier provided by an external application. This value can be used to identify the call in subsequent events and actions. If a requestId is specified, there is a corresponding XML element in the event messages generated for the session.
-
[async]: When enabled, causes the ME to return a response immediately without waiting for the action to complete. When disabled (the default), the ME waits for the action to complete before returning a response.
-
[persist]: When enabled, a connected session remains parked even when the remote endpoint disconnects.
-
[config]: The session-config on the ME to use to process a call. Use the full path to the session-config. For example:
vsp\session-config-pool\entry MyConfig
call-control-persistence
Makes a call-leg persist in a parked state even when its peer is terminated.
Enter the following arguments:
-
<handle>: Identifies the leg of a session. Handles are returned as part of the <info> element of call-control results and can be used to manipulate each leg of a call independently.
-
<persist>: When enabled, a connected session remains parked even when the remote endpoint disconnects.
call-control-play
Plays a given audio file to the specified call leg. If two call legs are connected, the file is played to both parties.
If the session-config > media-scanner-settings is configured, the ME waits until the recipient (or an answering machine) has finished speaking before delivering the message. If the media scanner times out waiting for the recipient to finish speaking, the file is not played.
Enter the following arguments:
-
<handle>: Identifies the leg of a call. Handles are returned as part of the <info> element of call-control results and can be used to manipulate each leg of a call independently.
-
<filename>: The name of the audio file where a message is recorded or from where a message is played. Audio files must be .wav files in 44.1 kHz, 16-bit mono PCM format. If you give an invalid filename, it is placed in or taken from the /cxc directory.
-
[startTime]: The number of milliseconds the ME waits before playing the file.
-
[async]: When enabled, causes the ME to return a response immediately without waiting for the action to complete. When disabled (the default), the ME waits for the action to complete before returning a response.
call-control-record-start
Starts the on-demand recording or a target session to a specific <filename> file. This recording can then be monitored via the call-control-monitor-file action. You can execute this command one or more times for a given target session, provided you give it a different <filename> each time. If a <filename> already exists for a given target session, the existing <filename> is preserved and the action fails.
Enter the following arguments:
-
<session-id>: The optional session ID for the session.
-
<filename>: The name of the recording for this particular target session.
call-control-record-stop
Stops the on-demand recording or a target session to a specific <filename>.
Enter the following arguments:
-
<session-id>: The optional session ID for the session.
-
<filename>: The name of the recording for this particular target session.
call-control-redirect
Redirects an initiated call to a new endpoint, prior to the call being answered. This creates a new call leg and cancels the original one.
Enter the following arguments:
-
<handle>: Identifies the leg of a call. Handles are returned as part of the <info> element of call-control results and can be used to manipulate each leg of a call independently.
-
<endpoint>: The URI of the call's destination.
-
[config]: The session-config on the ME to use to process a call. Use the full path to the session-config. For example:
vsp\session-config-pool\entry MyConfig
Enclose the value in quotation marks when using the CLI.
call-control-reject
Rejects an incoming call from an offering endpoint.
Enter the following arguments:
-
<handle>: Identifies the leg of a session. Handles are returned as part of the <info> element of call-control results and can be used to manipulate each leg of a call independently.
-
[response-code]: The SIP response code to return in response.
-
[responseText]: Text to return in the response.
call-control-retrieve
Retrieves the held call leg you specify by call handle. This reconnects the call's media for that call leg and, if present, the other call leg.
Enter the following arguments:
-
<handle>: Identifies the leg of a call. Handles are returned as part of the <info> element of call-control results and can be used to manipulate each leg of a call independently.
call-control-ringing
Redirects an initiated call to a new endpoint, prior to the call being answered. This creates a new call leg and cancels the original one.
Enter the following arguments:
-
<handle>: Identifies the leg of a session. Handles are returned as part of the <info> element of call-control results and can be used to manipulate each leg of a call independently.
-
<endpoint>: The URI of the call's destination.
-
[config]: The session-config on the ME to use to process a call. Use the full path to the session-config. For example:
vsp\session-config-pool\entry MyConfig
Enclose the value in quotation marks when using the CLI.
call-control-send-message
Sends a message to the endpoint specified by the To URI. If you specify a From URI, it is used for the From URI. If a From URI is not specified, the From URI is the same as the To URI.
Enter the following arguments:
-
<to>: The destination SIP URI of the call.
-
<from>: The originating SIP URI of the call.
-
[requestId]: A unique identifier provided by an external application. This value can be used to identify the call in subsequent events and actions. If a requestId is specified, there is a corresponding XML element in the event messages generated for the session.
-
[content-type]: Should be set to text/plain.
-
[body]: The content of the message.
-
[config]: The session-config on the ME to use to process a call. Use the full path to the session-config. For example:
vsp\session-config-pool\entry MyConfig
Enclose the value in quotation marks when using the CLI.
call-control-send-info
The call-control-send-info action sends an in-dialog SIP INFO request.
Valid arguments for this action are:
-
<AOR>: The Address of Record in the form of a URI.
-
[id]: The Unique ID that identifies the registration binding (returned in SubscribeEvent).
-
[session-config]: The session-config used for formatting INFO headers and bodies.
call-control-send-notify
The call-control-send-notify action sends an in-dialog SIP NOTIFY request.
Valid arguments for this action are:
-
<AOR>: The Address of Record in the form of a URI.
-
[id]: The Unique ID that identifies the subscription binding (returned in SubscribeEvent).
-
[session-config]: The session-config used for formatting NOTIFY headers and bodies.
call-control-send-options
The call-control-send-options action sends in-dialog SIP OPTIONS requests.
Valid arguments for this action are:
-
<AOR>: The Address of Record in the form of a URI.
-
[id]: The Unique ID that identifies the registration binding (returned in SubscribeEvent).
-
[session-config]: The session-config used for formatting OPTIONS headers and bodies.
call-control-send-other
The call-control-send-other action sends in-dialog requests for all other SIP methods which do not have a specific action.
Valid arguments for this action are:
-
<method>: The SIP method to use in the request.
-
<AOR>: The Address of Record in the form of a URI.
-
[id]: The Unique ID that identifies the registration binding (returned in RegisterEvent).
-
[session-config]: The session-config used for formatting the request headers and bodies.
call-control-send-subscribe
The call-control-send-subscribe action sends an in-dialog SIP SUBSCRIBE request.
When an application either sends a SUBSCRIBE request and receives a 200 OK or accepts a SUBSCRIBE request by responding with a 200 OK, the ME creates a subscription binding. This binding contains the supported events and a unique ID. The application can use this ID to distinguish between subscriptions that it created and other subscriptions created for the same AOR but a different application.
Subscription bindings are arranged in a vector under the AOR and have an expiration time that can be specified in the sip-send-subscribe and call-control-send-subscribe actions. If you do not specify an expiration time, the default is 3600 seconds.
Valid arguments for this action are:
-
<AOR>: The Address of Record in the form of a URI.
-
[event]: The name of the event type to subscribe to.
-
[accept]: The acceptable event data to include.
-
[id]: The unique ID that identifies the subscription binding (returned in SubscribeEvent). This value is optional on a first call but required on subsequent re-subscribes.
-
[session-config]: The session-config used for formatting SUBSCRIBE headers and bodies.
-
[expiration]: The expiration time of the binding, in seconds. If this value is not specified, the default is 3600 seconds.
call-control-subscribe-request
Sends a SUBSCRIBE on an existing call.
Enter the following arguments:
-
<handle>: Identifies the leg of a session. Handles are returned as part of the <info> element of call-control results and can be used to manipulate each leg of a call independently.
-
[pkg]: Specifies the package for the SUBSCRIBE.
-
[expires]: The expiration value for the SUBSCRIBE.
-
[content-type]: Specifies the Content-Type: for the indication.
-
[body]: Specifies the body for the indication.
call-control-terminate
Terminates the call leg indicated by the handle you specify. This parameter is only available for calls with a parked status.
Enter the following argument:
-
<handle>: Identifies the leg of a call. Handles are returned as part of the <info> element of call-control results and can be used to manipulate each leg of a call independently.
call-control-transfer
Transfers the specified call leg to the specified To SIP URI. The original call leg, referred to by its handle, is disconnected. Handle can be thought of as belonging to the party doing the transfer, even though the transfer is done via a third-party action.
Enter the following arguments:
-
<handle>: Identifies the leg of a call. Handles are returned as part of the <info> element of call-control results and can be used to manipulate each leg of a call independently.
-
<to>: The destination SIP URI of the call.
call-create
Creates a media session that includes the underlying media subsystem. The ME performs a route lookup and if it determines the destination endpoint is a media endpoint, no signaling is generated. However, if the ME determines the destination endpoint is SIP, H.323, or MSS, it uses the existing infrastructure for establishing a call to an endpoint of that type to establish the out-leg for the session.
Enter the following arguments:
-
<to-uri>—The destination endpoint.
-
<from-uri>—The source endpoint.
-
[request-id]—The string returned in all events associated with this session.
-
<prev-hop>—The address of the media source.
-
<next-hop>—The address of the media destination.
-
<media-specification>—The media specification (initial-offer-SDP).
-
[named-configs]—A list of one or more associated named session-configs.
call-destroy
Terminates a media session resulting in all endpoints being disconnected.
Enter the following arguments:
-
<call-leg-handle>—The handle of the call-leg indicating a desire to terminate the session.
-
<response-code>—An RFC 3261 code indicating why the call is being terminated.
-
[response-phrase]—A text string summarizing the reason the call is being terminated.
call-failover
Flushes the call-failover database of any signaling and media-session records used to maintain call state between redundant ME devices. Typically this action is used for troubleshooting purposes only, when advised to do so from customer support. This action is only available in the CLI if you have enabled the call-failover master service. You can also schedule this action as part of routine maintenance using the task object.
call-hold
This action may be initiated following a call-connected-event or after completion of a media-session-accept action. When executed, this action notifies the peer endpoint that a hold has been requested and completes immediately. No structured results are returned.
Enter the following argument:
-
<call-leg-handle>—The handle of the call-leg indicating it has entered the held state.
call-lookup
Displays, for a specified Request URI, the dial-plan settings that ME assigned, the routing arbitration process, and the selected server. This action simulates the call routing path, but does not actually trigger an outbound call. It exercises both dial plan and location database lookups. Its output indicates which dial plan entry (or location cache entry) the call would use and the next hop.
Enter a Request URI. The action returns results for any AOR that matches a configured dial plan, or you can find the URI of interest in the AOR field displayed with the show location-cache command.
Syntax
call-lookup requestUri [wildcard | named tag | anonymous] [soureceIP] [localPort] [fromURI] [toURI] [contactHeader]
Example
NNOS-E> call-lookup sip:2078548355@elmaple.com
Resulting priority 100 sequential hunting total 1 next 0
option 0: preference 10000 bandwidth 0 cap 0 rate 0 QOS null selected 192.168.77.179
All matching routes:
route domain elmaple.com priority 100 best yes
This call will be forwarded to 192.168.77.179 transport UDP port 5060
call-lookup-detail
Displays, for a specified Request URI, the content of the session configuration associated with the selected dial-plan. If the SIP URI matches a dial-plan (source-) route or arbiter, the action returns the session configuration for that entry (or the default session configuration if the entry does not have one assigned). If the dial-plan route has the peer set to server, and the server has a session configuration, this action displays the merged session configuration. (The server session configuration takes precedence over the route session configuration.)
Syntax
call-lookup-detail requestUri [wildcard | named tag | anonymous] [soureceIP] [localPort] [fromURI] [toURI] [contactHeader]
Example
NNOS-E> call-lookup-detail sip:2078548355@elmaple.com
Resulting session config merged from server/group egress:
sip-settings
mode auto-determine
transport any
port auto-determine
route-hdr none
route-hdr-use-fqdn enabled
route-hdr-uri-host
route-hdr-add-register-msg disabled
route-hdr-preprocess-strip disabled
lcs-compatibility disabled
in-server unknown
out-server unknown
utilize-contact enabled
add-contact-nat disabled
compress-signaling disabled
preserve-call-id disabled
preserve-cseq disabled
proxy-generate-100-trying
handle-3xx-locally enabled
handle-3xx-locally-lookup-original-invite disabled
session-timeout 300 seconds
session-duration-max 0 seconds
--more--
call-modify
This action may be initiated following either a call-connected-event or after completion of a call-accept or a call-create action. The ME injects the initial-offer-SDP media specification provided into the media session and the resulting actual-offer-SDP is forwarded to the appropriate peer in accordance with the endpoint type.
Enter the following arguments:
-
<call-leg-handle>—The handle identifying the call-leg indicating a need for media re-negotiation.
-
<media-type>—The mime type of media specification (initial-answer-SDP).
-
<media-specification>—The offer media specification (initial-offer-SDP).
call-reject
This action may be initiated in response to a call-connecting-event and causes the media session to be terminated. The action completes immediately and does not provide structured results. The initiator of the action or signaling event creating the media session is notified appropriately.
Enter the following arguments:
-
<out-leg-handle>—The handle identifying the call-leg that is rejecting the call invitation.
-
<response-code>—The RFC 3261 code for why the call was rejected.
-
[response-phrase]—A text string summarizing the reason the call is being rejected.
call-retrieve
This action may be initiated following a call-held-event or after a call-hold action has completed. When executed, this action notifies the peer endpoint that a retrieve has been requested and completes immediately. No structured results are returned.
Enter the following argument:
-
<call-leg-handle>—The handle of the holding call-leg indicating a desire to terminate the hold.
call-retrieved
This action may be initiated following a call-retrieved-event or is invoked when the peer endpoint has indicated via signaling that the endpoint is no longer in the held state. This action completes immediately and does not return structured results.
Enter the following argument:
-
<call-leg-handle>—The handle of the held call-leg indicating the hold has been terminated.
cert-gen
Generates a 1024-bit key pair (public and private) using the RSA algorithm. In addition, the action generates an X.509 V3 self-signed certificate. You can subsequently use the keyfile you create to generate a Certificate Signing Request (CSR) to send to a CA. (Generate the request using the cert-request action and update the self-signed certificate with the validated certificate using the cert-update action.)
The following fields must or can be specified as part of the action to create a certificate's Distinguished Name (DN), which uniquely identifies the entity:
-
keyfile: The name of the file to which the key and certificate will be saved.
-
password: The password used to encrypt the private key.
-
alias: The name given to this entry within the keyfile.
-
commonName: The fully-qualified domain name for the site using the certificate. To include subdomain, use a wildcard (e.g., www*.companyABC.com).
-
[daysValid]: The number of days that you are requesting from the CA that your certificate remains valid. The default is 365 days.
-
[country]: The two-letter ISO country code for the country in which the business is registered. See the International Organization for Standardization for a listing of codes.
-
[alternateName]: Any other name you want associated with the distinguished name (e.g., an email address).
-
[organization]: The legally registered name of the business or holder of the domain name.
-
[organizationalUnit]: A division within the organization (e.g., marketing, engineering).
-
[state]: The name of the state, province, region, or territory in which the business is registered. Do not abbreviate this field.
-
[locality]: The name of the city or locality in which the business is registered. Do not abbreviate this field.
When you invoke this action, you are required to enter and confirm your password. Enter the password that you used, in this action, to create the key pair.
See RFC 1779, A String Representation of Distinguished Names, for more information.
cert-request
Generates a certification request for a private key and its certificate. You specify the keyfile and entry within it that you want to generate for, as well as a file name to write the data to. You then send that file to the CA authority. You can use the cert-gen action to generate an entry in the keyfile for which you can request certification, or you can use a keyfile and alias that exist on the system. Use the cert-update action to update the self-signed certificate with the validated certificate. Enter the following:
-
keyfile: The name of the file containing the key and the self-signed certificate.
-
password: The password used to encrypt the private key when it was created.
-
alias: The entry within the certificate for which you are requesting a validation certificate.
-
csrfile: The file to which the certification request should be saved. The data is output in PEM format. You must send the contents of this file, along with your CSR, to the CA. By default, the file is written to the /cxc/certs directory.
When you invoke this action, you are required to enter and confirm your password. Enter the password that you used, in the cert-gen action, to create the key pair.
cert-update
Loads a signed certificate onto ME and associates it with the key specified by alias. Use the action to update your self-signed certificate when the CA has returned a signed certificate. When you receive the file, you can put it anywhere on ME. However, if you store it in the directory /cxc/certs, it will be available to all boxes in the cluster. Enter the following:
-
keyfile: The name of the file containing the key and the self-signed certificate.
-
password: The password used to encrypt the private key when it was created.
-
alias: The entry within the certificate for which you are creating a validated certificate.
-
certFile: The signed certificate file returned from the CA.
You can use the cert-gen action to generate an entry in the keyfile for which you are requesting certification; generate the request using the cert-request action.
clock
Sets the ME system time. The internal clock uses a 24-hour clock, beginning at midnight starting at 00:00 hours.
cls
Clears the window in which your CLI session is active by moving your prompt and cursor to the first line of the display. Your terminal emulation program defines at what point the screen erasure begins (and therefore, which previous data is still displayed if you scroll backward).
config
Manipulates or saves the running configuration
-
merge: Merges the specified file into the current running configuration. If any properties overlap (set in both configuration files), the values from the file being merged in take precedence.
-
replace: Writes the specified file to the running configuration. All values are overwritten with the values of the new file.
-
save: Writes the running configuration to the default configuration file (/cxc/cxc.cfg), or if a pathname is supplied, to that file name. You can choose standard, verbose, or XML formats. Standard format only outputs properties with a value different from the default; verbose outputs every property.
You can also save your configuration file in XML format. You can then import this XML file to other ME systems to create a saved configuration. This will save you time if you have identical configuration settings across systems in the cluster. With XML, you can also work on the configuration file offline. In the CLI, XML and standard/verbose CLI configuration files are interchangeable (functionally equivalent), and the default save location is the same.ME creates a numbered backup (cxc.cfg.#) with each execution, creating up to 100 backups. Files are saved in the /cxc/backup directory.
This command works the same as the save global command.
-
setup: Creates a minimal operating configuration file from a setup script run from the top-level prompt. After answering a a series of questions at the command line, you can then PING the system to check connectivity. See one of the following for a complete description:
-
Oracle Communications WebRTC Session Controller Installation Guide
-
The appropriate Quick Installation card that ships with your hardware
-
cpu-monitor
Displays the percentages of CPU usage over time. The first column of the output indicates the system time stamp of the reading. The second column indicates CPU usage as a percentage of total CPU processing power. The third column, if present, indicates the number of seconds that the measurement has been unchanged. Use the show cpu-usage command to display usage levels at preset intervals over time.
In the first example, below, the system is using 0% of the total CPU. The value has been unchanged for 34 seconds. In example 2, the value is continuously changing. Example 3 shows the MEII output of system under DOS attack with no DOS rules enabled to protect it. If you have a color ANSI terminal emulation program, the system will display CPU monitoring graphically, as shown in Example 4. Green bars show usage between 1% and 60%; yellow shows 61-80%, and red shows 81-100%.
Press EXC to cancel the display.
Example
NNOS-E>cpu-monitor
Monitoring cpu usage; press Esc to cancel...
15:26:43 0% 34

NNOS-E>cpu-monitor
Monitoring cpu usage; press Esc to cancel...
21:23:23 9%
21:23:24 7%
21:23:25 7%
21:23:26 6%
21:23:27 6%
21:23:28 9%
21:23:29 7%
The following example shows first the MEII output of a system under attack with no DOS rules enabled, and then the terminal emulation output of the same attack.
NNOS-E>cpu-monitor
Monitoring cpu usage; press Esc to cancel...
08:04:26 0% 13
08:04:27 34%
08:04:28 98%
08:04:29 99%
08:04:30 100%
08:04:32 100%
08:04:33 100%
08:04:34 100%
08:04:35 99%
08:04:36 100%
08:04:37 99%
08:04:38 99%
08:04:39 99%
08:04:40 77%
08:04:41 41%
08:04:42 43%
08:04:43 77%
08:04:44 55%
08:04:45 57%
08:04:46 33%
08:04:47 68%
08:04:48 39%
08:04:49 60%
08:04:50 54%
08:04:51 76%
08:04:52 56%
08:04:53 49%
08:04:54 32%
08:04:55 58%
08:04:56 51%
08:04:57 40%
08:04:58 29%
08:04:59 14%
08:05:00 12%
08:05:01 8%
08:05:02 6%
08:05:03 4%
08:05:04 2%
08:05:05 4%
08:05:06 3%
08:05:07 1% 01
08:05:08 3%
The following image is a terminal emulation output of a cpu-monitor action. 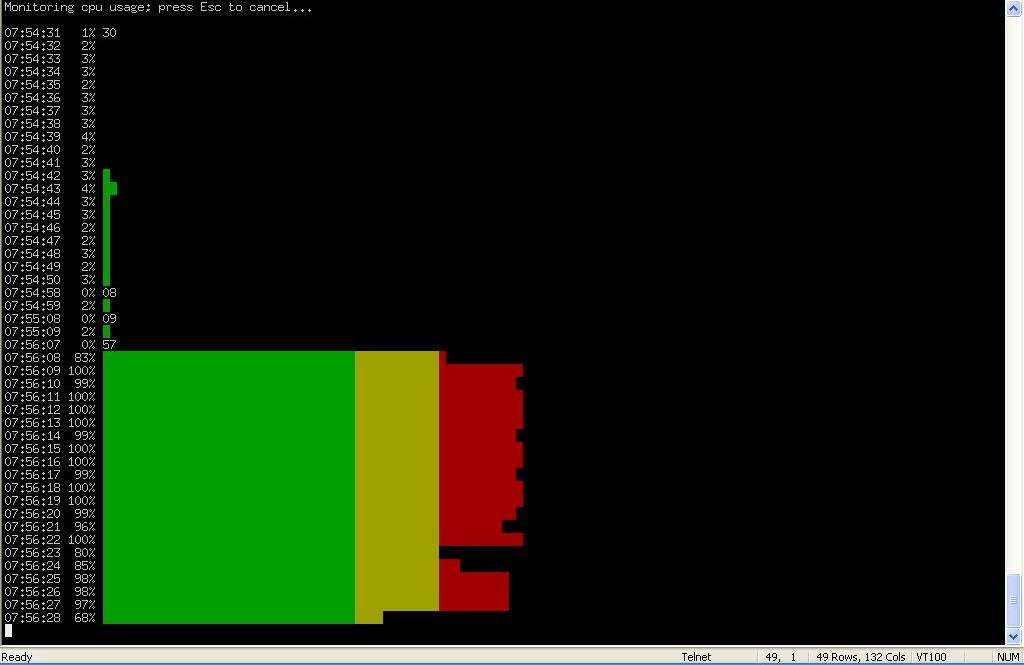
csta-moc-commands
Manages MOC clients, such as changing status for one, two, or all clients, or finding login status of clients.
-
update-moc: Changes the status of a MOC client to the status you specify by issuing a CSTA Call Update. Enter the From URI, in the form of a telephone number (e.g., tel:+14135551212 or the normalized 5551212), to change the status of the caller. Optionally, you can simultaneously change the ”callee” to the same status by entering the To URI.
-
find-moc: Searches the list of MOC clients, listed in the CSTA and/or MOC caches, for one with the specified URI. Results of the action indicate whether or not the client is logged in.
-
reset-all-moc: Resets the status of all the MOC clients that are currently connected to ME. Status for all is changed to Available.
csta-uri-normalization
Tests the regular expression rules for URI normalization that are configured for a 3PCC server. This is a way to reference a configured server and run intended URI normalization rules against it to verify the applicability of the normalization properties. When you execute this action, you reference a server and indicate which type of normalization rules to test. ME then applies the rules in that configuration. For a full description of using URI normalization in third-party call control, see the 3pcc-servers object description. Note that issuing the action using the keyword none initiates no action.
To use this action, specify:
-
A server type
-
A reference to a server of that type
-
The type of normalization for that server that you are testing
-
The phone number to run the test against.
database
Deletes or cleans database records. This is for databases you configured with the master services' database object. You can clean or delete an entire database, or a specific table within the database. Use the show database-tables command to list the tables and their associated database.
Regular vacuuming is done automatically as part of the nightly maintenance and logs should show when a table is automatically vacuumed.
-
delete: Purges the database of entries contained in the specified database, or entries in the table within the database. The database delete action (without qualifiers) deletes all rows in all tables in the database.
-
vacuum: Based on the SQL VACUUM command, reclaims storage occupied by deleted entries and makes it available for re-use. The system can read and write to the table while the process is occurring.
-
vacuum-full: Based on SQL VACUUM command, reclaims storage occupied by deleted entries and makes it available for re-use. It also does more extensive processing, however, and as a result the table is not available for read/write operations during the process. To do a periodic ”global” vacuum, as Oracle recommends in the release notes, use the database vacuum-full system command. If you receive a message telling you a specific table needs to be vacuumed, execute the database vacuum-full system <table> command.
-
drop: Deletes all data stored in the specified table and removes the table definition from the database schema.
-
repair: Initiates database repair options. If you select the data-recovery option, the system recovers data that was removed by ME when it corrected a corrupted database. The translate option migrates earlier databases to a format compatible with release 3.2 and later.
-
initialize: Deletes all data and reinitializes the database.
-
snapshot: Breaks the database into smaller pieces, each starting from either the beginning of the database or the last snapshot, and ending when this action is executed (either manually or as a task). This results in fewer and faster disk accesses and improved performance. Use this action to manually take a snapshot, or schedule periodic snapshots with the task object. (See the following section Taking snapshots at regular intervals for more information.) You can access archived snapshots from the ME Management System Call Logs tab by clicking on the Database Archives link.
Select a minimum number of records in the snapshot, either an integer or the force or automatic options. If you enter a number, ME takes the snapshot if there is at least one table that has at least that many records. Otherwise, it does not execute the action for that interval. The default number of records is three million. The force option takes the snapshot regardless of how many records there are in the database tables. The automatic option skips the snapshot if no table has 3 million records or more.
Taking Snapshots at Regular Intervals
To take a snapshot at regular intervals, use the task object. You can, for example, schedule the ME to take a snapshot every four hours. The content of the snapshot will depend on the settings of the snapshot option, but will contain the data that was written to the database from the end of the previous snapshot to four hours forward. Each snapshot will contain only those four hours worth of data. Queries can then be performed on snapshot segments instead of the whole database. When creating a database snapshot, ME:
-
Takes the current timestamp and uses it as the part of the snapshot data directory name;
-
Dumps the whole database up to the timestamp to a new database stored in the named data directory;
-
Deletes from the running database all records with a timestamp up to the above set timestamp;
-
Performs a vacuum analyze on the running database to reclaim disk space.
While a snapshot is in progress, all database reads and writes, as well as DOS queries, are performed as usual.
database-backup
Executes a database backup or restore operation. A backup saves the database to the path you specify. The restore actions loads the specified database file from the location you specify to ME. Any restore action adds entries from that file to the database. (If your goal is to overwrite the database, then you should first use the database delete action and then use the database-backup restore action.)
When you supply a path name, you are also giving a name to the database file. The ME saves the file to /cxc/pg_dump/name. Do not specify a path name unless it begins with /cxc/pg_dump/. For example, if you specify db1, the ME saves it to /cxc/pg_dump/db1. Or, you could specify, /cxc/pg_dump/db1. However, if you specify /cxc/db1, the operation will fail.
Note that by default the ME uses BZIP2 compression. This format is optimized for size, but can take longer to produce. If you would prefer to use GZIP compression, which is faster but results in a 30-40% larger archive, you can do so by supplying the gz suffix when you initiate the action. The following table provides an example of compression suffixes:
Table 3-1 Compression Suffixes
| Enter this file name at the command line... | Get an archive of this type... |
|---|---|
|
DBbackup |
DBbackup.bz2 |
|
DBbackup.gz |
DBbackup.gz |
Syntax
database-backup {backup | restore} {log | system | status dos | directory | accounting} databasePath
Example
NNOS-E>database-backup restore system /cxc/pg_dump/sysDB
Are you sure (y or n)? y
Starting database restore as a background operation.
 -- this may take a very long time --
Please check database-maintenance-status for notification when this operation is complete.
NNOS-E>show database-maintenance-status
maintenance-status: idle
directory-reset
Resets the enterprise directory, causing the ME to reread the directory and update the user information. Use this action when you have added users and want the ME to retrieve the new entries.
Enter the name of the VSP that houses the directory. In addition, you can set a directory purge action of true or false:
-
true: Clears out the contents of the database and then repopulates it.
-
false: Updates the database but leaves users that are no longer in the directory itself in the database.
If you do not enter a VSP name, the system uses the VSP default. For the directory-reset action, the default purge action is true.
You can cancel this action when it is in progress using the directory-reset-cancel action. You can also schedule this action as part of routine maintenance using the task object.
directory-reset-cancel
Cancels the execution of an in-progress directory-reset action. When the directory-reset-cancel action is invoked, it immediately stops the reset action: some entries are updated and some are not. Use this action with caution as it leaves the directory entries in a mixed state.
disconnect-call
Disconnects the specified call based on the session ID. If a call hasn't yet been answered, this action sends a ”403 Forbidden” response to the UA that initiated the call, and a CANCEL request to the called UA. If the call has already been cancelled, the action sends BYE requests to both UAs (informing all involved parties that the call has been shut down). Use the show active-call command to retrieve the ID. You can also do this from the Call Logs Session pages in the ME Management System. From the GUI, you can list the active calls and then select and disconnect. Use the terminate-call action if the endpoints are no longer reachable.
display
Temporarily changes the display output without changing your configuration. After ending your CLI session, ME erases the changes and uses the settings in your configuration at the next session. Select either:
-
paged: The CLI outputs text a page at a time, pausing the display with the --More-- prompt. You set the number of lines displayed before the prompt. The following table shows the keystrokes the prompt accepts:
| Keystroke | Result |
|---|---|
|
Enter |
Outputs the next line of text. |
|
Tab |
Outputs the remainder of the text. |
|
Esc or Q or q |
Cancels the display, outputs no more text, and returns to the prompt. |
|
any other keystroke |
Outputs the next page of text. |
-
scrolled: The CLI scrolls text continuously.
To set the output display in your configuration, use the cli object.
Example
NNOS-E> display paged 12
NNOS-E> ?
archive                     Run the archiving task for a given vsp
arp-delete                  Flush the ARP cache
autonomous-ip-lookup        Actions to determine Autonomous IP group
call-lookup                 Actions for Dial Plan operations
clock                       Set the system time
cls                         Clear terminal screen
config                      Configuration commands
database                    Delete database records or vacuum tables
--More--
dns
Executes a variety of DNS actions. Use the dns object to configure how the ME services DNS requests. Select one of the following options:
-
lookup: Executes a DNS lookup on a named host. You can specify a server to query; otherwise the ME uses the server(s) configured through the resolver server. You can set a timeout for the request, either a number of milliseconds or that the request never timeout (forever). Optionally you can set the record type that the ME returns:
-
A: An IP address (the default).
-
PTR: Pointer record, mapping IP address to the canonical name.
-
SRV: Service location record.
-
NAPTR: Name authority pointers, mapping a domain name to general information such as a URI.
-
CNAME: Canonical name, mapping any name aliases.
-
NS: Name server record, mapping a domain name to authoritative DNS servers for that name.
-
-
flush-cache: Flushes all dynamic entries from the DNS resolver cache of all processes. Optionally, you can specify an individual process cache to flush.
-
reset-servers: Flushes all dynamic entries from the server DNS resolver cache and resets the DNS sockets. It is possible for a DNS socket has become nonfunctional but the ME continues sending DNS messages to it. This action closes and then reopens all DNS sockets. In addition it resets server counts, refreshes the server, and sets the administrative state to UP. By default, the action impacts all servers configured as resolver servers. Optionally, you can specify an individual server.
-
delete-entry: Deletes the specified record from the DNS cache. Enter the name, and, optionally, the record type of the entry to be deleted. You can delete the entry from all configured servers (the default), or a specific server. Use the show dns-cache command to display names of the entries in the cache. a server.
dos-delete-rules
Deletes all or a specific configured denial-of-service (DOS) rules. Use the show dos-rule command to see the current rules. Rules can be deleted on the local system or for the cluster. By default the action deletes all rules across the cluster.The ME automatically creates DOS rules as a result of the configured policies. The policy selects which table rows to consider, the threshold for instances, and the frequency (period) of comparison. When the threshold is reached for a given period, the ME generates a rule in the kernel to block traffic meeting that selection criteria. The rule will persist as long as any traffic matching the rule is seen within the user-configurable inactivity-timeout period. The ME automatically deletes a rule when the inactivity timer expires,. You can delete rules manually using this action.
dynamic-event-service
This action allows third party applications to subscribe to events without having to be configured directly on the ME.
-
register: Allows a web application to register itself by using the web service REST and SOAP clients. Valid arguments are:
-
<endpoint>: The application endpoint that receives events.
-
[channels]: The channels for which the endpoint is getting events.
-
[xml-format]: The XML format used by this server. This can be either simplified (the default) or legacy.
-
[time-to-live]: The time to live, in minutes, for the keepalive on this registration. The default is untilRestart, meaning the registration stays alive until the system is restarted.
-
[connect-timeout]: The connect timeout, in milliseconds, for the endpoint. The default is 1000.
-
[read-timeout]: The read timeout, in milliseconds, for the endpoint. The default is 1000.
-
[character-set]: The character set to use when forming requests to this endpoint. This can be utf-8 (the default) or iso-8859-1.
-
[request-style]: The style to use when sending events to this listener. This can be SOAP (the default), XML, or JSON.
-
[include-channels-in-events]: Whether channels are included in events. This is enabled by default.
-
-
keepalive: Keeps current registrations alive.
-
unregister: Allows the web application to unregister itself.
enum-lookup
Enter a phone number to resolve. As a resolver, the ME obtains resource records from servers on behalf of resident or requesting applications. In addition, it maps a server to a domain name.
Example
NNOS-E>config vsp enum mapping 15085551212
Creating 'mapping 15085551212'
config mapping 15085551212> set url SIP:skd@skdPC:5060;transport=TLS
config mapping 15085551212> exit
Do you want to commit your changes before you exit (y or n)? y
Do you want to update the startup configuration (y or n)? y
NNOS-E> enum-lookup 15085551212
Phone 15085551212 has a mapping to URL SIP:skd@skdPC:5060;transport=TLS
ethernet-negotiate
Causes the specified Ethernet interface to renegotiate its parameters. To see the current settings, execute the show ethernet command. Enter the Ethernet interface you want to effect, eth0 through eth19.
expression
Provides actions to test match and replacement in regular expressions. A scan option provides line-by-line processing output to help with debugging. Remember that you must use quotation marks around special characters at the command line. Select one of the following:
-
match: Tests a URI, allowing you to determine whether an expression you created matches a supplied string.
-
replace: Tests both the regular expression and the replacement for a URI against the supplied string. Supply both and the system responds with the resulting output. The ME executes the replacement on the first occurrence of the expression. To replace all instances, use the all keyword option.
-
scan: Debugs a URI and regular expression by providing pass-by-pass information on how the system is processing the string.
external-normalization
Manages the file used to maintain DNIS-to-ANI translation data.These mappings are checked prior to any dial-plan lookups. Typically, this action is initiated though the task object scheduler. Select one of the following operations:
-
replace-file: Pulls data from the named file into the external normalization database of the SIP process. All previous mappings are removed. (The mappings known to the ME can be displayed using the show external-normalization status provider.) Enter a file path or browse the system for a file name. The default normalization file is /cxc/normalization.xml.
-
replace-url: Identifies the external service that hosts the normalization (mapping) data. Specify a host name or IP address.
-
flush: Removes all entries from the internal normalization cache. (It does not affect the normalization.xml file.)
You can also schedule this action as part of routine maintenance using the task object.
Example
NNOS-E>external-normalization flush
Success!
NNOS-E>show external-normalization
match   pri   hits   ALT-REQ-USR   ALT-TO-USR   ALT-FROM-USR   DLG   tag
------  ----  -----  -----------   -----------  ------------   ---   ---

NNOS-E>external-normalization replace-file normalization.xml
Success!

NNOS-E>show external-normalization
match   pri   hits   ALT-REQ-USR   ALT-TO-USR   ALT-FROM-USR   DLG   tag
------  ----  -----  -----------   -----------  ------------   ---   ---
899101201 99   0    **12027423317   OUT
1202742331 99  0    **8991012017    IN                               abc
NNOS-E>external-normalization replace-url ftp://myserver.foo.com/external-normalization.xml
Success!
external-presence
Clears all or a specified entry from the external presence cache. The external cache is the database running on the backup system in a cluster configuration. The primary or master appliance contains the presence cache from which the external presence cache is mirrored. If a failover happens, the external cache becomes the master cache. See the presence action for information on managing the master cache.
Select one of the following operations:
-
delete: Deletes the specified entry from the external presence cache. Enter the URL for the entry, which can be found in the show presence-cache-external command.
-
flush: Removes all entries from the external presence cache.
You can also schedule this action as part of routine maintenance using the task object.
Example
NNOS-E>show presence-cache-external
url: 2078548355@elmaple.com
Box: 0.0.0.0
state: Online
prestype: Voice
LastRegisteredTime: 0
ExpireInterval: 4294967295
numCurrSubscribers: 1
url: 2078548357@elmaple.com
Box: 0.0.0.0
state: Online
prestype: Voice
LastRegisteredTime: 0
ExpireInterval: 4294967295
numCurrSubscribers: 3
NNOS-E>external-presence flush
Success!
external-session
Removes all entries from the external CSTA SIP session cache. If configured to do so, the cache contains state information for all active CSTA sessions on all boxes in the cluster. This action is typically used to clear the cache without rebooting in the event of a failover recovery. Use the install examine action to clear the cache on an individual box.
To ensure that boxes share this information, set share-signaling-entries to true in the cluster object.
You can also schedule this action as part of routine maintenance using the task object.
file
Performs file management operations. The file actions support a number of protocols (HTTP, HTTPS, FTP, etc.) and can be used to manage a variety of file types, for example, configuration files, certificates, patches, or licenses. All operations begin with \cxc as the root directory. Select one of the following operations:
-
erase: Deletes the specified file.
-
purge: Deletes one or more files. Use a wildcard to specify more than one (e.g., /cxc_common/announcements/*). You can select a minimum age for the file(s): the system deletes anything older. See Setting Time and Time Intervals for information on entry format requirements for minimum age.
-
fetch: Moves a file from a specified location to the ME.
-
send: Copies a file from the ME to the specified location.
file-based-word-lists-refresh
Rereads any saved word-list or url-list file entry into memory. Use this if you have made a change to the file and want the new words, expressions, or domains read into memory.
You can also schedule this action as part of routine maintenance using the task object.
file-mirror-service
Manages mirrored files and the file database. To enable file mirroring, use the file-mirror master service. File mirroring sets all participating ME devices to share particular files, such as media recordings, log files, etc., making them highly available. Using this action, you can execute the following operations:
-
make-available: Moves the named file from its current location to the common directory of the first highly available directory. This is the first entry in the file-mirror file-mirror-directory property configuration. The master then distributes the file across the cluster. Use this option to mimic the file mirror function for files that are not automatically managed under the service.
-
fetch: Validates whether the specified file is up-to-date on the disk. If it is not, the action retrieves the current file from the master.
-
delete: Removes the specified file form both the local disk and the shared database. The action also sends a message to the master, instructing it to remove the file from each backup box.
-
find: Returns a list of full path name matches to the relative path name that you enter.
All operations take a file name.
Example
NNOS-E> show file-mirror-db-record

canonical-file-name   timestamp   file-permission   last-update-from-box-number
-------------------   ---------   ---------------   ---------------------------
/cxc_common/mirror1/file1.txt 15:24:16 Tue 2007-10-16  33188            1
/cxc_common/mirror1/file3.txt 15:24:48 Tue 2007-10-16  33188            1
/cxc_common/mirror2/file2.txt 15:26:21 Tue 2007-10-16  33188            1
/cxc_common/mirror2/file3.txt 15:26:14 Tue 2007-10-16  33188            1

NNOS-E> file-mirror-service find file1.txt
Found file /cxc_common/mirror1/file1.txt

NNOS-E> file-mirror-service find file3.txt
Found file /cxc_common/mirror1/file3.txt
Found file /cxc_common/mirror2/file3.txt
file-play
Places a call to the specified SIP URI, plays the .WAV file, and then disconnects the call. This could be a .WAV file you recorded and moved to the ME, for instance with the file fetch action. Compare this to the playback action. The playback action plays recorded sessions only (the ME takes care of mixing the media for playing). This action plays any audio file. For example, if you made a file using the mix-session action, you can play it using file-play.
Enter the following information:
-
filename: The location of the .WAV file you want played.
-
to: The SIP URI that specifies where to place the call to.
-
from: A SIP URI that appears as the caller ID.
-
transport: The transport protocol to use, either any, UDP, TCP, or TLS.
file-play-verify
Verifies that a WAV file is of a format supported by the ME (for example, PCM16/PCMA/PCMU, 16000/8000 sample rate, single channel, and others). Use this action to validate a file used for playout or for insertion as an introduction (see the media object) or periodic-announcement.
file-transfer-delete
Deletes a file that was added to the ME via a file transfer (e.g., via IMs) and entered in the database. (The database maintains a record of all files transferred.) Deleting the file removes the entry from the database.
Enter the following:
-
sessionID: To find the session ID, use the Call Logs tab in the ME Management System or the show file-transfer-files command in the CLI.
-
fileName: The name of the file to delete.
-
identifier: The unique identifier that distinguishes the file in the event that the same named file was transferred more than once during a single session.
file-transfer-delete-old
Invokes the ME to delete all files added to the ME via a file transfer that are older than the specified number of days or seconds. Enter a number and a unit of measure. By default, the ME deletes transferred files that are older than seven days when you execute this command.
You can also schedule this action as part of routine maintenance using the task object.
file-transfer-retrieve
Creates a link to the specified file transfer so that the ME Management System can retrieve the file. This action is primarily for use with the GUI only.
Enter the following:
-
sessionID: To find the session ID, use the Call Logs tab in the ME Management System or the show file-transfer-files command in the CLI.
-
fileName: The name of the file to retrieve.
-
identifier: The unique identifier that distinguishes the file in the event that the same named file was transferred more than once during a single session.
-
file: The path to the link created for the file.
format
Formats the specified system hard drive. Enter the drive you wish to format and the file system to use on that drive. Use this action with caution, as it formats or reformats the specified drive, removing all existing data. Note that the format action also automatically performs the equivalent of the add-device and mount actions. If you have data on a drive that you want to maintain, be sure to manually execute these two actions. See the Net-Net OS-E – USB Creation and Commissioning Instructions for a complete description of system drives and partitioning.
ftrace
Manages debug tracing results that are directed to a file. You must have an existing settings file to start writing trace results to a file. The settings file defines the trace class and severity to record. You can create a settings file with the ME CLI trace command or another program.
Select one of the following options
-
start: Begins writing tracing results to a file. Specify the process that you want to collect debugging information on, and a file name to write the information to. Optionally, you can specify a settings file. The default settings file used by the ME, if you do not specify a settings file name, is target.ini. However, you must create that file before you can use this action.
-
stop: Ends the tracing action for a specific process to a specific file.
-
remove: Deletes the specified file for a given target.
-
import: Imports a trace file into the log database. Specify the full path name of the file to import. The default table to import the file to is TraceStruct.
group-down
Simulates a VRRP group becoming non-operational. You can use this action to test your configuration. If configured for failover, when you execute this action, the ME fails over interfaces and master services to the backup box. If you execute this action without such a configuration, the ME brings down and then restores the specified group.