Purging EPS Market Codes
This section discusses how to purge EPS suspense files.
|
Page Name |
Definition Name |
Navigation |
Usage |
|---|---|---|---|
|
EPS Purge Suspense File |
EPS_PURGE_PARMS |
|
Purge EPS code records from the suspense file. You can purge all EPS codes or a specific type. |
Access the EPS Purge Suspense File page ().
Image: EPS Purge Suspense File page
This example illustrates the fields and controls on the EPS Purge Suspense File page. You can find definitions for the fields and controls later on this page.
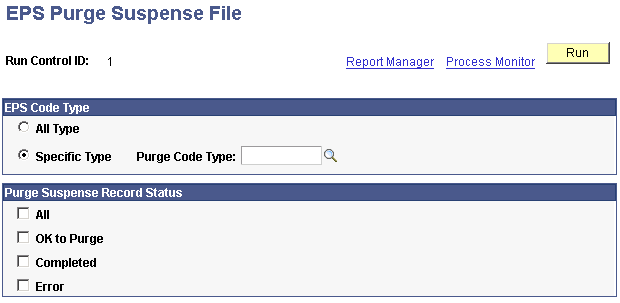
EPS Code Type
Use this group box to select the EPS market code records that you want to purge from the suspense file.
|
Field or Control |
Definition |
|---|---|
| All Type |
Select to purge all EPS market code type records from the suspense file. |
| Specific Type and Purge Code Type |
Select to purge only a specific EPS market code type record from the suspense file. Use Purge Code Type to choose an EPS market type. |
Purge Suspense Record Status
Use this group box to select the type of messages that you want to remove. You must choose at least one.
|
Field or Control |
Definition |
|---|---|
| All |
Select to remove all suspense records, regardless of their status. |
| OK to Purge |
Select to remove all suspense records with a status of OK to Purge. |
| Completed |
Select to remove all suspense records with a status of Completed. |
| Error |
Select to remove all suspense records with a status of Error. |
Click the Run button to run the EPS Purge Program process at user-defined intervals.