Generating an XML File to Send to SEVIS
You must run an XML extract process to create the data files in the format that SEVIS requires.
|
Page Name |
Definition Name |
Navigation |
Usage |
|---|---|---|---|
|
Export SEVIS Events - F/M |
RUNCTL_SEV_EXTRACT |
|
Generate the XML file of F and M visas data for transmission to SEVIS. |
|
Export SEVIS Events - J |
RUNCTL_SEV_EXT_J |
|
Generate the XML file of J visas data for transmission to SEVIS. |
Access the Export SEVIS Events - F/M page for F/M visas processing () or access the Export SEVIS Events - J page for J visas processing ().
Image: Export SEVIS Events - F/M page
This example illustrates the fields and controls on the Export SEVIS Events - F/M page. You can find definitions for the fields and controls later on this page.
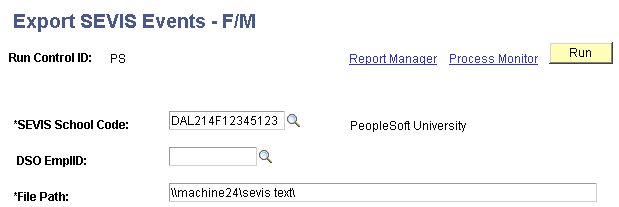
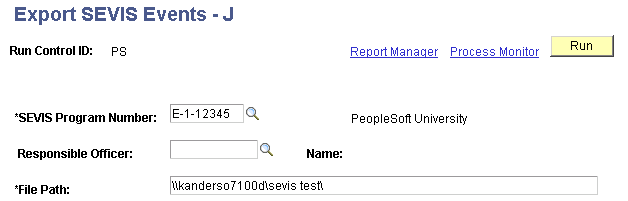
Image: Export SEVIS Events - J page
This example illustrates the fields and controls on the Export SEVIS Events - J page. You can find definitions for the fields and controls later on this page.
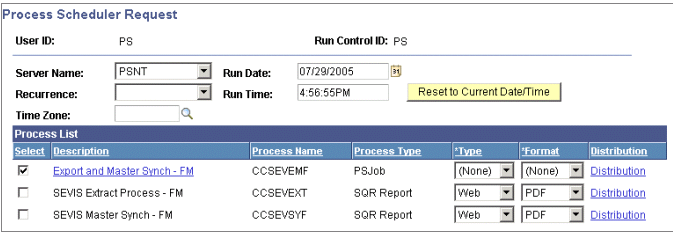
The SEVIS Export process includes two processes, the SEVIS Extract Process (CCSEVEXT for F and M visas or CCSEVEXJ for J visas) which creates the XML file to send to SEVIS, and the SEVIS Master Sync Process (CCSEVSYF for F and M visas or CCSEVSYJ for J visas) which updates the SEVIS Master directly. Which process runs depends on the visa type, the value in the Send To field on the Alerts Header page for that visa type, and the selection that you make on the Process Scheduler Request page.
To force the extract and Master Sync processes to run at the same time, select the Export and Master Synch option on the Process Scheduler Request page.
Image: Example of the Process Scheduler Request page for the SEVIS Export process for F and M visas
This example illustrates the fields and controls on the Example of the Process Scheduler Request page for the SEVIS Export process for F and M visas. You can find definitions for the fields and controls later on this page.
When the Send To field on the Alerts Header page is set to Master and you select the SEVIS Master Synch option for the visa type in PeopleSoft Process Scheduler, the process updates the SEVIS Master component directly. Events set to Master are not included in the XML file produced by the Master Sync process.
When the Send To field on the Alerts Header page is set to SEVIS and you select the SEVIS Extract Process option for the visa type, the process extracts data into an XML file that is compliant with the SEVIS Create - Update Student or Create EV schema and therefore ready to send to SEVIS. Only events set to SEVIS are included in the XML file produced by the extract process.
The extract process creates an XML file using a 30-character file name with the SEVIS extract batch ID and the SEVIS school code for F and M visas or the program code for J visas. For example, the XML filename for F and M visas might be 00000000005DAL21400078230.xml where the 00000000005 is the SEVIS extract batch ID and DAL21400078230 is the SEVIS school code. The XML filename for J visas might be 00000000005G-2-10128.xml where the 00000000005 is the SEVIS extract batch ID and G-2-10128 is the SEVIS program number.
Note: The SEVIS system currently accepts XML files with names no longer than 30 characters, including the .xml file extension. The XML file produced by the PeopleSoft SEVIS Export process does not display the first three characters of the extract batch ID.
The SEVIS extract batch ID value is recorded on the Installation Defaults - CC page. The extract process controls and sequentially numbers the extract batch ID value with each new run.
The PeopleSoft application delivers the SEVIS extract batch ID value set to 00000000000000 and the field is set to display-only on the Installation Defaults - CC page.
Warning! Exercise extreme care if you update the SEVIS extract batch ID value. The batch ID value is an important key to SEVIS batch XML documents. PeopleSoft Campus Solutions controls the SEVIS extract batch ID value. The SEVIS system no longer requires sequential batch ID numbering, however, the Batch ID submitted with each file must be unique.
|
Field or Control |
Definition |
|---|---|
| SEVIS School Code or SEVIS Program Number |
For F and M visas, enter the SEVIS school code for the data to be exported. For J visas, enter the SEVIS program number for the data to be exported. |
| DSO EmplID (designated school official employee ID) or Responsible Officer |
For F and M visas, enter the ID of the assigned DSO for the data to export. For J visas, enter the ID of the assigned responsible officer (RO) or assistant responsible officer (ARO) of the data to export. This field is optional for either visa type and is used to limit the export file to only those individuals whose current form (I-20 or DS-2019) is associated with the specified responsible ID (DSO or RO/ARO). Depending on business processes, if your institution has multiple responsible IDs, you might find it useful to limit the XML data files to a specific ID. This can assist with the organization and review of transaction log results and forms received from SEVIS. |
| File Path |
Enter the path to the destination where you want the system to store the created export file. |