Modifying Cashiering Receipt Forms
To set up cashiering receipt forms, use the Upload EPS Image File component (FE_UPIMG_RUNCTL), the Form Image Text component (FE_IMAGE_TEXT), and the Form Editor component (FORM_EDITOR).
There are some simple modifications that you can make to the delivered Forms Engine cashiering receipts. For example, you can have your institution's logo appear on your receipts.
This section discusses:
|
Page Name |
Definition Name |
Navigation |
Usage |
|---|---|---|---|
|
Upload EPS Image File |
FE_UPIMG_RUNCTL |
|
Upload image files. |
|
Form Image Text |
FE_IMAGE_TEXT |
|
Set up form image text. |
|
Form Editor |
FORM_EDITOR |
|
Change a receipt title and add an image. |
|
Form Text Attributes |
FORM_TEXT |
Click the Edit Field Attributes link for a form row with a form field type of Text. |
Specify form text attributes. |
|
Form Image Attributes |
FORM_IMAGE |
Click the Edit Field Attributes link for a form row with a form field type of Image. |
Specify form image attributes. |
Before you upload an image file to your database, there are some steps you must take to prepare the file. The required steps differ depending on whether the image is cached or noncached.
Preparing a Cached Image for Uploading
If an image is cached, Forms Engine does not resend it for each page on which it is printed. Preparing a cached image for uploading requires some knowledge of PostScript. You must:
Create a plain text file with an .eps (Encapsulated PostScript) extension.
See the sample file fe_flower1.eps in the data directory of your PS_HOME (or PS_APP_HOME, depending on your installation) for an example.
Edit this PostScript file with a plain text editor to display the graphic image.
Only edit the contents between the first "begin" and the last "end," noninclusive.
Test print the image. To do so:
Copy the EPS file to a temp file.
Delete everything before the first "begin" inclusive.
Delete everything after the last "end" inclusive.
Insert a line at the top that reads "40 40 translate" to move the image to within the page margins.
Insert a line at the bottom that reads "showpage."
Copy the temp file to a PostScript printer.
Preparing a Noncached Image for Uploading
If an image is noncached, Forms Engine resends it for each page on which it is printed. Preparing a noncached image for uploading does not require knowledge of PostScript. You must:
Open and display the image using a graphical display or editing program.
Create a graphic image that is the size of a page.
This image will be a background image for the receipt, so place it within a white background.
Print the image to a PostScript printer, but when the print dialog box appears, select the Print to file check box.
When the Print to file dialog box appears, place the file into a temp directory.
Make the following edits to the file:
Remove the "showpage" command near the end of the file.
Remove all lines with "@PJL" in them.
Remove all lines with "%%Pages" in them.
Remove all lines with "%%Page" in them.
Remove the "%%EOF" line near the end of the file.
Access the Upload EPS Image File page ().
Image: Upload EPS Image File page
This example illustrates the fields and controls on the Upload EPS Image File page. You can find definitions for the fields and controls later on this page.
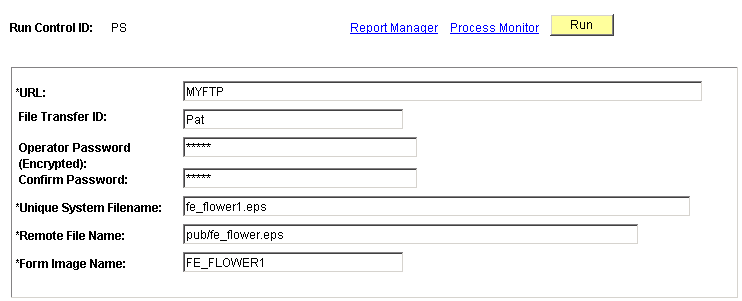
Enter the required information and run the process to upload the image to an FTP server.
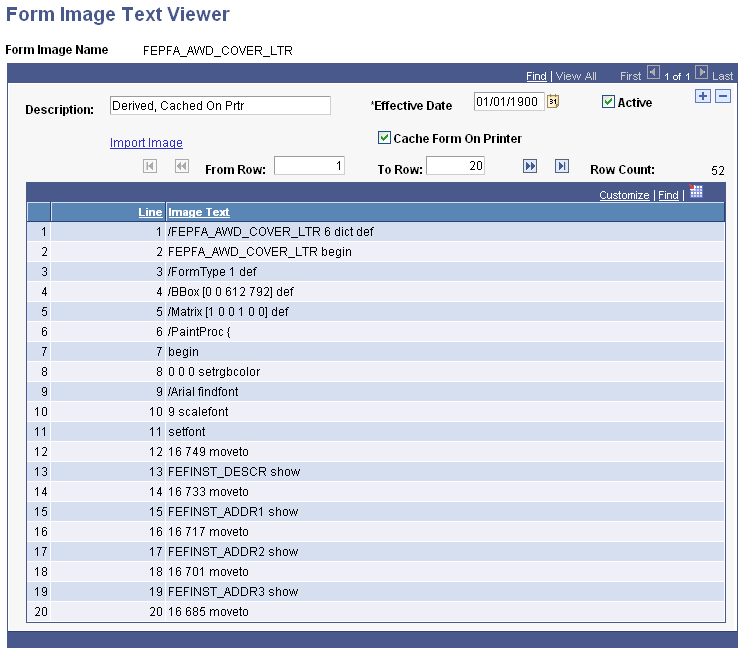
Access the Form Image Text Viewer page ().
Image: Form Image Text Viewer page
This example illustrates the fields and controls on the Form Image Text Viewer page. You can find definitions for the fields and controls later on this page.
|
Field or Control |
Definition |
|---|---|
| Description |
Enter a description for the image. |
|
Field or Control |
Definition |
|---|---|
| Cache Form On Printer |
Select if the image is cached. Clear if the image is noncached. |
Access the Form Editor page ().
Image: Form Editor page
This example illustrates the fields and controls on the Form Editor page. You can find definitions for the fields and controls later on this page.
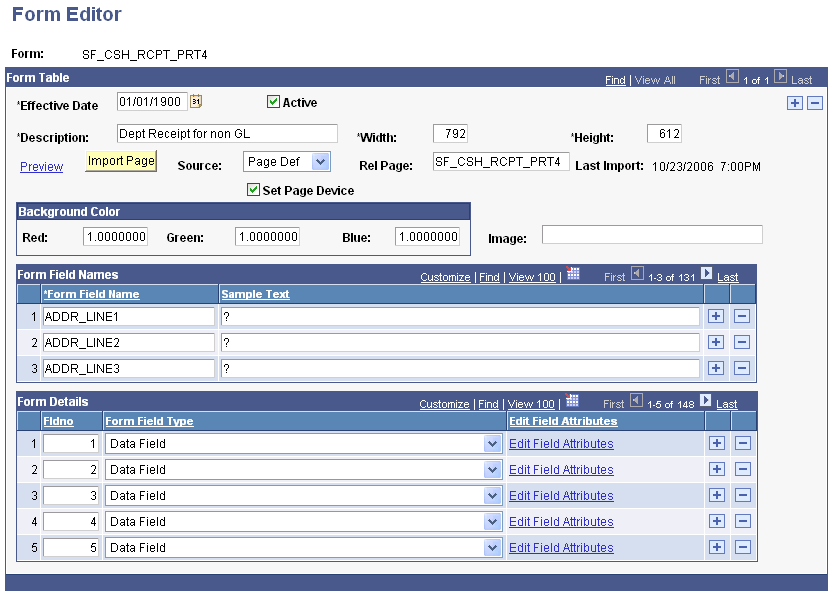
Changing a Receipt Title
To change a receipt title:
Scroll to the row with a Fldno (field number) of 12.
Click the Edit Field Attributes link to open the Form Text Attributes page.
Edit the title in the Form Text field.
Click OK and save your changes to the form.
Adding a Cachable Image to a Receipt
To add a cachable image to a receipt:
Insert a row in the field number grid.
Entered a form field type of Image.
Click the Edit Field Attributes link to open the Form Image Attributes page.
Locate and select the desired image.
Specify a start position.
X is the horizontal distance from the left side of the page, in units of 1/72 of an inch. Y is the vertical distance from the bottom of the page, in units of 1/72 of an inch. For example, if X is 504 and Y is 684, the start position would be 1.5 inches from the upper right corner of an 8.5-inch by 11-inch page.
Specify a scaling factor.
For example, if the unscaled image is roughly 3 inches square, use an X and Y scaling factor of 0.3 so that the image comes out as one square inch.
Click OK and save your changes to the form.
Adding a Noncachable Image to a Receipt
To add a noncachable image to a receipt:
Enter the name of the image in the Image field.
Save your changes to the form.