Setting Up Self-Service Navigation
Use the Navigation Tabs Setup (SSS_NAV_SETUP) component to define the two-level folder tabs for self-service applications.
You can change the name and order of the navigational tabs that appear in student Self Service for each of the functional areas — Campus Community, Faculty Center, Financials and Student Records.
This section discusses how to:
Define tabs for self-service applications.
Set up the Enrollment tab for Student Records Self Service.
|
Page Name |
Definition Name |
Navigation |
Usage |
|---|---|---|---|
|
Navigation Tabs Setup |
SSS_NAV_SETUP |
|
Define tabs for self-service applications. |
Access the Navigation Tabs Setup page ().
Image: Navigation Tabs Setup page (1 of 2)
This example illustrates the fields and controls on the Navigation Tabs Setup page (1 of 2). You can find definitions for the fields and controls later on this page.
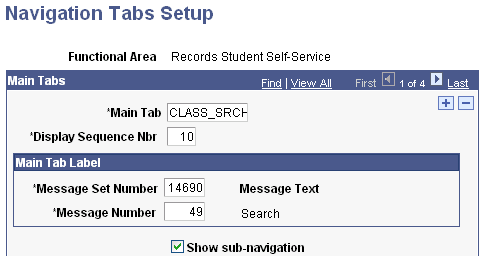
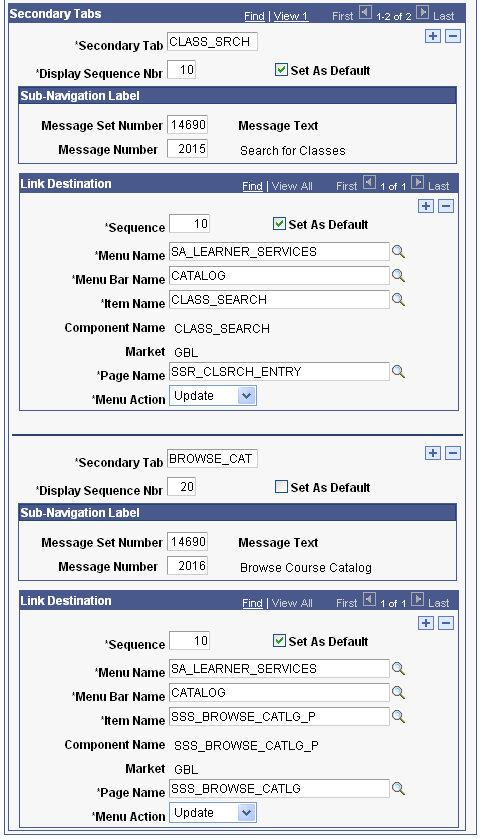
Image: Navigation Tabs Setup page (2 of 2)
This example illustrates the fields and controls on the Navigation Tabs Setup page (2 of 2). You can find definitions for the fields and controls later on this page.
You can use the Navigation Tabs Setup page to:
Change the name of a tab in Self Service (which also changes the Student Center links).
Change sequence numbers and set secondary tab defaults to change the order of the tabs and the secondary tabs.
Add additional tabs.
The Show sub-navigation check box is selected by default. You might want to clear this check box if you use only one of the subtabs or pages in a particular area.
Only users with security access to the Navigation Tabs Setup component can configure the tabs.
In Self Service, students can access only the tabs for which they have access to the relevant component. For example, if course history is a secondary tab under the Plan main tab and a student does not have access to the SSS_MY_CRSEHIST component, the student cannot see the course history tab.
Here is an example of the self-service Search for Classes page:
Image: Example of the Search for Classes page
This example illustrates the fields and controls on the Search for Classes page. You can find definitions for the fields and controls later on this page.
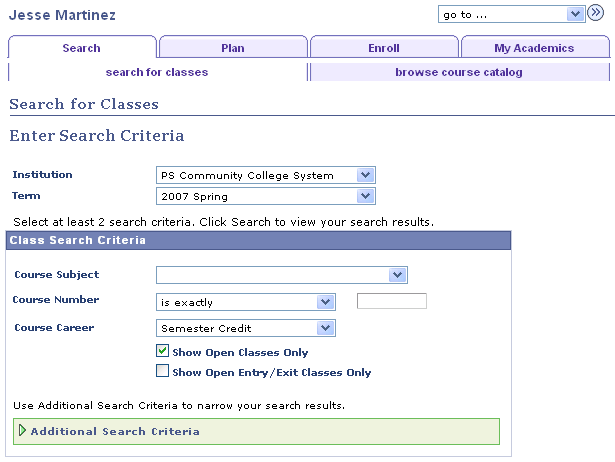
You can see how the text in the Message Text fields on the setup page correspond to the tab names in Self Service.
The Search tab has the lowest sequence number in the Main Tabs group box on the setup page and therefore appears first in Self Service. Similarly, the search for classes tab appears before the browse course catalog tab because of the sequencing of the secondary tabs on the setup page.
When students access the Search tab, the search for classes tab appears by default because the Set as Default check box is selected for that tab on the setup page.
To change the name of a tab, modify the delivered text in the Message Text field on the Message Catalog page or add a new message to the message catalog and associate that message with the tab.
See PeopleTools: System and Server Administration
Note: If you map a component to more than one navigation path, you receive a warning message indicating that duplicate navigation entries exist for the component. You can save the settings, but the first navigation path to which a component is mapped in the setup is always used regardless of how many paths are mapped.
You can use one of the two delivered variations of the shopping cart component under both the Plan, shopping cart tab and the Enroll, add tabs.
You can set up the add tab so that when students access that tab, they are taken to the version of the component that is used on the shopping cart tab—that is, the version with the Select check box for each class.
Here are the setup steps:
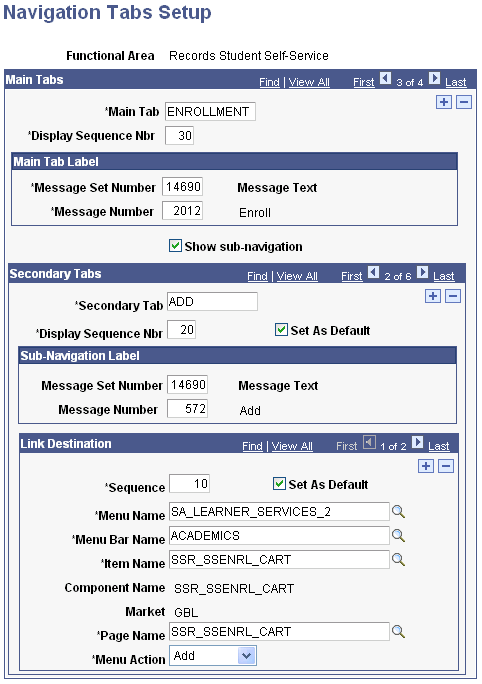
On the Navigation Tabs Setup page (for Student Records), select ENROLLMENT in the Main Tab field in the Main Tabs group box.
In the Secondary Tabs group box, select ADD in the Secondary Tab field.
In the Link Destination group box, select SA_LEARNER_SERVICES_2 in the Menu Name field.
Note: Two rows exist in this group box. Ensure that you select SA_LEARNER_SERVICES_2 in both rows.
Click Save.
Here is an example of the setup for the add tab using SA_LEARNER_SERVICES_2:
Image: Example of setup for the add tab using SA_LEARNER_SERVICES_2
This example illustrates the fields and controls on the Navigation Tabs Setup page. You can find definitions for the fields and controls later on this page.
The add tab in Self Service uses the version of the component with the Select check box:
Image: Example of the add tab in Student Center
This example illustrates the fields and controls under the add tab in Student Center. You can find definitions for the fields and controls later on this page.
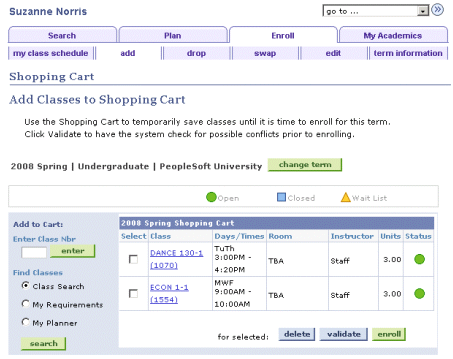
If you select SA_LEARNER_SERVICES in the Link Destination group box, the Select check box does not appear on the add tab in Self Service. The check box appears only on the shopping cart tab.
You can use the Message Catalog (PeopleTools, Utilities, Administration, Message Catalog) to change the title text that appears on the add and shopping cart tabs. The existing text appears on the previous example page.