2. Processing Checkbook Requests
An investor could avail the use of checkbooks for a fund. You can maintain details of checkbooks requested by an investor, as well as the status of individual checks in a checkbook that has been issued.
This chapter contains the following sections:
- Section 2.1, "Checkbook Requests"
- Section 2.2, "Send Details of Checkbook Requests "
- Section 2.3, "Receive Details of Printed Checkbooks "
- Section 2.4, "Make Changes to Checkbook Requests"
- Section 2.5, "Statuses for Individual Checks"
2.1 Checkbook Requests
This section contains the following topics:
- Section 2.1.1, "Processing Checkbook Requests"
- Section 2.1.2, "Before Entering Checkbook Request"
- Section 2.1.3, "Entering Checkbook Request in Check Book Request Screen"
2.1.1 Processing Checkbook Requests
To maintain details of requested checkbooks and update the status of checks in each issued checkbook, use the ‘Check Book Request Detail’ screen. You can invoke this screen by typing ‘UTDCHKRQ’ in the field at the top right corner of the Application tool bar and clicking on the adjoining arrow button.

2.1.2 Before Entering Checkbook Request
Only those investors, for whom the check writing facility has been allowed in their account profiles, can avail the use of checkbooks for a fund. Also, rules for the check writing facility must also be maintained for the fund for which the checkbook has been requested by the investor.
Typically, checkbooks requested by investors for a fund are printed by external agencies known as check vendors that enter into an agreement with the AMC, to print the checks on the investor’s behalf. You must maintain a record for each check vendor with whom the AMC has entered into such an agreement, as an entity in the Entity Maintenance, in FCIS. You must also associate each check vendor with the funds for which the vendor can print checks. You do this in the Fund Entity screen.
2.1.3 Entering Checkbook Request in Check Book Request Screen
To enter a checkbook request in the Check Book Request screen, you must specify the following details:
Specifying the unit holder
You must specify the unit holder who has requested the use of a checkbook. Only those unit holders, for whom check writing is allowed, as part of their account profiles, may avail the use of a checkbook.
Specifying the fund
You must specify the fund for which the unit holder has requested the use of a checkbook. Rules for check writing should already have been maintained for such a fund.
Specifying the check vendor
You must also specify the check vendor who will print the checkbooks on behalf of the investor. Only those check vendors associated with the selected fund for which the checkbook is being requested, can be specified.
Specifying checkbook details
You must also specify the details of the checkbook being printed, such as the number of the checkbook, the currency in which it is being issued and any remarks.
Specifying the status of a checkbook request
When a new checkbook request is being filled in, in this screen, you must mark the status of the checkbook as ‘Checkbook Applied’. The interface that you have defined for exporting details for checkbook requests to the designated vendors, when executed, will only pick up those requests whose status is ‘Checkbook Applied’. After the interface is successfully executed, the status of the requests processed is automatically marked as ‘Sent to Vendor’.
After a checkbook request has been sent to the designated check vendor, if there is any discrepancy reported by the vendor while downloading the checkbook request, you must manually change the status to ‘Discrepancy Noticed’, by either editing or amending the request.
When the details of checkbooks printed and issued against each request are received from the vendors and uploaded into the system, the status of all issued checkbooks is marked as ‘Check Status Maintained’. In this status, the details of all checks that are part of the issued checkbook are maintained in the system.
When all checks in the checkbook have been used up, the status of the book is marked as ‘Check Book Exhausted’. You will need to either edit or amend the record to mark this status. In this status, all checks contained in the book are marked ‘Invalid’.
If, for any reason, the checkbook stands cancelled, and you have received notification to that effect, you must edit or amend the checkbook request and mark the status as ‘Cancelled’. In this status, all checks contained in the book are marked ‘Invalid’.
You can also monitor the status of individual checks in the checkbook, through the Check Status Summary screen.
You can specify the following fields in this screen:
Unit Holder ID
16 Characters Maximum, Alphanumeric; Mandatory
In this field, you can indicate the unit holder for whom the checkbook request is being entered. You can use the Find Options button to view a list of unit holders for whom the check writing facility has been allowed in their account profiles, and select the required unit holder from this list.
You cannot enter a checkbook request for a unit holder for whom the check writing facility is not allowed, in the account profile.
Fund ID
6 Characters Maximum, Alphanumeric; Mandatory
In this field, you can indicate the fund for which the unit holder made the checkbook request. You can use the Find Options button to view a list of funds for which rules for check writing facility have been defined, and select the required fund from this list.
You cannot enter a checkbook request for a unit holder in a fund for which rules for check writing facility have not been defined.
When you specify the ID of the fund, the ISIN Code of the fund is displayed in the ISIN Code field.
ISIN Code
12 Characters Maximum; Alphanumeric; Mandatory
Select the ISIN Code of the selected fund. If you specify the ISIN Code of a fund, the ID of the fund is displayed in the Fund field.
Entity ID
16 Characters Maximum, Alphanumeric; Mandatory
Indicate the check vendor to whom the checkbook request will be sent for printing. You can use the Find Options button to view a list of check vendors associated with the selected fund, select the required vendor from this list. The name of the vendor that you select is displayed in the Entity Name field.
Check Book Details Section
Check Book Number
16 Characters Maximum, Numeric; Mandatory
Specify the number of the checkbook that has been requested. This is the identification for the checkbook in the system. The number you specify here must not be used to identify any other checkbook in the system, for the same unit holder and fund combination.
Check Status
50 Characters Maximum, Alphanumeric; Mandatory
This field is used to assign a status to a checkbook. The individual checks in the book may have different statuses, which are different from the status of the checkbook. You can choose the status of the checkbook that is being requested from the drop down list. The list contains statuses defined to be applicable to checkbooks, in the System Parameters.
The following statuses are possible for a checkbook:
- Check Book Applied: You must mark this status when a checkbook request is entered for the first time in this screen. This is the only status you can assign when you are entering a new request in this screen.
- Sent to Vendor: The system automatically marks this status for all checkbook requests that are sent to the designated vendor for printing.
- Discrepancy Noticed: You can mark this status when a vendor reports a discrepancy in a checkbook request, while processing it. You can only mark this status by editing or amending the checkbook request with the status ‘Sent to Vendor’.
- Check Status Maintained: The system automatically marks this status when the file containing details of printed and issued checkbooks is received from the vendor and uploaded into the system. In this status, details of each check in the checkbook are maintained in the system.
- Check Book Exhausted: You can mark this status when all the checks in a checkbook have been used up. In this status, all checks in the book are marked ‘Invalid’. You can only mark this status by editing or amending the checkbook request with the status ‘Check Status Maintained’.
- Cancelled: You can mark this status when notification is received that the checkbook stands cancelled. In this status, all checks in the book are marked ‘Invalid’. You can only mark this status by editing or amending the checkbook request.
Check Issue Currency
3 Characters Maximum, Alphanumeric; Mandatory
In this field, you can indicate the currency in which the check amounts will be expressed, on a check issued from the requested checkbook. All currencies allowed for the selected fund (in the Fund Transaction Currency Rule) are displayed in the drop down list.
Remarks
200 Characters Maximum, Alphanumeric; Optional
You can specify any relevant narrative regarding the requested checkbook in this field.
2.2 Send Details of Checkbook Requests
To send details of checkbook requests entered into the system through the Check Book Request screen to the designated check vendors, you must define an interface, through the Interface Definition facility.
The interface, when executed on a given business day, sends all authorized checkbook requests with status ‘Checkbook Applied’, received during the day, as an export file, to the designated check vendors.
You must manually execute the interfaces on each business day. If you fail to do so, the pre-end of day checks performed by the system prompts you to do so. To execute the interfaces, use the Online Execution of Interfaces menu option.
2.3 Receive Details of Printed Checkbooks
To upload details of checkbooks printed by vendors against requests received, you must define an interface, through the Interface Definition facility. The checkbooks are uploaded as authorized records.
The interface, when executed on a given business day, uploads all authorized checkbooks printed by vendors against requests received during the day, from an import file sent by the vendors.
You must manually execute the interfaces on each business day. If you fail to do so, the pre-end of day checks performed by the system prompts you to do so. To execute the interfaces, use the Online Execution of Interfaces menu option.
2.4 Make Changes to Checkbook Requests
This section contains the following topics:
- Section 2.4.1, "Invoking the Check Book Request Summary Screen"
- Section 2.4.2, "Retrieving a Check Book Request Record"
- Section 2.4.3, "Editing a Check Book Request Record"
- Section 2.4.4, "Viewing a Check Book Request Record"
- Section 2.4.5, "Deleting a Check Book Request Record "
- Section 2.4.6, "Authorizing a Check Book Request Record"
- Section 2.4.7, "Amending a Check Book Request Record"
- Section 2.4.8, "Authorizing a Check Book Request Record"
2.4.1 Invoking the Check Book Request Summary Screen
If a checkbook request has been entered incorrectly, you can make changes to the details of the request, through the ‘Check Book Request Summary’ screen.
You can invoke this screen by typing ‘UTSCHKRQ’ in the field at the top right corner of the Application tool bar and clicking on the adjoining arrow button.
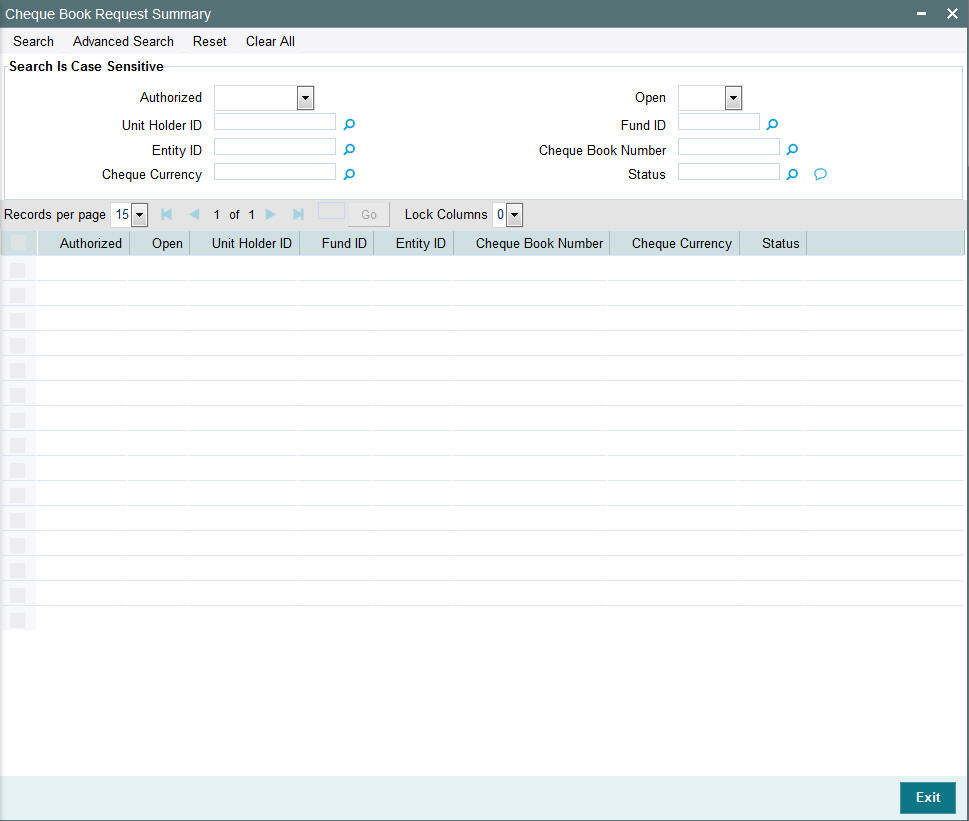
You can make changes both before the request is authorized, and also after.
You can change the following details:
- Check Book Number
- Check vendor
- Checkbook status
- Checkbook issue currency
In the summary screen, you can select a checkbook request for which you want to make changes, by specifying any or all of the following details:
- The ID of the unit holder who requested the checkbook
- The ID and ISIN Code of the fund for which the checkbook request was made
- The check vendor to whom the checkbook request was sent for printing
- The number of the checkbook
The following operations are possible in through the Check Book Request Summary screen:
2.4.2 Retrieving a Check Book Request Record
You can retrieve a previously entered record in the Summary Screen, as follows:
In the Browser, select Check Book Request menu and click on Summary, specify any or all of the following details in the corresponding fields:
- The status of the record in the Authorized field. If you choose the ‘Blank Space’ option, then all the records are retrieved.
- The status of the record in the Open field. If you choose the ‘Blank Space’ option, then all records are retrieved
- Unit Holder ID
- Fund ID
- Entity ID
- Check Book Number
- Check Currency
- Status
Click 'Search' to view the records. All the records with the specified details are retrieved and displayed in the lower portion of the screen.
You can also retrieve the individual record detail from the detail screen by querying in the following manner:
- Press F7
- Input the Unit Holder ID, Fund Id, Entity ID and check book number
- Press F8
You can perform Edit, Delete, Amend, Authorize, Reverse, Confirm operations by selecting the operation from the Action list. You can also search a record by using a combination of % and alphanumeric value.
Example
You can search the record for Fund ID by using the combination of % and alphanumeric value as follows:-
- Search by A% :- System will fetch all the records whose Fund ID starts from Alphabet ‘A’. For example, AGC17,AGVO6,AGC74 etc.
- Search by %7 :- System will fetch all the records whose Fund ID ends by numeric value’ 7’ . For example, AGC17,GSD267,AGC77 etc.
- Search by %17%:- System will fetch all the records whose Fund ID contains the numeric value 17. For example, GSD217,GSD172, AGC17 etc.
You can retrieve a previously entered record in the Summary Screen, as follows:
In the Browser, select Corporate Actions menu and click on Summary, specify any or all of the following details in the corresponding fields:
The status of the record in the Authorized field. If you choose the ‘Blank Space’ option, then all the records are retrieved.
The status of the record in the Open field. If you choose the ‘Blank Space’ option, then all records are retrieved
- Fund ID
- ISIN Code
- Corporate Action Date
- Corporate Action Type
Click ‘Search’ to view the records. All the records with the specified details are retrieved and displayed in the lower portion of the screen.
You can also retrieve the individual record detail from the detail screen by querying in the following manner:
- Press F7
- Input the Fund Id
- Press F8
You can perform Edit, Delete, Amend, Authorize, Reverse, Confirm operations by selecting the operation from the Action list. You can also search a record by using a combination of % and alphanumeric value.
For example:
You can search the record for Fund ID by using the combination of % and alphanumeric value as follows:-
- Search by A%:- System will fetch all the records whose Fund ID starts from Alphabet ‘A’. Ex:- AGC17,AGVO6,AGC74 etc.
- Search by %7:- System will fetch all the records whose Fund ID ends by numeric value’ 7’. Ex :- AGC17,GSD267,AGC77 etc.
- Search by %17%:- System will fetch all the records whose Fund ID contains the numeric value 17. Ex:- GSD217,GSD172, AGC17 etc.
2.4.3 Editing a Check Book Request Record
You can modify the details of a check book request record that you have already entered into the system, provided it has not been subsequently authorized. You can perform this operation as follows:
- Invoke the Check Book Request Summary screen from the Browser.
- Select the status of the record that you want to retrieve for modification in the Authorized field. You can only modify records that are unauthorized. Accordingly, choose the unauthorized option.
- Specify any or all of the details in the corresponding fields to retrieve the record that is to be modified.
- Click 'Search'. All unauthorized records with the specified details are retrieved and displayed in the lower portion of the screen.
- Double click the record that you want to modify in the list of displayed records. The Check Book Request Detail screen is displayed.
- Select Unlock Operation from the Action list to modify the record. Modify the necessary information.
- Click Save to save your changes. The Check Book Request Detail screen is closed and the changes made are reflected in the Corporate Actions Summary screen.
You can modify the details of a Corporate Actions record that you have already entered into the system, provided it has not been subsequently authorized. You can perform this operation as follows:
- Invoke the Corporate Actions Summary screen from the Browser.
- Select the status of the record that you want to retrieve for modification in the Authorized field. You can only modify records that are unauthorized. Accordingly, choose the unauthorized option.
- Specify any or all of the details in the corresponding fields to retrieve the record that is to be modified.
- Click on Search button. All unauthorized records with the specified details are retrieved and displayed in the lower portion of the screen.
- Double click the record that you want to modify in the list of displayed records. The Corporate Actions Detail screen is displayed.
- Select Unlock Operation from the Action list to modify the record. Modify the necessary information.
- Click Save to save your changes. The Corporate Actions Detail screen is closed and the changes made are reflected in the Corporate Actions Summary screen.
2.4.4 Viewing a Check Book Request Record
To view a record that you have previously input, you must retrieve the same in the Check Book Request Summary screen as follows:
- Invoke the Check Book Request Summary screen from the Browser.
- Select the status of the record that you want to retrieve for viewing in the Authorized field. You can also view all records that are either unauthorized or authorized only, by choosing the Unauthorized/ Authorized option.
- Specify any or all of the details of the record in the corresponding fields on the screen.
- Click 'Search'. All records with the specified fields are retrieved and displayed in the lower portion of the screen.
- Double click the record that you want to view in the list of displayed records. The Check Book Request Detail screen is displayed in View mode.
To view a record that you have previously input, you must retrieve the same in the Corporate Actions Summary screen as follows:
- Invoke the Corporate Actions Summary screen from the Browser.
- Select the status of the record that you want to retrieve for viewing in the Authorized field. You can also view all records that are either unauthorized or authorized only, by choosing the Unauthorized/ Authorized option.
- Specify any or all of the details of the record in the corresponding fields on the screen.
- Click on search button. All records with the specified fields are retrieved and displayed in the lower portion of the screen.
- Double click the record that you want to view in the list of displayed records. The Corporate Actions Detail screen is displayed in View mode.
2.4.5 Deleting a Check Book Request Record
You can delete only unauthorized records in the system. To delete a record that you have previously entered:
- Invoke the Check Book Request Summary screen from the Browser.
- Select the status of the record that you want to retrieve for deletion.
- Specify any or all of the details in the corresponding fields on the screen.
- Click 'Search'. All records with the specified fields are retrieved and displayed in the lower portion of the screen.
- Double click the record that you want to delete in the list of displayed records. The Check Book Request Detail screen is displayed.
- Select Delete Operation from the Action list. The system prompts you to confirm the deletion and the record is physically deleted from the system database.
You can delete only unauthorized records in the system. To delete a record that you have previously entered:
- Invoke the Corporate Actions Summary screen from the Browser.
- Select the status of the record that you want to retrieve for deletion.
- Specify any or all of the details in the corresponding fields on the screen.
- Click on search button. All records with the specified fields are retrieved and displayed in the lower portion of the screen.
- Double click the record that you want to delete in the list of displayed records. The Corporate Actions Detail screen is displayed.
- Select Delete Operation from the Action list. The system prompts you to confirm the deletion and the record is physically deleted from the system database.
2.4.6 Authorizing a Check Book Request Record
An unauthorized Check Book Request record must be authorized in the system for it to be processed. To authorize a record:
- Invoke the Check Book Request Summary screen from the Browser.
- Select the status of the record that you want to retrieve for authorization. Typically, choose the unauthorized option.
- Specify any or all of the details in the corresponding fields on the screen.
- Click 'Search'. All records with the specified details that are pending authorization are retrieved and displayed in the lower portion of the screen.
- Double click the record that you wish to authorize. The Check Book Request Detail screen is displayed. Select Authorize operation from the Action List.
When a checker authorizes a transaction, details of validation, if any, that were overridden by the maker of the transaction during the Save operation are displayed. If any of these overrides results in an error, the checker must reject the transaction.
An unauthorized Corporate Actions record must be authorized in the system for it to be processed. To authorize a record:
- Invoke the Corporate Actions Summary screen from the Browser.
- Select the status of the record that you want to retrieve for authorization. Typically, choose the unauthorized option.
- Specify any or all of the details in the corresponding fields on the screen.
- Click on search button. All records with the specified details that are pending authorization are retrieved and displayed in the lower portion of the screen.
- Double click the record that you wish to authorize. The Corporate Actions Detail screen is displayed. Select Authorize operation from the Action List.
When a checker authorizes a transaction, details of validation, if any, that were overridden by the maker of the transaction during the Save operation are displayed. If any of these overrides results in an error, the checker must reject the transaction.
When you authorize a corporate action, you must re-key the liquidation price (for liquidations) or the parent – resultant ratio (for splits, reverse splits and mergers)
2.4.7 Amending a Check Book Request Record
After a Corporate Actions record is authorized, it can be modified using the Unlock operation from the Action List. To make changes to a record after authorization:
- Invoke the Corporate Actions Summary screen from the Browser.
- Select the status of the record that you want to retrieve for authorization. You can only amend authorized records.
- Specify any or all of the details in the corresponding fields on the screen.
- Click 'Search'. All records with the specified details that are pending authorization are retrieved and displayed in the lower portion of the screen.
- Double click the record that you wish to authorize. The Corporate Actions Detail screen is displayed in amendment mode. Select Unlock operation from the Action List to amend the record.
- Amend the necessary information and click on Save to save the changes.
When you amend an authorized corporate action after it has been processed, you can only alter the liquidation price, lot size and book closing period (for liquidations) or the new unit par value, book closing period and parent – resultant ratio (for splits, reverse splits and mergers). The original corporate action is marked ‘cancelled’, and a new record is created, with a link to the original action record. Also, the book closing dates can be entered if required.
The exchange rate details, such as the rate source and rate date, can be amended provided the corporate action has not been processed.
When you amend an authorized corporate action before it has been processed, the amendment operation is similar to an edit operation. All the validations performed by the system when a new corporate actions record is initiated, are applicable. In this mode, the corporate action can also be marked as ‘cancelled’, in which case it will not be processed.
After a Corporate Actions record is authorized, it can be modified using the Unlock operation from the Action List. To make changes to a record after authorization:
- Invoke the Corporate Actions Summary screen from the Browser.
- Select the status of the record that you want to retrieve for authorization. You can only amend authorized records.
- Specify any or all of the details in the corresponding fields on the screen.
- Click on search button. All records with the specified details that are pending authorization are retrieved and displayed in the lower portion of the screen.
- Double click the record that you wish to authorize. The Corporate Actions Detail screen is displayed in amendment mode. Select Unlock operation from the Action List to amend the record.
- Amend the necessary information and click on Save to save the changes.
When you amend an authorized corporate action after it has been processed, you can only alter the liquidation price, lot size and book closing period (for liquidations) or the new unit par value, book closing period and parent – resultant ratio (for splits, reverse splits and mergers). The original corporate action is marked ‘cancelled’, and a new record is created, with a link to the original action record. Also, the book closing dates can be entered if required.
The exchange rate details, such as the rate source and rate date, can be amended provided the corporate action has not been processed.
When you amend an authorized corporate action before it has been processed, the amendment operation is similar to an edit operation. All the validations performed by the system when a new corporate actions record is initiated, are applicable. In this mode, the corporate action can also be marked as ‘cancelled’, in which case it will not be processed.
2.4.8 Authorizing a Check Book Request Record
An amended Check Book Request record must be authorized for the amendment to be made effective in the system. The authorization of amended records can be done only from Fund Manager Module and Agency Branch module.
The subsequent process of authorization is the same as that for normal transactions.
2.5 Statuses for Individual Checks
This section contains the following topics:
- Section 2.5.1, "Monitoring Statuses for Individual Checks"
- Section 2.5.2, "Cheque Status Information Section"
- Section 2.5.3, "Check Details Section"
2.5.1 Monitoring Statuses for Individual Checks
A unit holder who uses the check writing facility could issue checks to third parties for a transaction.
The bank at which the check is presented communicates with the AMC and sends the check details to the AMC. A redemption transaction is initiated for the unit holder who issued the check, in the fund for which the check was issued.
The used check details are typically sent to the AMC as a file, the contents of which may be uploaded into the system. You must define an interface that will upload the details from the file and also automatically trigger the generation of redemption transactions based on the check details.
Each check in an issued checkbook will pass through different statuses in the cycle of issue through clearing. To monitor the status of a check in the system, use the Check Status Summary screen.
The active status
When a checkbook is printed and issued against a request, and the details of the checkbook sent by a vendor are uploaded into the system, each check in the issued checkbook is marked with the ‘active’ status. This means that the check is now available to the unit holder to be issued to a third party for a transaction.
A stop payment instruction could be issued on an active check. An active check could also be rendered lost, if the unit holder misplaces it, or a third party to whom it is issued, misplaces it before presenting it at the bank.
You can manually change the status of active checks in a checkbook as ‘Stop Payment Issued’, ‘Lost’, or ‘Inactive’, as deemed necessary, by amending the check status in the Check Status Summary Screen.
A change in status of the original checkbook request could also affect the status of an active check in the checkbook. For instance, if the original request is marked with ‘Cancelled’ status, then all checks in the checkbook would automatically be marked ‘Invalid’.
The ‘Used’ status
Any check that has been issued by a unit holder, for which the details have been received by the AMC from the bank or clearing house, and uploaded into the system, is automatically marked as ‘Used’.
For such checks, redemption transactions are generated when you execute the interface that you have defined, through the Online Execution of Interfaces option. If the transaction is generated successfully, the status of the ‘Used’ check is marked as ‘Redemption Cleared’.
If the redemption transaction fails to be generated successfully, the status of the ‘Used’ check is marked as ‘Redemption Failed’.
If the redemption transaction generated for the check is amended, the status of the used check is marked as ‘Redemption Amended’.
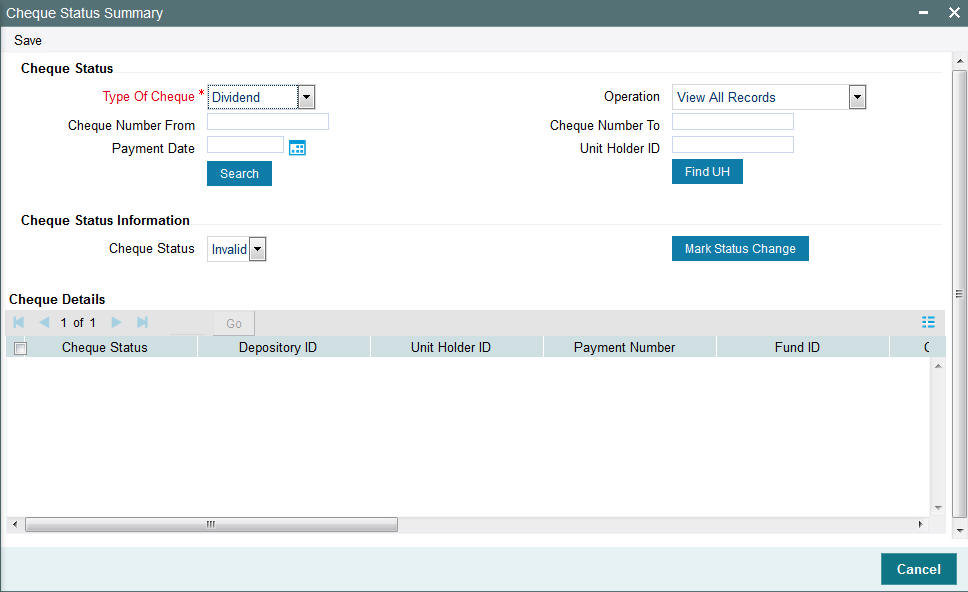
Selecting a check in the Check Status Summary screen
To recall, you can effect manual status changes on an active check, in the Check Status Summary screen. You can also view the status of active or used checks. You can invoke this screen by typing ‘UTDCHKST’ in the field at the top right corner of the Application tool bar and click the adjoining arrow. The screen is displayed below:
You can manually change the status of an active check to ‘Stop Payment Issued’ or ‘Lost’, through this screen.
To select a check in this screen, you must specify the following details that the system will use to identify and retrieve the check record:
- The number of the check
- The ID of the unit holder who issued the check
- The ID of the fund for which the check was issued, and the ISIN Code for the fund.
- The number of the redemption transaction that was generated for the check
- The status of the check
You could also specify the number of the checkbook that contained the check issued, as well as the ID of the check vendor who printed the checkbook.
If you do not select any criteria for the search, all the records are displayed.
The following details are displayed for each check:
- The ID of the unit holder that has issued the check
- The ID of the fund for which the check has been issued
- The ID and name of the check vendor
- The number of the checkbook
- The number of the check
- The date on which the check was assigned the present status
- The currency in which the checkbook was issued
- The transaction number corresponding to the redemption payment made against the check
Selecting the operation
To change the status of an active check in the Check Status Screen, select ‘Amend’ as the operation. The amended record will be saved as an unauthorized record, which you must authorize to make the change effective. To authorize a check status amendment, choose ‘Authorize’ as the operation.
To view the status of a check, select ‘View’ as the operation.
When you have specified all the details for selecting the check and the operation you want to perform, click on ‘OK’ Button. The checks that match the details you have specified are displayed in the lower list portion of the screen.
In this screen, the details of the check you have selected are displayed in View Mode. If you have selected an operation to change the status of the check, the Check Status field is enabled, with the current status displayed, and you can select the required status by choosing from the options in the drop down list.
If the operation you have selected is ‘View’, then none of the details in the Check Status screen can be changed, including the Check Status. The latest status of the check is displayed here.
You can specify the fields in the Cheque Status Summary Screen:
Cheque Status Section
The following fields are available in this screen:
Type of Cheque
Mandatory
Specify the type of cheque for which you wish to view details or change the status.
The type can be any of the following:
- Redemption
- Dividend
- Fee /Incentive
- Bonus
Operation
Mandatory
Specify the type of operation you wish to perform.
You can:
- View all records
- View records whose status has been changed
- Change the status for a cheque
Note
The field 'Cheque Status' and the button 'Mark Status Change' are enabled only if the type of operation is 'Mark Status Change'
Cheque Number From
Optional
Enter the cheque number from which you wish to perform the operation specified.
Cheque Number To
Optional
Enter the Cheque number till which you require the operation you have specified.
Payment Date
Optional
Specify the payment date of the cheque(s).
Unit Holder ID
Optional
Specify the unit holder ID if you want view details/ make changes only for a specific unit holder.
Use the 'UH Find' button to search for the specific unit holder.
Click 'OK' after having specified all the relevant details. The system displays all the relevant details in the 'Cheque Status Details' section.
2.5.2 Cheque Status Information Section
Cheque Status
The current status of the selected check is displayed here. It could be any of the following:
- Lost: Indicates that information has been received from the unit holder that the check has been misplaced.
- Invalid: Indicates that the original checkbook that contained this issued check has been marked with the status ‘Cancelled’ or ‘Check Book Exhausted’.
Mandatory
Specify the status for the cheque you have chosen. It can be one of the following:
- Invalid
- Lost
Click on the 'Mark Status Change' button to apply the status change to the given cheque.
2.5.3 Check Details Section
The system displays the following check details:
- Cheque Status
- Depository ID
- Unit Holder ID
- Payment Number
- Fund ID
- Cheque Number
- Cheque Date
- Drawee Bank
- Drawee Branch
- Cheque amount
- Transaction Number