5. Managing Brokers
Brokers are intermediaries between investors and their investment avenues.
An investor may approach the AMC, seeking to invest in its funds, on the basis of guidance received from a broker. Also, an AMC may contract a broker to market its funds and thereby attract investors.
Being an intermediary, a broker usually receives payments either from investors or the AMC, as the case may be. This payment is known as a commission.
Sometimes, brokers do not act as single entities, but as groups of brokers, in hierarchical structures that entail sharing of profits. The commission earned by a broker may not be credited just to the actual broker for the investment transaction, but could also share with other brokers who are part of the same hierarchical structure.
Oracle FLEXCUBE Investor Servicing enables the AMC to maintain records of brokers and their respective hierarchies in the system database, as well as process and maintain details of commission payments to brokers. This chapter deals with all aspects of maintaining brokers, their hierarchies and processing commission payments in the system.
This chapter contains the following sections:
- Section 5.1, "Broker Type Detail Screen"
- Section 5.2, "Broker Type Summary Screen"
- Section 5.3, "Broker Maintenance Detail Screen"
- Section 5.4, "Broker Maintenance Summary Screen"
- Section 5.5, "Transaction Broker Amendment Screen"
- Section 5.6, "Broker Payment Currency Preference Detail Screen"
- Section 5.7, "Broker Payment Currency Preference Summary Screen"
- Section 5.8, "Broker Migration Screen"
- Section 5.9, "Broker Migration Summary Screen"
- Section 5.10, "Broker Journal Detail Screen"
- Section 5.11, "Broker Journal Summary Screen"
- Section 5.12, "Income Distribution Setup Screen"
- Section 5.13, "Income Distribution Setup Summary Screen"
- Section 5.14, "Raise Broker Commission Screen"
- Section 5.15, "Commission Payment Status Change Screen"
- Section 5.16, "Broker Commission Payment Screen"
- Section 5.17, "Minimum Commission Payment Amount Maintenance Screen"
- Section 5.18, "Minimum Commission Payment Amount Maintenance Summary Screen"
5.1 Broker Type Detail Screen
This section contains the following topics:
5.1.1 Creating Broker Groups
In Oracle FLEXCUBE Investor Servicing, you can create groups of brokers with common characteristics such as the following:
- Frequencies at which commission payment is received
- Common consultants
- Common contact details
These group sets are known as broker types. Therefore, a broker type is a set of characteristics such as commission payment frequencies, common consultants and contact details, which you expect to be common to a group of brokers for whom you want to maintain records in the database.
Broker types are typically relevant in the case of brokerage firms with many individual brokers operating under them. They are also relevant in the case of countries where the tax is different based on the broker type, that is, the tax for an individual broker is different from the tax charged from the corporate broker.
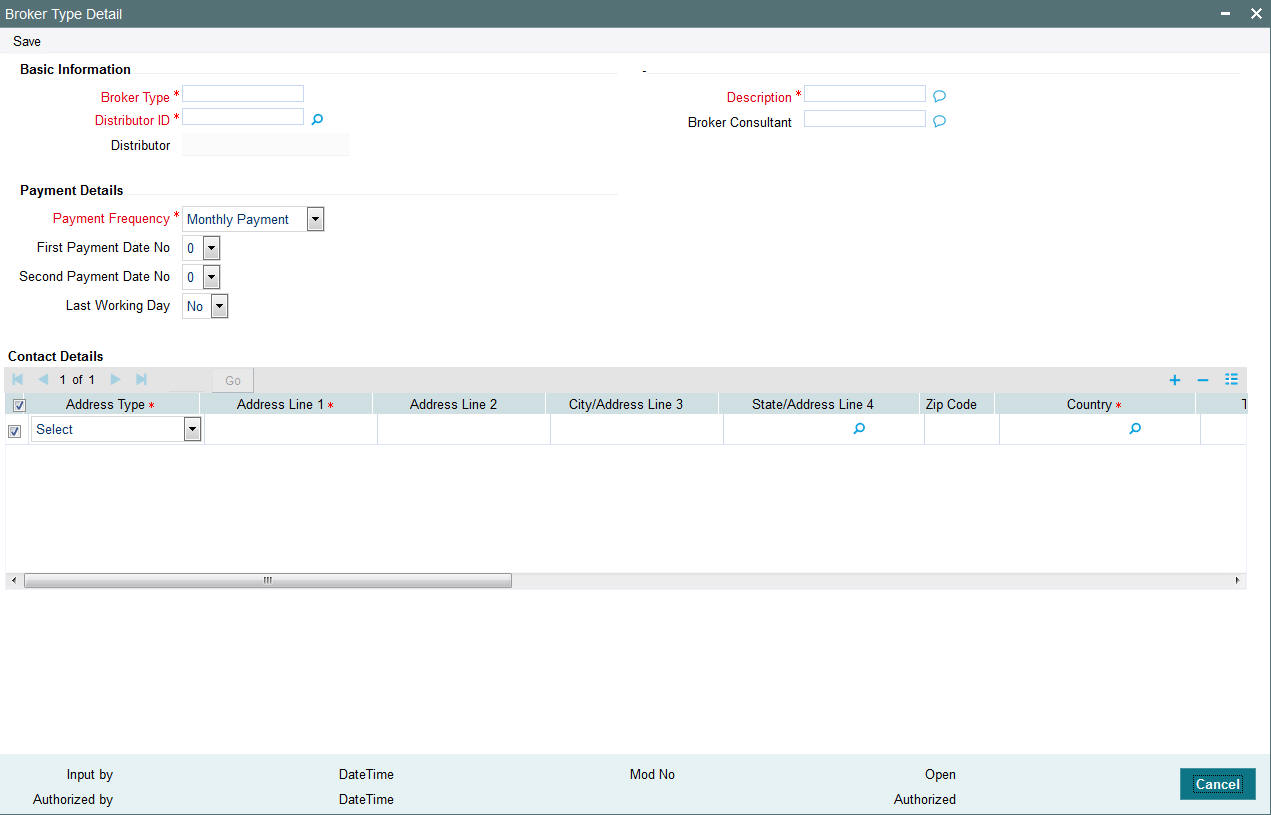
5.1.2 Invoking Broker Type Details Screen
To set up a broker type, use the ‘Broker Type Detail’ screen. You can invoke this screen by typing ‘UTDBRKTY’ in the field at the top right corner of the Application tool bar and clicking on the adjoining arrow button.
Specify the following mandatory information to set up a broker type:
- A code that will uniquely identify the broker type, in the Broker Type field.
- Descriptive text about the broker type, in the Description field.
- The ID of the AMC for which the broker type is applicable, in the AMC ID field.
- The commission payment frequency that would apply to any broker mapped to the broker type, in the Payment Details section. Select either Monthly or Bi-Monthly, as applicable.
After you have specified these details, save your changes by clicking the Save button.
Select 'New' from the Actions menu in the Application tool bar or click new icon to enter the details of the Broker Type screen.
Basic Information Section
Broker Type
6 Characters Maximum; Alphanumeric, Mandatory
Specify a unique alphanumeric identifier for the broker type.
Distributor ID
Alphanumeric, Mandatory
Select the ID of the AMC for which you are defining the broker type.
Broker Consultant
40 Characters Maximum; Alphanumeric, Optional
Specify the name of the designated consultant for the broker type.
Description
255 Characters Maximum; Alphanumeric, Mandatory
Describe the broker type in a few words, as applicable.
Payment Details Section
In this section, specify the frequency pattern for the payment of commission to any of the brokers that would be mapped to the broker type.
Payment Frequency
Mandatory
Check the appropriate radio button to indicate whether a monthly or bimonthly frequency of payment is preferred for brokers under this broker type.
First Payment Date No
Any numeric value between 1 and 31, Optional
If the payment frequency you have indicated for the broker type is monthly, indicate the date of every month on which the commission payment is to be processed for brokers under this broker type, by choosing the appropriate day of the month from the list.
If the payment frequency you have indicated for the broker type is bimonthly, indicate the date of every month on which the first commission payment is to be processed for brokers under this broker type, by choosing the appropriate day of the month from the list.
Second Payment Date No
Any numeric value between 1 and 31, Optional
If the payment frequency you have indicated for the broker type is bimonthly, indicate the date of every month on which the second commission payment is to be processed for brokers under this broker type, by choosing the appropriate day of the month from the list.
This value must be higher than the one you selected in the First Payment Date No. field.
Last Working Day
Optional
Check this box to indicate that the commission payment for brokers mapped to this broker type must be processed on the last working day of the month.
Contact Details Section
In this section, specify the means of communication with the main brokerage firm that represents the broker type. You can access this section by clicking the Contact Details link.
You can specify at least two addresses, and designate one as the default mailing address to be used for correspondence with the brokerage firm, and the other as the alternate address. Specify the default address under the Default Address head, and the alternate address under the Alternate Address head.
You can also maintain the SWIFT Address for the main brokerage firm of the broker type, in the SWIFT Address tab.
Address Type
Select Correspondence, Alternate or SWIFT Address
The following fields in the address information are same for Correspondence, Alternate or SWIFT Address option:
Address Lines 1-2
Each line is 80 Character Maximum, Alphanumeric. Address Line 1 is Mandatory
Specify the postal address that is to be used for correspondence with the main brokerage firm for this broker type.
City/ Address Line 3
20 Character Maximum, Alphanumeric, Optional
Specify the name of the city of residence of the main brokerage firm for this broker type.
State/ Address Line 4
20 Character Maximum, Alphanumeric, Optional
Specify the state in which the city of residence of the main brokerage firm for this broker type is located.
Zip Code
6 Characters Maximum, Alphanumeric, Optional
Specify the zip code of the specified city of residence of the main brokerage firm for this broker type.
Country
Alphanumeric, Optional
Select the country in which the main brokerage firm for this broker type is domiciled, from the drop-down list.
Telephone 1-2
15 Character Maximum, Alphanumeric, Optional
Enter the contact telephone numbers of the main brokerage firm for this broker type.
Cell Phone Number
16 Characters Maximum; Numeric; Optional
Specify the cell phone number of the main brokerage firm for this broker type.
Fax Number
15 Character Maximum, Alphanumeric, Optional
Enter the fax number of the main brokerage firm for this broker type.
50 Characters Maximum, Alphanumeric; Optional
Specify the Email address of the main brokerage firm for this broker type.
Contact Person
40 Character Maximum, Alphanumeric, Optional
Specify the name of any contact person or official through whom communication with the main brokerage firm is possible.
Effective From Date
Date Format, Optional
Specify the date that marks the beginning of the period for which the specified Correspondence address is valid.
Effective To Date
Date Format, Optional
Specify the date that marks the end of the period for which the specified Correspondence address is valid.
BIC Code
12 Characters Maximum, Alphanumeric; Mandatory
Specify the Bank Identifier Code (BIC) of the main brokerage firm for this broker type.
US State
Optional
Check this box to indicate that the specified state is a US (United States) state.
5.2 Broker Type Summary Screen
This section contains the following topics:
- Section 5.2.1, "Retrieving Broker Type in Broker Type Summary Screen"
- Section 5.2.2, "Editing Broker Types"
- Section 5.2.3, "Viewing Broker Types"
- Section 5.2.4, "Deleting Broker Types"
- Section 5.2.5, "Authorizing Broker Types"
- Section 5.2.6, "Amending Broker Types"
- Section 5.2.7, "Authorizing Amended Broker Types"
5.2.1 Retrieving Broker Type in Broker Type Summary Screen
After you have set up a broker type through the Broker Type Detail screen, you can:
- Make changes to the record before you authorize it. You can also delete the record, if deemed necessary.
- Have another user authorize it. You cannot map any individual brokers to the broker type until it is authorized.
- Make changes to the authorized record through an amendment operation, and then authorize your amendment changes.
To perform any of these operations, use the ‘Broker Type Summary’ screen. You can invoke this screen by typing ‘UTSBRKTY’ in the field at the top right corner of the Application tool bar and clicking on the adjoining arrow button.
You can also set up a record for each individual broker in the system and map these broker records to the authorized broker type. You can do this using the ‘Broker Maintenance Detail’ screen, which you can access from the Broker Maintenance menu in the Browser.
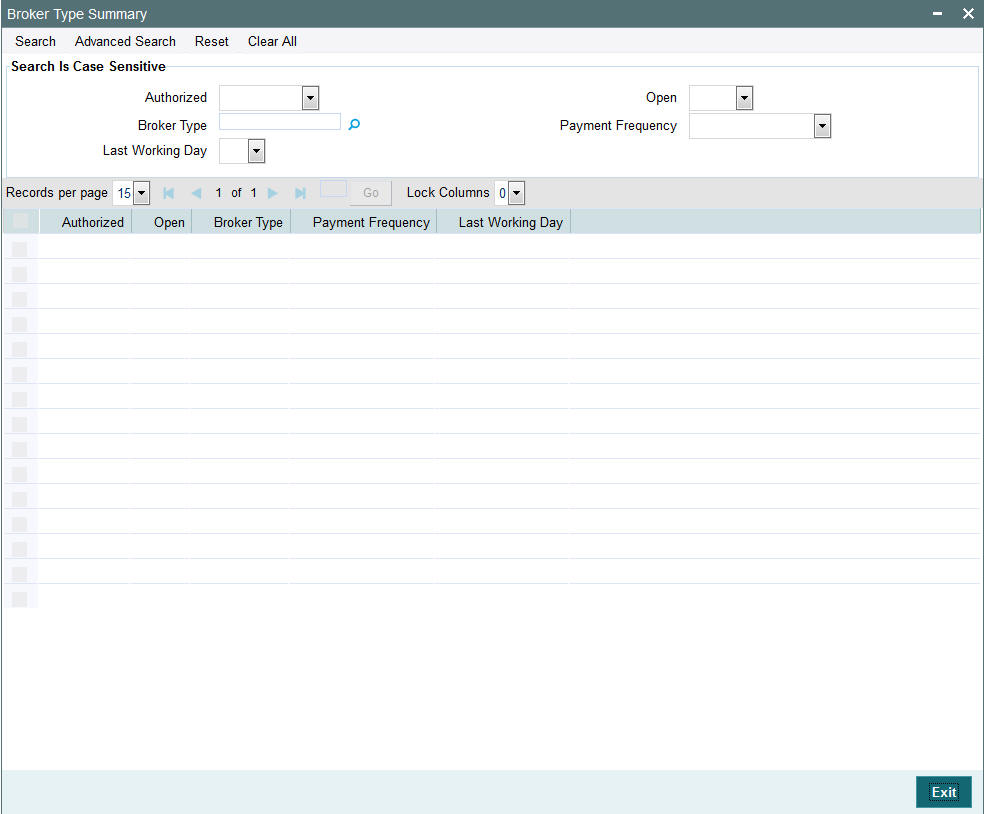
You can retrieve a previously entered record in the Broker Type Summary screen, as follows:
- Specify any or all of the following details in the Broker Type Summary screen:
- The status of the transaction in the Authorized field. If you choose the “Blank Space” option, then all the records that involve the specified unit holder are retrieved.
- The status of the record in the Open field. If you choose the “Blank Space” option, then all the records that involve the specified unit holder are retrieved.
- The Broker Type
- The Payment Frequency
- The last working Day
- Click ‘Search’ button to view the records. All records with the specified details are retrieved and displayed in the lower portion of the screen.
Note
You can also retrieve the individual record detail from the detail screen by doing query in the following manner:
- Press F7
- Input the Broker Type
- Press F8
You can perform Edit, Delete, Amend, Authorize, Reverse, Confirm operation by selecting from the Action list.
You can also search the record by using combination of % and alphanumeric value.
Example
You can search the record for Broker Type by using the combination of % and alphanumeric value as follows:
- Search by A%: System will fetch all the records whose Broker Type starts from Alphabet ‘A’. For Example: AGC17, AGVO6, AGC74 and so forth.
- Search by %7: System will fetch all the records whose Broker Type ends by numeric value’ 7’. For Example: AGC17, GSD267, AGC77 and so forth.
- Search by %17%: System will fetch all the records whose Broker type contains the numeric value 17. For Example: GSD217, GSD172, AGC17 and so forth.
5.2.2 Editing Broker Types
You can modify the details of Broker Type parameters that you have already entered into the system, provided it has not been subsequently authorized. You can perform this operation as follows:
- Invoke the Broker Type Summary screen from the Browser.
- Select the status of the record that you want to retrieve for modification in the Authorization Status field. You can only modify records that are unauthorized. Accordingly, choose the Unauthorized option.
- Specify any or all of the details in the corresponding fields to retrieve the record that is to be modified. All unauthorized records with the specified details are retrieved and displayed in the lower portion of the screen.
- Double click the record that you want to modify in the list of displayed transactions. The Broker Type Detail screen is displayed.
- Select Unlock Operation from Action list to modify the record. Modify the necessary information.
- Click Save to save your changes. The Broker Type Detail screen is closed and the changes made are reflected in the Broker Type Summary screen.
5.2.3 Viewing Broker Types
To view a record that you have previously entered, you must retrieve the same in the Broker Type Summary screen, as follows:
- Invoke the Broker Type Summary Screen from the Browser.
- Select the status of the record that you want to retrieve for viewing in the Authorization Status field. You can also view all records that are either unauthorized or authorized only, by choosing the Unauthorized / Authorized option.
- Specify any or all of the details of the record in the corresponding fields on the screen, and click ‘Search’ button. All records with the specified details are retrieved and displayed in the lower portion of the screen.
- Double click the record that you want to view in the list of displayed records. The Broker Type Detail screen is displayed in View mode.
5.2.4 Deleting Broker Types
You can delete only unauthorized records in the system. To delete a record that you have previously entered:
- Invoke the Broker Type Summary screen from the Browser.
- Select the status of the record that you want to retrieve for deletion.
- Specify any or all of the details and click ‘Search’ button. All record with the specified details are retrieved and displayed in the lower portion of the screen.
- Double click the record that you want to delete. The Broker Type Detail screen is displayed.
- Select Delete operation from the Action list. The system prompts you to confirm the deletion, and the record is deleted physically from the system database.
5.2.5 Authorizing Broker Types
An unauthorized Broker Type record must be authorized in the system for it to be processed. To authorize a record:
- Invoke the Broker Type Summary screen from the Browser.
- Select the status of the record that you want to retrieve for authorization. Typically, choose the Unauthorized option.
- Specify any or all of the details of the record in the corresponding fields on the screen. Click ‘Search’ button. All records with the specified details that are pending authorization are retrieved and displayed in the lower portion of the screen.
- Double click the transaction that you wish to authorize. The Broker Type Detail screen is displayed. Select Authorize operation from Action.
When the checker authorizes a record, details of validations, if any, that were overridden by the maker of the record during the Save operation, are displayed. If any of these overrides results in an error, the checker must reject the transaction.
5.2.6 Amending Broker Types
After a Broker Type record is authorized, it can be modified using the Unlock operation from Action list. To make changes to a record after authorization:
- Invoke the Broker Type Summary screen from the Browser.
- Select the status of the record that you wish to retrieve for amendment. You can only amend only authorized records.
- Specify any or all of the details of the Broker Type in the screen. All records with the specified details are retrieved and displayed in the lower portion of the screen.
- Double click the record that you want to amend. The Broker Type Detail screen is displayed in Amendment mode. Click the Unlock operation from the Action list to amend the record.
- Amend the necessary information. Click the Save button to save the changes.
5.2.7 Authorizing Amended Broker Types
An amended Broker Type record must be authorized for the amendment to be made effective in the system. The authorization of amended records can only be done from Fund Manager Module and Agency branch Module.
The process of authorization is subsequently the same as that for normal transactions.
5.3 Broker Maintenance Detail Screen
This section contains the following topics:
- Section 5.3.1, "Maintaining Individual Brokers"
- Section 5.3.2, "Specifying Mandatory Information for Creating Broker Record"
- Section 5.3.3, "Saving Broker Record"
- Section 5.3.4, "Invoking Broker Maintenance Detail Screen"
- Section 5.3.5, "Broker Details Tab"
- Section 5.3.6, "Broker Add Info Tab"
- Section 5.3.7, "Broker Contact Info Tab"
- Section 5.3.8, "Broker Bank Details Tab "
- Section 5.3.9, "Broker Legacy Details Tab"
- Section 5.3.10, "Broker Preference Tab"
5.3.1 Maintaining Individual Brokers
In the Oracle FLEXCUBE Investor Servicing system, you can maintain a record in the database for each individual broker who wishes to transact with the AMC.
Just as with the unit holder account for an investor, the broker record in the system database is the single repository for all details concerning the broker, including details of commission processing and payment.
In Oracle FLEXCUBE Investor Servicing, when a broker wishes to reinvest the commission earnings from any fund back into the funds of the AMC, the reinvestment is effected through a default unit holder account that functions as the broker’s investment account in the system database.
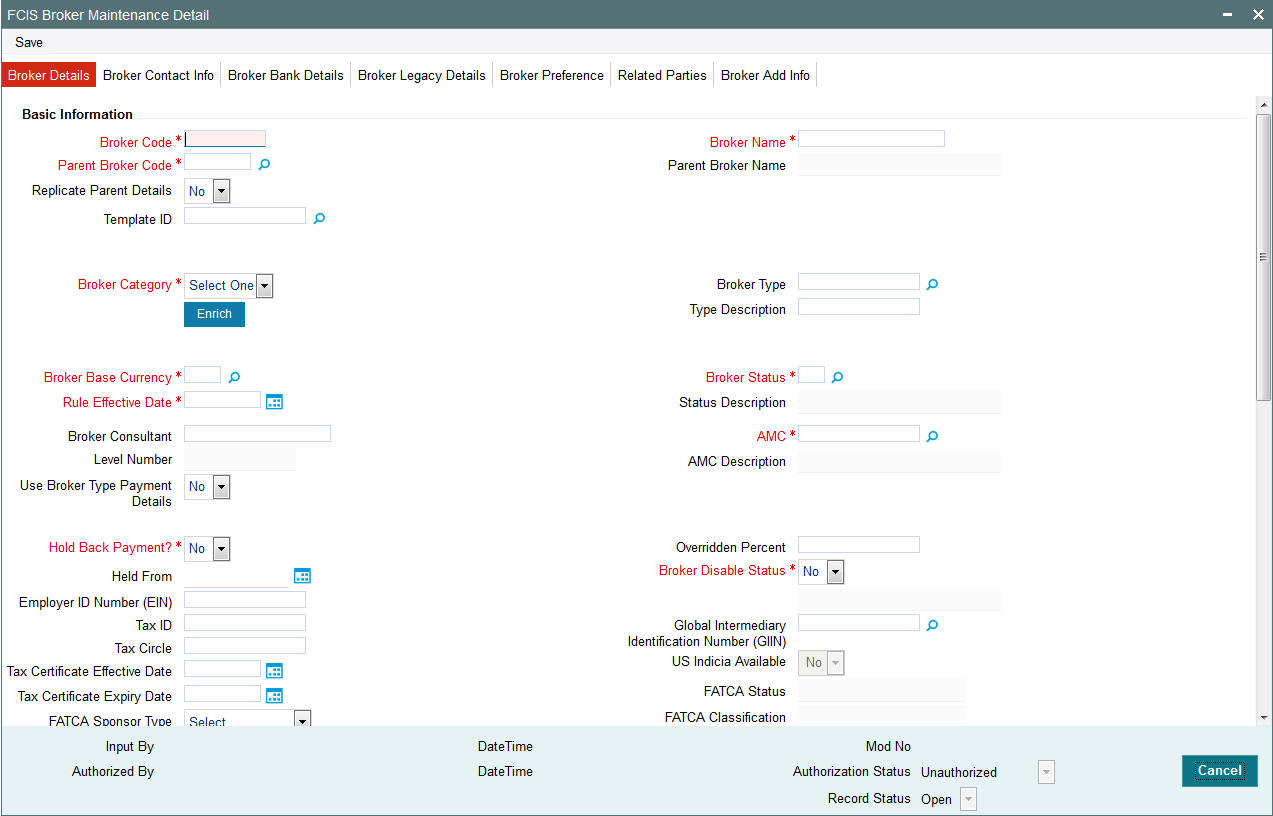
To maintain a record for a broker, use the ‘FCIS Broker Maintenance Detail’ screen. You can invoke this screen by typing ‘UTDBRKMN’ in the field at the top right corner of the Application tool bar and clicking on the adjoining arrow button.
You can set up a broker in the system database by creating a record for the same in the Broker Maintenance Detail screen, as follows:
- By specifying all the mandatory information that is necessary to form a profile of the broker in the database.
- Saving your specifications.
Before you begin to set up any new brokers in the system, you must ensure that the following static information sets have already been set up and entered into the system database and the required authorizations done:
- All reference data that is typically defined in the Data Entry menu item in the Fund Manager component. This includes:
- All static information such as required entities (agents, branches, agency branches, AMCs, registrars, trustees), countries, corporation types, investor categories, occupation types, identification types, banks and their branches, mode of payment types, currencies, additional information heads, fee categories and subcategories.
- Authorized funds with all necessary fund rules, agency branches, brokers, countries of domicile, account types, currencies and so on.
For a detailed account of this information, refer to the Fund Manager.
Note
You must also ensure that any broker types necessary for grouping the brokers have been set up and authorized.
5.3.2 Specifying Mandatory Information for Creating Broker Record
When you create a record for a broker in the Broker Maintenance Detail screen, you must specify the following data as mandatory information:
- A unique identifier for the broker record in the database, in the Broker Code field.
- The name of the broker, in the Broker Name field.
- The AMC in which the broker is designated to transact, in the AMC ID field.
- The system code of any broker that is designated as the immediate higher broker in the broker hierarchy, in the Parent Broker Code field. If the broker is to be designated as the highest in the hierarchy, then specify the code that you specified in the Broker Code field.
- If the broker is mapped to a broker type, indicate whether the frequency of commission payment defined for the selected broker type must also be deemed applicable to the broker. Indicate this in the Use Broker Type Payment Details field check box. If you select this check box the commission frequency of the broker type chosen will be defaulted for the broker.
- If the broker record has been amended, then indicate the Rule Effective Date from which the changes are effective in the system. Rule Effective date cannot be back dated. Rule Effective date can be Future Dated and system would make that rule effective only on that date during BOD
- You are allowed to amend only the last available record for which Latest Rule is 1. If a transaction exists with that Broker on that day, system will not allow you to save the Broker details
- If the status of the broker is to be disabled, indicate this by selecting the option ‘WEEDED’ in the Broker Status field.
- If payment of commission is to be held back for any reason for the broker, indicate this by checking the Hold Back Payment field check box.
Contact Details Section
In the Contact Details section, you must specify the default contact address of the broker, in the Default Address field.
Bank Details Section
In the Bank Details section, you must specify the details of at least one bank account operated by the broker, and at designate at least one of the bank accounts as the default bank account. For each bank account, all the details on the screen are mandatory information.
Payment Details Section
In this section, you must specify the following:
- The currency in which the broker would prefer to receive commission payments. Select the preferred currency in the Payment Currency field.
- The percentage of earned commission that is to be paid by the broker to the immediate parent broker in the broker hierarchy. Indicate this in the Hierarchy Commission Percentage field.
- The ID of a unit holder account in the system that will function as the broker’s account, typically for reinvestments requested by the broker. Indicate this in the Default Unit Holder ID field.
- The frequency at which commission processing and payment must be made for the broker, in the Payment Frequency field.
- The earliest future date on which the next commission payment is to be made, in the Next Payment Date field.
- For VAT registered brokers, indicate the applicability of VAT by checking the VAT Registered field check box in the VAT Details section. Also indicate the applicable VAT Registration Number for the broker.
5.3.3 Saving Broker Record
After you have specified all of the mandatory information required for saving a record for a new broker into the database, save the record by clicking the Save button at the bottom of the Broker Maintenance Detail screen.
The record of the broker is now saved as an unauthorized record in the system database.
Alternatively, after you have specified all mandatory information, you can add further data before you save the record, as follows:
- The tax category corresponding to the broker, on the Broker Category field.
- The designated consultant for the broker, in the Broker Consultant field.
- If the broker is to be part of a broker type group, select the same in the Broker Type field.
- Any applicable additional information under any of the defined heads, in the Additional Information section.
5.3.4 Invoking Broker Maintenance Detail Screen
Select 'New' from the Actions menu in the Application tool bar or click new icon to enter the details of the FCIS Broker Maintenance screen.
5.3.5 Broker Details Tab
Click ‘Broker Details’ tab to enter the details.
The following fields are available in the Broker Maintenance Detail screen for data entry:
Broker Code
9 Character Maximum, Alphanumeric, Mandatory
Specify an alphanumeric code that would uniquely identify the record of the broker in the system.
This would be the identifier that you would use whenever you query the database for any details regarding the broker.
Broker Name
40 Character Maximum, Alphanumeric, Mandatory
Specify the name of the broker for whom you are setting up a record in this screen.
Broker Category
Alphanumeric, Optional
From the list, select the tax category applicable for the broker.
Broker Type
Alphanumeric, Mandatory
From the list, select the broker type to be associated with the broker.
You can indicate that the frequency of payment that has been designated for the selected broker type must also apply to the broker, by checking the Use Broker Type Payment Details check box.
Type Description
Provide a description of the broker type.
Broker Base Currency
Specify the broker base currency. The adjoining option list displays valid broker base currencies maintained in the system. You can choose the appropriate one.
Rule Effective Date
DD/MM/YYYY, Mandatory
Specify the date from which the broker is effective in the system. The rule effective date must be equal to or greater than the application date.
By default, system will display the application date as the rule effective date.
Broker Status
Alphanumeric, Optional
From the list, specify the status of the broker. If the broker is to be disabled in the system, select the option ‘WEEDED’.
By default, the broker status will be ‘NORMAL’.
Broker Consultant
40 Characters Maximum; Alphanumeric, Optional
Specify the name of the consultant preferred by the broker.
AMC
12 Character Maximum, Alphanumeric, Mandatory
Select the AMC in which the broker wishes to transact.
Parent Broker Code
9 Character Maximum, Alphanumeric, Mandatory
Select the broker code of the immediate higher broker to which this broker must report from the option list.
When you select a parent broker in this field, you indicate that the broker whose record you are creating now is a sub-broker of an authorized broker already existing in the system. It also means that the broker is part of an existing hierarchy structure.
Note
If it is necessary to set up the broker as the highest broker in a new hierarchy, specify the unique code that you entered for this broker in the Broker Code field in the screen. If the broker code and the parent broker code are identical for a broker, then it means that the broker is the highest broker in the hierarchy, and has no parent broker. You can change the parent broker code for a particular broker. The system changes the hierarchy and the level number of the broker and all its sub brokers based on the new parent broker code and level during authorization. The broker commission processing considers the latest broker maintenance for commission sharing.
Parent Broker Name
When you select the parent broker for the broker in this field, the name of the selected parent broker is displayed in the Parent Broker Name field.
Note
Also, you must authorize a broker before you select the broker as a parent broker for another broker.
Level Number
Display Only
When you specify the code and the parent broker for the new broker, the level number of the new broker in the broker hierarchy structure is displayed here by the system. If you specified the code of the new broker itself as the parent broker code, (i.e., the new broker has no parent broker) the level number displayed is zero, and so on.
Use Broker Type Payment Details
Optional
If you have designated the new broker to be identified under a selected broker type in the system, then you can designate that the frequency of payment identified for the broker type be applicable by default to the new broker too. To do so, check this box.
Hold Back Payment
Optional
Check this box to indicate that commission payments to the new broker must be held back and not paid out. The commission payment will be held back and not paid out until the tax liability of the broker falls below the commission earned, for a tax year.
Broker Disable Status
Optional
Select the broker status from the given option. The broker status is displayed as a label below Broker Disable Status drop-down.
Select ‘Yes’ to indicate that the broker whose record you are creating is disabled.
If the broker disable status is selected as ‘Yes’ then the Broker is marked as Pending Closure on save. The broker needs to be authorized to incorporate the status change of the broker and then it will not be available for the new business. Also the system will check if the broker is associated with any active UH accounts, SI, or policy. If yes, the system displays the following message:
‘Broker has pending transactions/business in the system’ and broker status is marked as ‘Pending closure’.
While the Broker is in Pending Status, any commission earned from Debit Orders is paid, but the Broker Code is not available for any new business.
A broker whose record in the system is disabled cannot be designated for an investor or for any transactions, and commission payments for the broker will also not be processed or paid out.
Note
You can re-enable the disabled broker if the broker is disabled by mistake.
Held From
Select the Held From date.
Global Intermediary Identification Number
Alphanumeric; Optional
Specify the global intermediary identification number.
Tax ID
Alphanumeric; Optional
Specify the tax identification.
Employer ID Number
Alphanumeric; Optional
Specify the employer ID number.
Tax Certificate Effective Date
Date Format; Optional
Specify the date from which the tax certificate is effective.
Tax Certificate Expiry Date
Date Format; Optional
Specify the expiry date of the tax certificate.
Tax Circle
Alphanumeric; Optional
Select the tax circle country from the adjoining option list.
FATCA Classification
Display
The system displays the FATCA classification type.
FATCA Status
Display
- If the ‘US Indicia Available’ is true then the ‘FATCA Status’ value depends on the FATCA
- Maintenance.
- If the ‘US Indicia Available’ is false then the ‘FATCA Status’ displays ‘Not Applicable’.
- If the Broker is compliant then ‘FATCA Status’ displays ‘Compliant’
- If the Broker is non compliant then ‘FATCA Status’ displays ‘Recalcitrant’
- If the Broker is yet to be classified then ‘FATCA Status’ displays ‘Pending classification’.
US Indicia Available
Display
The system defaults US Indicia Available as Yes if any of the below mentioned values are true::
- The nationality is US
- The country of birth is US
- The country of domicile is US
- The country of incorporation is US
- The country of correspondence or alternate address is US
- The country code of the telephone number is 01
- The country code of the bank branch address is US
FATCA Sponsor Type
Optional
Select the FATCA sponsor type from the adjoining drop down list. The values are:
- Sponsoring Entity
- Sponsored Entity
If you select ‘Sponsoring Entity’, you need to specify the sponsoring entity type and sponsoring entity ID.
If you select ‘Sponsored Entity’, you need not to specify the sponsoring entity type and sponsoring entity ID.
Sponsoring Entity Type
Numeric; 8 Characters; Mandatory
Specify the sponsoring entity type. You can also select the valid entity type from the adjoining option list.
Sponsoring Entity ID
Alphanumeric; 8 Characters; Optional
Specify the sponsoring entity for the FATCA entity type. You can also select the valid entity ID from the adjoining option list.
GIIN Issue Date
Date Format; Optional
Specify the GIIN issue date.
The GIIN issue date cannot be greater than the application date.
GIIN Expiry Date
Date Format; Optional
Specify the GIIN expiry date.
The GIIN expiry date cannot be lesser than the GIIN issue date.
Global Intermediary Identification Number (GIIN)
Alphanumeric; Optional
You can select or specify the GIIN from the adjoining option list.
GIIN Verified Flag
Display
System displays the GIIN verified flag based on the GIIN. In case the GIIN is entered and not chosen from the list, the flag GIIN verified will be set to ‘NO’. If the GIIN is chosen from the list of values, then GIIN verified flag will be set to ‘YES’.
Overridden Percent
5 Characters, Numeric, Maximum of 2 Decimal Places, Optional
For the purpose of computing and deducting withholding tax, the tax slabs (if any) maintained in the With Holding Tax Input for the broker category under which the broker is placed, are identified. However, you can specify a fixed percentage in this field that will override any slab details maintained for the broker category.
Therefore, the percentage that you specify here is used to compute tax, and supersedes any WHT slabs maintained in the With Holding Tax Input screen.
Replicate Parent Details
Optional
The system defaults the parent broker details, if Replicate Parent Details option is selected. Even if you input the broker details it will be overridden by the parent broker details only for the fields mentioned in the template. During authorization of broker amendment, the system replicates the fields specified in the template of the amended broker to all the sub-brokers for whom the Replicate Parent Details option is selected.
If Template Id is given and the Replicate Parent Details is selected as Yes, then click Enrich button to default the parent broker details based on Auto replication preference maintenance.
Template Id
Optional
Select the template id from the given option. All the templates maintained in auto replication preference screen are listed here.
Individual Details
Nationality
Alphanumeric; Optional
Select the nationality from the adjoining option list.
Country of Birth
Alphanumeric; Optional
Select the country of birth from the adjoining option list.
Country of Domicile
Alphanumeric; Optional
Select the country of domicile from the adjoining option list.
Corporate Details
Country of Incorporation
Alphanumeric; Optional
Select the Incorporation country from the adjoining option list.
Country Code for all Telephone Numbers
Optional
Specify the country code for the telephone number.
Payment Details Section
In this section, specify the parameters that will govern the processing and payment of commission due the broker.
Also, if the broker is VAT registered, indicate the corresponding registration number.
You can access this section through the Payment Details link.
Default Unit Holder ID
12 Character Maximum, Alphanumeric, Optional
Select the ID of the unit holder account that is designated to be used as the default account in the system for the broker. This is typically so when the broker prefers that a unit holder receives the proceeds of the commission payments.
Whenever the broker opts for reinvestment of earned commission back into the funds of the AMC, (according to the income distribution setup options defined for the broker) the reinvestment will be effected through the unit holder ID you specify here.
Hierarchy Commission Percentage
5 Numeric Characters Maximum, including 2 decimals, Mandatory
Specify the percentage of the commission received that is to be paid by the broker to the immediate parent broker level.
For a given broker hierarchy structure, the commissions received at any level may be shared between the brokers of the hierarchy in a pre-defined manner.
To understand how earned commission would be shared in a hierarchy structure, let us consider an example.
Consider a four-tier broker setup as given below. Let us suppose that the transaction commission processed of a particular subscription transaction must be split amongst the brokers in the following manner.
The Top-Level (Level Zero) parent broker receives 10%
The Level 1 parent broker receives 15%
The Level 2 parent broker receives 25%
The Level 3 parent broker receives 50%
Such a setup entails that a subscription transaction commission of 1000 currency units (initiated by Level 4 broker) must be split amongst this broker hierarchy as follows:
The Top-Level (Level Zero) parent broker receives 100 currency units.
The Level 1 parent broker receives 150 currency units.
The Level 2 parent broker receives 250 currency units.
The Level 3 parent broker receives 500 currency units.
Therefore, this must be the pattern of receivables that must arise from this commission setup, for this hierarchy.
In Oracle FLEXCUBE, to enable this kind of a pattern, the following setup (called the payables method) is used.
Set the commission percentage of Top-Level (Level Zero) parent broker to 0% (i.e., this broker pays nothing to the immediate parent broker as the broker is a level zero broker)
Level 1 parent broker: 60% (Pays 60% of commission received to immediate parent broker)
Level 2 parent broker: 50% (Pays 50% of commission received to immediate parent broker)
Level 3 parent broker: 50% (Pays 50% of commission proceeds to immediate parent broker i.e. Level 2)
As a result of the above setup for the case mentioned above, (subscription commission of 1000 currency units) the split will be as follows:
Broker |
Receivable (Currency Units) |
Payable (Currency Units) |
Net Receivable (Currency Units) |
Level 3 Broker |
1000 |
500 |
500 |
Level 2 broker |
500 |
250 |
250 |
Level 1 broker |
250 |
150 |
100 |
Level 0 broker |
150 |
0 |
150 |
Payment Frequency
Mandatory
From the list, indicate the frequency according to which commission payments must be made to the broker.
If you have designated the broker to be identified under a selected broker type, and also checked the Use Broker Type Payment Details check box in this screen, the frequency of payment identified for the selected broker type is also applicable by default for the broker. This frequency is displayed here.
Next Payment Date
Date, Mandatory
Specify the earliest future date on which the next commission payment should be made to the broker. Do not specify a designated system holiday in this field. The commissions will be processed based on the new payment date and the frequency specified will be used to make periodic payments.
Last Payment Date
Display Only
The most recent date on which a commission payment was made to this broker is displayed here. When you are creating a new record for a broker in this screen, this field is empty.
VAT Details Section
VAT Registered
Mandatory
Click this check box to indicate that the broker is a VAT Registered broker.
VAT Registration No.
15 Characters Maximum, Alphanumeric, Mandatory if broker is VAT registered.
If the broker is a VAT registered broker, specify the broker’s VAT Registration Number.
VAT Registration Date
DD/MM/YYYY
Specify the date of VAT registration here. VAT Registration date is mandatory if the broker is a VAT registered broker.
While processing broker commission, the system computes the VAT amount only if the transaction date is on or after the VAT registration date of the broker.
During periodic loan accrual processing, system computes the VAT amount only if the accrual date is on or after the VAT registration date maintained at the broker level.
5.3.6 Broker Add Info Tab
If the AMC has designated any additional information heads for brokers, you can indicate the relevant information applicable to the broker under each head, in this section.
You can access this section by clicking ‘Broker Add Info’ tab.
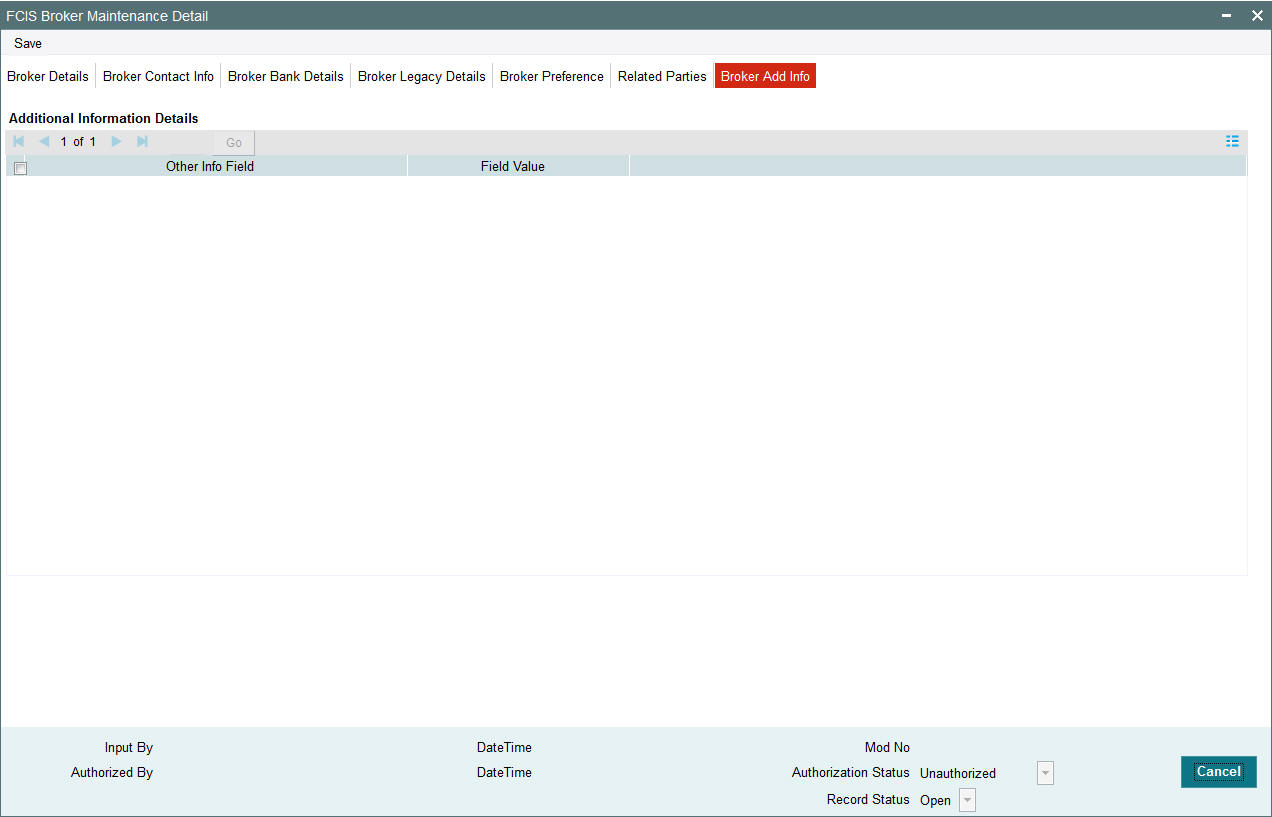
Other Info Field
Displays the other information in the field.
Field Value
Select the field value from the option list.
5.3.7 Broker Contact Info Tab
In this section, specify all the details of the available modes of communication and correspondence with the broker. Click ‘Broker Contact Info’ tab to enter the details.
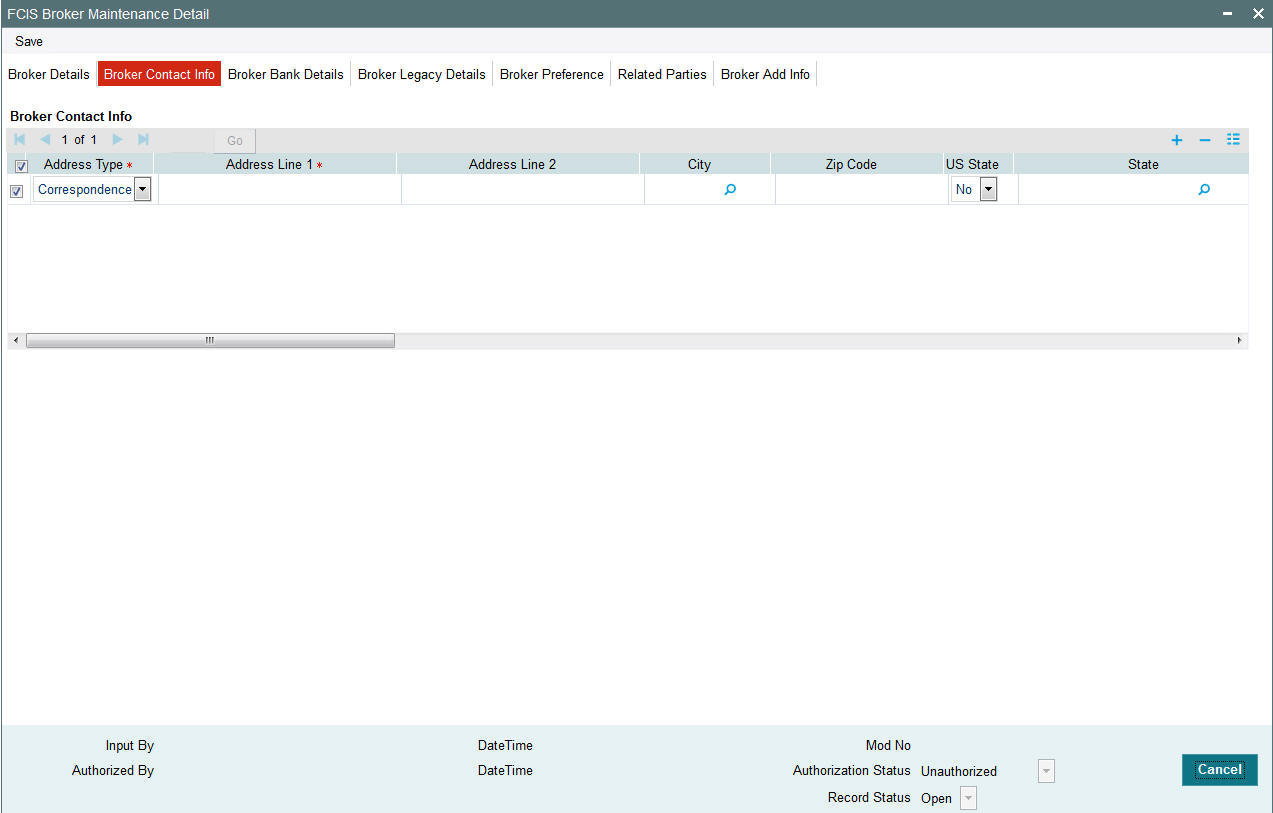
,You can specify at least two addresses, and designate one as the default mailing address to be used for correspondence with the broker, and the other as the alternate address. Specify the default address under the Default Address head, and the alternate address under the Alternate Address head.
You can also maintain the SWIFT Address for the main brokerage firm of the broker type, in the SWIFT Address tab.
The following fields comprise the Correspondence; Alternate and SWIFT address information in the Address Type tab:
Address Lines 1-2
Each line is 80 Character Maximum, Alphanumeric. Address Line 1 is Mandatory
Specify the postal address that is to be used for correspondence with the broker.
City
20 Character Maximum, Alphanumeric, Optional
Specify the name of the city of residence of the broker. You can select the city from the drop down list provided. The available options depend on the values defined at the params maintenance. If the city is not available in the list, you can specify the city in the field provided alongside.
Zip Code
6 Characters Maximum, Alphanumeric, Optional
Specify the zip code of the specified city of residence of the broker.
US State
Optional
Check this box to indicate that the specified state is a US (United States) state.
State/ Address Line 4
20 Character Maximum, Alphanumeric, Optional
Specify the state in which the city of residence of the broker is located. You can select the state of residence from the drop down list provided. The available options depend on the values defined at the params maintenance. If the state is not available in the list, you can specify the city in the field provided alongside.
Country
Alphanumeric, Optional
Select the country in which the broker is domiciled, from the drop-down list.
Contact Person
40 Character Maximum, Alphanumeric, Optional
Specify the name of any contact person or official through whom communication with the broker is possible.
Telephone 1-2
15 Character Maximum, Alphanumeric, Optional
Enter the contact telephone numbers of the broker.
Cell Phone Number
16 Characters Maximum; Numeric; Optional
Specify the cell phone number of the broker.
Fax Number
15 Character Maximum, Alphanumeric, Optional
Enter the fax number of the broker.
E - Mail
50 Characters Maximum, Alphanumeric; Optional
Specify the E-mail address of the broker.
Effective From Date (dd/MM/yyyy)
Date Format, Optional
Specify the date that marks the beginning of the period for which the specified alternate address is valid.
Effective To Date (DD/MM/YYYY)
Date Format, Optional
Specify the date that marks the end of the period for which the specified alternate address is valid.
BIC Code
12 Characters Maximum, Alphanumeric; Mandatory
Specify the Bank Identifier Code (BIC) of the broker.
5.3.8 Broker Bank Details Tab
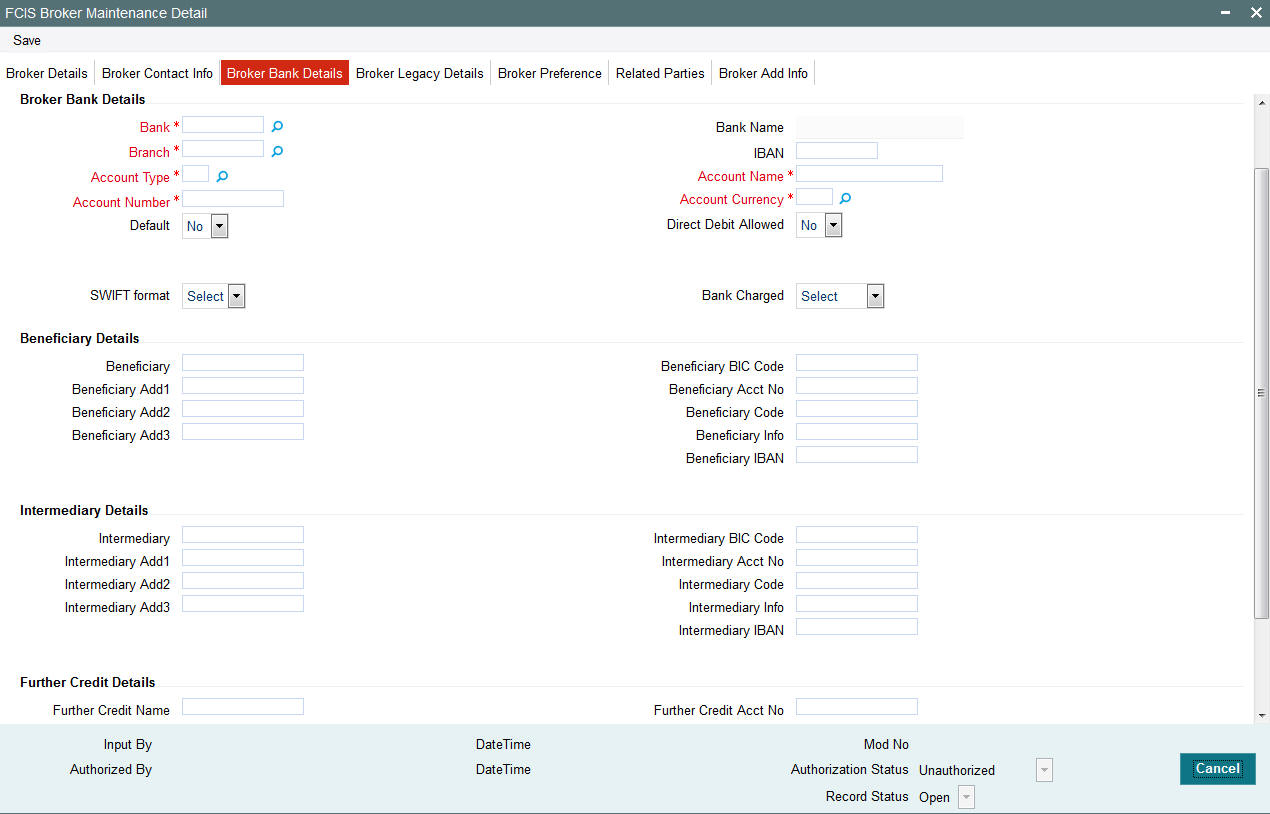
In this section, you specify details of any bank accounts operated by the broker, which are preferred for transacting with the AMC. You can access this section by clicking ‘Broker bank Details’ tab.
You can specify any number of preferred bank accounts for a broker for each currency, but you must designate one of these to be used by the broker as the default bank account for making or receiving payments in transactions in each currency.
For each bank account in each currency, specify the following details:
Bank
Alphanumeric, Mandatory
From the list, select the name of the bank in which the account is held.
Branch
Alphanumeric, Mandatory
From the list, select the name of the branch of the bank in which the account is held.
Account Type
Alphanumeric, Mandatory
From the list, select the nature of the account held by the broker.
The list provides all account types that have been set up in the Account Type Maintenance records.
Account Number
15 Character Maximum, Alphanumeric, Mandatory
Specify the number of the account held by the broker in the selected bank.
Account Name
60 Character Maximum, Alphanumeric, Mandatory
Specify the name in which the broker holds the specified bank account.
By default, the system reckons this to be the specified name of the broker, and the same is displayed here. It will be accepted into the database as the account holder’s name if you do not specify any other.
Account Currency
3 Characters Maximum, Alphanumeric; Mandatory
Select the currency of the bank accounts that you are designating for the broker. You can maintain any number of accounts in each currency; however, you must designate one default bank account for each currency.
Note
You can make commission payments where the commission currency is different from the broker bank account currency by selecting MCY option from the list of values for account currency.
Default
Select ‘Yes’ to identify the bank account that is to be reckoned as the default bank account for the broker in the system. In the desired row, check this box.
Direct Debit Allowed
Select ‘Yes’ to allow the direct debit.
IBAN
36 Characters Only; Alphanumeric; Optional
Specify the IBAN (International Bank Account Number) of the account holder.
5.3.9 Broker Legacy Details Tab
Click ‘Broker Legacy Details’ tab to enter the details.
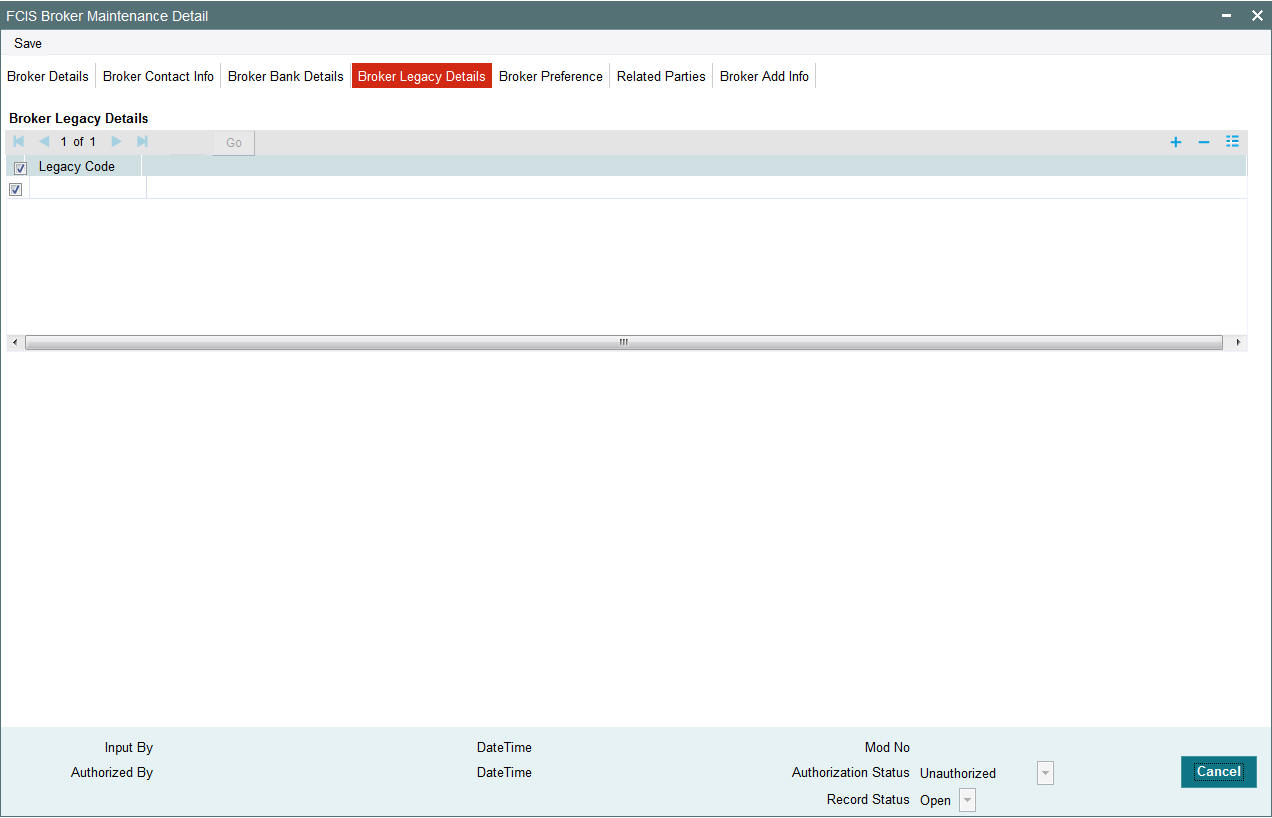
Legacy Code
Alphanumeric, Optional
Enter any legacy code linked to the broker. The legacy code for each broker must be unique in the system. System will not allow you to store duplicate legacy codes. While processing a transaction, you can search for the broker using the legacy codes specified here.
5.3.10 Broker Preference Tab
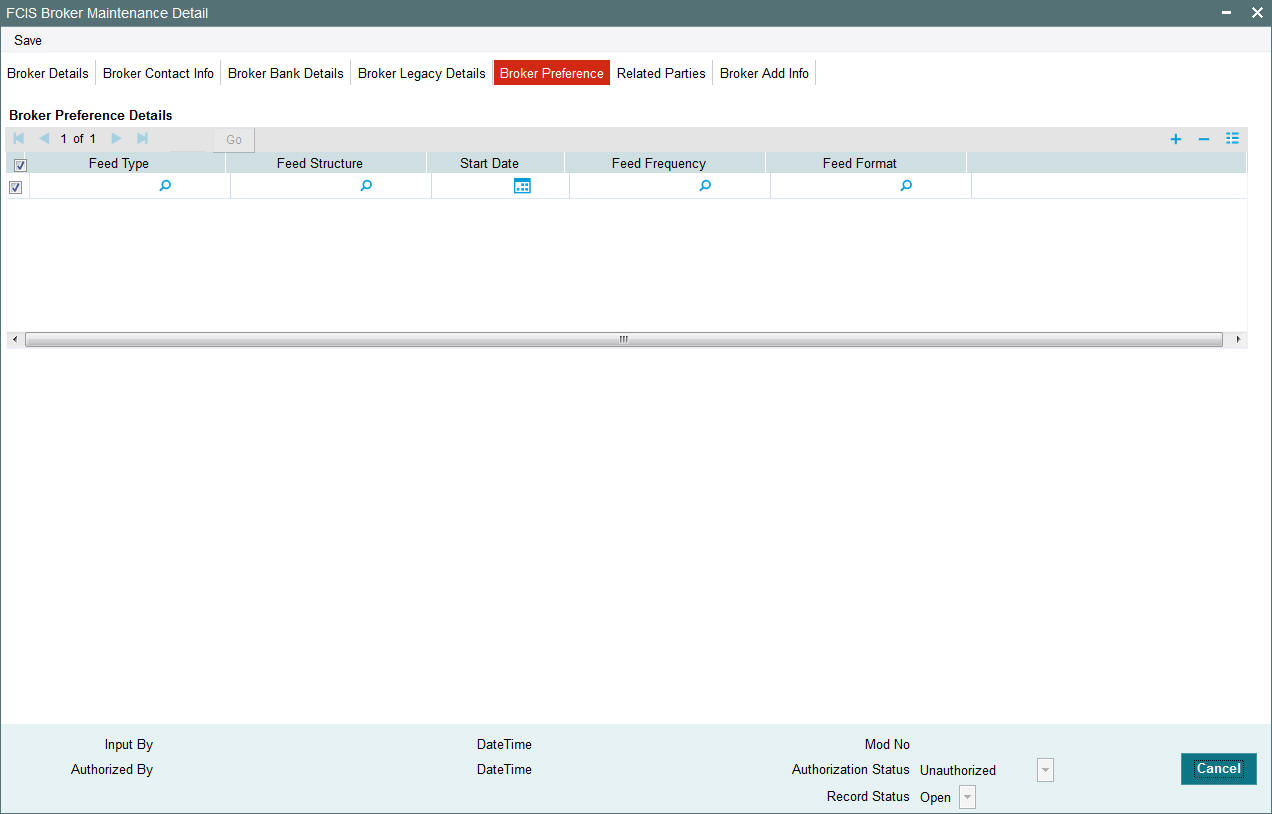
Click ‘Broker Preferences’ tab to enter the details.
Broker Preference Details Section
Feed Type
Alphanumeric; Optional
From the option list, select the type of feed the broker wishes to receive. The various types available are as follows:
- Transaction Feeds – All transactions, Subscription, Redemption, Switch, Transfer
- Brokerage Payment Feeds
- Investor Feeds
- NAV Feeds
- Scheme Feeds
You cannot maintain preferences for a feed type more than once. If a duplicate feed type is selected, then system will throw up an error.
Feed Structure
Alphanumeric; Optional
Indicate the format of the file being extracted. The options are:
- DBF
- TXT
- XLS
The available options depend on the values defined in PARAMS maintenance.
Start Date
Date Format; Optional
Specify the date that marks the beginning of the Feed period.
Feed Frequency
Alphanumeric; Optional
From the list, indicate the frequency according to which the data feed must be made to the broker.
Feed Format
Alphanumeric; Optional
Indicate the format of the Feed to be made to the broker.
The available options depend on the values defined in PARAMS maintenance.
5.4 Broker Maintenance Summary Screen
This section contains the following topics:
- Section 5.4.1, "Retrieving Broker Records in Broker Maintenance Summary Screen"
- Section 5.4.2, "Editing Broker Records "
- Section 5.4.3, "Viewing Broker Records"
- Section 5.4.4, "Deleting Broker Records "
- Section 5.4.5, "Authorizing Broker Records "
- Section 5.4.6, "Amending Broker Records"
- Section 5.4.7, "Authorizing Amended Broker Records"
- Section 5.4.8, "Amending Broker Details after Transaction Unitization "
5.4.1 Retrieving Broker Records in Broker Maintenance Summary Screen
After you have set up a record for a broker in the system, you can perform the following maintenance operations, as required:
- Make changes to any information in the record before it is authorized.
- Have the record authorized by another user. Commission for a broker will only be processed by the system when the broker’s maintenance record in the system is authorized.
- After authorization, you can make further changes to any information in the record through amendment.
To perform any of these operations, use the ‘FCIS Broker Maintenance Summary’ screen. You can invoke this screen by typing ‘UTSBRKMN’ in the field at the top right corner of the Application tool bar and clicking on the adjoining arrow button.
After a broker record is authorized, you can also:
- Set up the preferred currency and income distribution options applicable for the broker. You can do this by accessing the Broker Payment Currency Preference screen and Broker IDS Setup Detail screen.
- Set up a journal of commission payment details for the broker. This
journal can be used to track advance payments of commissions and adjustment
of the same. You can use the Broker Journal Detail screen from the Broker
Journal menu in the Browser.
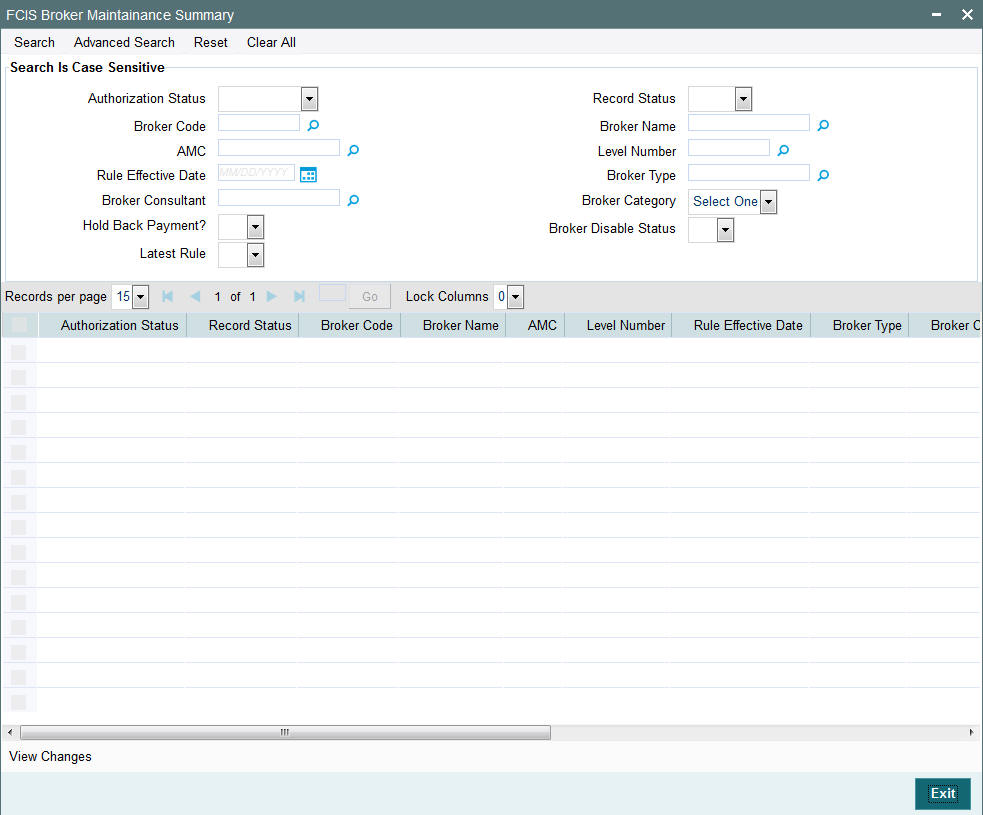
You can retrieve a previously entered record in the FCIS Broker Maintenance Summary screen, as follows:
- Specify any or all of the following details in the FCIS Broker Maintenance Summary screen:
- The status of the transaction in the Authorized field. If you choose the “Blank Space” option, then all the records that involve the specified unit holder are retrieved.
- The status of the record in the Open field. If you choose the “Blank Space” option, then all the records that involve the specified unit holder are retrieved.
- The Broker Code
- The Broker Name
- The AMC
- The Level Number
- The Rule Effective Date
- The Broker Type
- The Broker Consultant
- The Broker Category
- The Hold Back Payment
- The Broker Disable Status
Click ‘Search’ button to view the records. All records with the specified details are retrieved and displayed in the lower portion of the screen.
Note
You can also retrieve the individual record detail from the detail screen by doing query in the following manner:
- Press F7
- Input the Broker Code
- Input Rule Effective Date
- Press F8
You can perform Edit, Delete, Amend, Authorize, Reverse, Confirm operation by selecting from the Action list.
You can also search the record by using combination of % and alphanumeric value.
Example
You can search the record for Broker Code by using the combination of % and alphanumeric value as follows:
- Search by A%: System will fetch all the records whose Broker Code starts from Alphabet ‘A’. For Example: AGC17, AGVO6, AGC74 and so forth.
- Search by %7: System will fetch all the records whose Broker Code ends by numeric value’ 7’. For Example: AGC17, GSD267, AGC77 and so forth.
- Search by %17%: System will fetch all the records whose Broker Code contains the numeric value 17. For Example: GSD217, GSD172, AGC17 and so forth.
5.4.2 Editing Broker Records
You can modify the details FCIS Broker Maintenance parameters that you have already entered into the system, provided it has not been subsequently authorized. You can perform this operation as follows:
- Invoke the FCIS Broker Maintenance Summary screen from the Browser.
- Select the status of the record that you want to retrieve for modification in the Authorized field. You can only modify records that are unauthorized. Accordingly, choose the Unauthorized option.
- Specify any or all of the details in the corresponding fields to retrieve the record that is to be modified. All unauthorized records with the specified details are retrieved and displayed in the lower portion of the screen.
- Double click the record that you want to modify in the list of displayed records. The FCIS Broker Maintenance Detail screen is displayed.
- Select Unlock Operation from Action list to modify the record. Modify the necessary information.
- Click Save to save your changes. The FCIS Broker Maintenance Detail screen is closed and the changes made are reflected in the FCIS Broker Maintenance Summary screen.
5.4.3 Viewing Broker Records
To view a record that you have previously entered, you must retrieve the same in the FCIS Broker Maintenance Summary screen, as follows:
- Invoke the FCIS Broker Maintenance Summary Screen from the Browser.
- Select the status of the record that you want to retrieve for viewing in the Authorized field. You can also view all records that are either unauthorized or authorized only, by choosing the Unauthorized / Authorized option.
- Specify any or all of the details of the record in the corresponding fields on the screen, and click ‘Search’ button. All records with the specified details are retrieved and displayed in the lower portion of the screen.
- Double click the record that you want to view in the list of displayed records. The FCIS Broker Maintenance Detail screen is displayed in View mode.
5.4.4 Deleting Broker Records
You can delete only unauthorized records in the system. To delete a record that you have previously entered:
- Invoke the FCIS Broker Maintenance Summary screen from the Browser.
- Select the status of the record that you want to retrieve for deletion.
- Specify any or all of the details and click ‘Search’ button. All records with the specified details are retrieved and displayed in the lower portion of the screen.
- Double click the record that you want to delete. The FCIS Broker Maintenance Detail screen is displayed.
- Select Delete operation from the Action list. The system prompts you to confirm the deletion, and the record is deleted physically from the system database.
- Only Maker can delete an unauthorized record.
5.4.5 Authorizing Broker Records
An unauthorized FCIS Broker Maintenance record must be authorized in the system for it to be processed. To authorize a record:
- Invoke the FCIS Broker Maintenance Summary screen from the Browser.
- Select the status of the record that you want to retrieve for authorization. Typically, choose the Unauthorized option.
- Specify any or all of the details of the record in the corresponding fields on the screen. Click ‘Search’ button. All records with the specified details that are pending authorization are retrieved and displayed in the lower portion of the screen.
- Double click the transaction that you wish to authorize. The FCIS Broker Maintenance Detail screen is displayed. Select Authorize operation from Action.
When the checker authorizes a record, details of validations, if any, that were overridden by the maker of the record during the Save operation, are displayed. If any of these overrides results in an error, the checker must reject the transaction.
5.4.6 Amending Broker Records
After a Broker Maintenance record is authorized, it can be modified using the Unlock operation from Action list. To make changes to a record after authorization:
- Invoke the Broker Maintenance Summary screen from the Browser.
- Select the status of the record that you wish to retrieve for amendment. You can only amend only authorized records.
- Specify any or all of the details of the Broker Maintenance in the screen. All records with the specified details are retrieved and displayed in the lower portion of the screen.
- Double click the record that you want to amend. The Broker Maintenance Detail screen is displayed in Amendment mode. Click the Unlock operation from the Action list to amend the record.
- Amend the necessary information. Click the Save button to save the changes.
5.4.7 Authorizing Amended Broker Records
An amended Broker Journal record must be authorized for the amendment to be made effective in the system. The authorization of amended records can only be done from Fund Manager Module and Agency branch Module.
The process of authorization is subsequently the same as that for normal transactions.
The amended record with the changes is saved in the database as an amended, unauthorized record that you must subsequently authorize for your changes to be reflected as authorized in the database.
5.4.7.1 Details of Broker Record That Can Be Amended
You can make changes to any of the following details in a broker record through an amendment operation:
- Broker Hierarchy
- VAT Information
- Next Payment Date
- Commission Information
- Enabling or Disabling brokers
- The status of the broker
- The rule effective date
- Legacy Codes
- Other Information
- Broker Details after transaction unitization
Amending the Broker Hierarchy
If you need to change the reporting structure in a broker hierarchy setup, you can amend the record of one of the concerned brokers and change the parent broker. You can also introduce an intermediate reporting level broker to whom the existing levels must report.
The following examples will make this clear:
Example 1
The above illustration is a sample Broker Hierarchy Structure that is referred to in the examples 1-3.
Consider the following hierarchy setup for representing a reporting structure:
Let us suppose that the record of broker B1 is amended, and as a result, the broker B1 undergoes a level change and now reports to broker B111. To enable this change, the broker code of broker B1 is altered from B1 (existing) to B111.
On authorization, this change will be interpreted by the system as follows:
Broker B111 will report to himself (become a level zero broker).
Broker B1 will report to broker B1
All brokers under broker B111 will report to broker B111.
All brokers under B1 broker will report to broker B1.
As a result of the above level changes the new hierarchy will look as follows:
Example 2
Let us suppose that, in the same original hierarchy structure, (the first figure) the record of the broker B11 is amended, and as a result, the broker B11 undergoes a level change and now reports to broker B111. To enable this change, the broker code of broker B11 is altered from B1 (existing) to B111.
On authorization, this will be interpreted by the system as follows:
Broker B111 will report to the original parent broker of broker B11, i.e., broker B1.
Broker B11 reports to broker B111.
All brokers under broker B111 will report to broker B111.
All brokers under broker B11 will report to broker B11.
As a result of the above level changes the new hierarchy will look as follows:
Example 3
If a new reporting level has to be incorporated so that an existing level reports to the new broker, the following level changes should be done.
For example, consider the original setup:
Let us suppose that a new broker Bx is required to be inserted as a level 3 broker under broker B111, and that all brokers who are currently reporting to B111 must now be made level 4 brokers who are required to report to broker Bx.
To meet the requirement, the following changes (amendments) must be done in the records of the brokers concerned:
Introduce broker Bx with parent broker as broker B111, and assign the level number 3 to this broker.
In the record of broker B1111, change the parent broker of broker B1111 to broker Bx, and change the level number assigned to broker B1111 from 3 to 4.
Do likewise in the record of broker B1112.
As a result of these amendments, the new reporting structure would look like this:
This structure reflects the desired changes.
Amending VAT Information
You can amend a broker record so that the VAT information can be changed. On authorization, this amended record will affect the VAT payment portion for VAT registered brokers. If the VAT Registered option is unchecked, for future payments VAT will not be added.
Next Payment Date
When you amend a broker record, you can alter the Next Payment Date. This possibility can be used in case a broker account is to be closed (disabled permanently) and the commission payable is to be paid out immediately.
Commission Information
When you amend a broker record, you can alter the Commission percentage payable by this broker to the immediate parent broker.
Enabling or Disabling Brokers
When you amend a broker record, you can disable or enable the broker. Therefore, this possibility can be used to disable a broker from initiating further transactions in the system. This restricts the agency branches in selecting the broker code in all the transaction screens. (To revoke the disabling of the broker, enable the broker again and authorize the details).
Amending Other Information
When you desire to change basic details such as addresses, names, contact persons, broker status, rule effective date and so on for a broker, you can amend the broker's record and make the required changes. On Amendment of Broker details, Rule Effective date will be defaulted with the current Application Date.
5.4.8 Amending Broker Details after Transaction Unitization
The system allows you to amend the broker details even after a transaction is unitized. If you amend the broker details of a transaction after unitization, the system passes the appropriate broker commission entries for the old and the new broker to the OMIPAY and GL interfaces.
The amendment of the broker details will not have any implications on:
- Re-computation of fees
- Oracle FLEXCUBE Commission Payments
- Periodic Loads applied on intermediary transactions.
5.5 Transaction Broker Amendment Screen
This section contains the following topic:
5.5.1 Invoking Transaction Broker Amendment Screen
The following screen displays the Transaction Broker Amendment details. You can invoke this screen by typing ‘UTDTXBRM’ in the field at the top right corner of the Application tool bar and clicking on the adjoining arrow button.
![]()
Note
The screen restricts to modify transactions linked with single broker. For multiple brokers scenario you can reverse and recapture the transaction.
Select 'New' from the Actions menu in the Application tool bar or click new icon to enter the details of the Transaction Broker Amendment screen.
Transaction Option
Select UT or Policy Transactions for amendment of Broker’s information.
Transaction Number
Enter UT transaction number or policy transaction number for amendment of Broker’s information.
Old Broker Code
This displays Old Broker
New Broker Code
Enter the New Broker Code.
On authorization of the changes to the broker details:
- The system checks if the transaction is reversed or not. The system allows only non reversed transactions for broker change.
- The system internally corrects the broker’s information for transaction and allocation related data stores and provides an internal log to historical data.
5.6 Broker Payment Currency Preference Detail Screen
This section contains the following topic:
5.6.1 Invoking Payment Currency Preference Screen
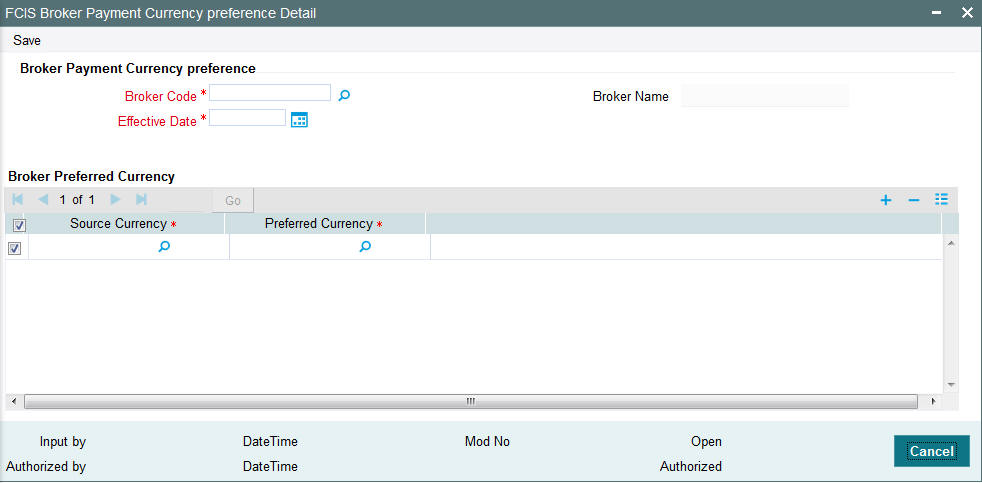
You can specify preferred broker payments in multiple currencies based on the source currency of the commission through the Broker Payment Currency Preference screen. You can invoke this screen by typing ‘UTDBCYPR’ in the field at the top right corner of the Application tool bar and clicking on the adjoining arrow button.
Note
You cannot map multiple bank accounts to the same preferred currency.
Select 'New' from the Actions menu in the Application tool bar or click new icon to enter the details of the Broker Payment Currency Preference screen.
Broker Code
Mandatory
Select unique broker code from the adjoining list.
Broker Name
Display
The broker name will be displayed.
Effective Date
Date Format, Mandatory
Specify the date from which the broker payment currency is effective in the system.
Broker Preferred Currency Details
Source Currency
Alphanumeric, Mandatory
Specify the source currency of the payment.
Preferred Currency
Alphanumeric, Mandatory
Select the preferred currency from the option list.
5.7 Broker Payment Currency Preference Summary Screen
This section contains the following topics:
- Section 5.7.1, "Retrieving Broker Currency Preference Summary"
- Section 5.7.2, "Editing Broker Currency Preference "
- Section 5.7.3, "Viewing Broker Currency Preference"
- Section 5.7.4, "Deleting Broker Currency Preference"
- Section 5.7.5, "Authorizing Broker Currency Preference"
- Section 5.7.6, "Amending Broker Currency Preference"
- Section 5.7.7, "Authorizing Amended Broker Currency Preference"
5.7.1 Retrieving Broker Currency Preference Summary
You can invoke the FCIS Broker Currency Preference Summary screen by typing ‘UTSBCYPR’ in the field at the top right corner of the Application tool bar and clicking on the adjoining arrow button.

You can retrieve a previously entered record in the Broker Currency Preference Summary screen, as follows:
- Specify any or all of the following details in the Broker Currency Preference Summary screen:
- The status of the transaction in the Authorized field. If you choose the ‘Blank Space’ option, then all the records that involve the specified broker currency are retrieved.
- The status of the record in the Open field. If you choose the ‘Blank Space’ option, then all the records that involve the specified broker currency are retrieved.
- Broker Code
- Effective Date
Click ‘Search’ button to view the records. All records with the specified details are retrieved and displayed in the lower portion of the screen.
You can also retrieve the individual record detail from the detail screen by doing query in the following manner:
- Press F7
- Input the Broker Code
- Press F8
You can perform Edit, Delete, Amend, Authorize, Reverse, Confirm operation by selecting from the Action list.
You can also search the record by using combination of % and alphanumeric value.
Example
You can search the record for Broker Code by using the combination of % and alphanumeric value as follows:
- Search by A%: System will fetch all the records whose Broker Code starts from Alphabet ‘A’. For Example: AGC17, AGVO6, AGC74 and so forth.
- Search by %7: System will fetch all the records whose Broker Code ends by numeric value’ 7’. For Example: AGC17, GSD267, AGC77 and so forth.
- Search by %17%: System will fetch all the records whose Broker Code contains the numeric value 17. For Example: GSD217, GSD172, AGC17 and so forth.
5.7.2 Editing Broker Currency Preference
You can modify the details of Broker Currency Preference parameters that you have already entered into the system, provided it has not been subsequently authorized. You can perform this operation as follows:
- Invoke the Broker Currency Preference Summary screen from the Browser.
- Select the status of the record that you want to retrieve for modification in the Authorization Status field. You can only modify records that are unauthorized. Accordingly, choose the Unauthorized option.
- Specify any or all of the details in the corresponding fields to retrieve the record that is to be modified. All unauthorized records with the specified details are retrieved and displayed in the lower portion of the screen.
- Double click the record that you want to modify in the list of displayed records. The Broker Currency Preference screen is displayed.
- Select Unlock Operation from Action list to modify the record. Modify the necessary information.
- Click Save to save your changes. The Broker Currency Preference screen is closed and the changes made are reflected in the Broker Currency Preference Summary screen.
5.7.3 Viewing Broker Currency Preference
To view a record that you have previously entered, you must retrieve the same in the Broker Currency Preference Summary screen, as follows:
- Invoke the Broker Currency Preference Summary Screen from the Browser.
- Select the status of the record that you want to retrieve for viewing in the Authorization Status field. You can also view all records that are either unauthorized or authorized only, by choosing the Unauthorized/ Authorized option.
- Specify any or all of the details of the record in the corresponding fields on the screen, and click ‘Search’ button. All records with the specified details are retrieved and displayed in the lower portion of the screen.
- Double click the record that you want to view in the list of displayed records. The Broker Currency Preference Detail screen is displayed in View mode.
5.7.4 Deleting Broker Currency Preference
You can delete only unauthorized records in the system. To delete a record that you have previously entered:
- Invoke the Broker Currency Preference Summary screen from the Browser.
- Select the status of the record that you want to retrieve for deletion.
- Specify any or all of the details and click ‘Search’ button. All records with the specified details are retrieved and displayed in the lower portion of the screen.
- Double click the record that you want to delete. The Broker Currency Preference Detail screen is displayed.
- Select Delete operation from the Action list. The system prompts you to confirm the deletion, and the record is deleted physically from the system database.
5.7.5 Authorizing Broker Currency Preference
An unauthorized Broker Currency Preference record must be authorized in the system for it to be processed. To authorize a record:
- Invoke the Broker Currency Preference Summary screen from the Browser.
- Select the status of the record that you want to retrieve for authorization. Typically, choose the Unauthorized option.
- Specify any or all of the details of the record in the corresponding fields on the screen. Click ‘Search’ button. All record with the specified details that are pending authorization are retrieved and displayed in the lower portion of the screen.
- Double click the transaction that you wish to authorize. The Broker Currency Preference Detail screen is displayed. Select Authorize operation from Action.
When the checker authorizes a record, details of validations, if any, that were overridden by the maker of the record during the Save operation, are displayed. If any of these overrides results in an error, the checker must reject the transaction.
5.7.6 Amending Broker Currency Preference
After a Broker Currency Preference record is authorized, it can be modified using the Unlock operation from Action list. To make changes to a record after authorization:
- Invoke the Broker Currency Preference Summary screen from the Browser.
- Select the status of the record that you wish to retrieve for amendment. You can only amend only authorized records.
- Specify any or all of the details of the Broker Currency Preference in the screen. All records with the specified details are retrieved and displayed in the lower portion of the screen.
- Double click the record that you want to amend. The Broker Currency Preference Detail screen is displayed in Amendment mode. Click the Unlock operation from the Action list to amend the record.
- Amend the necessary information. Click the Save button to save the changes.
5.7.7 Authorizing Amended Broker Currency Preference
An amended Broker Currency Preference record must be authorized for the amendment to be made effective in the system. The authorization of amended records can only be done from Fund Manager Module and Agency branch Module.
The process of authorization is subsequently the same as that for normal transactions.
Note
When a journal entry for a broker is authorized, the process for any adjustments specified in the entry to the next payment cycle or transaction for the broker is begun in the database. Subsequently, you cannot change a journal entry that has been authorized, in any way. The amendment operation is not available on authorized journal entries for brokers.
5.8 Broker Migration Screen
This section contains the following topics:
5.8.1 Processing Broker Merger
Broker merger is a scenario, where source broker code merges with target broker code to form a single entity.
Post RDR, if the broke merger is not due to advise, then the merger is considered as not advised and the new agent/broker will inherit the terms of holdings. Also. is eligible to receive commission.
Once the broker is merged, the commission due to source broker is paid to the target broker for the business mobilized by the source broker. Also, the system transfers the holdings of source broker to target broker. Post merger, if a transaction is received with source broker code, then the transaction is linked to the target broker code.
Merger of brokers is scheduled as a EOD batch process triggered by 'Broker Merger' activity on the day the merger is authorized.
Note
– If either the source or target broker is suspended or deceased, then the system disables broker merger.
– If source broker code is UK domiciled and target broker code is non UK domiciled or visa versa, then the system displays the warning message as “Source/target broker is UK Domiciled- Do you wish to continue”.
5.8.2 Invoking Broker Migration Screen
You can change the default broker, from one broker to the other, for all the unit holders, in bulk, through the Broker Migration screen.
You can invoke this screen by typing ‘UTDBRMIG’ in the field at the top right corner of the Application tool bar and clicking on the adjoining arrow button.
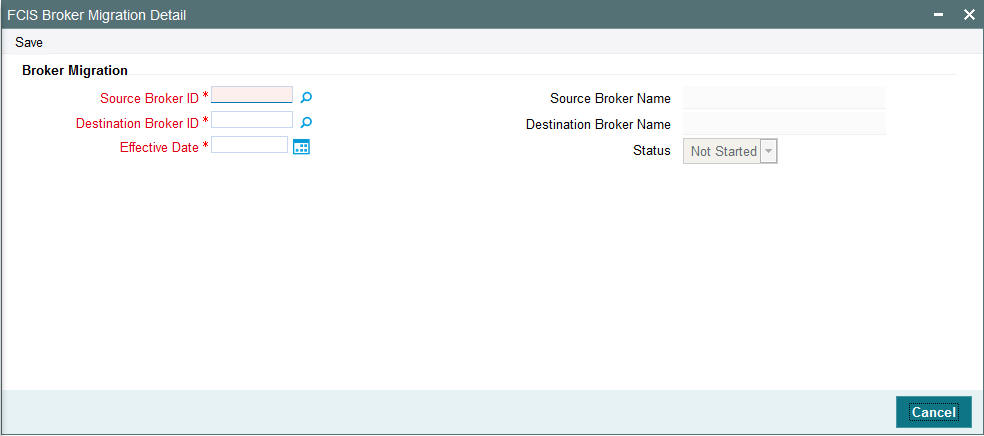
The system validates if the source broker status is Pending Closure before migration. Only the Brokers with disabled status as ‘No’ are mapped as destination brokers.
Note
Duplicate entries with the same source and destination broker with the same effective date are not allowed.
Select 'New' from the Actions menu in the Application tool bar or click new icon to enter the details of the Broker Migration screen. Only save operation is applicable for the Broker Migration screen.
Source Broker ID
Alphanumeric, Mandatory
Source broker is the broker from whom migration is done. Select the source Broker ID of the option list.
Source Broker Name
Display
The name of the source broker is displayed.
Destination Broker ID
Alphanumeric, Mandatory
Destination broker is the new broker to whom the details are migrated. Select the destination Broker ID of the option list.
Destination Broker Name
Display
The name of the destination broker is displayed.
Effective Date
Date Format, Mandatory
Specify the date from which the broker migration is effective in the system.
Status
Display
The status of broker migration is displayed.
5.9 Broker Migration Summary Screen
This section contains the following topics:
5.9.1 Retrieving Broker Migration Summary
You can invoke the ‘FCIS Broker Migration Summary’ screen by typing ‘UTSBRMIG’ in the field at the top right corner of the Application tool bar and clicking on the adjoining arrow button.
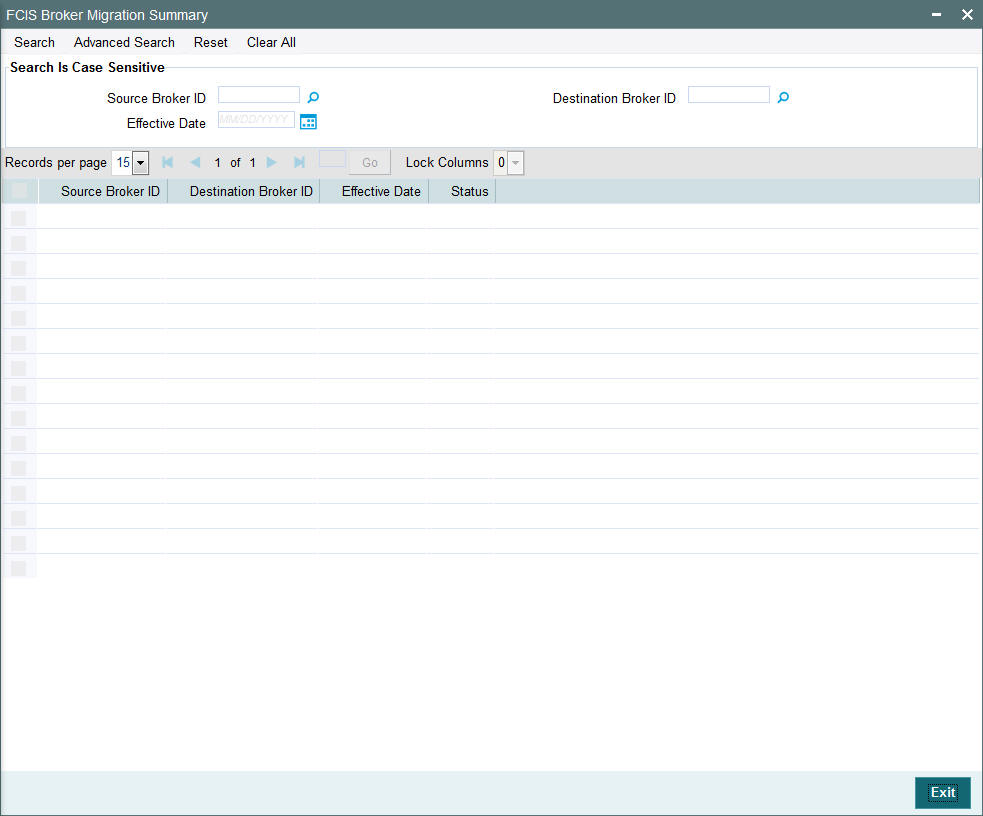
You can retrieve a previously entered record in the Broker Migration Summary screen, as follows:
- Specify any or all of the following details in the Broker Migration Summary screen:
- Source Broker Id
- Destination Broker Id
- Effective Date
Click ‘Search’ button to view the records. All records with the specified details are retrieved and displayed in the lower portion of the screen.
Note
You can also retrieve the individual record detail from the detail screen by doing query in the following manner:
- Press F7
- Input the Broker Code
- Press F8
You can also search the record by using combination of % and alphanumeric value.
Example
You can search the record for Source Broker Id by using the combination of % and alphanumeric value as follows:
- Search by A%: System will fetch all the records whose Source Broker Id starts from Alphabet ‘A’. For Example: AGC17, AGVO6, AGC74 and so forth.
- Search by %7: System will fetch all the records whose Source Broker Id ends by numeric value’ 7’. For Example: AGC17, GSD267, AGC77 and so forth.
- Search by %17%: System will fetch all the records whose Source Broker Id contains the numeric value 17. For Example: GSD217, GSD172, AGC17 and so forth.
5.9.2 Viewing Broker Migration
To view a record that you have previously entered, you must retrieve the same in the Broker Migration Summary screen, as follows:
- Invoke the Broker Migration Summary Screen from the Browser.
- Select the status of the record that you want to retrieve for viewing in the Authorization Status field. You can also view all records that are either unauthorized or authorized only, by choosing the Unauthorized/ Authorized option.
- Specify any or all of the details of the record in the corresponding fields on the screen, and click ‘Search’ button. All records with the specified details are retrieved and displayed in the lower portion of the screen.
- Double click the record that you want to view in the list of displayed records. The Broker Migration Detail screen is displayed in View mode.
5.10 Broker Journal Detail Screen
This section contains the following topics:
- Section 5.10.1, "Maintaining Accounting Journal for Broker"
- Section 5.10.2, "Invoking Broker Journal Detail Screen"
5.10.1 Maintaining Accounting Journal for Broker
Brokers receive commission payments out of some of the transactions in every fund for which they are designated intermediaries.
With regard to commission earnings, brokers could request for:
- Advance payments
- Ad-hoc payments
Oracle FLEXCUBE Investor Servicing enables the AMC to keep track of the processing and actual payment of commission earnings for brokers, by providing an accounting ‘journal’ facility, which would record each payment made.
Using this journal, you can:
- Make an accounting entry for each payment made to a broker for earnings from a specific transaction in a fund
- Maintain the payables and receivables for a broker for earnings from a fund
- Adjust the effect of advance payments or ad-hoc payments made to a broker, on any future payments
- The journal for a broker is therefore a single repository for all commission payments received by the broker.
5.10.2 Invoking Broker Journal Detail Screen
To maintain a journal of accounting entries for payments to a broker, use the ‘Broker Journal Detail’ screen. You can invoke this screen by typing ‘UTDBRKJR’ in the field at the top right corner of the Application tool bar and clicking on the adjoining arrow button.
In the screen, specify the following mandatory information for each accounting entry for a broker, for a transaction in a fund:
- The date of the entry, in the Entry Date field
- A unique reference number for the journal entry, in the Reference Number field.
- The currency for the journal entry, in the Journal Currency field.
- The payables or receivables resulting from the transaction, in the Payables and Receivables fields.
- Whether the entry is to be deemed an adjustment entry, as indicated in the Adjustment Entry field.
- Any applicable descriptive or narrative text qualifying the entry, in the Remarks field.
- The details of the mode of payment, in the Payment Details section.
After you have specified this data, save your changes by clicking the Save button at the end of the screen.
You must have another user to authorize a journal entry for the same to be reflected in the database.

Select 'New' from the Actions menu in the Application tool bar or click new icon to enter the details of the Broker Journal screen.
The following fields are available in the Broker Journal Detail screen for data entry:
Journal Txn Number
Display
System displays the automatically generated Journal Txn Number here.
Entry Date
Date Format, Mandatory
Specify the date on which the respective accounting entry was made in this journal. This date cannot be a future date.
Note
System computes the VAT amount for the commission only if the broker journal entry date is on or after the broker VAT registration date.
Reference Number
16 Characters Maximum; Alphanumeric, Mandatory
Specify a unique alphanumeric identifier for the journal entry. You will use this reference number to track this entry subsequently.
Journal Type
Alphanumeric; Mandatory
Select the Journal type from the adjoining drop-down list.
This list displays the following values:
General Journal (G): If you select General Journal, the broker code and the journal remarks are mandatory.
Client-Specific Journal (C): If you select Client-Specific Journal, the broker code, UHID and remarks are mandatory.
Transaction-Specific Journal (T): If you select Transaction-Specific Journal, broker code, transaction number, UHID and remarks are mandatory.
The system defaults Fund ID and Unit Holder ID on the selection of transaction number.
Broker
Alphanumeric, Mandatory
Select the code of the broker for whom the accounting entry is being recorded in the journal.
Broker Name
The broker name will be displayed.
Product ID
Select the product ID from the option list.
ISIN Code
12 Characters Maximum; Alphanumeric; Mandatory
Select the ISIN Code of the selected fund. If you specify the ISIN Code of a fund, the fund is displayed in the Fund field.
Fund ID
Alphanumeric, Mandatory
Select the fund ID in which the commission was earned by the broker, resulting in this journal entry.
The list contains all funds in which the broker has transacted and received commission, in the AMC. When you specify the fund, the ISIN Code of the fund is displayed in the ISIN Code field.
Transaction Number
Numeric; Optional
Select the Transaction Number from the adjoining option list.
Note
If the transaction number is given then system validates whether the transaction number belongs to the corresponding broker or not, while saving.
Unit Holder ID
Alphanumeric; Optional
The system populates the Unit Holder ID from the transaction number selected.
Unit Holder Name
The system defaults the Unit Holder Name as per the Unit Holder ID.
Journal Currency
Alphanumeric, Mandatory
Select the currency for the journal entry. The base currency for the fund is displayed here, but you can choose a different currency.
Adjustment Entry
Mandatory
Select the appropriate Adjustment Entry from the adjoining drop-down list to indicate that the payable or receivable amount specified for this journal entry must be adjusted or offset in the next commission payment cycle for the next transaction, for the selected broker.
If you select the option ‘VAT Only’, then the amount entered against Payables and Receivables is considered as VAT amount payable and receivable.
If the Adjustment entry is selected as VAT only, then the system will make changes only to the VAT amount.
Payables
30 Characters Maximum, including 12 decimal places, Numeric, Mandatory
Specify the amount that the broker must pay to the AMC, if any, as a result of the transaction.
Receivables
30 Characters Maximum, including 12 decimal places, Numeric, Mandatory
Specify the commission amount that the broker must receive from the AMC, if any, as a result of the transaction.
Remarks
255 Characters Maximum, Alphanumeric, Mandatory
Specify any narrative or descriptive text qualifying the journal entry. This information is mandatory.
Payment Details Section
In this section, specify the details of the mode in which the payables or receivables amount has to be paid out or received by the broker.
Payment Mode
Alphanumeric, Mandatory
Select the mode in which the payment was made or received, either through check or by account transfer.
Maintained Bank Accounts
Select the maintained bank accounts from the option list.
For Payments by check
Drawee Bank
Alphanumeric, Mandatory for check payments
Specify the name of the bank where the check was drawn.
Drawee Branch
Alphanumeric, Mandatory for check payments
Specify the branch of the selected bank where the payment was drawn.
Check Number
16 Characters Maximum, Alphanumeric, Mandatory for check payments
Specify the number of the check.
Check Date
Date Format, Optional
Specify the date on which the check was drawn.
For Payments by Account Transfer
Bank
Alphanumeric, Mandatory
Select the code of the bank, in which the transfer account resides, which was used to make the payment.
Branch
Alphanumeric, Mandatory
Select the code of the bank, in which the transfer account resides, which was used to make the payment.
Account Number
Alphanumeric, Mandatory
Specify the number of the transfer account that was used to make the payment.
Account Type
Alphanumeric, Mandatory
Select the type of the transfer account, which was used to make the payment.
Account Currency
Alphanumeric, Mandatory
Select the currency of the transfer account, which was used to make the payment.
IBAN
36 Characters Only; Alphanumeric; Optional
Specify the IBAN (International Bank Account Number) of the account holder.
5.11 Broker Journal Summary Screen
This section contains the following topics:
- Section 5.11.1, "Retrieving Journal Entry in Broker Journal Summary Screen"
- Section 5.11.2, "Editing Journal Entry "
- Section 5.11.3, "Viewing Journal Entry"
- Section 5.11.4, "Deleting Journal Entry "
- Section 5.11.5, "Authorizing Journal Entry"
5.11.1 Retrieving Journal Entry in Broker Journal Summary Screen
After you have made an accounting entry in a broker journal, you can:
- Make changes to the entry before you authorize it. You can also delete the entry, if deemed necessary.
- Have another user authorize it. Adjustments to the next payment cycle, if any, sought as specified in the entry, can only be effected after it is authorized.
To perform any of these operations, use the ‘Broker Journal Summary’ screen. You can invoke this screen by typing ‘UTSBRKJR’ in the field at the top right corner of the Application tool bar and clicking on the adjoining arrow button.
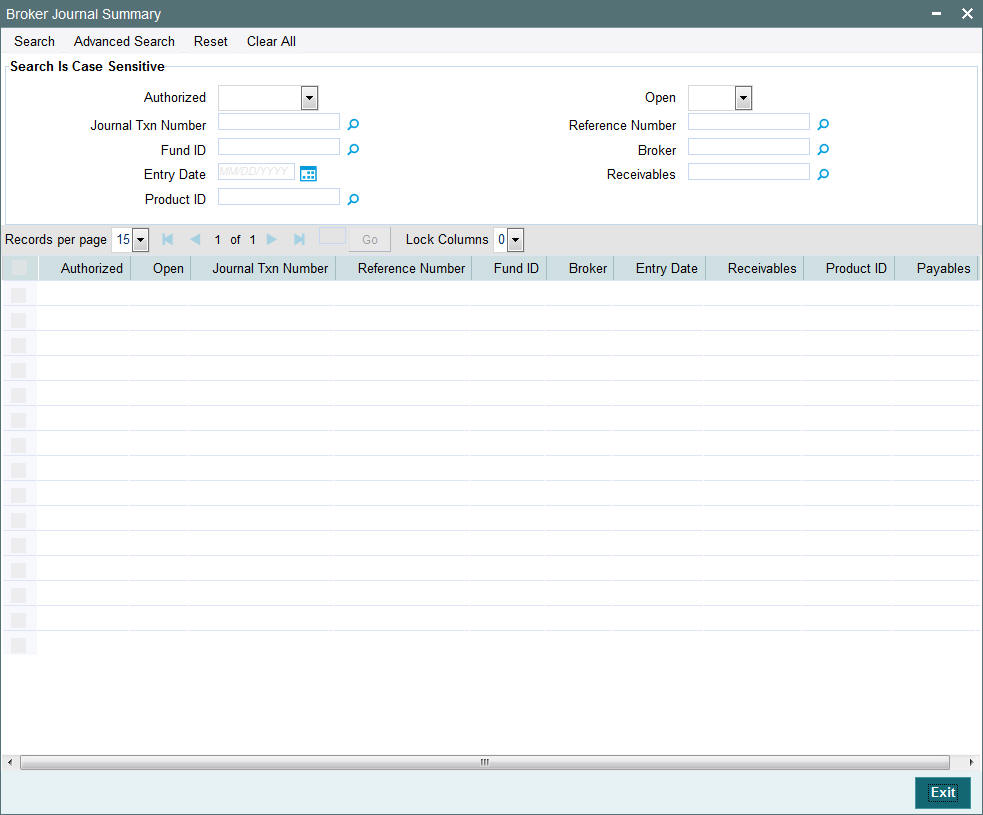
You can retrieve a previously entered record in the Broker Journal Summary screen, as follows:
- Specify any or all of the following details in the Broker Journal Summary screen:
- The status of the transaction in the Authorized field. If you choose the ‘Blank Space’ option, then all the records that involve the specified unit holder are retrieved.
- The status of the record in the Open field. If you choose the ‘Blank Space’ option, then all the records that involve the specified unit holder are retrieved.
- The Journal Txn Number
- The Reference Number
- The Fund ID
- The Broker
- The Entry Date
- The Receivables
- The Product ID
Click ‘Search’ button to view the records. All records with the specified details are retrieved and displayed in the lower portion of the screen.
You can also retrieve the individual record detail from the detail screen by doing query in the following manner:
- Press F7
- Input the Journal Txn Number
- Press F8
You can perform Edit, Delete, Amend, Authorize, Reverse, Confirm operation by selecting from the Action list.
You can also search the record by using combination of % and alphanumeric value.
Example
You can search the record for Journal Txn Number by using the combination of % and alphanumeric value as follows:
- Search by A%: System will fetch all the records whose Journal Txn Number starts from Alphabet ‘A’. For Example: AGC17, AGVO6, AGC74 and so forth.
- Search by %7: System will fetch all the records whose Journal Txn Number ends by numeric value’ 7’. For Example: AGC17, GSD267, AGC77 and so forth.
- Search by %17%: System will fetch all the records whose Journal Txn Number contains the numeric value 17. For Example: GSD217, GSD172, AGC17 and so forth.
5.11.2 Editing Journal Entry
You can modify the details of Broker Journal parameters that you have already entered into the system, provided it has not been subsequently authorized. You can perform this operation as follows:
- Invoke the Broker Journal Summary screen from the Browser.
- Select the status of the record that you want to retrieve for modification in the Authorized field. You can only modify records that are unauthorized. Accordingly, choose the Unauthorized option.
- Specify any or all of the details in the corresponding fields to retrieve the record that is to be modified. All unauthorized records with the specified details are retrieved and displayed in the lower portion of the screen.
- Double click the record that you want to modify in the list of displayed records. The Broker Journal Detail screen is displayed.
- Select Unlock Operation from Action list to modify the record. Modify the necessary information.
- Click Save to save your changes. The Broker Journal Detail screen is closed and the changes made are reflected in the Broker Journal Summary screen.
5.11.3 Viewing Journal Entry
To view a record that you have previously entered, you must retrieve the same in the Broker Journal Summary screen, as follows:
- Invoke the Broker Journal Summary Screen from the Browser.
- Select the status of the record that you want to retrieve for viewing in the Authorized field. You can also view all records that are either unauthorized or authorized only, by choosing the Unauthorized/ Authorized option.
- Specify any or all of the details of the record in the corresponding fields on the screen, and click ‘Search’ button. All records with the specified details are retrieved and displayed in the lower portion of the screen.
- Double click the record that you want to view in the list of displayed records. The Broker Journal Detail screen is displayed in View mode.
5.11.4 Deleting Journal Entry
You can delete only unauthorized records in the system. To delete a record that you have previously entered:
- Invoke the Broker Journal Summary screen from the Browser.
- Select the status of the record that you want to retrieve for deletion.
- Specify any or all of the details and click ‘Search’ button. All records with the specified details are retrieved and displayed in the lower portion of the screen.
- Double click the record that you want to delete. The Broker Journal Detail screen is displayed.
- Select Delete operation from the Action list. The system prompts you to confirm the deletion, and the record is deleted physically from the system database.
5.11.5 Authorizing Journal Entry
An unauthorized Broker Journal record must be authorized in the system for it to be processed. To authorize a record:
- Invoke the Broker Journal Summary screen from the Browser.
- Select the status of the record that you want to retrieve for authorization. Typically, choose the Unauthorized option.
- Specify any or all of the details of the record in the corresponding fields on the screen. Click ‘Search’ button. All record with the specified details that are pending authorization are retrieved and displayed in the lower portion of the screen.
- Double click the transaction that you wish to authorize. The Broker Journal Detail screen is displayed. Select Authorize operation from Action.
When the checker authorizes a record, details of validations, if any, that were overridden by the maker of the record during the Save operation, are displayed. If any of these overrides results in an error, the checker must reject the transaction.
When a journal entry for a broker is authorized, the process for any adjustments specified in the entry to the next payment cycle or transaction for the broker is begun in the database. Subsequently, you cannot change a journal entry that has been authorized, in any way. The amendment operation is not available on authorized journal entries for brokers.
5.12 Income Distribution Setup Screen
This section contains the following topics:
- Section 5.12.1, "Setting Up Income Distribution Options for Brokers"
- Section 5.12.2, "Invoking Income Distribution Setup Screen"
- Section 5.12.3, "Payment Details Tab"
- Section 5.12.4, "Reinvestment Details Tab"
- Section 5.12.5, "Routing Details Tab"
5.12.1 Setting Up Income Distribution Options for Brokers
An intermediary (such as a broker) derives commission earnings from the transactions in the funds of the AMC.
Brokers could wish to choose the manner in which they could use their commission earnings. They could:
- Receive the entire earnings, dividend or commission, as payment, either entirely through checks or account transfer, or a combination of both.
- Not receive the earnings by way of payment, but invest the earnings back into the funds of the AMC. This is known as reinvestment. Also, the reinvestment could be made into a designated unit holder account too.
- Receive a portion of the earnings by way of payment, and reinvest the remaining portion.
The pattern chosen by the broker to use commission earnings is known as the Income Distribution Setup pattern or the IDS pattern for the broker.
You can capture this pattern for any broker in the Oracle FLEXCUBE Investor Servicing system.
5.12.2 Invoking Income Distribution Setup Screen
Use the Income Distribution Setup Detail screen to set up the income distribution pattern for a broker. You can invoke this screen by typing ‘UTDUHIDS’ in the field at the top right corner of the Application tool bar and clicking on the adjoining arrow button.
In this screen, you set up the IDS pattern by:
- Specifying the broker for whom the pattern is being setup, in the Broker Code field.
- Specifying the mode of distribution, in the Distribution Mode field.
- Specifying the percentages that represent the portions of dividend earnings to be paid and reinvested, as desired by the broker, in the Payment Percentage and Reinvestment Percentage fields.
- Specifying the payment details for the paid portion, in the Payment Details section, and the reinvestment details, for the reinvestment portion, in the Reinvestment Details section.
- Saving your changes.
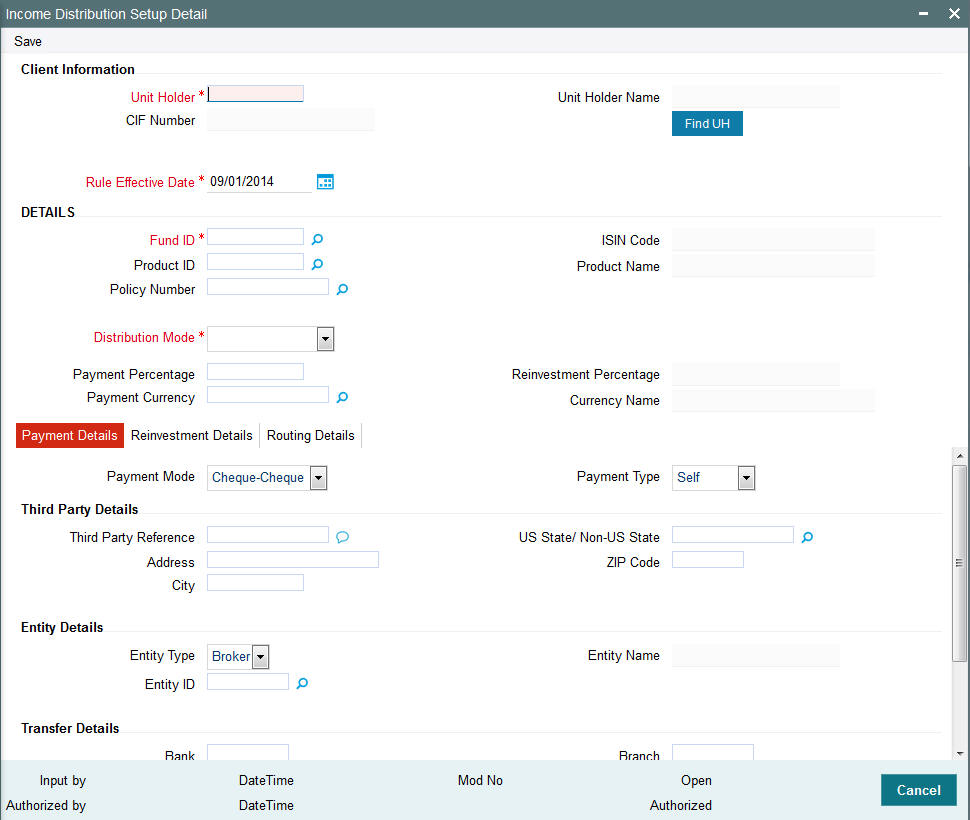
Select 'New' from the Actions menu in the Application tool bar or click new icon to enter the details of the ‘Income Distribution Setup’ screen.
Client Information Section
CIF Number
Display (for setting up IDS options for a unit holder under a CIF Account)
Select or specify the number of the CIF Account under which the unit holder for whom you are creating an income distribution setup is found.
When you specify the CIF Number, the name of the corresponding CIF Account is retrieved from the database and displayed alongside the field.
All the unit holder accounts under the CIF Account that you have selected are listed in the drop down list in the Unit Holders for CIF field.
CIF Name
Display
CIF Name is displayed when you select/ locate a Unit Holder.
Unit Holder
Mandatory
From the list, select the unit holder for whom you are creating an income distribution setup record.
Unitholder Name
Display
The system displays the name of the unit holder.
5.12.2.1 Details Section
In this section, you can indicate the manner in which the income earnings of the broker from all funds in the AMC must be distributed.
Fund ID
Alphanumeric, Mandatory
Select the fund ID from the option list.
ISIN Code
Alphanumeric, Optional
Enter the ISIN code.
Distribution Mode
Alphanumeric, Mandatory
From the list, indicate the manner in which the selected broker prefers to avail of income earned in the selected fund. This could be any of the following:
- Full Payment: Choose this option to indicate that the broker prefers to receive the entire income derived from an income distribution cycle in the selected fund as a payment.
Further, the broker can choose to avail of payment either in the form of a check, or an account transfer.
- Full Reinvestment: Choose this option to indicate that the broker prefers to reinvest the entire income derived from an income distribution cycle in the AMC back into the funds of the AMC.
Further, the broker can choose to have the income reinvested either in the broker’s own default unit holder account or the account of another unit holder. In the latter case, the unit holder in whose account the reinvestment is proposed (i.e., the Reinvestment Unit Holder) must belong to the same AMC as the source broker.
- Both: Choose this option to indicate that the broker prefers to have the income derived from an entire income distribution cycle in the selected fund divided into two portions, receive one portion as payment, and reinvest the remaining portion.
Note
- In some funds in which reinvestment is not allowed, according to the Corporate Actions profile for the fund and corporate action type, the broker cannot choose to have income earnings reinvested. In such cases, this field is locked with the “Full Payment” option displayed as a non-editable default option. Also, the Payment Percentage field is locked with a default, non-editable value of one hundred percent displayed, and the Reinvestment Percentage field is locked with a default, non-editable value of zero percent displayed.
- If you have chosen the distribution mode in this field as ‘Full
Reinvestment’ or ‘Both’, and the reinvestment fund
has a restriction on the nationality of the broker as maintained
in the Fund Residency Restriction list, then reinvestment is not allowed
at all.
Payment Currency
Select the payment currency from the option list.
Note
- The payment currency mentioned at the broker level in the FCIS Broker Maintenance screen and the payment account number mapped in broker IDS setup are overridden by the Broker payment preference currency maintained in the Broker Payment Currency Preference screen.
- During broker raise commission, default exchange rate source is applied
to convert from source currency to preferred currency.
Payment Percentage
Alphanumeric, Optional (Mandatory if distribution mode is either Both or Full Payment)
Specify the percentage of income earned that the broker prefers to receive by way of payment.
- If the distribution mode chosen is Both, specify a percentage that is below one hundred percent.
- If the distribution mode chosen is Full Payment, this field contains one hundred percent as a default value. If so, you cannot specify any other value.
- If the distribution mode chosen is Full Reinvestment, and the reinvestment is disallowed for the selected fund, this field contains one hundred percent as a default value. If so, you cannot change it.
Reinvestment Percentage
Alphanumeric, Optional (Mandatory if distribution mode is either Both or Full Reinvestment)
Specify the percentage of income earned that the broker prefers to reinvest back into the funds of the AMC.
- If the distribution mode chosen is Both, specify a percentage that is below one hundred percent.
- If the distribution mode chosen is Full Reinvestment, this field contains one hundred percent as a default value. If so, you cannot specify any other value.
- If the distribution mode chosen is Full Reinvestment, and the reinvestment is disallowed for the selected fund, this field contains zero as a default value. If so, you cannot change it.
5.12.3 Payment Details Tab
In this section, you can define the pattern in which the broker can receive income earnings in the form of payment. The broker can receive the payment income either in the form of checks or through account transfers.
If you have chosen either Both or Full Payment as the distribution mode, all the information in this section is mandatory.
Click ‘Payment Details’ tab to enter the details.
Payment Mode
Alphanumeric, Mandatory
From the list, select the mode in which the broker prefers to receive the paid portion of the income earned – either in the form of a check-check or transfer-transfer.
Payment Type
Alphanumeric, Mandatory
From the list, indicate whether the payment instrument must be addressed to the Self third party or Entity
Third Party Details Section
Third Party Reference
Alphanumeric, Mandatory for ‘Third Party’ payment
Specify the name or reference of the third party for which the check instrument must be made out.
Address
Alphanumeric, Mandatory for ‘Third Party’ payment
Specify the address of the third party for which the check instrument must be made out.
Zip Code
9 Characters Maximum, Alphanumeric, Mandatory for ‘Third Party’ payment
Specify the zip code of the city of residence of the third party for which the check instrument must be made out.
City
Alphanumeric, Mandatory for ‘Third Party’ payment
Select the city of residence of the third party for which the check instrument must be made out.
US State/ Non –US State
Alphanumeric, Mandatory for ‘Third Party’ payment
Select the state of residence of the third party for which the check instrument must be made out, if the state is a US state.
Transfer Details Section
Bank
Numeric, Mandatory for Third Party transfer payment
Select the name of the bank in which the transfer account is present, from the drop down list.
Branch
20 Character Maximum, Alphanumeric, Mandatory for Third Party transfer payment
Specify the branch name of the bank in which the transfer account is present.
A/c No
16 Character Maximum, Alphanumeric, Mandatory for Third Party transfer payment
Specify the number of the transfer account.
A/c Ccy
Alphanumeric, Mandatory for Third Party transfer payment
Specify the currency of the transfer account.
The currency specified here must be a valid fund bank account currency.
A/c Type
1 Character Maximum, Alphanumeric, Mandatory for Third Party transfer payment
Select the account type (Fixed, Savings or Current) of the transfer account.
A/c Holder Name
Alphanumeric, Mandatory for Third Party transfer payment
Specify the name of the holder of the third party account.
IBAN
36 Characters Only; Alphanumeric; Optional
Specify the IBAN (International Bank Account Number) of the account holder.
5.12.4 Reinvestment Details Tab
In this section, you can define the pattern in which the broker can reinvest income earnings back into the funds of the AMC. Click ‘Reinvestment Details’ tab to enter the details.
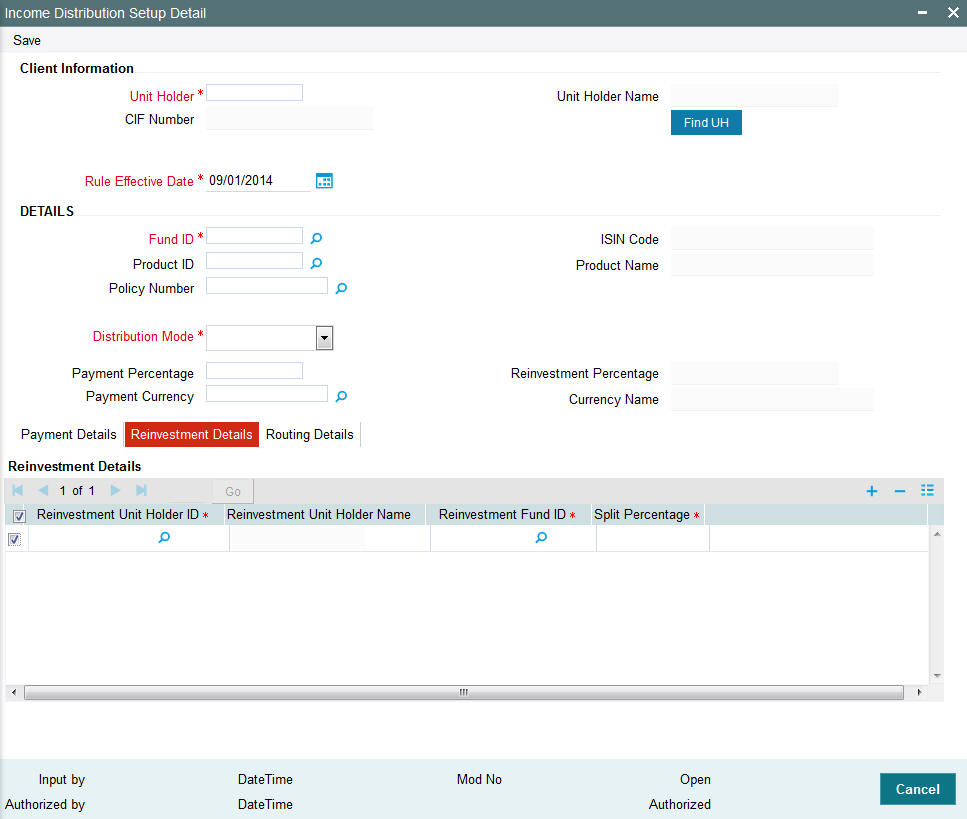
Reinvestment Unit Holder ID
12 Character Maximum, Alphanumeric, Optional
Specify the ID of the unit holder in whose account the income is to be reinvested.
Reinvestment Unitholder Name
When you select the ID of the reinvestment unit holder, the name of the unit holder is displayed in the Reinvestment Unit Holder Name field.
The broker’s default Unit Holder ID is displayed here. If necessary, you can change it.
Reinvestment Fund ID
6 Character Maximum, Alphanumeric, Optional
Select the ID of the fund in which the income is to be reinvested.
Split Percentage
Numeric, Optional
Specify the percentage of the derived income that is to be reinvested in the specified reinvestment unit holder's account, in the specified reinvestment fund. You can make any number of such entries, specifying a percentage for each combination. The sum total of all split percentages for all reinvestment unit holder – reinvestment fund ID combinations you have specified must be equal to one hundred percent.
The broker can reinvest earned income in any of the following ways:
- Reinvest either in the broker’s own default unit holder account, or another unit holder account. In the latter case, the unit holder in whose account the reinvestment is proposed (that is, the Reinvestment Unit Holder) must belong to the same AMC as the source broker.
- Reinvest the income back into any of the funds of the AMC.
- Reinvest the income in as many target fund/unit holder combinations, subject to the constraints expressed above. This is again subject to the consideration that the sum of the percentages of reinvestment in all these combinations must be equal to 100.
Note
Reinvestment is only allowed into or out of a fund if so designated in the Corporate Actions profile for the fund and corporate action type.
If you have chosen either Both or Full Reinvestment as the distribution mode, you must specify all information in this section mandatorily.
5.12.5 Routing Details Tab
FCIS provides the option to capture the bank routing details. At the time of transaction input, the routing details specified here are picked up for the combination of fund, transaction type and transaction currency. You can specify the routing details by clicking on 'Routing Details'.
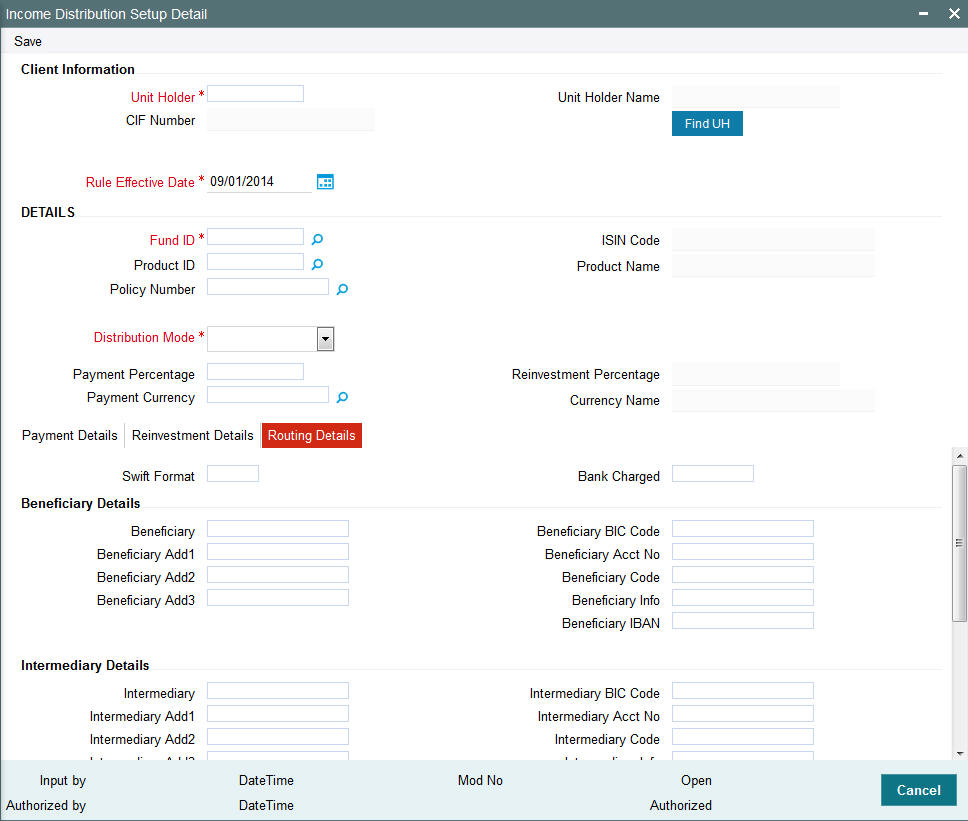
You need to maintain the following details:
Swift Format
Optional
At the time of transaction input, the routing details specified here are picked up for the combination of fund, transaction type and transaction currency.
Bank Charged
Optional
Indicate whether the bank charges must be levied upon the beneficiary, the remitter or must be shared between the two.
Beneficiary Details
Beneficiary
Specify the beneficiary name.
Beneficiary Add 1
Specify the beneficiary address. There are three lines available for the same.
Beneficiary BIC Code
Specify the BIC code of the beneficiary.
Beneficiary Acct No
Specify the account number of the beneficiary.
Beneficiary Code
Specify the code of the beneficiary.
Beneficiary Info
Enter more information about the beneficiary.
Intermediary Details
Intermediary
Specify the intermediary detail.
Intermediary Add 1
Specify the intermediary address. There are three lines available for the same
Intermediary BIC Code
Specify the BIC code of the Intermediary.
Intermediary Acct No
Specify the account number of the Intermediary.
Intermediary Code
Specify the code of the Intermediary.
Intermediary Info
Enter more information about the Intermediary.
Save all the details to proceed or click cancel button to cancel the operation.
5.13 Income Distribution Setup Summary Screen
This section contains the following topics:
- Section 5.13.1, "Retrieving Income Distribution Setup Options for Brokers "
- Section 5.13.2, "Editing Income Distribution Setup Options for Brokers"
- Section 5.13.3, "Viewing Income Distribution Setup Options for Brokers "
- Section 5.13.4, "Deleting Income Distribution Setup Options for Brokers"
- Section 5.13.5, "Authorizing Income Distribution Setup Options for Brokers"
- Section 5.13.6, "Amending Income Distribution Setup"
- Section 5.13.7, "Authorizing Amended Income Distribution Setup Details"
5.13.1 Retrieving Income Distribution Setup Options for Brokers
After you set up the IDS options for a broker in the Broker IDS Setup Detail screen, you can perform any of the following operations before the record is authorized:
- Edit the specified options in the setup. At this stage, you can alter any of the details.
- Delete the setup.
To perform either operation, use the ‘Income Distribution Setup Summary’ screen. You can access this screen by typing ‘UTSUHIDS’ in the field at the top right corner of the Application tool bar and clicking on the adjoining arrow button.
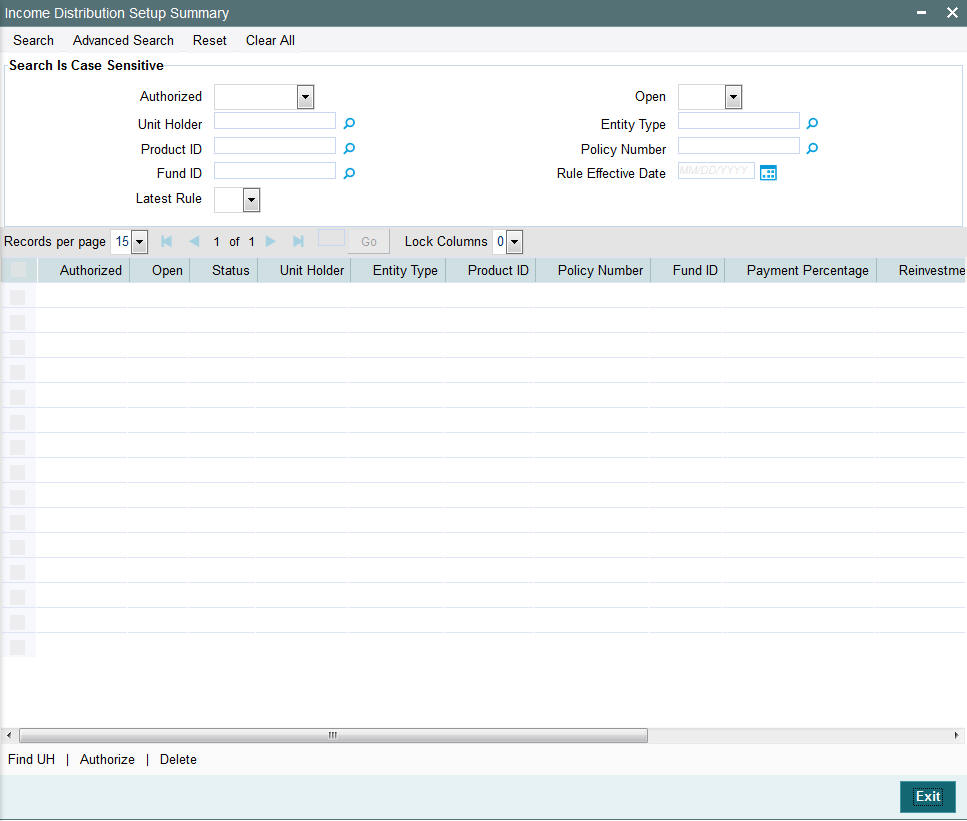
You can retrieve a previously entered record in the INCOME DISTRIBUTION SETUP Summary screen, as follows:
- Specify any or all of the following details in the Income Distribution Setup Summary screen:
- The status of the transaction in the Authorization Status field. If you choose the “Blank Space” option, then all the records that involve the specified unit holder are retrieved.
- The status of the records in the Transaction Status field. If you choose the “Blank Space” option, then all the records that involve the specified unit holder are retrieved.
- The Entity ID
- The Entity Type
- Product ID
- Policy Number
- The Fund ID
- The Payment Percentage
- The Reinvestment Percentage
- Rule Effective Date
Click ‘Search’ button to view the records. All records with the specified details are retrieved and displayed in the lower portion of the screen.
Note
You can also retrieve the individual record detail from the detail screen by doing query in the following manner:
- Press F7
- Input the Entity ID
- Press F8
You can perform Edit, Delete, Amend, Authorize, Reverse, Confirm operation by selecting from the Action list.
You can also search the record by using combination of % and alphanumeric value.
Example
You can search the record for Entity ID by using the combination of % and alphanumeric value as follows:
- Search by A%: System will fetch all the records whose Entity ID starts from Alphabet ‘A’. For Example: AGC17, AGVO6, AGC74 and so forth.
- Search by %7: System will fetch all the records whose Entity ID ends by numeric value’ 7’. For Example: AGC17, GSD267, AGC77 and so forth.
- Search by %17%: System will fetch all the records whose Entity ID contains the numeric value 17. For Example: GSD217, GSD172, AGC17 and so forth.
5.13.2 Editing Income Distribution Setup Options for Brokers
You can modify the details of Income Distribution Setup parameters that you have already entered into the system, provided it has not been subsequently authorized. You can perform this operation as follows:
- Invoke the Income Distribution Setup Summary screen from the Browser.
- Select the status of the record that you want to retrieve for modification in the Authorization Status field. You can only modify records that are unauthorized. Accordingly, choose the Unauthorized option.
- Specify any or all of the details in the corresponding fields to retrieve the record that is to be modified. All unauthorized records with the specified details are retrieved and displayed in the lower portion of the screen.
- Double click the record that you want to modify in the list of displayed records. The Income Distribution Setup Detail screen is displayed.
- Select Unlock Operation from Action list to modify the record. Modify the necessary information.
- Click Save to save your changes. The Income Distribution Setup Detail screen is closed and the changes made are reflected in the Income Distribution Setup Summary screen.
5.13.3 Viewing Income Distribution Setup Options for Brokers
To view a record that you have previously entered, you must retrieve the same in the Income Distribution Setup Summary screen, as follows:
- Invoke the Income Distribution Setup Summary Screen from the Browser.
- Select the status of the record that you want to retrieve for viewing in the Authorization Status field. You can also view all records that are either unauthorized or authorized only, by choosing the Unauthorized/ Authorized option.
- Specify any or all of the details of the record in the corresponding fields on the screen, and click ‘Search’ button. All records with the specified details are retrieved and displayed in the lower portion of the screen.
- Double click the record that you want to view in the list of displayed records. The Income Distribution Setup Detail screen is displayed in View mode.
5.13.4 Deleting Income Distribution Setup Options for Brokers
You can delete only unauthorized records in the system. To delete a record that you have previously entered:
- Invoke the Income Distribution Setup Summary screen from the Browser.
- Select the status of the record that you want to retrieve for deletion.
- Specify any or all of the details and click ‘Search’ button. All records with the specified details are retrieved and displayed in the lower portion of the screen.
- Double click the record that you want to delete. The Income Distribution Setup Detail screen is displayed.
- Select Delete operation from the Action list. The system prompts you to confirm the deletion, and the record is deleted physically from the system database.
5.13.5 Authorizing Income Distribution Setup Options for Brokers
An unauthorized Income Distribution Setup record must be authorized in the system for it to be processed. To authorize a record:
- Invoke the Income Distribution Setup Summary screen from the Browser.
- Select the status of the record that you want to retrieve for authorization. Typically, choose the Unauthorized option.
- Specify any or all of the details of the record in the corresponding fields on the screen. Click ‘Search’ button. All records with the specified details that are pending authorization are retrieved and displayed in the lower portion of the screen.
- Double click the transaction that you wish to authorize. The Income Distribution Setup Detail screen is displayed. Select Authorize operation from Action.
When the checker authorizes a transaction, details of validations, if any, that were overridden by the maker of the transaction during the Save operation, are displayed. If any of these overrides results in an error, the checker must reject the transaction.
5.13.6 Amending Income Distribution Setup
After an Income Distribution Setup record is authorized, it can be modified using the Unlock operation from Action list. To make changes to a record after authorization:
- Invoke the Income Distribution Setup Summary screen from the Browser.
- Select the status of the transaction that you wish to retrieve for amendment. You can only amend only authorized records.
- Specify any or all of the details of the Income Distribution Setup in the screen. All records with the specified details are retrieved and displayed in the lower portion of the screen.
- Double click the record that you want to amend. The Income Distribution Setup Detail screen is displayed in Amendment mode. Click the Unlock operation from the Action list to amend the record.
- Amend the necessary information. Click the Save button to save the changes.
While amending an income distribution setup record for a broker, you can alter the following details:
- The distribution mode
- Percentage of income as payment
- Payment mode
- Transfer details
- Reinvestment details
When you retrieve an IDS setup record for the purpose of amendment in this screen, it is displayed in the Broker IDS Setup Detail screen, in Amend mode. All the non-editable field values are displayed as labels, while the editable fields are enabled for data entry changes.
Note
When you make changes to any authorized record in the system database through the amendment operation, the record with the amended information is saved as an unauthorized record in the system. For your amendment changes to be effective, the amended record must be subsequently authorized. When it is authorized, it is saved in the system database as an authorized record with the amendment information, and is effective.
5.13.7 Authorizing Amended Income Distribution Setup Details
An amended Income Distribution Setup record must be authorized for the amendment to be made effective in the system. The authorization of amended records can only be done from Fund Manager Module and Agency branch Module.
The process of authorization is subsequently the same as that for normal transactions.
5.14 Raise Broker Commission Screen
This section contains the following topics:
5.14.1 Invoking Raise Broker Commission
You can raise broker commission using the ‘Raise Broker Commission’ screen. You can invoke this screen by typing ‘UTDBRAIS’ in the field at the top right corner of the Application tool bar and clicking on the adjoining arrow button.
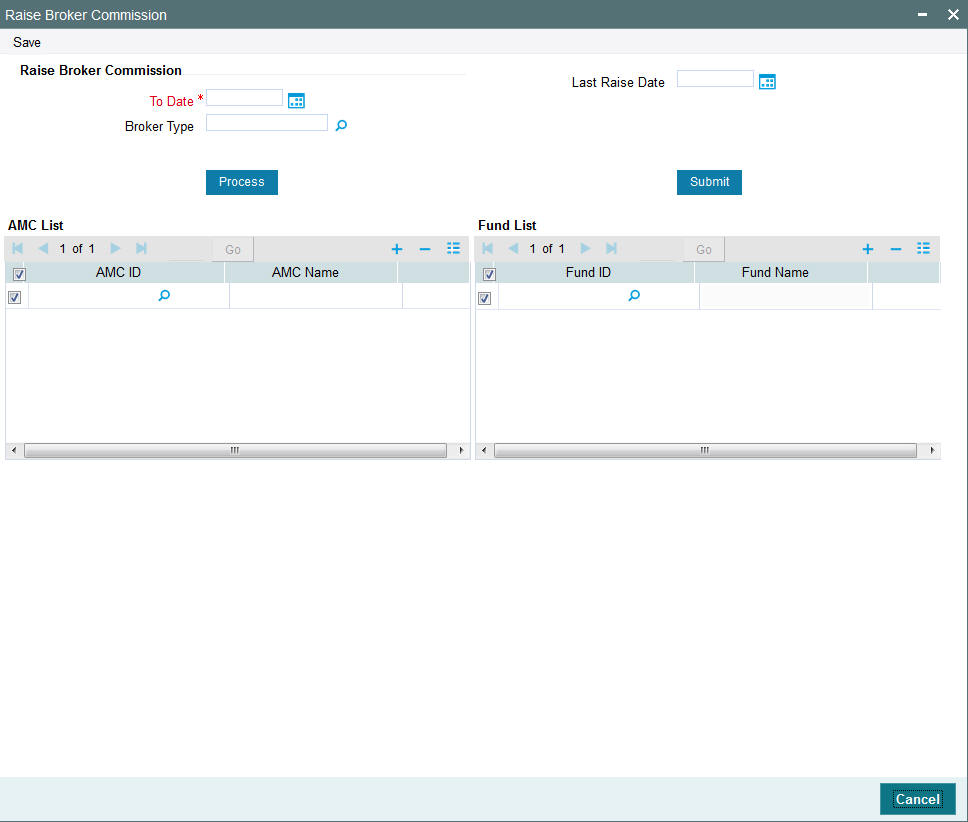
To Date
DD/MM/YYYY
Specify the date until which you wish to raise the broker commission. This field is mandatory.
If you raise broker commission on current application date, the system will consider all the transactions allotted till the previous day. ‘To date’ should be less than or equal to the previous working date.
Last Raise Date
Display
The system displays the last raise date when the raise was made.
Broker Type
Alphanumeric; 10 characters; Mandatory
Specify the broker type for which the commission should be raised.
AMC List Section
AMC ID
Alphanumeric; 10 characters; Optional
Specify the id of the AMC. The adjoining option list displays all valid AMC ids maintained in the system. You can select the appropriate one.
AMC Name
Alphanumeric; 10 characters; Optional
When you select the AMC id ,the AMC name automatically gets populated. However, you are allowed to edit the same.
Fund List Section
Fund ID
Alphanumeric; 10 characters; Optional
Specify the fund id. The adjoining option list displays all valid fund ids maintained in the system. You can select the appropriate one.
Fund Name
Alphanumeric; 10 characters; Optional
When you select the fund id ,the fund name automatically gets populated. However, you are allowed to edit the same.
The system logs the VAT amount details along with commission details.
The raising of commission is independent of the payment of commission, and the raise of commission and the payment of commission need not occur on the same day. The commission table shows the converted amount if the broker source currency is different from that of the preferred currency.
For raise broker commission, previous system date cannot be a holiday.
5.14.2 Calculating VAT Amount
The system computes the VAT amount for periodic load accrual using the following formula:
(Load Amount * VAT%)
The system computes the VAT for transaction load using the following formula:
(Load Amount * VAT%)
The VAT will be calculated only if the VAT registered date is less than the transaction date.
The criteria based load setup should be done to achieve the VAT calculation based on the VAT registered date. The criteria based load set up should be done as below:
LOAD ID |
LOAD DESCRIPTION |
CRITERIA |
203 |
Initial Broker Fee - Rands(Vat) |
WHERE TransactionDetails.TRANSACTIONMODE = 'A' AND TransactionDetails.BROKERCODE <> 'DIRECT' AND TransactionDetails.VATREGISTERED = '1' |
204 |
Initial Broker Fee - Rands(Non Vat) |
WHERE TransactionDetails.TRANSACTIONMODE = 'A' AND TransactionDetails.BROKERCODE <> 'DIRECT' AND TransactionDetails.VATREGISTERED = '0' |
205 |
Initial Broker Fee - Units(Vat) |
WHERE TransactionDetails.TRANSACTIONMODE = 'U' AND TransactionDetails.BROKERCODE <> 'DIRECT' AND TransactionDetails.VATREGISTERED = '1' |
206 |
Initial Broker Fee - Units(Non Vat) |
WHERE TransactionDetails.TRANSACTIONMODE = 'U' AND TransactionDetails.BROKERCODE <> 'DIRECT' AND TransactionDetails.VATREGISTERED = '0' |
5.15 Commission Payment Status Change Screen
This section contains the following topics:
- Section 5.15.1, "Invoking Commission Payment Status Change Screen"
- Section 5.15.2, "Search Results Tab"
- Section 5.15.3, "Exchange Rate Source Tab"
- Section 5.15.4, "Exchange Rate Maintenance Tab"
5.15.1 Invoking Commission Payment Status Change Screen
You can change the commission payment status using the ‘Commission Payment Status Change’ screen. This means that you can hold the commission payment for which the commission is raised. You can invoke this screen by typing ‘UTDCHPAY’ in the field at the top right corner of the Application tool bar and clicking on the adjoining arrow button.
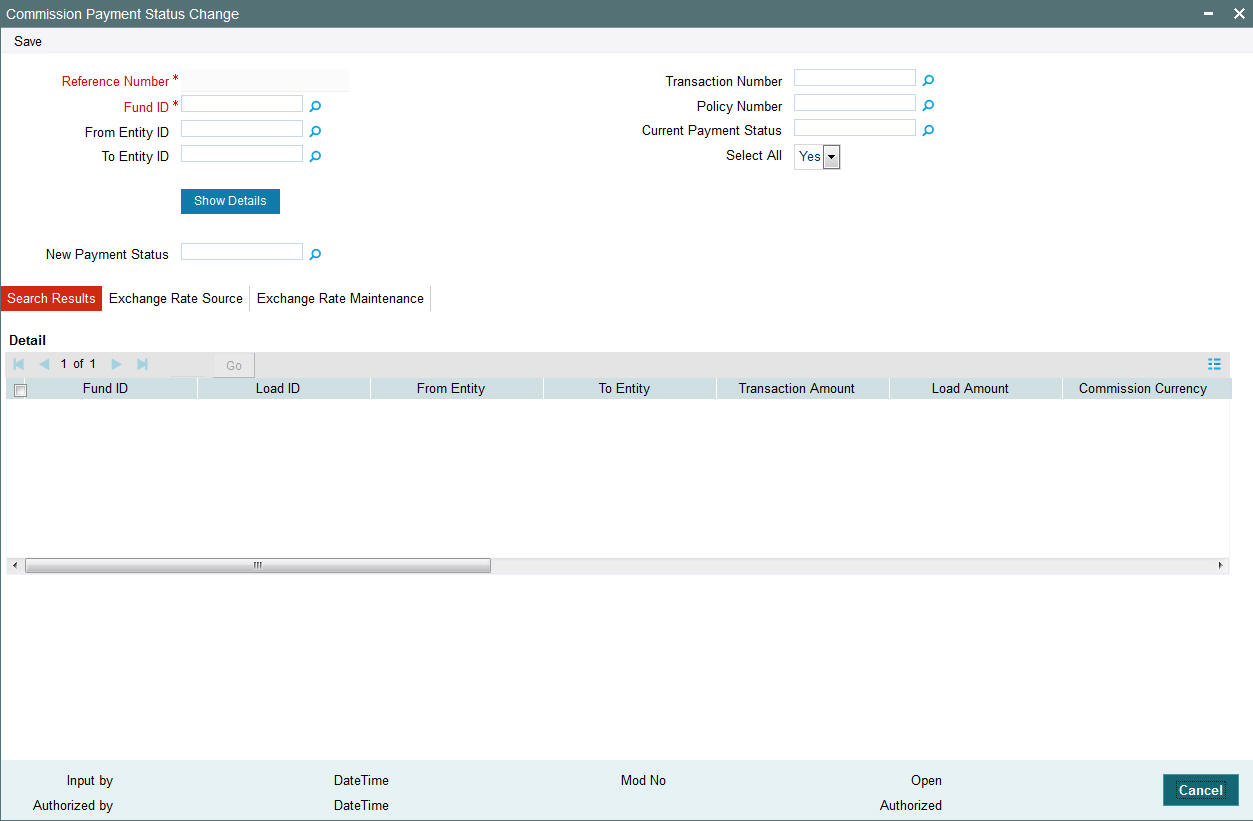
Fund ID
Alphanumeric; 12 characters; Mandatory
Specify the fund ID.
Transaction Number
The system displays the transaction number.
From Entity ID
Alphanumeric; 12 characters; Mandatory
Specify the entity from whom the commission is charged.
To Entity ID
Alphanumeric; 12 characters; Mandatory
Specifies the entity for whom the commission is charged. This field is mandatory.
Policy Number
Alphanumeric; 10 characters; Mandatory
Specify the policy number. The adjoining option list displays valid policy numbers maintained in the system. You can choose the appropriate one.
New Payment Status
Alphanumeric; Mandatory
Specify the new payment status for the commission record. This determines the eligibility for the payment of commission.
All commission records that have a Payment Status = ‘P’ will be eligible for Commission Payment. ‘P’ means payable.
All commission records that have a Payment Status = ‘S’ will not be eligible for the next commission payment run. After the next commission payment processing, system will update the commission records with Payment Status as ‘S’ to ‘P’ (Payable) status. ‘S’ means Single Payment Hold Back.
All commission records that have a Payment Status = ‘I’ will not be eligible for a commission payment run. ‘I’ means indefinite hold back.
System will not automatically update the commission records with payment status as ‘I’ to ‘P’. This should be done manually.
Current Payment Status
Alphanumeric; Optional
Select the current payment status from the adjoining option list.
Click on ‘Show Details’ button to show all the records with the specified values.
You can select a record and change the Exchange Rate Source or Exchange Rate or New payment status and click on ‘Process’ button to update the commission record with new payment status, new exchange rate source applied, new exchange rate applied.
5.15.2 Search Results Tab
Click ‘Search Results’ tab to view the records for which broker commission is raised. However, you can override the details in this section.
You can view the following fields:
- Load ID
- From Entity
- To Entity
- Transaction Amount
- Load Amount
- Load Amount
- Load Amt in Fee Ccy
- Commission Amount in Pay CCY
- VAT Amount
- VAT Amount in Pay CCY
5.15.3 Exchange Rate Source Tab
Click ‘Exchange Rate Source’ tab to map the exchange rate source and currency details.
Specify the following details:
Commission Currency
Alphanumeric; 3 characters; Mandatory
Specify the currency in which the commission is paid.
Currency Name
Alphanumeric; 3 characters; Mandatory
Specify the name of the currency.
New Exchange Rate Source
Alphanumeric; 100 characters; Mandatory
Select the exchange rate source from which the exchange rates are to be derived for the transaction.
For example, If the default source currency is USD and you are required to convert commission from GBP to EUR, then the system first converts from GBP to USD and then from USD to EUR.
5.15.4 Exchange Rate Maintenance Tab
Click ‘Exchange Rate Maintenance’ tab to maintain the exchange rate.
Specify the following fields:
Source Currency
Alphanumeric; 3 characters; Mandatory
The system displays the source currency, however, you can specify the currency in which the commission is paid from the adjoining option list.
Payment Currency
Alphanumeric; 3 characters; Mandatory
Specify the currency in which the commission is paid.
Exchange Rate Source
Alphanumeric; 100 characters; Mandatory
Specify the exchange rate source from which the exchange rates are to be derived for the transaction.
New Exchange Rate
Alphanumeric; 100 characters; Mandatory
Specify the latest exchange rate maintained for an exchange rate source.
Note
Payment status change of a record is also reflected in the Payment Enrichment screen.
5.16 Broker Commission Payment Screen
This section contains the following topic:
5.16.1 Invoking Broker Commission Payment Screen
You can determine the date of commission payment for all commission transactions raised from a specific agency branch or across all agency branches using the ‘Broker Comm Payment’ screen. You can invoke this screen by typing ‘UTDBRCOP’ in the field at the top right corner of the Application tool bar and clicking on the adjoining arrow button.
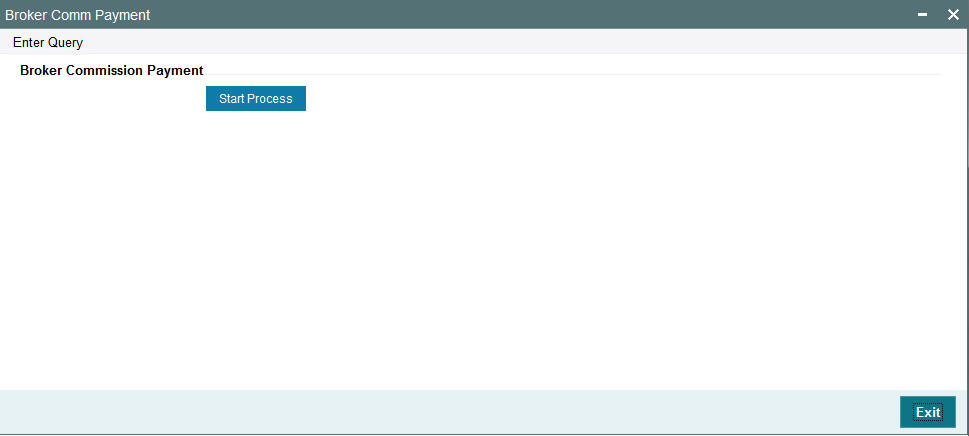
Click the ‘Start Process’ button to process the commission payment.
Note
If the amount in payment currency for the broker is greater than the minimum payment amount for Payment Currency, then all of those commission should be paid. You can make the payment at any time.
5.17 Minimum Commission Payment Amount Maintenance Screen
This section contains the following topic:
5.17.1 Invoking Minimum Commission Payment Amount Maintenance
In this section specify the details to maintain a minimum payment amount for each commission payment currency. You can invoke this screen by typing ‘UTDMINPY’ in the field at the top right corner of the Application tool bar and clicking on the adjoining arrow button. The FCIS Min Comm Payment Amt Maintenance Detail screen is displayed:
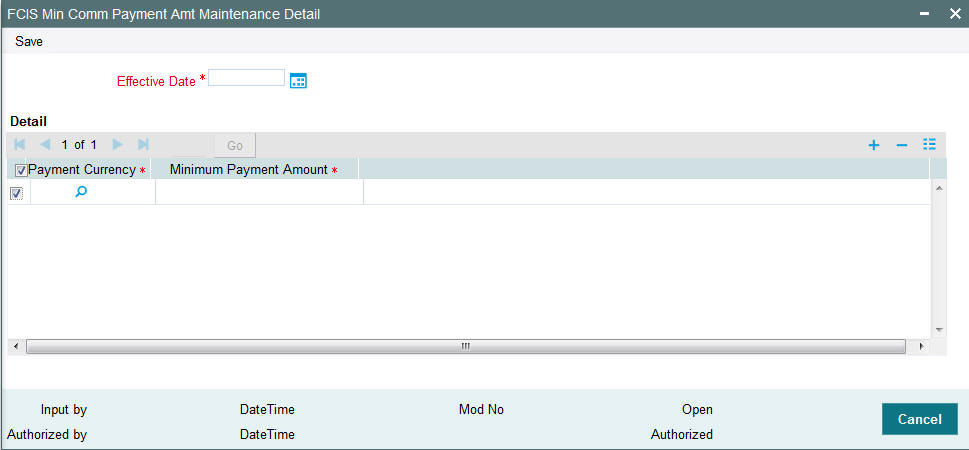
Effective Date
DD/MM/YYYY, Mandatory
Specify the date from which the commission payment should be effective in the system.
5.17.1.1 Details section
Payment currency
Alphanumeric; Mandatory
Select appropriate currency from the adjoining option list.
Minimum payment amount
Mandatory
Specify the minimum payment amount for each commission payment amount.
Note
You can maintain a new record, copy, unlock, delete, authorize and re-open a record in this screen.
Example
The system validates the minimum payment amount specified for each payment currencies during payment processing.
If minimum payment amount is not maintained then the system considers the minimum amount as zero.
Assume that in minimum commission Payment Amount Maintenance screen the payment currency and minimum payment amount is maintained as follows:
Currency |
Minimum Payment Amount |
ZAR |
150 |
USD |
100 |
GBP |
0 |
Then the system will make the broker commission payment as follows:
- If the Commission payment currency is ZAR, then system transfers the money to the broker if the commission amount is greater than or equal to 150 ZAR.
- If the Commission payment currency is USD, then system transfers the money to the broker if the commission amount is greater than or equal to 100 USD.
- If the Commission payment currency is GBP, then system transfers the money to the broker if the commission amount is greater than zero.
- If the minimum payment amount is not maintained for any of the currency then system will pay the broker if the commission amount is greater than zero.
System uses the default exchange rate for conversion.
5.18 Minimum Commission Payment Amount Maintenance Summary Screen
This section contains the following topics:
- Section 5.18.1, "Retrieving Minimum Commission Payment Amount Maintenance Summary"
- Section 5.18.2, "Editing Minimum Commission Payment Amount"
- Section 5.18.3, "Viewing Minimum Commission Payment Amount "
- Section 5.18.4, "Deleting Minimum Commission Payment Amount "
- Section 5.18.5, "Authorizing Minimum Commission Payment Amount "
- Section 5.18.6, "Amending Minimum Commission Payment Amount "
- Section 5.18.7, "Authorizing Amended Minimum Commission Payment Amount "
5.18.1 Retrieving Minimum Commission Payment Amount Maintenance Summary
You can invoke the FCIS Broker Currency Preference Summary screen by typing ‘UTSMINPY’ in the field at the top right corner of the Application tool bar and clicking on the adjoining arrow button.
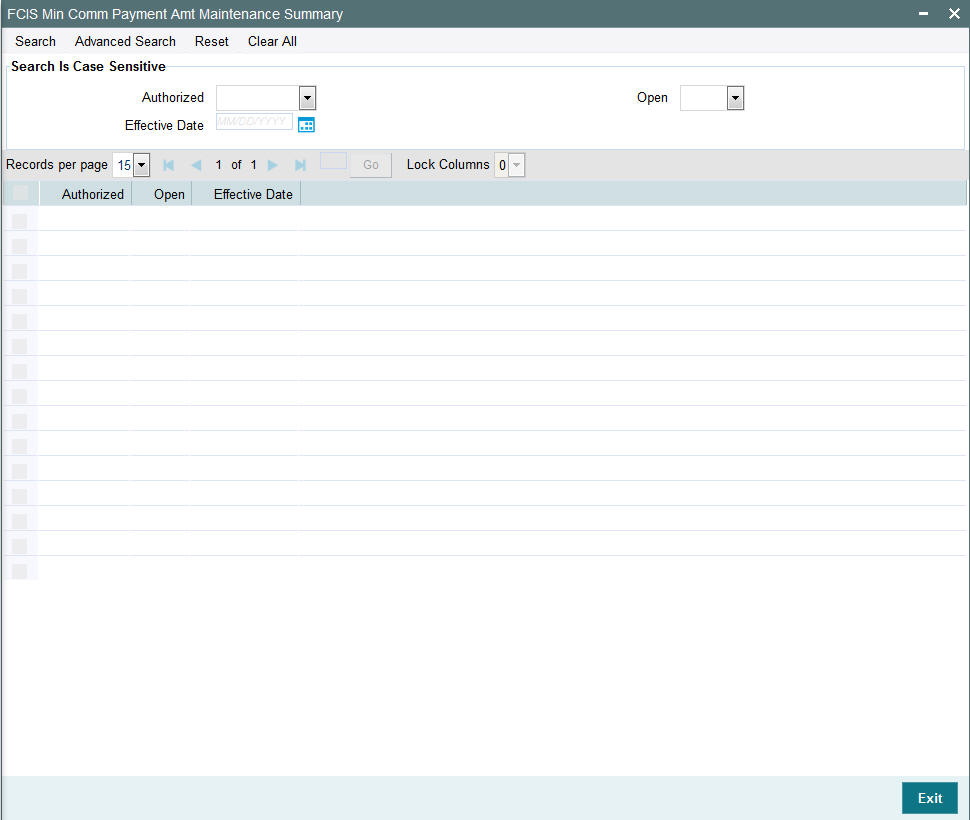
You can retrieve a previously entered record in the Minimum Commission Payment Amount Maintenance Summary screen, as follows:
- Specify any or all of the following details in the Minimum Commission Payment Amount Maintenance Summary screen:
- The status of the transaction in the Authorization Status.
- The status of the record in the Open field. If you choose the ‘Blank Space’ option, then all the records that involve the specified Minimum Commission Payment Amount are retrieved.
- Effective Date
Click ‘Search’ button to view the records. All records with the specified details are retrieved and displayed in the lower portion of the screen.
Note
You can also retrieve the individual record detail from the detail screen by doing query in the following manner:
- Press F7
- Input the Record Status
- Press F8
You can perform Edit, Delete, Amend, Authorize, Reverse, Confirm operation by selecting from the Action list.
You can also search the record by using combination of % and alphanumeric value.
5.18.2 Editing Minimum Commission Payment Amount
You can modify the details of Minimum Commission Payment Amount Maintenance parameters that you have already entered into the system, provided it has not been subsequently authorized. You can perform this operation as follows:
- Invoke the Minimum Commission Payment Amount Maintenance Summary screen from the Browser.
- Select the status of the record that you want to retrieve for modification in the Authorization Status field. You can only modify records that are unauthorized. Accordingly, choose the Unauthorized option.
- Specify any or all of the details in the corresponding fields to retrieve the record that is to be modified. All unauthorized records with the specified details are retrieved and displayed in the lower portion of the screen.
- Double click the record that you want to modify in the list of displayed records. The Minimum Commission Payment Amount Maintenance screen is displayed.
- Select Unlock Operation from Action list to modify the record. Modify the necessary information.
- Click Save to save your changes. The Minimum Commission Payment Amount Maintenance screen is closed and the changes made are reflected in the Minimum Commission Payment Amount Maintenance Summary screen.
5.18.3 Viewing Minimum Commission Payment Amount
To view a record that you have previously entered, you must retrieve the same in the Broker Currency Preference Summary screen, as follows:
- Invoke the Minimum Commission Payment Amount Maintenance Summary Screen from the Browser.
- Select the status of the record that you want to retrieve for viewing in the Authorization Status field. You can also view all records that are either unauthorized or authorized only, by choosing the Unauthorized/ Authorized option.
- Specify any or all of the details of the record in the corresponding fields on the screen, and click ‘Search’ button. All records with the specified details are retrieved and displayed in the lower portion of the screen.
- Double click the record that you want to view in the list of displayed records. The Minimum Commission Payment Amount Maintenance screen is displayed in View mode.
5.18.4 Deleting Minimum Commission Payment Amount
You can delete only unauthorized records in the system. To delete a record that you have previously entered:
- Invoke the Minimum Commission Payment Amount Maintenance Summary screen from the Browser.
- Select the status of the record that you want to retrieve for deletion.
- Specify any or all of the details and click ‘Search’ button. All records with the specified details are retrieved and displayed in the lower portion of the screen.
- Double click the record that you want to delete. The Minimum Commission Payment Amount Maintenance screen is displayed.
- Select Delete operation from the Action list. The system prompts you to confirm the deletion, and the record is deleted physically from the system database.
5.18.5 Authorizing Minimum Commission Payment Amount
An unauthorized Minimum Commission Payment Amount Maintenance record must be authorized in the system for it to be processed. To authorize a record:
- Invoke the Minimum Commission Payment Amount Maintenance Summary screen from the Browser.
- Select the status of the record that you want to retrieve for authorization. Typically, choose the unauthorized option.
- Specify any or all of the details of the record in the corresponding fields on the screen. Click ‘Search’ button. All record with the specified details that are pending authorization are retrieved and displayed in the lower portion of the screen.
- Double click the transaction that you wish to authorize. The Minimum Commission Payment Amount Maintenance screen is displayed. Select Authorize operation from Action.
When the checker authorizes a record, details of validations, if any, that were overridden by the maker of the record during the Save operation, are displayed. If any of these overrides results in an error, the checker must reject the transaction.
5.18.6 Amending Minimum Commission Payment Amount
After a Minimum Commission Payment Amount Maintenance record is authorized, it can be modified using the Unlock operation from Action list. To make changes to a record after authorization:
- Invoke Minimum Commission Payment Amount Maintenance Summary screen from the Browser.
- Select the status of the record that you wish to retrieve for amendment. You can only amend only authorized records.
- Specify any or all of the details of the Minimum Commission Payment Amount Maintenance in the screen. All records with the specified details are retrieved and displayed in the lower portion of the screen.
- Double click the record that you want to amend. The Minimum Commission Payment Amount Maintenance screen is displayed in Amendment mode. Click the Unlock operation from the Action list to amend the record.
- Amend the necessary information. Click the Save button to save the changes.
5.18.7 Authorizing Amended Minimum Commission Payment Amount
An amended Minimum Commission Payment Amount Maintenance record must be authorized for the amendment to be made effective in the system. The authorization of amended records can only be done from Fund Manager Module and Agency branch Module. The process of authorization is subsequently the same as that for normal transactions.