2. Overview
Oracle FLEXCUBE Investor Servicing (FCIS) is flexible, comprehensive automation software for mutual fund investor services. It provides both online and offline automation for a network for the purpose of distributing open-ended as well as close-ended funds.
With FC-IS, you can set up highly parameterized funds, create and service investor accounts, organize the declaration and disbursement of dividends and automate your bookkeeping.
This chapter contains the following sections:
- Section 2.1, "Password Change"
- Section 2.2, "Record Maintenance Operations"
- Section 2.3, "Structure"
- Section 2.4, "Fund Manager"
- Section 2.5, "Agency Branch"
2.1 Password Change
To change the Password, after logging into the system, click on the change password button which is on the Toolbar at the top of the screen. The Change Password screen will be displayed. You must key in your new desired password in the New Password field, and confirm the same by re-keying it in the Confirm New Password field. This new password entered will be verified, encrypted and stored.
For security reasons, you should change your password at regular intervals. At the end of this interval, the Change Password screen will appear automatically as soon as you login.
If you exceed the number of specified invalid logon attempts, your user profile is disabled, and must be created again.
2.2 Record Maintenance Operations
This section contains the following topics:
2.2.1 Invoking the Record Maintenance Operation Screen
There are generally two types of screens in the agency branch system. Each business function is therefore operable in either or both of the following screens:
The Detail screen
To perform any of the following operations use the Detail option:
- Enter the New Record
- Query the existing record
- Delete the existing Record
- Unlock the existing Record
- Copy the existing Record
The Summary screen
To perform any of the following operations on a previously entered business function record, use the Summary option:
- View Authorized and Unauthorized Records
- Advance query
- Reset
- Refresh
Once you specify the search criteria for retrieving the records, the system will display the appropriate records. If there are more than 15 records, you can specify the number of records that has to be listed in the screen. You can also navigate between the pages using the arrow buttons or specify the Page Number.
Note
As a user, you can perform any of the operations in a Summary screen, provided the operation has been allowed for your user profile (or role profile).
A user can perform any of the following operations for the purpose of record maintenance, in any screen, provided the operation has been allowed for the user profile.
2.2.1.1 Entering New Records
The Detail screens in the system are opened in the Disable mode. You can enable all the fields to enter the values in the fields. To enable the fields, click ‘New’.
To enter a new record in a Detail screen, follow the steps given below:
- Click ‘New’ Specify the record details as desired, in the fields on the screen.
- Click the Save button provided.
- You must specify all mandatory details before you click the Save button. If you do not, the system prompts you to specify the same when you choose the Save button.
- When the Save operation is successfully completed, a message “Record Saved”, along with any ID generated for the record is displayed.
2.2.1.2 Editing Records
If you specify incorrect or incomplete information while creating a new record, an edit facility is provided to correct these situations. You can edit/amend to make changes before authorization is performed. To edit/amend a record, click ‘Unlock’.
To edit a record in the Detail screens, follow the steps given below:
- Retrieve the maintenance record that you want to edit by querying the record, by pressing F7 and F8.
- Click ‘Unlock’, then all the fields will be enabled for editing.
- Click the Save button in the Detail screen to save your changes. The Detail screen is then closed and the changed details are displayed in the Summary screen, in the lower grid list portion of the screen.
- Even when you are editing, you must specify all mandatory details before you choose the Save button in the Detail screen. If you do not, the system prompts you to specify the same when you choose the Save option.
- When the Save operation is successfully completed, a message “Record Saved” is displayed.
The system will not allow more than one user to edit/ delete a Record simultaneously.
2.2.1.3 Viewing Records
You can select records for viewing in any Summary screen, in any of the modes.
To view a record in any of the Summary screens, follow the steps given below:
- In the Authorization Status field, choose the status of the record which is to be viewed.
- Retrieve the maintenance record that you want to view from the database by specifying search parameters in the Summary screen. The search parameters for each business function are different.
- When the record or record list is displayed in the lower grid portion of the screen, double click on the record. The record is displayed in view mode in the Detail screen for the function, and you can view the details. You will not be able to change any information displayed on the Summary or Detail screen in the View mode.
2.2.1.4 Deleting Records
Only unauthorized records can be deleted from the system. When you delete a record, it is physically deleted from the database and you cannot retrieve such a record again under any circumstances.
To delete a record from the Summary screen, follow the steps given below:
You can delete only unauthorized records in the system. To delete a record that you have previously entered:
- Invoke the Summary screen from the Browser.
- Select the status of the record that you want to retrieve for deletion.
- Specify any or all of the details and click ‘Search’ button. All records with the specified details are retrieved and displayed in the lower portion of the screen.
- Double click the record that you want to delete. The Detail screen is displayed.
- Select Delete operation from the Action list. The system prompts you to confirm the deletion, and the record is deleted physically from the system database.
To delete a record from the Detail screen, follow the steps given below
Click ‘Search’ button to view the records from the Detail screen. All records with the specified details are retrieved and displayed in the lower portion of the screen.
- Press F7
- Input the Identification Number.
- Press F8
You can perform Delete operation by selecting from the Action list.
The system will not allow more than one user to edit or delete a record simultaneously.
2.2.1.5 Saving Records
When you save a record in any Detail screen, the details that you have specified (or changed) in the record are accepted and written into the database in the system. In the case of records such as fund rule records, unit holder account records, transaction request entry records and Load details records, the information you have specified is accepted as unauthorized information if it is entered for the first time (or if you have edited the record, i.e., you have made changes using the Edit option). This information must subsequently be authorized to make it effective in the system.
To save a record in any Detail screen, follow the steps given below
- Specify all the details necessary to save a record in the fields on the screen. In particular, specify all the mandatory details.
- Click ‘Ok’ button to save your specifications, or changes made to a record. If you specify incomplete information and omit mandatory details, the system prompts you to specify the same when you click the Save button, and the record will not be saved until you specify these details.
- If the record is invalid for any other reason, the system will display an error message.
- When the Save operation is successfully completed, a message “Record Saved”, along with any ID generated for the record is displayed.
The system does not allow more than one user to Save a record simultaneously.
2.2.1.6 Finding Records
In any of the Summary screens, you can retrieve any record to perform any operation as follows:
- Invoke the Summary screen from the Browser, and specify the details in the corresponding fields.
- Click ‘Search’ button to view the records. All records with the specified details are retrieved and displayed in the lower portion of the screen.
Note
You can also retrieve the individual transaction detail from the detail screen by doing query in the following manner:
- Press F7.
- Input the Identification Number.
- Press F8.
You can perform Edit, Delete, Amend, Authorize, Reverse, Confirm operation by selecting from the Action list.
You can also search the record by using combination of % and alphanumeric value.
For example
You can search the record for Identification Number by using the combination of % and alphanumeric value as follows:-
- Search by A%: System will fetch all the records whose Identification Number starts from Alphabet ‘A’. For Example: AGC17, AGVO6, AGC74 and so forth.
- Search by %7: System will fetch all the records whose Identification Number ends by numeric value’ 7’. For Example: AGC17, GSD267, AGC77 and so forth.
- Search by %17%:- System will fetch all the records whose Identification Number contains the numeric value 17. For Example: GSD217, GSD172, AGC17 and so forth.
If there are more than 15 records, you can specify the number of records that has to be listed in the screen. You can also navigate between the pages using arrow buttons or specify the Page Number.
2.2.1.7 Closing Active Screen
When you close the active screen, the system prompts you that any information that you have specified in the active Detail screen will be lost if you close the screen.
To close the active screen, click the Close button found at the right top portion of the screen. The system will close the active screen.
2.2.1.8 Getting Help
To get help on the active screen, click the Help button found at the right top portion of the screen. The system will display help on the active screen.
2.2.1.9 Amending Authorized Records
When you authorize a record, it becomes effective in the system. If, after authorization, you need to change the details in a record, you can amend it. The Amend operation is available only on authorized records. You can access the amend operation through the Summary screen of the desired business function menu item.
It is important to remember that before a record is authorized, you can make any changes to it by editing it. After authorization, you cannot edit the record, but you can make any further changes to it by amending it.
When you amend a record and save the changes you have made, it is saved as an unauthorized record. You must subsequently authorize the record to make it effective.
To amend an authorized record in the Summary screen,
After a record is authorized, it can be modified using the Unlock operation from Action list. To make changes to a transaction after authorization:
- Invoke the Summary screen from the Browser.
- Select the status of the transaction that you wish to retrieve for amendment. You can only amend only authorized records.
- Specify any or all of the details of the Detail screen. All records with the specified details are retrieved and displayed in the lower portion of the screen.
- Double click the record that you want to amend. The Detail screen is displayed in Amendment mode. Click the Unlock operation from the Action list to amend the record.
- Amend the necessary information. Click the Save button to save the changes.
2.2.1.10 Viewing Record
To view a record that you have previously entered, you must retrieve the same in the Summary screen, as follows:
- Invoke the Summary Screen from the Browser.
- Select the status of the transaction that you want to retrieve for viewing in the Authorization Status field. You can also view all records that are either unauthorized or authorized only, by choosing the Unauthorized / Authorized option.
- Specify any or all of the details of the transaction in the corresponding fields on the screen, and click ‘Search’ button. All records with the specified details are retrieved and displayed in the lower portion of the screen.
- Double click the record that you want to view in the list of displayed records. The Detail screen is displayed in View mode.
2.2.1.11 Authorizing Records
Any business maintenance or processing information that is entered into the system must be authorized for it to be effective in the system database. A user other than the one who entered it must perform the authorization.
An unauthorized record must be authorized in the system for it to be processed. To authorize a record:
- Invoke the Summary screen from the Browser.
- Select the status of the record that you want to retrieve for authorization. Typically, choose the unauthorized option.
- Specify any or all of the details of the record in the corresponding fields on the screen. Click ‘Search’ button. All transactions with the specified details that are pending authorization are retrieved and displayed in the lower portion of the screen.
- Double click the transaction that you wish to authorize. The Detail screen is displayed. Select Authorize operation from Action.
Assigning a record for editing
If a record requires to be edited, and the user that entered the record (the maker) is not available, a user with authorization rights can assign the record to another user who can make the necessary edits.
You can assign a transaction through Delegation screen. Select the Delegate operation and select the user to whom the record is being assigned.
Assigning of records in this manner is audit trailed.
2.3 Structure
Oracle FLEXCUBE Investor Servicing consists of inter-dependent components:
- Fund Manager
- Agency Branch
The Fund Manager component automates all the fund-related administrative functions within the AMC.
The Agency Branch component facilitates the maintenance of investor accounts, and processing of investor transactions.
2.4 Fund Manager
This section contains the following topics:
- Section 2.4.1, "Maintaining Reference Information"
- Section 2.4.2, "Maintaining Funds and Products"
- Section 2.4.3, "Authorization Functions in Fund Manager"
- Section 2.4.4, "Interfaces to External Systems"
- Section 2.4.5, "Scheduler Services"
- Section 2.4.6, "Security and Control"
- Section 2.4.7, "Reports"
- Section 2.4.8, "End of Day Processes"
- Section 2.4.9, "Other Functions"
- Section 2.4.10, "Conventions to be Followed in Screens"
- Section 2.4.11, "Before You Login"
- Section 2.4.12, "Logging in to Fund Manager"
- Section 2.4.13, "Fund Manager –Menu"
2.4.1 Maintaining Reference Information
The Fund Manager is the entity that handles all administrative functions within the AMC. This involves the following operations and activities:
- The set up and maintenance of reference and static data concerning all entities, currencies, exchange rate sources and exchange rates.
- The set up and maintenance of all funds floated by the AMC
- Authorization of all data related to static information, unit holder accounts, information change requests, amended transactions, closure of accounts and bulk clients information
The Fund Manager component, therefore, acts as an administrative core that seamlessly integrates with the rest of the system in an offline hand-off mode or an online mode.
In Fund Manager, you maintain basic reference information that would be used for processing in the system. This includes:
- Entities that the AMC would transact with, such as agents, agency branches, banks, bank branches, registrars, trustees, bulk clients, check vendors, underwriters and custodians. You can also maintain different AMC’s as entities.
- The different values for static system parameters, such as countries, identification, corporation and occupation types, account types, investor categories, fee categories, and so on.
- Currency information, such as the different currencies, exchange rate sources and pair currencies. On a daily basis, you can also capture the prevalent exchange rates.
- Tax processing information that would be applicable to investor categories, country tax laws, cash dividends, brokers and funds floated by the AMC.
- The different fees, incentives or loads that would apply to transactions of investors in the funds of the AMC. This includes fees such as contingent deferred sales charge (CDSC), trailing commissions and ongoing management fees.
- The holiday calendar for the AMC
2.4.2 Maintaining Funds and Products
In Fund Manager, you can maintain the different funds that your AMC would offer to investors for investment. If your AMC offers investment in umbrella funds, or fund families you can maintain these in the system. You can also maintain the different products for retirement plans, or endowment policies, and so on.
Fund Hierarchies
Your AMC could offer investors opportunities to invest not just in a single fund, but into umbrella funds, or fund families. You can maintain these hierarchies in the system.
Fund Rules
For each individual fund, you can maintain exhaustive guidelines for processing investment. These guidelines are organized into different sets of rules, which you can maintain for each fund. The rules will apply cumulatively, on all investment into the fund, and they are called the fund rules, as given below:
- Fund Demographics (the basic profile of the fund including the name and effective date)
- Corporate Actions (rules governing the processing of dividends and distribution of earnings derived by investors from investment into the fund)
- General Operating Rules (guidelines for pricing policies, automatic redemption, check writing, and so on)
- Shares Characteristics (guidelines for scrip-based and scrip-less funds, for certificate processing)
- Transaction Processing Rules (the processing limits for each transaction type, allocation rules, limits for investor categories, standing instructions and transaction requests coming through each communication mode)
- Fund Load Setup (associating the fees, charges or incentives to be applicable to investment transactions in each fund)
- Fund Formula Maintenance (maintaining expressions for calculation of NAV or transaction base price, for each transaction type)
- Fund Sale Country (identifying the countries of domicile in which the AMC can offer the fund for sale)
- Fund Transaction Currencies (identifying the currencies in which the AMC can accept investment into the fund)
- Fund Residency Restriction (identifying the nationalities of investors that can invest in the fund)
- Specific Price Dates for funds (identifying specific dates on which prevalent prices can be used for ascertaining the value of investment in the fund)
- Amount Limits for IRA Transactions (identifying the limits for investment into funds that are part of the portfolio of a retirement product)
- SI Specific Information (maintaining rules for standing instruction generation for a fund)
- Fund Delivery Instruction
- Fund Investment Account (associating the fund investment account types allowed with a fund)
- KYC Maintenance (maintaining the list of KYC documents specific to the fund)
- Additional Information (maintaining additional information under the information heads specific to an AMC)
If you do not maintain fund rules for a fund, you cannot process investment into the fund, in the system.
Associating entities with funds
You can associate entities such as agents with a fund that you maintain. Such agents would be allowed to market the fund.
If check writing facilities are allowed for a fund, you can also associate the check vendors that would print the checks, for the fund.
Groups of funds with common load characteristics
You can maintain groups of funds, for which common loads are applicable on transactions. The group of funds (or load group) facility is especially useful for loads that are applicable in the case of privileges of the investor such as rights of accumulation (ROA) or a letter of intent (LOI).
Investment Products
You can also maintain processing guidelines for investment products that you offer to investors. You can maintain products with different attributes, to attract specific investors. The attributes could be funding, retirement features, premium and annuity features, loans, withdrawals and so on.
Fund Prices
You can also maintain the NAV and the transaction base prices for each fund, for each transaction type, for each business day.
Other Fund Activities
You can also maintain bank accounts used by the fund, in each currency in which the fund transacts.
Refer the following chapters in Fund Manager User Manual for a full discussion of all maintenance functions in Fund Manager.
- Maintaining Reference Information
- Setting up Loads
- Maintaining Currencies and Capturing Exchange Rates
- Other Maintenance Functions in the Maintenance Module
- Setting up Funds
Hedge Funds
Hedge funds are special type of investment funds that use leveraging and other investment strategies to hedge the exposure of a portfolio against the movements in the equity market. They can take both short and long positions, use arbitrage, trade options and bonds and invest in any opportunity where they can make impressive gains at reduced risk.
Hedge funds are handled by hedge fund managers. They charge the investors a fee called performance fee, which is a percentage of the gains received by the investor. As investors enter and exit hedge funds at different points in time, the performance gains received by them also differ accordingly. Hence, the performance fee calculations are carried out using a special accounting methodology called equalization accounting which ensures that the fund manager is paid the correct performance fee and also that the fees are fairly allocated between each investor in the fund. The investors also receive profit only for the period during which they stay invested in the fund.
Hedge funds can be of any of the following types or structures:
Simple
A simple hedge fund is a regular fund with normal processing rules. These funds usually have monthly dealing frequency and valuation points. Performance fee is generally accrued on monthly basis and paid out on yearly basis.
Master-Feeder
A master-feeder fund structure is set up to accept assets from both foreign and domestic investors in the most tax and trading efficient manner possible. A traditional setup consists of a master fund company into which different feeder funds invest. The transactions of feeder funds will be fed into master fund either on net or non-netted basis.
Fund of Funds
A fund of hedge fund invests in hedge funds rather than investing in individual securities. Performance fee will be collected at two levels; one for the underlying hedge funds and the other for the fund of funds. Net asset value also is calculated separately for the underlying funds and the fund of funds.
The details related to the minimum and maximum number of investors investing is maintained in case of fund of funds. For fund of funds, the investors usually need to give a notice period which signifies the number of days in advance that the investor must notify the fund in order to receive the payment.
Side Pockets
A side pocket is a special type of account used in hedge funds to separate illiquid assets from other more liquid investments. Once an investment enters a side pocket account, only the present participants in the hedge fund will be entitled to a share of it. Future investors will not receive a share of the proceeds in the event the asset's returns get realized. Investors who leave the hedge fund will still receive a share of the side pocket's value when it gets realized.
Investments that get locked into a side pocket cannot be redeemed until a realization event happens and the side-pocket gets converted back into a tradable series. The dealing and valuation frequencies and the net asset value of the side pockets will be different from that of the main fund.
Refer the following chapters for more details on the maintenances required for hedge funds and the calculation of performance fees.
- Maintaining Reference Information
- Setting up Fund Rules
- Other Fund Activities
- Fund Rule Upload Formats
2.4.3 Authorization Functions in Fund Manager
Each of the reference data and fund-related maintenances must be authorized within the system for them to be effective in processing.
The creation of new investor accounts (known as unit holder accounts), with all the investor preferences, and the entry of any transactions in the account are all functions that are managed in the Agency Branch. However, any changes made to authorized accounts or authorized transactions will require the scrutiny and approval of the fund manager, and can only be authorized through the Fund Manager component.
You can also authorize any interface defined with an external system as well as any defined job (associated with the Scheduler Services).
2.4.4 Interfaces to External Systems
FCIS provides the facility to define and process interfaces to external systems for the purpose of effecting data transfers and information exchanges. For instance, the NAV for a fund may be imported from an external Asset Management system by processing an internally defined interface.
You can define and execute these interfaces through Fund Manager.
2.4.5 Scheduler Services
The FCIS system provides a facility that you can use to schedule any internal activities that need to be executed either on a periodic basis, or event-based frequency. When you schedule these activities, they will be executed by the Scheduler Services as pre-programmed proceedings according to the frequency defined for them.
2.4.6 Security and Control
The Fund Manager System provides application level security features that will prevent unauthorized users from accessing the system.
Refer the Ensuring Security chapter in this User Manual for a detailed discussion of the Security Management System of Oracle FLEXCUBE Investor Servicing.
Typically, the business user roles associated with the Agency Branch component of the system are the following:
Fund Administrator
The Fund Administrator is responsible for maintenance of reference information and the fund related information.
Supervisor
The Supervisor is responsible for any authorization activities carried out in Fund Manager.
Operator
The Operator is responsible for carrying out the End of Day activities.
2.4.7 Reports
The Fund Manager component allows you to view and print various kinds of reports either on a daily basis or at periodic intervals. E.g. If you want to print the transfer transactions that have taken place, you can print the Transfer Summary Report, which shows all the Transfer transactions received for a given date on which units have been allotted.
The reports that are available for generation, preview and print include:
- Performance Across All Funds (Amount)
- Performance Across All Funds (Units)
- Unit Holder Register
- Transaction Load Listings
- Check Printing
- Payment Summary
- Letter Of Intents
- Login Tracking Report
- Unit Holder Transaction
- Unit Holder Transaction Fee
- Rejected Transactions Report
- Maturity Date Report
- Account Transfer Payments
- Exchange Rate Override Report
- Bulk Account Client Related Reports
- Fund Bank Account Transfer Report
Refer the Reports chapter in Reports User Manual for a full discussion of these reports.
2.4.8 End of Day Processes
The Fund Manager is responsible for running the End of Day (EOD) activities of the Fund Manager component of the system. The Fund Administrator user typically performs EOD activities. The Fund Manager is also responsible for those branches that have not completed the activities for the day. The EOD activities include:
- Allocation of transactions of any transaction type
- EOD Maintenance
- Execute Pre-EOD
- Execute EOD
- Execute BOD
- Branch Sign-on/Sign-off
- EOD Log Report
- Sending / Receiving Messages
You can also execute and process any authorized interface that has been defined with an external system, through the Online Execution of Interfaces option.
For a full discussion of the End of Day Operations Module refer the End of Day Activities chapter in this User Manual.
2.4.9 Other Functions
Defaults Maintenance
In Fund Manager, the implementers maintain the system default information that will be used in processing, that is specific to your installation. You can make changes to this information subsequently, if necessary, through the Defaults Maintenance function in Fund Manager.
Query Builder
Fund Manager provides a query facility that allows you to extract business information from the system database by constructing simple query statements, called the Query Builder.
2.4.10 Conventions to be Followed in Screens
- The words “screen” and “form” (noun) are used interchangeably throughout the entire document. They refer to the active interface presented to the user for the purpose of data entry operations throughout the system.
- In the screens, all checkboxes can accept only two valid entries – “Yes” or “No”. If the user checks a checkbox, a cross-mark or a tick-mark appears in the box, indicating to the system that the value specified is a “Yes”. If the box is not checked, and is empty, the value indicated to the system is a “No”.
For example, if the “On-line Allocation” checkbox has a cross mark or a tick-mark in it, it indicates to the system that on-line allocation is to be allowed. If the box is empty, it indicates to the system that on-line allocation is not to be allowed.
Entering Dates:
The user is advised to check all dates that he has specified in any of the forms before executing a “Save” operation.
2.4.11 Before You Login
Before you attempt to log in to Fund Manager, ensure that all the following activities have been performed:
- The user profile has to be defined by the system administrator for all the users of the back-office.
- The Defaults required for Fund Manager, namely the default language; currency and so on must already have been defined.
2.4.12 Logging in to Fund Manager
Invoking Fund Manager
When the Fund Manager component is installed on the workstation, you can access it through the browser. You must specify the URL of the installation in the Address box in the Internet Explorer Address Bar.
For instance, if the URL of the installation is //install/fundmanager/flexsms/emg, you must key in this URL in the Address box in the Address Bar in the Internet Explorer.
You can configure the Internet Explorer to invoke the URL of the Fund Manager installation by default.
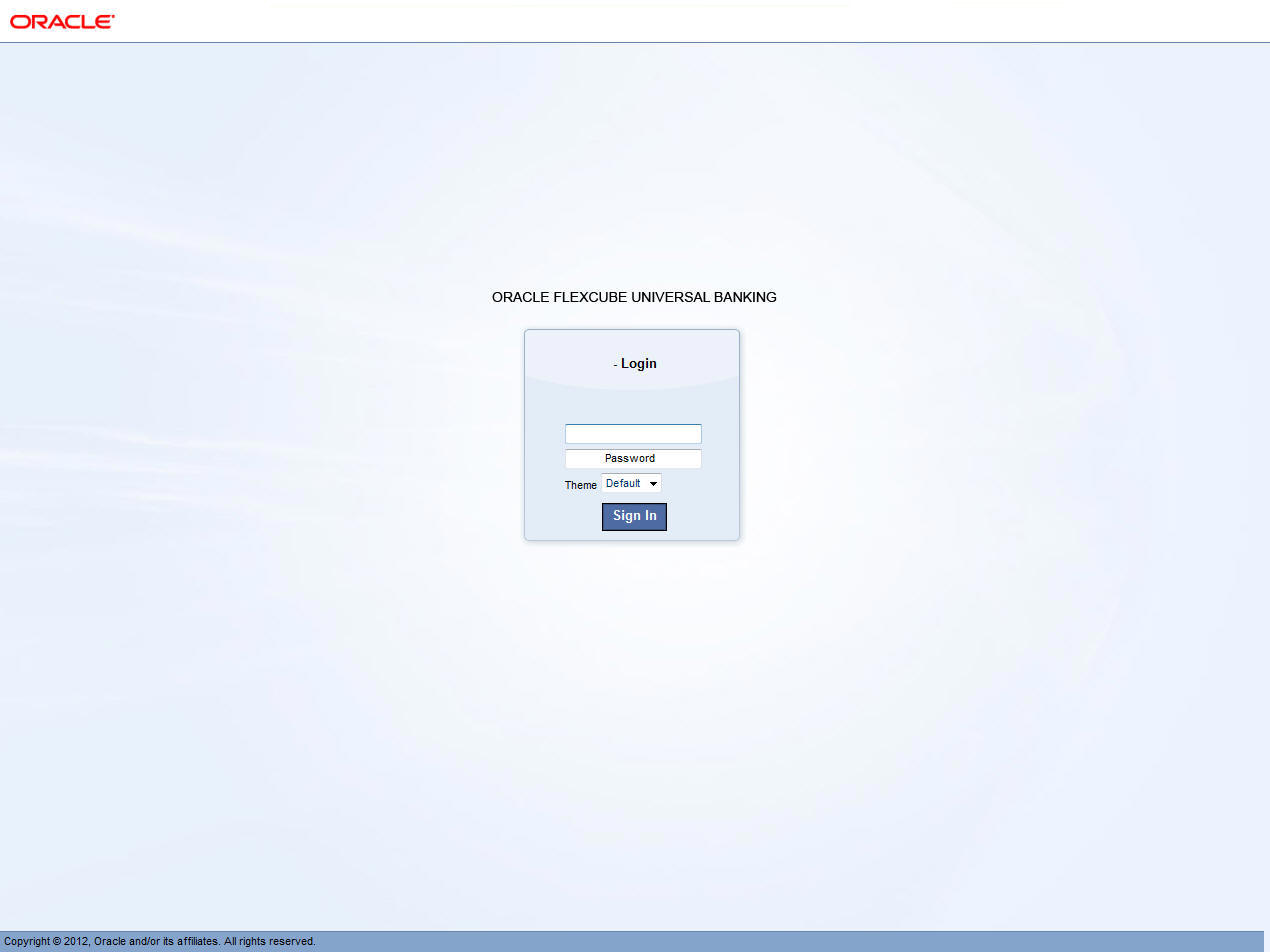
The Login Screen
When Fund Manager is successfully invoked in the manner described above, the login screen is displayed. In the Login screen, specify your name and password to login to the system.
If you are logging in for the first time, specify the password allotted to you by the System Administrator. After you have logged in for the first time, the system forces you to change your password. Whenever you login subsequently, you must use this password.
2.4.13 Fund Manager –Menu
When you successfully log into the system, the Fund Manager Main Menu screen is displayed and the various options are enabled or disabled based on the rights given to you in your user profile.
2.4.13.1 Choosing Fund Manager AMC Module
You must choose the module of your Fund Manager AMC installation in which you are going to operate in, in the AMC Branch field. When you choose the module, the menu that is accessible to you, according to the definitions made in your user profile, are displayed.
2.4.13.2 Logging in to Different Branch
To login to a different AMC Fund Manager module, click the Chg Brn button, and choose the relevant branch in the AMC Branch field.
2.4.13.3 Main Menu Screen
The main menu screen is as shown below. You can choose any of the options from the left hand side of the screen.
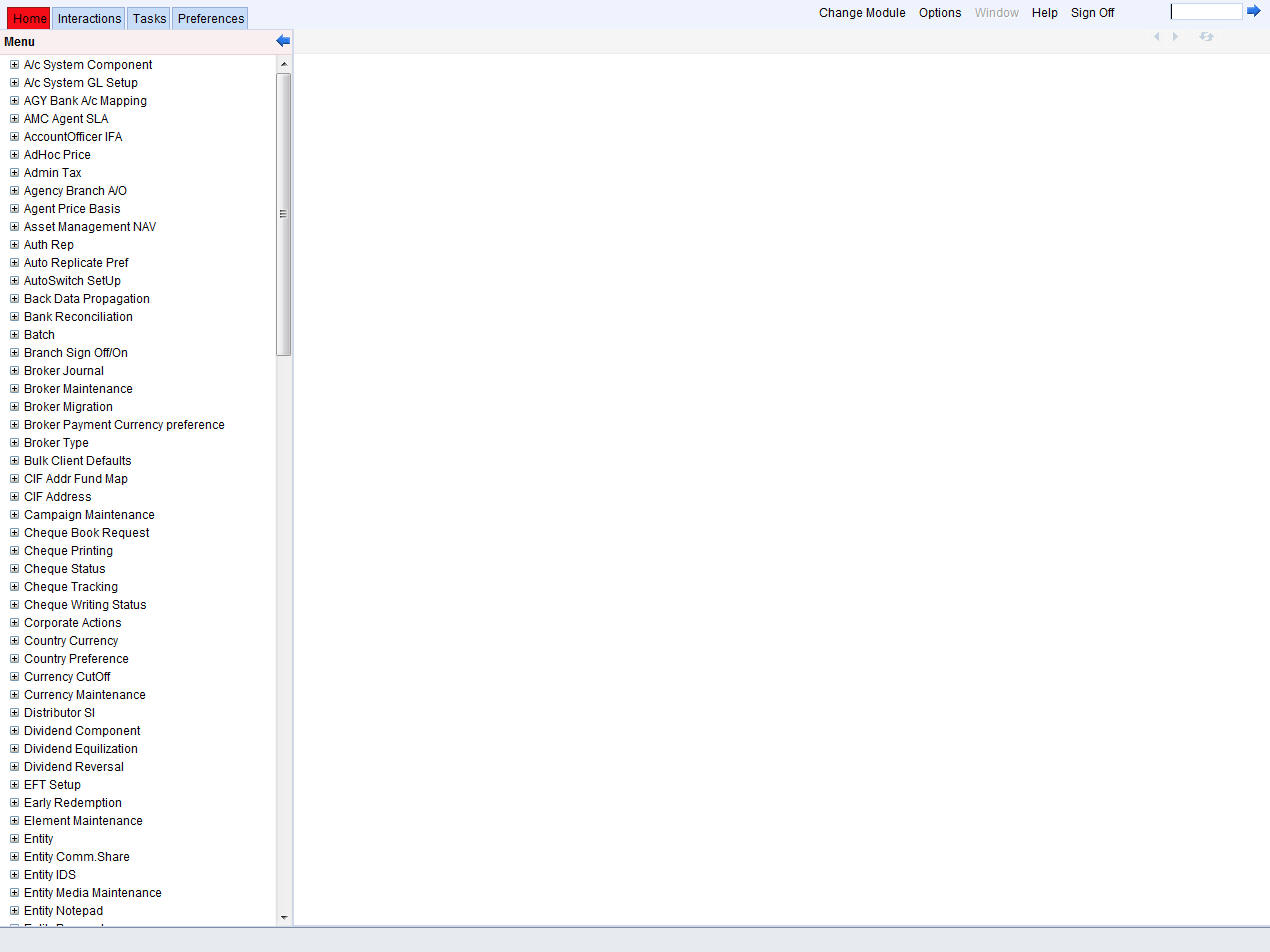
In each screen, you will only be allowed to perform those operations that are allowed in your user profile.
If you do not perform any activity for more than ten minutes, the system will automatically log you out, after displaying a message.
2.5 Agency Branch
This section contains the following topics:
- Section 2.5.1, "Details on Agency Branch"
- Section 2.5.2, "Servicing Investors"
- Section 2.5.3, "Entry, Maintenance and Processing of Transactions"
- Section 2.5.4, "Setting up Standing Instructions for Unit Holders"
- Section 2.5.5, "Clearing of Payment Instruments"
- Section 2.5.6, "Unit Holder Account Servicing Operations"
- Section 2.5.7, "Transactions Operations"
- Section 2.5.8, "Security and Control"
- Section 2.5.9, "Conventions to be followed in Screens"
- Section 2.5.10, "Before You Login"
- Section 2.5.11, "Logging in to Agency Branch"
- Section 2.5.12, "Agency Branch - Menu"
2.5.1 Details on Agency Branch
The Agency Branch is the entity that actually interacts with the investors or unit holders in an AMC scenario.
In Oracle FLEXCUBE Investor Servicing, the following operations are handled by the web-enabled interface of the Agency Branch:
- The servicing and maintenance of unit holder accounts and daily unit holder operations.
- The servicing and maintenance of brokers
- The entry, maintenance and processing of transactions
- The setting up of standing instructions for unit holders
- The maintenance of the clearing status of payment instruments used in transaction processing.
- Other functions that include maintenance of deals for unit holders, income distribution options, letters of intent, non-tax limits, and so on.
- Maintenance of static data such as system parameters, defaults for the agency branch or the AMC, additional information heads for unit holders, fee categories for unit holders, and mapping of information heads for entities.
2.5.2 Servicing Investors
The service and maintenance of unit holder accounts involves the following operations and activities:
- Creating and maintaining new unit holder accounts
- Setting up deals, standing instructions, letters of intent options, income distribution options and non-tax limits for unit holder accounts.
- Making changes to the information in authorized unit holder accounts
- Closing unit holder accounts
- Capturing details of authorized representatives for unit holders
For a fuller understanding of how unit holder servicing is facilitated in the system, refer the “Managing Investor Accounts”
2.5.3 Entry, Maintenance and Processing of Transactions
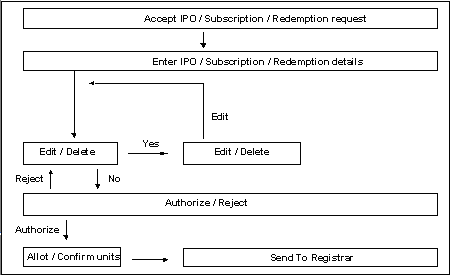
Applications for any transactions that the investors want to enter into using their accounts in the AMC are accepted and processed in the Agency Branch. The transactions are entered into the system, and they can be tracked at all stages in the processing cycle.
The following transaction types can be processed in the system:
- IPO subscription transactions
- Subscription transactions
- Redemption transactions
- Switch transactions involving switching of units from one fund to another for a unit holder.
- Transfer transactions involving transferring of units from one unit holder to another within a fund.
- Blocking of units (lien processing)
- Unblocking of units (lifting of lien)
- Consolidation of units
- Splitting of units
- Reissue of units
- Enrichment of payment details for a transaction
For a fuller understanding of how the entry and processing of transactions is facilitated in the system, refer the “Processing Transactions”
2.5.4 Setting up Standing Instructions for Unit Holders
Any Regular Savings/ Withdrawal Plans that an investor desires to issue standing instructions for can be set up and maintained in the Agency Branch.
The system provides for the maintenance of standing instructions for a unit holder.
For a fuller understanding of how the entry and processing of standing instructions transactions is facilitated in the system, refer the “Maintaining Standing Instructions”
2.5.5 Clearing of Payment Instruments
The clearing status of payment instruments used for transactions and standing instructions can be updated at the Agency Branch.
For a complete understanding of how the clearing of payment instruments is facilitated in the system, refer the “Data Entry”
The system provides an option to print the acknowledgment/confirmation slips on-line. They can be printed again, if required, for investor related operations.
2.5.6 Unit Holder Account Servicing Operations
2.5.6.1 Opening New Unit Holder Account
The investor fills out an account opening application and hands it over to the agent along with supporting documents. The Account Administrator crosschecks the application and the supporting documents and enters the details into the system. The system prints an acknowledgment slip on saving the new account. After the new account is authorized, the unit holder number for the account is generated.
The request for opening an account could be made by any means, through telephone, fax, etc.
2.5.6.2 Closing Unit Holder Account
The unit holder fills out an account closure application along with the redemption slips to redeem the units held in various funds and hands them over to the agent. The agent checks the details and enters them into the system. The system marks the account as “pending closure”. If the number of units in all the funds for a unit holder becomes zero, then the system closes the corresponding unit holder account automatically. An account once closed can be re-opened.
2.5.6.3 Making Changes to Unit Holder Account
The unit holder fills out a change request application and hands it over to the Agent. The agent checks the details and inputs it into the system. The agent will then hand over the acknowledgment slip to the unit holder.
2.5.7 Transactions Operations
2.5.7.1 Making Transaction Requests
If the transaction request is being made directly over the counter, the unit holder fills out a transaction application and hands it over to the teller. Alternatively, the transaction requests can be made by any means, such as by telephone, through fax, and so on. The unit holder can pay by cash, transfer, check, credit card or demand draft. The teller checks the completeness of the form and inputs the transaction details into the system. If a fee is to be collected from the unit holder at the time of accepting the application form, the system prompts for this.
2.5.7.2 IPO Subscription/ Subscription Transactions
The system validates the details that were entered against the fund rules. The fund manager allocates the IPO subscription/ subscription based on the NAV declared for the fund for that day. After the allocation, the agency branch can print the confirmation/ rejection note.
If the fund is scrip-based, the certificate-related information is also captured either from the fund or the unit holder based on the fund rule definition.
IPO Subscription/Redemption

2.5.7.3 Redemption Transactions
The fund manager allocates the redemption based on the NAV or any other formula that is computed for the fund for that day or the last fund price declaration day. If the redemption allocation is partial on a given date, the unit holder will receive multiple confirmation notes for the transaction. After the allocation, the agency branch can print the confirmation / rejection note. The check or the draft as specified by the unit holder that is equal to the redemption consideration handed over.
If the fund is scrip-based, the certificate-related information, including the denominations, is also captured either from the fund or the unit holder based on the fund rule definition. Wherever certificates are to be surrendered to the AMC, the certificate numbers are captured and validated against the certificate information defined in the system.
2.5.7.4 Switch Transactions
The system validates the details that were entered against the fund rules for switch transaction. The fund manager allocates the switch based on the NAV declared for the fund or based on any other formula for that day or the last day of declaration of price. If the switch allocation is partial on a given date, the unit holder will receive multiple confirmation notes for the same transaction. The other activities are same as those that are followed in a normal transaction, as for any of the transaction types
If the fund is scrip-based, the certificate - related information, including the denominations, is also captured either from the fund or the unit holder, based on the fund rule definition. Wherever certificates are to be surrendered to the AMC, the certificate numbers are captured and validated against the certificate information defined in the system.
Switch/Transfer Transactions

2.5.7.5 Transfer Transactions
The system validates the details that were entered, against the fund rules and issues an acknowledgment slip to the unit holder for a transfer transaction. The fund manager allocates the transfer based on the NAV declared for the fund for that day or any other transfer price. After the allocation, the agency branch can print the confirmation/ rejection note. The allocation information is then used to update the transferee and transferor.
If the fund is scrip-based, the certificate related information is also captured either from the fund or the unit holder based on the fund rule definition.
2.5.7.6 Block (Lien Processing) Transactions
The system validates the details that were entered, against the fund rules and issues an acknowledgment slip to the unit holder for a block transaction. The fund manager allocates the block based on the NAV declared for the fund for that day or on any special block prices that could be derived through any specific formula. All the other activities are the same as those followed for any of the transaction types. The scrip-based funds are also handled in the same manner as for the other transaction types.
2.5.7.7 Unblock (Lien Processing) Transactions
The system validates the details entered, against the fund rules and issues an acknowledgment slip to the unit holder for the unblock transactions. The fund manager allocates the unblock transaction based on the NAV declared for the fund or any special unblock price for that day. All the other activities are the same as those followed for any of the transaction types.
2.5.7.8 Consolidation Transactions
The system validates the details entered, against the scrip-based fund rules and issues an acknowledgment slip to the unit holder for the consolidation transaction. The fund manager allocates the consolidation based on the NAV declared for the scrip-based fund for that day or any other formula based price. After the allocation, the agency branch can print the confirmation / rejection note. The certificate related information is also captured either from the fund or the unit holder based on the fund rule definition. In the system, consolidation transactions are supported only for scrip- based funds.
2.5.7.9 Split Transactions
The system validates the details entered against the scrip-based fund rules for a split transaction. The fund manager allocates the split based on the NAV declared for the scrip-based fund for that day. After the allocation, the agency branch can print the confirmation/ rejection note. The certificate related information of the certificate is also captured either from the fund or the unit holder based on the fund rule definition. In the system, split transactions are supported only for scrip based funds.
2.5.7.10 Reissue Transactions
The system validates the details entered, against the scrip-based fund rules and issues an acknowledgment slip to the unit holder for the reissue transaction. The fund manager allocates the reissue based on the NAV declared for the scrip-based fund for that day. After the allocation, the agency branch can print the confirmation/ rejection note. The certificate related information is also captured either from the fund or the unit holder based on the fund rule definition. In the system, reissue transactions are supported only for scrip-based funds.
2.5.8 Security and Control
The Oracle FLEXCUBE Investor Servicing system provides application level security features that will prevent unauthorized users from accessing the system.
For a detailed discussion of the Security Management System of Oracle FLEXCUBE Investor Servicing, refer Ensuring Security
Typically, the business user roles associated with the Agency Branch component of the system are the following:
- Teller – This role is responsible for accepting the transaction requests from investors. The teller will check all the application forms and enter the transactions in the system.
- Supervisor – This role is responsible for authorizing the transactions entered by the teller group.
- Accounts Officer – This role is responsible for opening, maintaining and closing unit holder Accounts.
2.5.9 Conventions to be followed in Screens
- The words “screen” and “form” (noun) are used interchangeably throughout the entire document. They refer to the active interface presented to the user for the purpose of data entry operations throughout the system.
- In the screens, all checkboxes can accept only two valid entries – “Yes” or “No”. If the user checks a checkbox, a cross-mark or a tick-mark appears in the box, indicating to the system that the value specified is a “Yes”. If the box is not checked, and is empty, the value indicated to the system is a “No”.
For example, if the “On-line Allocation” checkbox has a cross mark or a tick-mark in it, it indicates to the system that on-line allocation is to be allowed. If the box is empty, it indicates to the system that on-line allocation is not to be allowed.
Entering Dates
The user is advised to check all dates that he has specified in any of the forms before executing a “Save” operation.
2.5.10 Before You Login
Before you attempt to log in to the Agency Branch component, ensure that all the following activities have been performed:
- The user profile has to be defined by the system administrator for all the users of the branch.
- The Defaults required for the branch namely the default language; currency and so on must already have been defined.
2.5.11 Logging in to Agency Branch
When the Agency Branch component is installed on the workstation, you can access it through the browser.
In the Login screen, specify your name and password to login to the system.
If you are logging in for the first time, specify the password allotted to you by the System Administrator. After you have logged in for the first time, the system forces you to change your password. Whenever you login subsequently, you must use this password.
2.5.12 Agency Branch - Menu
When you successfully log into the system, the Agency Branch Main Menu screen is displayed and the various options are enabled or disabled based on the rights given to you in your user profile.
2.5.12.1 Choosing your AMC Branch
You must choose the branch of the AMC that you are going to operate in, in the AMC Branch field. When you choose the AMC branch, the menu that is accessible to you, according to the definitions made in your user profile, are displayed.
2.5.12.2 Logging in to Different Branch
To login to a different branch, click the Chg Brn button, and choose the relevant branch in the AMC Branch field.
2.5.12.3 Main Menu Screen
You can specify the operations from the main menu items in your user profile. If you do not perform any activity for more than the time maintained as the session timeout, the system will automatically log you out, after displaying a message.