| Oracle® Communications Session Monitor Installation Guide Release 3.3.80 E57620-01 |
|
|
PDF · Mobi · ePub |
| Oracle® Communications Session Monitor Installation Guide Release 3.3.80 E57620-01 |
|
|
PDF · Mobi · ePub |
This chapter describes how to install Oracle Communications Session Monitor.
To install Session Monitor:
Insert the DVD or attach the USB flash drive and power on the system. Make sure that the machine boots from the installation media. This is usually done using a one-time boot option.
Note:
Booting from EFI without BIOS emulation is not supported.If booting from the installation media succeeds, you should see the Session Monitor installer Boot Menu screen.
Figure 2-1 shows the Boot Menu screen.
Figure 2-1 Session Monitor Boot Menu Screen
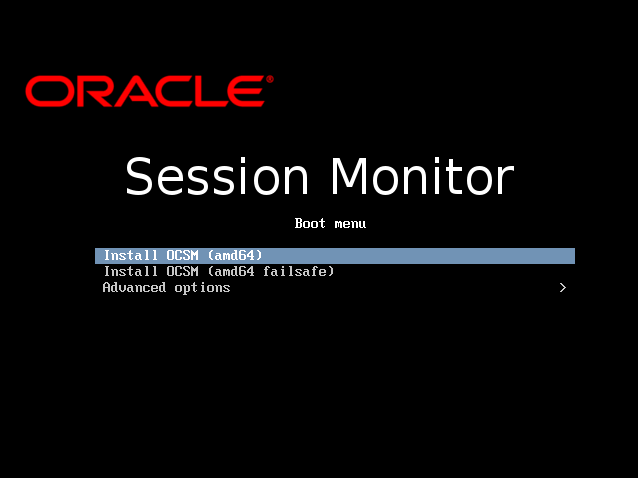
Press ENTER on your keyboard to continue the installation. The installer is subsequently loaded which can take a few minutes.
The installer checks whether the hardware passes the minimum system requirements for Session Monitor. If the minimum system requirements are not met, installation does not continue. See "Session Monitor Hardware Requirements" or contact your Oracle sales engineer for more information about the system requirements.
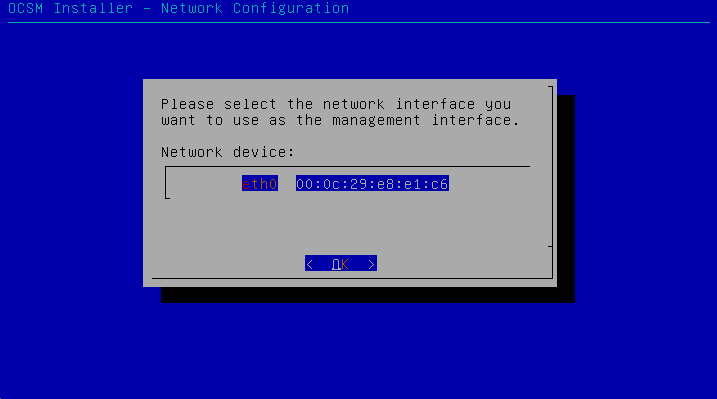
Select the network adapter that is to be used for the management Web interface. A list of the supported network interfaces together with their hardware addresses (MAC) is shown.
Figure 2-2 shows the network adapter selection screen.
Choose the interface to use for accessing Session Monitor. Access via this interface is required to finish the installation. Refer to the documentation of the machine for further information about the location of network interfaces.
Select the IP configuration for the management network adapter. You can select to configure static IP settings manually or using DHCP.
Figure 2-3 shows the network adapter IP configuration selection screen.
Note:
No error checking is performed to validate the network configuration; verify your inputs before proceeding.Figure 2-3 Network Adapter IP Configuration Selection

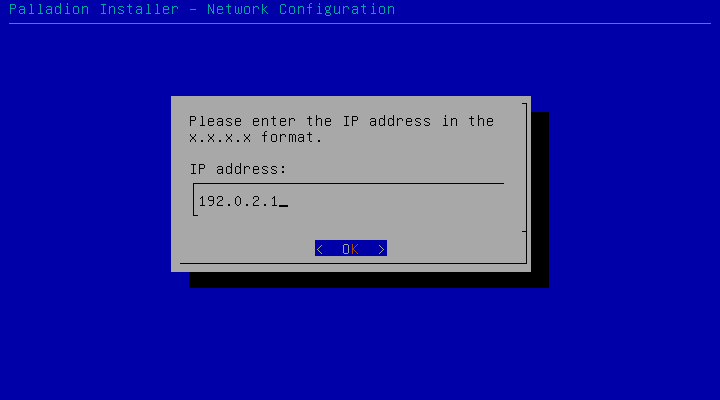
If you select static IP configuration, the installer prompts for the IP address, netmask, and the default gateway of your network.
Figure 2-4 shows the network adapter IP address specification screen.
Figure 2-4 Network Adapter IP Address Specification
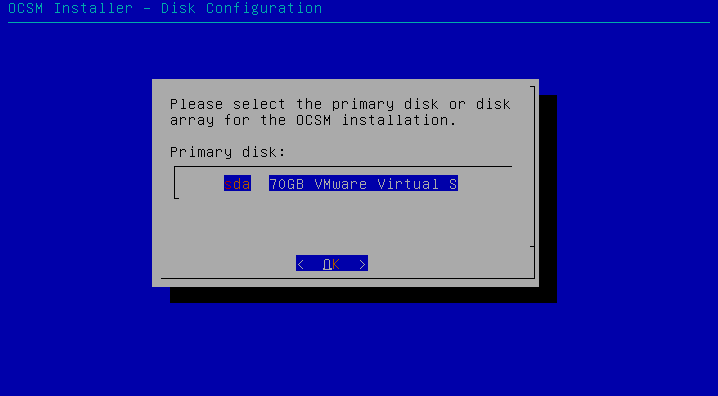
Select the primary disk or disk array for the installation. The primary disk will hold the Session Monitor operating system and the database. In the second step you can choose to use another disk for long-term stored data or to keep all data on one disk.
Figure 2-5 shows the primary disk selection screen.
Note:
The primary disk can have a size between 70GB and 2TB. If you want to use a larger disk array for data storage, configure it as a secondary disk.Important:
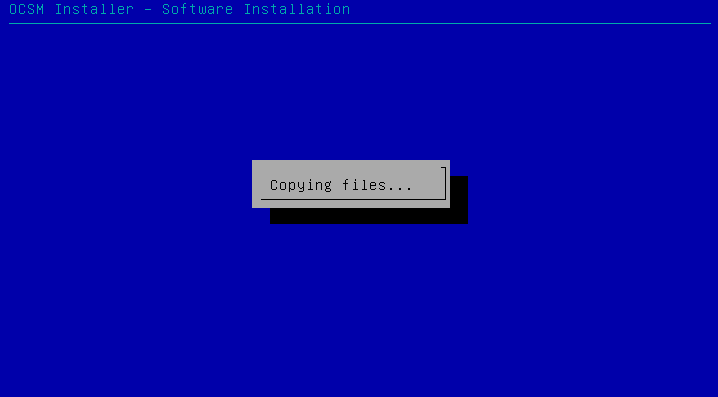
Configuring a machine with a secondary disk as a standalone Probe is not supported. Only Mediation Engine and Mediation Engine with embedded Probe machines can use a secondary disk.The installer prepares the disks and sets up the system. This installation process usually takes about 10 minutes.
Figure 2-6 shows the installation screen.
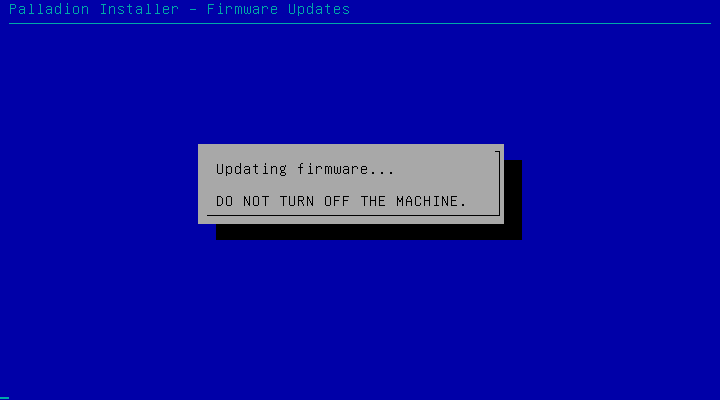
The installer updates the firmware required for the hardware components on the machine. This process can take several minutes to complete. Do not power off the machine during this process, as this may leave components in an unusable state.
Figure 2-7 shows the firmware update screen.
The installer reboots the system. When instructed, remove the USB flash drive or DVD used for the installation. Make sure that the machine boots from the primary hard disk that you selected in the previous steps.
Figure 2-8 shows the system reboot screen.
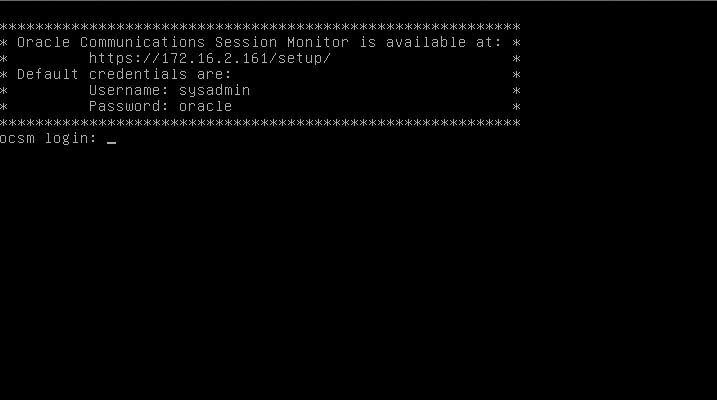
After rebooting, the machine shows the IP address that it uses. Open the URL https://ip-address/ in your Web browser to continue with the configuration of the Session Monitor system. You should see the login dialog to the Session Monitor Platform Setup Application (see "Configuring Session Monitor").
|
Copyright © 2015, Oracle and/or its affiliates. All rights reserved. Legal Notices |
|