Raise the Drive Compartment to Service Position
- Disconnect the cables attached to the backplane.Cables that must be disconnected include:
SATA or drive cable
NV-DIMM cable
Motherboard to HDD backplane cable
USB board cable
Figure 1 Cables connected to the backplane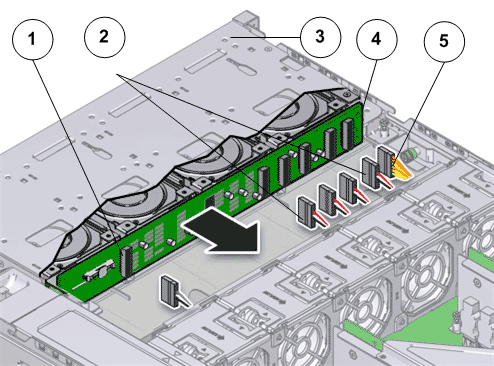
- Legend
1 SATA or drive cable 2 NV-DIMM cables 3 Drive compartment 4 Backplane boards 5 Motherboard to HDD backplane cable
Note: The USB board cable is connected to the Controller display panel.Note: All cables attached to the backplane must be disconnected before raising the drive compartment. Otherwise, the cables might get damaged or tear due to unnecessary flexure or pull.Note: Note the location of all the cable connections to the backplane for later re-connection of the cables after the replacement procedure is completed.Tip: Refer to the service label for more information on rotating the drive compartment. - Disengage the backplane by loosening the four Phillips Number 2 thumb screws on the four sides of the backplane using a Phillips Number 2 screwdriver and rotate the backplane at a 90 degrees angle.Figure 2 Disengaging the backplane
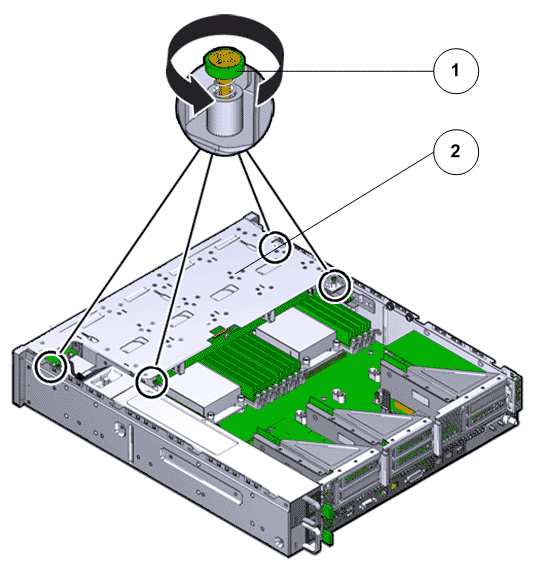
- Legend
1 Thumb screws that secure the backplane 2 Backplane
Note: Use the screwdriver very carefully to avoid damaging the electrical circuitry inside the Controller. - Raise the backplane and drive compartment to the vertical position.Figure 3 Drive compartment raised
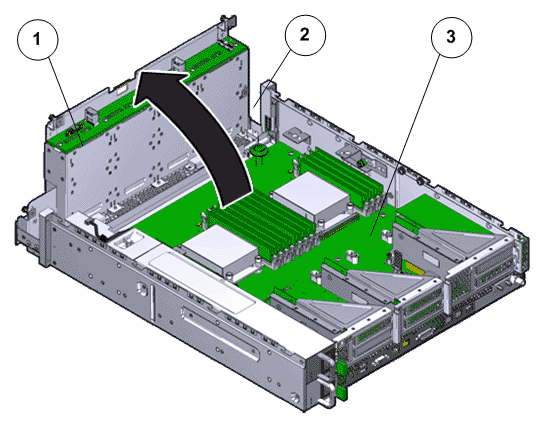
- Legend
1 Backplane 2 Drive compartment 3 Controller motherboard