Figure 1 Insert Controller DIMM 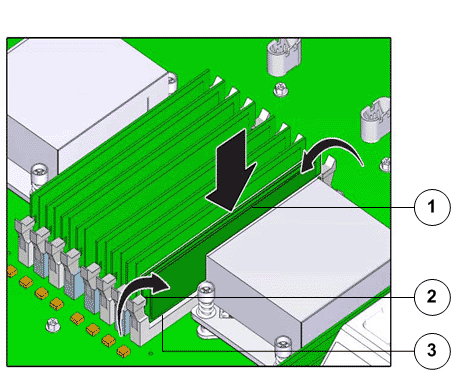
- Legend
| 1 DIMM |
| 2 Tabs to secure DIMMs |
| 3 DIMM notch aligns with the DIMM slots |
Note: While inserting DIMMs, ensure that there is no interference with the cables. Pulling or pressing down on the cables might cause damage to the cables during the replacement procedure.
Figure 2 DIMM alignment over DIMM slots 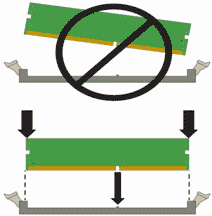
Important! Ensure that the notch in the DIMM lines up with the key in the slot.
Note: Replace only one DIMM at a time to make sure that they are inserted into the correct slots. Attempting to insert multiple DIMMs into the slots might damage the DIMMs due to excessive flexure.
Note: Never leave a DIMM slot unpopulated. Insert fillers into empty slots to ensure proper air flow inside the Controller.