- Unpack the
component from its shipping carton.Note: Place the component on an antistatic mat if it must be set aside for any reason.
- Lower the disk backplane into the Pilot and position it to engage the three standoffs.Figure 1 Pilot disk backplane positioned over standoffs
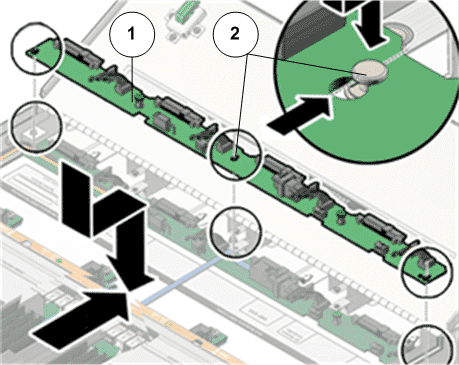
- Legend
1 Disk backplane 2 Standoffs
Note: If replacing two disk backplane boards, start by installing the bottom disk backplane board. - Using just your thumb and fingers, tighten the two captive thumb screws to secure the disk backplane to the Pilot chassis.Figure 2 Captive thumb screws to secure disk backplane
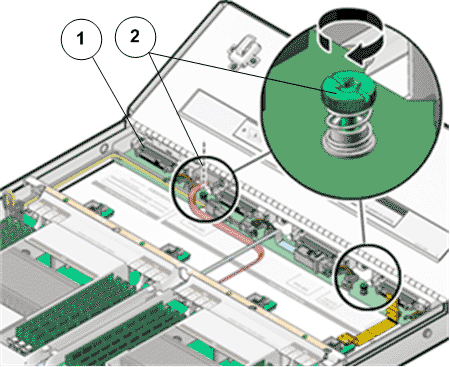
- Legend
1 Disk backplane 2 Captive thumb screws
- Reconnect the disk backplane LED cable (1U system controller cable) and the disk backplane power cord to the disk backplane.
- Reconnect the SAS cable bundle to the disk backplane.Figure 3 Disk backplane cables connected
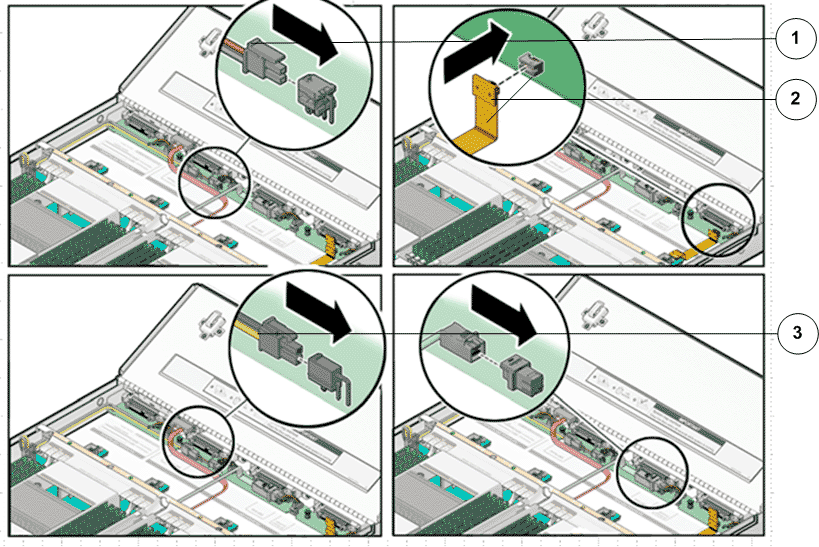
- Legend
1 SAS cable bundle 2 LED cable 3 Disk backplane power cable
Note: After replacing the disk backplane, you must manually program the product serial number (PSN) into the replacement disk backplane. Programming the PSN on the disk backplane is important for service entitlement. - Reinstall all of the storage drives into the drive compartment.