Figure 1 Heat
sink insertion 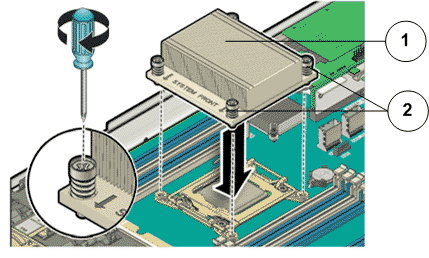
- Legend
| 1 Heat
sink |
| 2 Phillips
screws that secure the heat sink |
Important! Ensure that the heat sink and the screws are aligned
so that the airflow marker on the heat sink faces the back of the Pilot and the system front
marker on the heat sink faces the front of the Pilot. Also, ensure that the
screws on opposite ends of the heat sink are tightened first. A slight
force must be applied to push down the screwdriver while tightening
the screws to overcome the tension generated.
Note: Install the
chassis mid-wall and ensure that the cables are running through the
opening in the center of the mid-wall. Position the mid-wall with
the cables in front of the motherboard so that it engages the mushroom-shaped
standoffs that are located on the chassis sidewall (one for each side
of the mid-wall).