- Lower the riser onto the Controller motherboard and press the riser edge connector securely into the socket. Important! Ensure that any HBAs that must be removed from the failed riser and placed onto the replacement rise are inserted into the same slots on the replacement riser.Figure 1 Insert riser

- Legend
1 Riser 2 Controller motherboard
- After the riser is seated properly inside the Controller, tighten the two captive Phillips screws on both sides of the riser to secure the riser on the Controller motherboard.Figure 2 Captive screws to secure risers to the motherboard
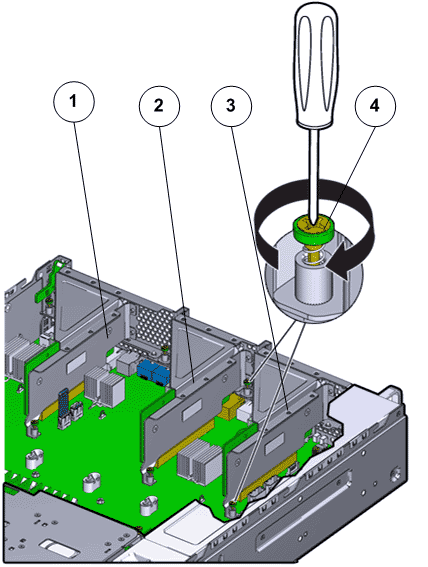
- Legend
1 Riser 3 with latch 3 Riser 1 2 Riser 2 4 Captive screws
To install riser 3, lock the latch to secure the riser to the ControllerReplication Engine motherboard.Figure 3 Riser 3 latch locked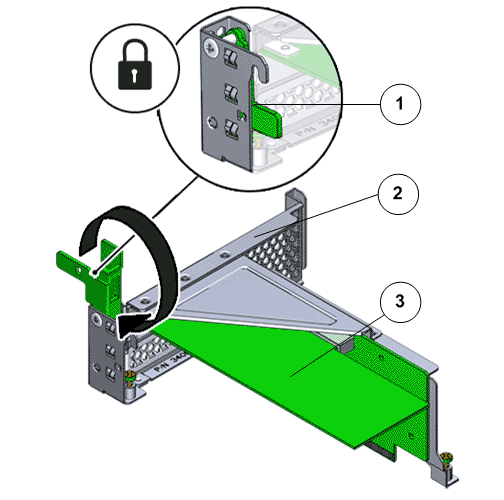
- Legend
1 Riser 3 latch 3 HBA 2 Riser 3
- Reconnect any previously removed internal or external cables to any HBAs installed in the riser.
- Repeat the above steps for any additional risers that you are installing.