- Locate the appropriate
rack unit (RU) height.The DE2-24P Drive Enclosure requires two standard mounting units (2U) of vertical space in the rack.
- Remove the rails from the Drive Enclosure packaging.
- Position the
front rail-location pegs fully inside the holes in the front rack
posts where you plan to add a Drive Enclosure.
Make sure the rail label faces the inside of the rack. Align the rail flange inside of the rack flange. Position the rail-location pegs fully within the rack holes.
Figure 1 Front of the rack and rail-location pegs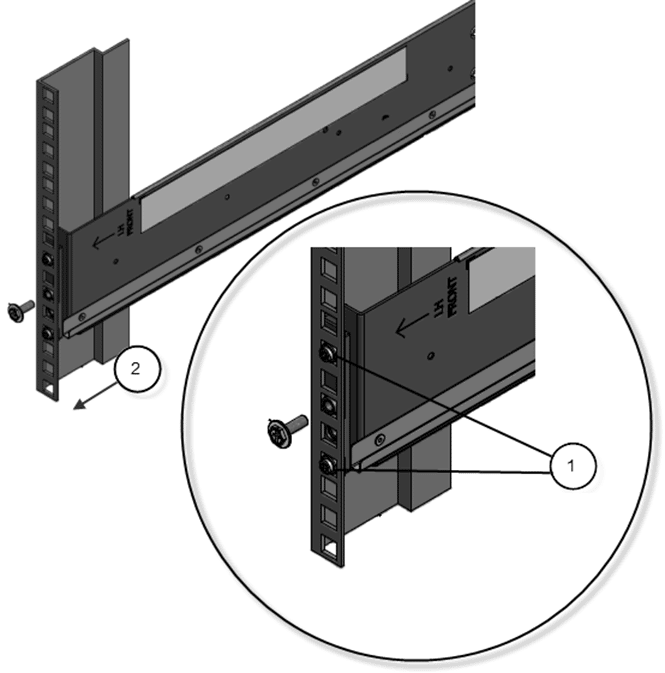
- Legend
1 Rail-location pegs 2 Front rack post
- Insert and tighten
one Phillips 13mm head hex flange screw through the front rack hole
and into the top hole of the rail.Figure 2 A Phillips 13mm head hex flange screw and the front of a rack
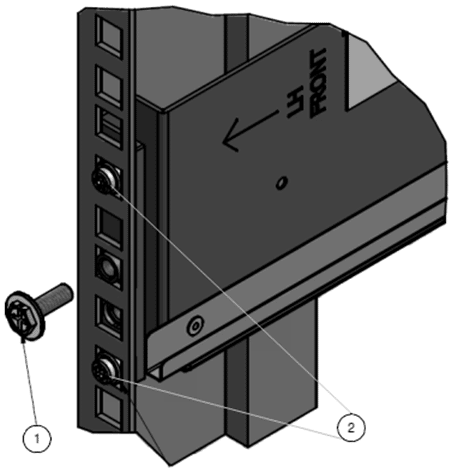
- Legend
1 Phillips 13mm head hex flange screw 2 Rail-location pegs
- From the back
of the rack, position the pegs fully into the corresponding rack holes.To position the pegs, extend the length of the rail to the back of the rack and position the pegs through the appropriate rack holes.Figure 3 Extended rail to the back of the rack
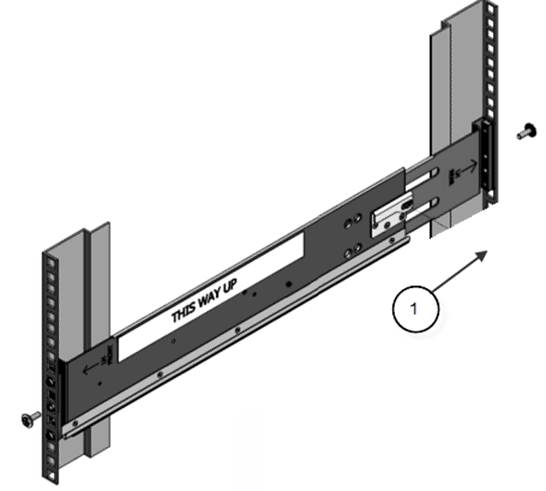
- Legend
1 Back of the rack
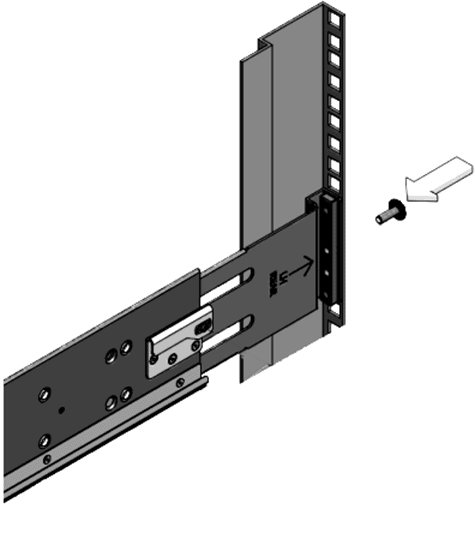
- Insert and tighten
one Phillips 13mm head hex flange screw into the back of the rack
and into the rail.Figure 4 A Phillips 13mm head hex flange screw and the back of a rack
- Repeat steps 1-6 to install the right-hand rail assembly.