Install the rack rails on the rack prior to installing the Pilot.
- Prerequisite:
Ensure that you have adequate room to work around the rack while installing the rails and the Pilot.
- Place the rack-mount installation card against the front rails to identify the correct mounting holes for the slide rails.Figure 1 Rack-mount installation card template
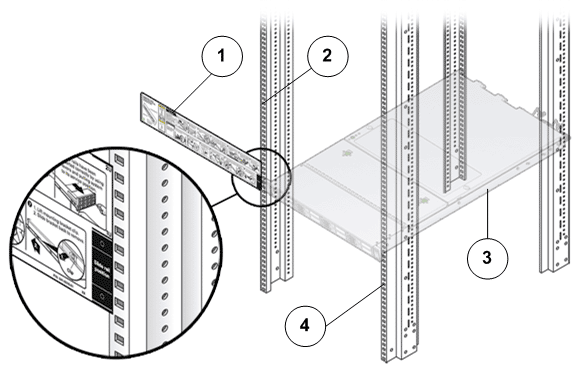
- Legend
1 Installation card 2 Rack mount hole 3 Pilot chassis 4 Front rack post
Note: The Pilot requires one standard rack units (1U) of vertical space.Tip: The bottom edge of the installation card must correspond to the bottom edge of the Pilot. Measure up from the bottom of the installation card. - Mark the mounting holes for the front slide rails.
- Mark the mounting holes for the back slide rails.
- Remove the rails from the packaging.
- Orient the slide-rail assembly so that the ball bearing track is forward and locked in place.Figure 2 Slide rails oriented with the ball bearing track
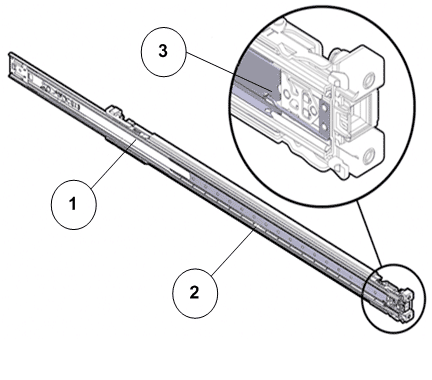
- Legend
1 Slide rail 2 Ball bearing track 3 Locking mechanism
- Starting with either the left or right side of the rack, align the rear of the slide-rail assembly against the inside of the rear rack rail, and push until the assembly locks into place with an audible click.Figure 3 Slide rail assembly aligned with the rack
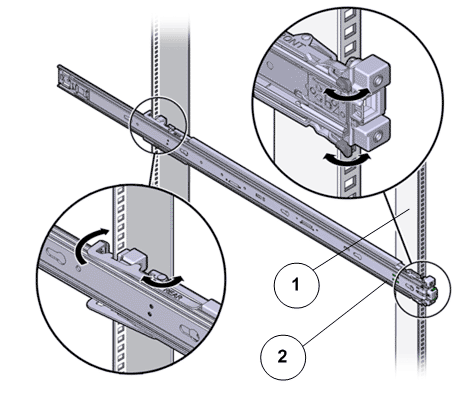
- Legend
1 Back of the rack 2 Slide rail
- Align the front of the slide-rail assembly against the outside of the front rack rail, and push until the assembly locks into place with an audible click.
- Repeat steps to attach the slide-rail assembly to the other side of the rack.