The cable management arm (CMA) clips into the ends of the left and right Controller slide rail assemblies. No screws are necessary for mounting the CMA. The right sides of the two CMA arms have hinged extensions. On the manufacturer's instruction sheet, the smaller extension is called the CMA Connector for Inner Member. It attaches to the right mounting bracket. The larger extension is called the CMA Connector for Outer Member, and attaches to the right sliding rail.
Note: The CMA shown in the graphics might vary slightly from the CMA shipped with your product.
- At the back of the rack, plug the CMA rail extension into the end of the left slide rail assembly.Figure 1 CMA rail extension inserted into the back of the left slide rail
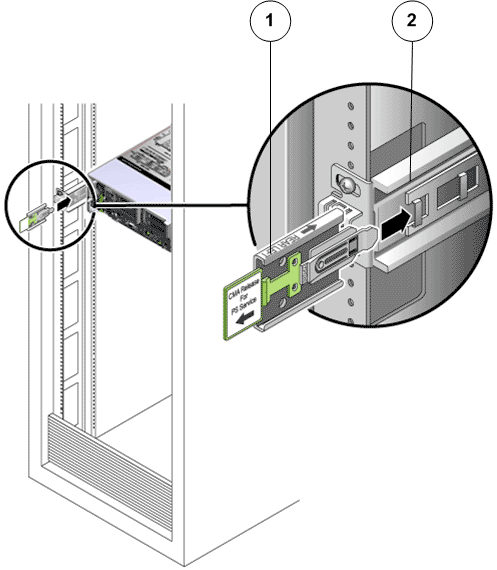
- Legend
1 CMA rail extension 2 Slide rail
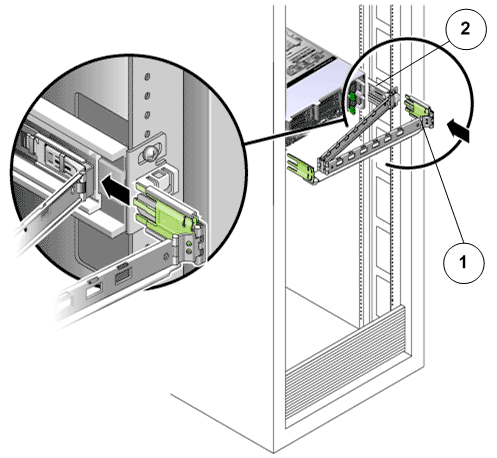
CautionSupport the CMA during this installation. Do not allow the assembly to hang by its own weight until it is secured by all three attachment points. - Insert the smaller extension into the clip located at the end of the mounting bracket.Figure 2 Inner CMA connector mounted

- Legend
1 Slide rail 2 Inner CMA connector 3 Clip
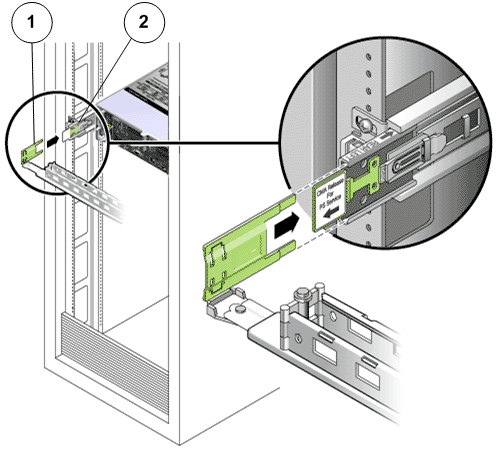
- Insert the outer CMA connector into the end of the right sliding rail.Figure 3 Outer CMA connector attached
- Legend
1 Outer CMA connector 2 Slide rail
- Fully insert the hinged plastic connector at the left side of the CMA into the CMA rail extension.Figure 4 Left side of the slide rail mounted
- Legend
1 Plastic tab on CMA rail extension 2 Slide rail