- Pull out all the storage drives or filler panels from the drive compartment far enough to disengage it from the disk backplane.Note: It is not necessary to completely remove the storage drives from the Pilot. However, you must pull them out far enough to disengage them from the disk backplane. If you remove the storage drives from the Pilot, make a note of their locations so that you can reinstall the storage drives in the same locations.
- If replacing both disk backplane boards, disconnect the SAS cable bundle starting with the top board of the disk backplane.If you are going to remove and replace both disk backplane boards, make a note of which cables connect to the top disk backplane and which cables connect to the bottom disk backplane. Do this before disconnecting any backplane cables.Figure 1 Disk backplane cables disconnected
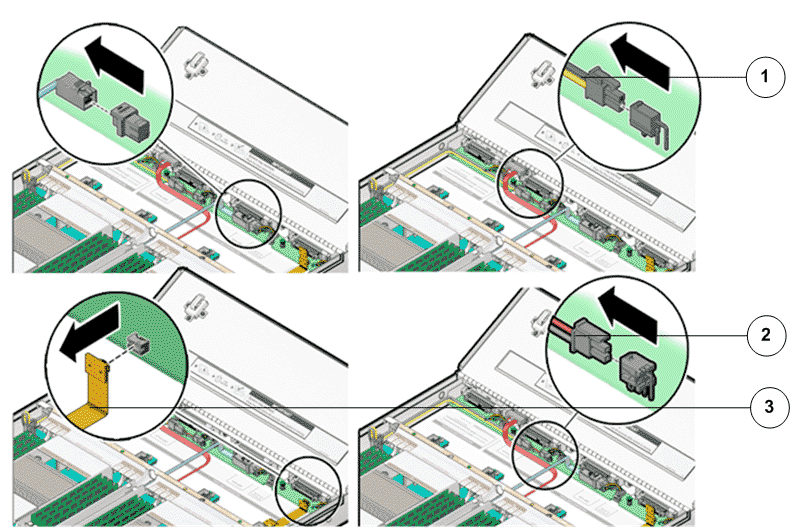
- Legend
1 Disk backplane power cable 2 LED cable 3 SAS cable bundle
- Disconnect the disk backplane LED cable (1U system controller cable) and the disk backplane power cord from the disk backplane.
- Using your thumb and fingers, loosen the two captive thumb screws that secure the disk backplane to the Pilot chassis.Figure 2 Captive thumb screws to remove disk backplane

- Legend
1 Captive thumb screws 2 Disk backplane
- Slide the disk backplane forward toward the front of the Pilot to release it from the three standoffs and lift it out of the chassis.Figure 3 Pilot disk backplane removal
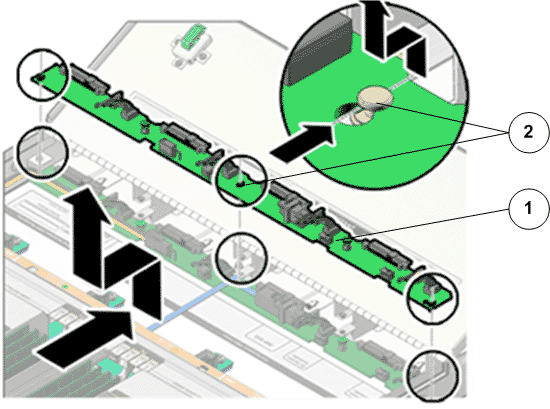
- Legend
1 Disk backplane 2 Standoffs
- Place the disk backplane on an antistatic mat.If replacing both disk backplane boards, repeat the steps for the second board.