- Tip: A portion of the air duct over CPU-1 must be removed to access CPU-1 and Heat sink-1.Loosen the four Phillips screws on the four sides of the heat sink in a diagonal pattern using a Phillips Number 2 screwdriver.
The four Phillips screws on the four sides of the heat sink secure the heat sink to the Pilot chassis.
Figure 1 Loosen four screws to remove heat sink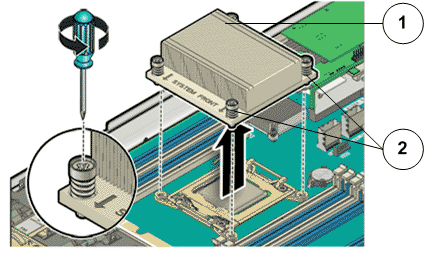
- Legend
1 Heat sink 2 Phillips screws that secure the heat sink
- Lift up the
heat sink and set aside the failed heat sink on an antistatic mat.Note: Visually inspect the failed heat sink to verify if the thermal grease has dried out. After cleaning the heat sink with an alcohol pad, apply thermal grease to the heat sink, if necessary.