- Remove the NV-DIMMs by pressing down on the tabs on both sides of the NV-DIMM to unlock it from the slot.Figure 1 Remove an NV-DIMM
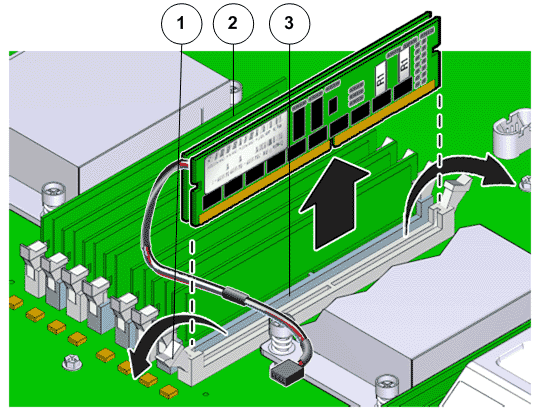
- Legend
1 Tabs to release NV-DIMM 2 NV-DIMM 3 NV-DIMM slot
Note: While inserting or removing NV-DIMMs, ensure that there is no interference with the cables. Pulling or pressing down on the cables might cause damage to the cables during the replacement procedure.Note: Pressing the fault remind button on the motherboard lights up the fault LEDs of the NV-DIMMs even if the power cords are dis-connected. The fault remind button helps to identify the faulted LEDs. - Lift out the NV-DIMM from the slot and set aside on an antistatic mat.Note: Visually inspect the DIMM slots, NV-DIMM slots, the DIMM, and the NV-DIMM for physical damage by checking for cracked or broken plastic in the slot.Note: Sometimes DIMMs and NV-DIMMs might fault because of dust or improper alignment or damaged slots. Use only compressed air to dust DIMMs or NV-DIMMs.