- Disconnect any external cables that remain connected to the HBAs in the risers.Note: Also disconnect any internal cables attached to the HBAs, if that will ease removing the HBA.Tip: Make a note of the positions of all existing cable connections before removing any cables. Replacing HBAs or their cables into the incorrect position in the riser may result in a loss of performance or functionality.
- Note the position of the HBAs installed on the riser.Tip: Make a note of the slot numbers of all existing HBAs before removing any HBAs.
- Using a Phillips Number 2 screwdriver, loosen the two Phillips Number 2 captive screws on either side of the riser that hold the riser to the Controller motherboard.Note: The riser on the opposite end of the power supply has a latch that must be disengaged to remove the riser from the Controller chassisFigure 1 Captive screws to secure the risers
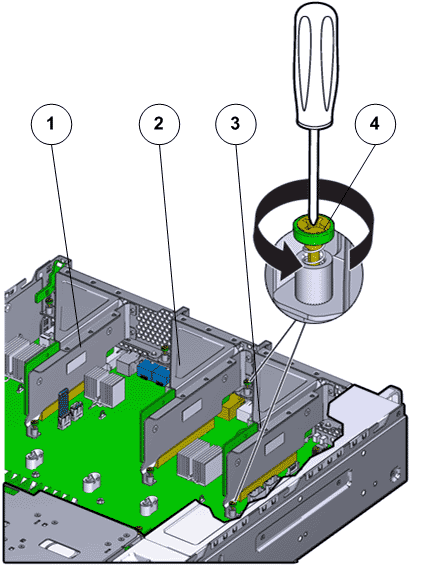
- Legend
1 Riser 3 with latch 3 Riser 1 2 Riser 2 4 Captive screws that secure riser
To remove riser 3, unlock the latch to release the riser from the Controller motherboard.Figure 2 Unlock Riser 3 latch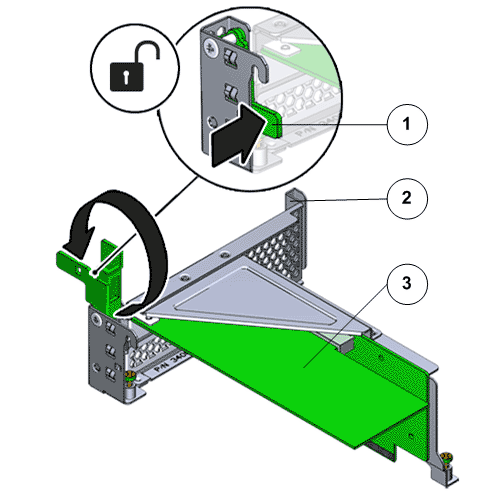
- Legend
1 Riser 3 latch 3 HBA 2 Riser 3
- Carefully pull the riser straight up and place it aside.Figure 3 Remove riser
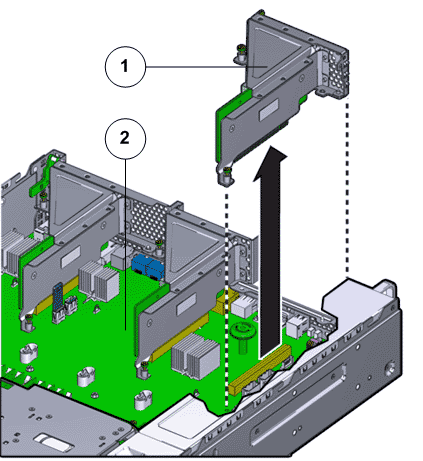
- Legend
1 Riser 2 Controller motherboard
Important! Ensure that any HBAs that must be removed from the failed riser and placed onto the replacement rise are inserted into the same slots on the replacement riser.