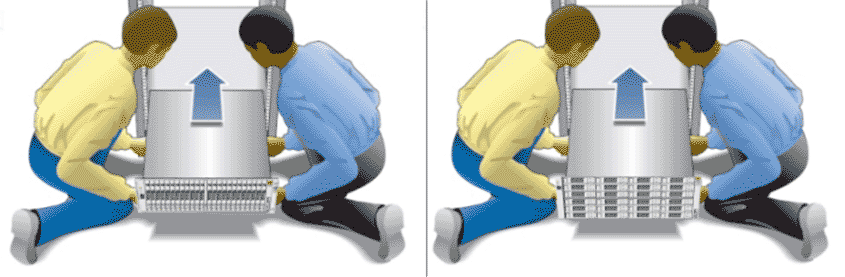
- With the help of a partner or mechanical lift, carefully lift the Drive Enclosure to the location of the prepared slot and rest the Drive Enclosure on the bottom ledge of the left and right rails.CautionThe Drive Enclosures are heavy. Work with a partner or use a mechanical lift for assistance. The DE2-24C Drive Enclosure weighs approximately 102 lbs (46 kg) and the DE2-24P Drive Enclosure weighs approximately 53 lbs (24 kg). Be careful not to drop a Drive Enclosure. Dropping a Drive Enclosure can cause damage and can reduce the life of the drives.CautionDo not use the power supply handles to lift the chassis. Using the power supply handles to lift the chassis can damage the power cooling modules and disrupt electrical power to the Drive Enclosure.Figure 1 DE2-24P Drive Enclosure (left) and DE2-24C Drive Enclosure (right)
- Carefully slide the Drive Enclosure into the rack.
The DE2-24C Drive Enclosure rails have a ledge along the bottom of the rail to allow you to slide the Drive Enclosure into the rack. To verify that the Drive Enclosure is seated correctly in the rails, ensure that the bottom edges on both sides of the Drive Enclosure slide along the left and right rail ledges.
Figure 2 The rail ledge for the DE2-24C Drive Enclosure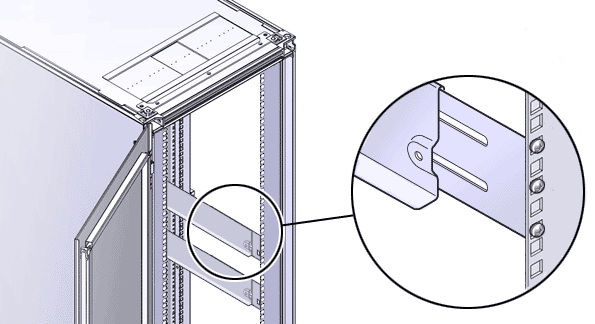
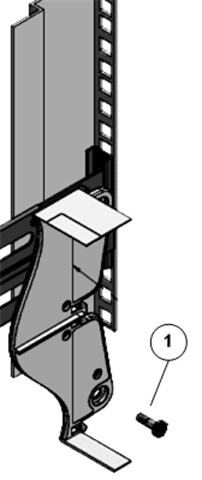
- At the back of the chassis, insert and fully tighten a Phillips Number 2 pan head screw with patch lock into the side of the rail.Figure 3 Phillips Number 2 pan head screw with patch lock
- Legend
1 Phillips Number 2 pan head screw with patch lock
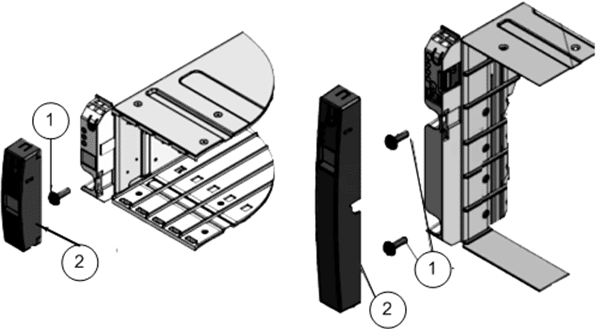
- Remove the front-side caps on both sides of the Drive Enclosure and secure a Phillips 13mm head hex flange screw.Note: The front-side cap on the right side of the Drive Enclosure contains the RFID tag, which uniquely identifies the Drive Enclosure. Take care not to mix up the right front-side caps among Drive Enclosures.After you have secured the Drive Enclosure to the rails, attach the front-side caps to the Drive Enclosure.Figure 4 Left front-side cap and Phillips 13mm head hex flange screw
- Legend
1 Phillips 13mm head hex flange screw 2 Left front-side cap
- Insert the I/O modules, the power cooling modules, and all of the drives into their corresponding slots in the chassis.