- Position the backplane boards to where it will install into the Replication Engine chassis.
Figure 1: Backplane boards
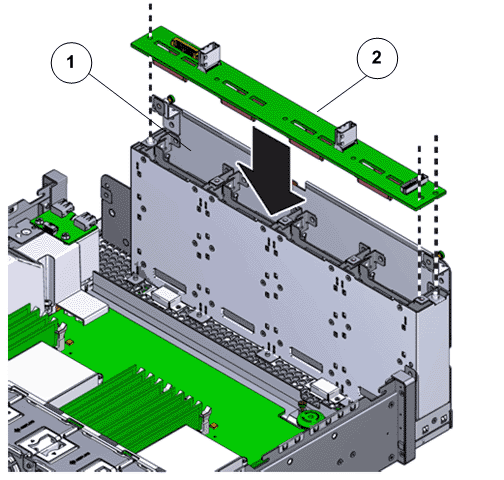
- Legend
1 Drive compartment 2 Backplane boards
Note: The backplane boards align with the drive connectors. In the following diagram, the two alignment holes are on the left and the single alignment hole is on the right. - Install and tighten the five screws that secure the backplane boards onto the drive compartment.
Figure 2: Backplane boards secured
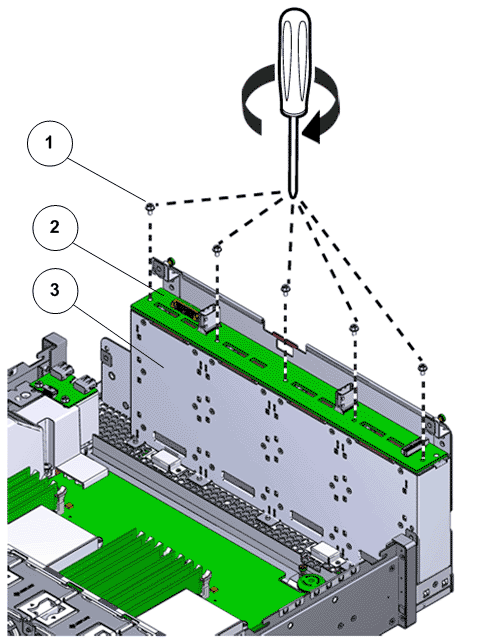
- Legend
1 Screws securing the backplane boards 2 Backplane board 3 Drive compartment
- Secure the backplane inside the Replication Engine by inserting the four Phillips Number 2 thumb screws on the four sides of the backplane and tightening them using a Phillips Number 2 screwdriver.
- Rotate the drive compartment and backplane back into position inside the Replication Engine and ensure that the alignment pins engage. Note: To confirm that the backplane is locked into position, listen for an audible click or feel the backplane engage with the Replication Engine.
- Reconnect all the cables that had been previously disconnected from the backplane.Cables that must be reconnected include:
SATA or drive cable
Motherboard to HDD backplane cable
Figure 3: Reconnect cables to the backplane
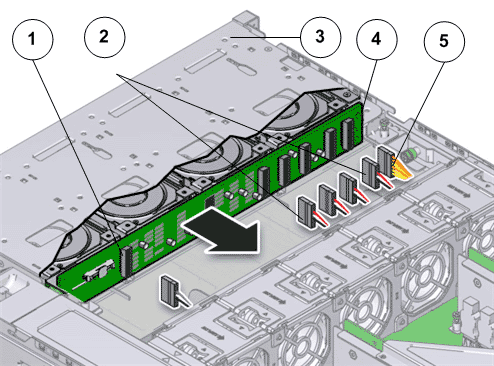
- Legend
1 SATA or drive cable 2 NV-DIMM cable 3 Drive compartment 4 Backplane boards 5 Motherboard to HDD backplane cable
- Reinstall the drives into the backplane in the appropriate locations.