- Unscrew the filler panels on the riser (if any), so that the HBAs can be inserted into the PCIe slots of the replacement riser.Note: If you are replacing an HBA from the riser with the retainer latch, swing the retainer latch to its fully open (180 degrees) position.
- Orient the HBA so that the brackets of the HBA align with the alignment pin in the PCIe slot of the riser.Important! Hold the HBA by the edges. Do not touch the metal contacts on the bottom of the card.
- Push the connectors on the edge of the HBA into the PCIe slot by pushing firmly to seat the card.
Figure 1: Insert HBA into riser slot
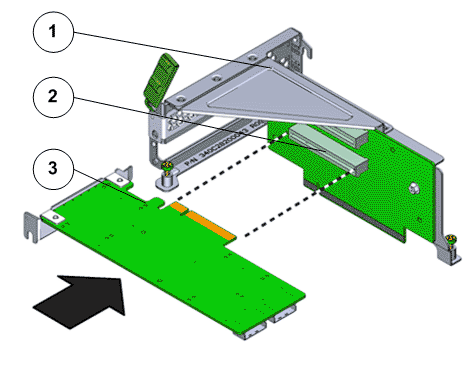
- Legend
1 Riser 2 Riser slots 3 HBA
- Apply firm pressure on each end of the HBA alternately until it clicks into place in the riser socket.CautionSupport the HBA and the riser as necessary to prevent excessive flexure. Otherwise, the HBA or the riser card might be damaged.
- When all HBAs have been installed in this riser, swing the retainer latch to its fully closed position. If there is resistance, check the alignment of the HBA and try again.
Figure 2: HBA retainer latch
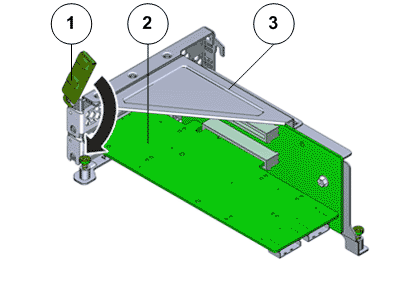
- Legend
1 Riser retainer latch 2 HBA 3 Riser
- Repeat the procedure for any additional PCIe3 HBAs that might be installed in the other risers.
- Reconnect any cables that had been disconnected from the HBAs.Note: Make sure that disconnected cables from the HBAs are connected to their original ports.