- Unpack the component from its shipping carton.Note: Place the component on an antistatic mat if it must be set aside for any reason.
- Set the LED board
into the LED assembly.
Figure 1: Attach LED board from the LED alarm assembly
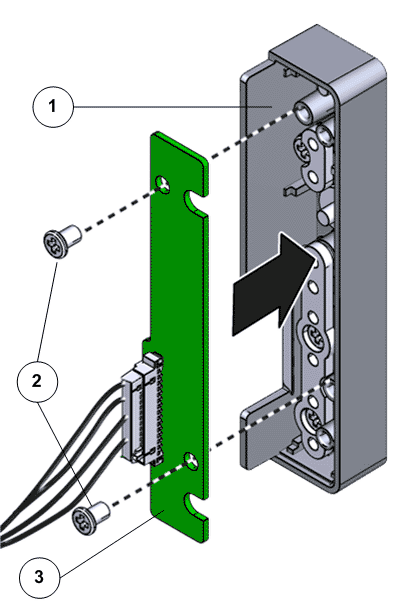
- Legend
1 LED alarm assembly 2 Screws securing the LED board to the LED alarm assembly 3 LED board
- Install and tighten the two screws.
- Position the LED
assembly over the flange on the left of the Replication Engine chassis.
Figure 2: LED alarm assembly positioned over Replication Engine chassis
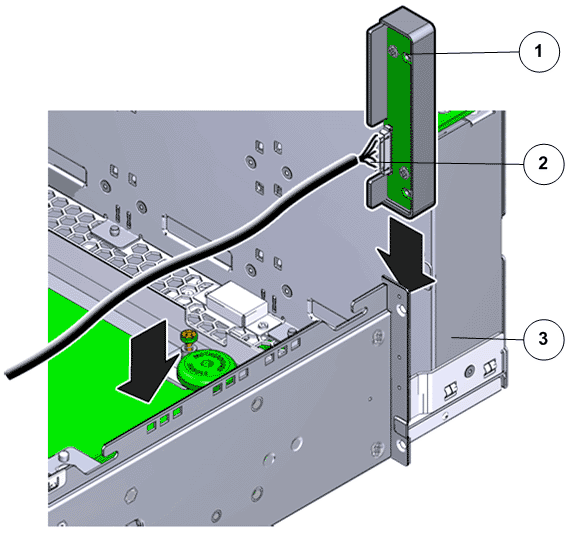
- Legend
1 LED board 2 LED cable 3 Replication Engine chassis
- Install and tighten
the two screws to secure the LED alarm assembly onto the Replication Engine chassis.
Figure 3: Screws to secure the LED alarm assembly
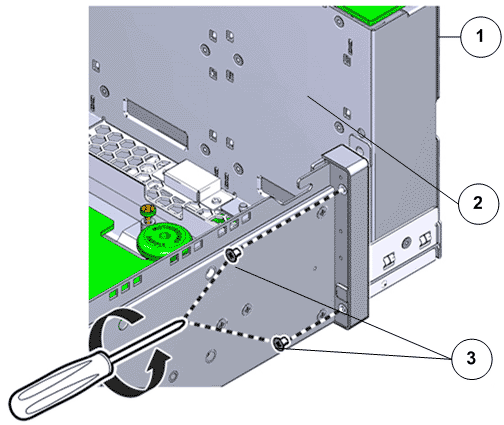
- Legend
1 LED assembly 2 Replication Engine chassis 3 Screws that secure the LED assembly to chassis
Note: The bottom Phillips Number 2 screw is hidden under the slide rail and can be accessed by removing the two rail screws closest to the front of the Replication Engine. Gently pry the slide rail away from the Replication Engine chassis about 1/4 inch. Do not bend the rail while removing the bottom screw. - Route the cable into the cable clamp against the side wall and the midplane of the Replication Engine chassis.
- Gently connect
the cable to the motherboard.
Figure 4: Reconnect LED alarm assembly cable
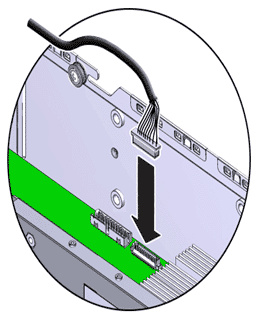
- Insert and tighten the two Phillips Number 2 screws at the back of the LED alarm assembly and secure the LED assembly to the Replication Engine front panel.