- Unpack the component from its shipping carton.Note: Place the component on an antistatic mat if it must be set aside for any reason.
- Use the two thumb screws or handles to place the motherboard onto the Replication Engine chassis gently.Note: Due to the tight fit inside the Replication Engine chassis, care must be taken while inserting the motherboard into the chassis. Do not flex the PDB board and ensure that the screw holes on the chassis align correctly with the motherboard while inserting the motherboard into the Replication Engine chassis.
- Lift the motherboard gently by the handles to a height of about 0.5 in. (13 mm) and slowly move the motherboard forward into the chassis from the rear.
- When there is about 1.5 inches (36 millimeters) to go, lower the motherboard onto the bottom alignment pins.
- Slowly slide the motherboard forward until it drops, engaging the bottom alignment pins.
- Continue to slide the motherboard forward until it seats.Note: The back of the motherboard must be flush with the back of the chassis. Additionally, the four holes in the motherboard must align with the four holes in the bus bars.
- Tighten the captive screws, the four bus bar screws, and reconnect the cables that you previously disconnected.
Figure 1: Secure the motherboard
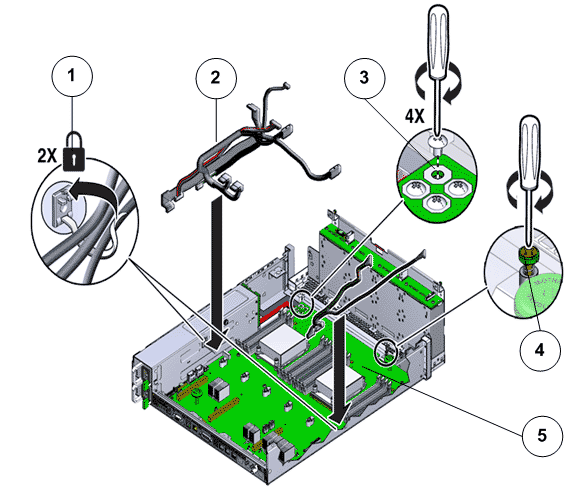
- Legend
1 PDB cable bundle 2 Motherboard cables 3 Bus bar screws that secure the PDB to motherboard 4 Thumb screws or handles to remove and insert the motherboard to the chassis 5 Replication Engine motherboard