- Unpack the component from its shipping carton.Note: Place the component on an antistatic mat if it must be set aside for any reason.
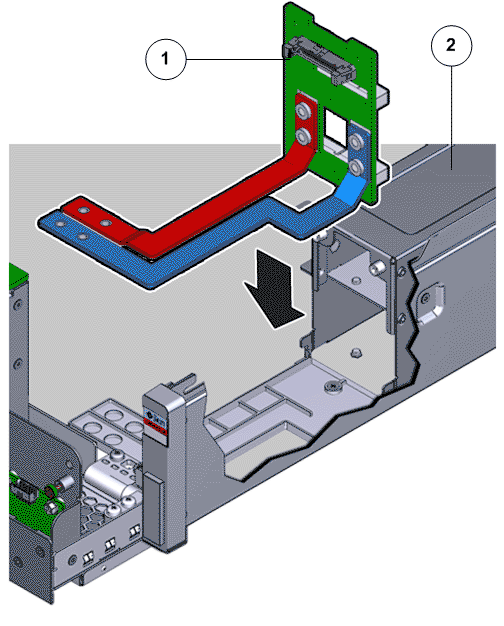
- Position the PDB to where it installs into the chassis.
Figure 1: PDB alignment

- Legend
1 PDB circuit board 2 PDB cage
Note: The bus bars are forward and down. - Place the bus bars into the channels, and move the PDB rearward and down onto the alignment pins.
- Using a Phillips Number 2 screwdriver, loosely insert the four Phillips Number 2 screws that secure the PDB assembly onto the motherboard.
Figure 2: Insert PDB

- Legend
1 Phillips screws that secure the PDB to the chassis 2 PDB
- Using a Torx Number 10 screwdriver, loosely insert the 10 Torx Number 10 screws that secure the motherboard to the Replication Engine chassis starting from one side.
- Tighten all 10 Torx Number 10 screws and the four Phillips Number 2 screws in a diagonal pattern.
- Insert and tighten the two finger screws on the motherboard to lock the motherboard inside the Replication Engine chassis. Note: The two thumb screws on the motherboard secure the motherboard to the Replication Engine chassis along with ten Torx Number 10 screws.