- Disengage the CPU release lever on the right side of the CPU socket (viewing the Replication Engine from the front) by pushing down and moving it to the side away from the CPU, and then rotating the lever upward.
Figure 1: Disengage CPU release lever
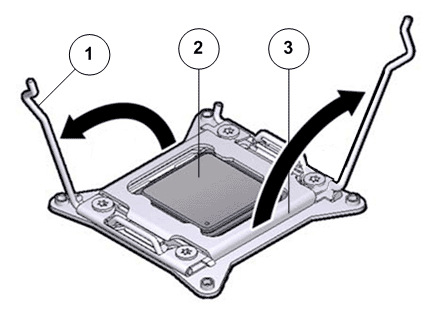
- Legend
1 CPU release lever 2 CPU 3 CPU socket
Note: This exposes the CPU inside the CPU socket.CautionThe correct CPU removal or replacement tool must be used to remove and replace a CPU. Otherwise, the CPU or the CPU socket might be damaged. The correct CPU removal/replacement tool is included in the box with the replacement CPU. Additionally, both removal or replacement tools ship with replacement motherboards.The model for the CPUs in the Oracle FS System Replication Engine is E5-2620 V2 (8 core processor) and requires a CPU removal tool that is color coded green.Figure 2: CPU removal tool
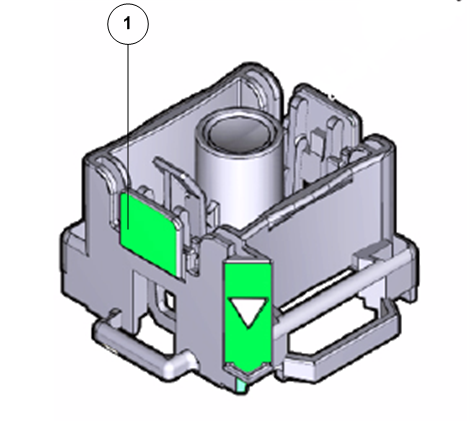
- Legend
1 CPU removal tool color coded green
- Disengage the CPU socket release lever on the left side of the CPU socket (viewing the Replication Engine from the front) by pushing down and moving it to the side away from the CPU, and then rotating the lever upward.
Figure 3: Disengage CPU socket release lever
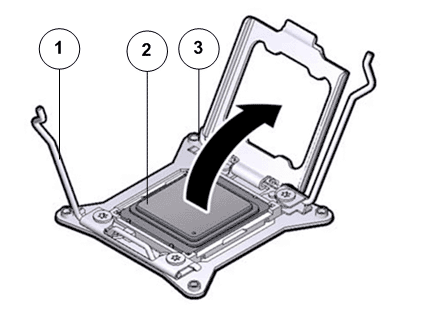
- Legend
1 CPU socket release lever 2 CPU 3 CPU pressure frame
- Swing the CPU pressure frame to fully open position and gently disengage the CPU pins on the underside to lift up the CPU from the CPU socket.Note: Handle the CPU socket pins with extreme care. CPU socket pins are very fragile. A light touch can bend the CPU socket pins and damage the board beyond repair.
- Use the syringe to apply approximately 0.1 ml of thermal grease to the top center of the CPU.
- Set aside the failed CPU on an antistatic mat.