- Using a Phillips Number 2 screwdriver, remove the four bus bar screws that secure the power distribution board (PDB) assembly onto the motherboard.
Figure 1: Phillips screwdriver to remove PDB screws
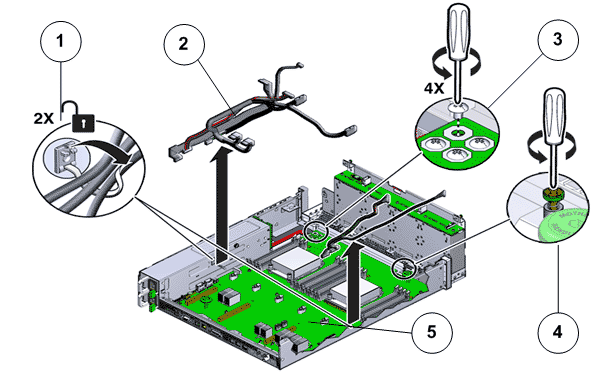
- Legend
1 PDB cable bundle 2 Motherboard cables 3 Phillips screws that secure the PDB to motherboard 4 Thumb screws that secure the motherboard to the chassis 5 Replication Engine motherboard
Tip: Disconnect all remaining cables and move them out of the way. - Fully loosen the captive screw at the front of the motherboard.
- Grasp the two motherboard handles or thumb screws and slide the motherboard backwards off of the alignment pins.
Figure 2: Handles to lift up the motherboard
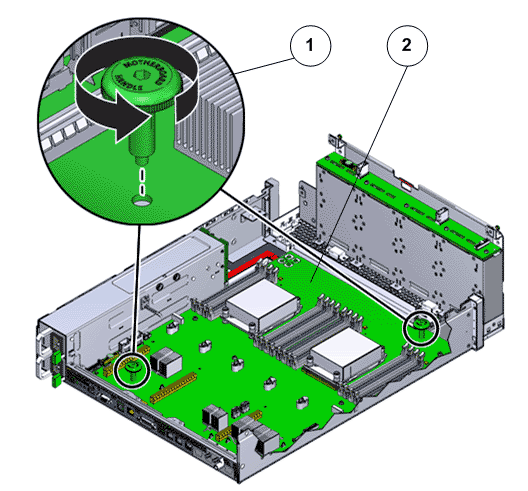
- Legend
1 Thumb screws (2) 2 Replication Engine motherboard
- Lift the motherboard 0.5 in. (13 mm) to clear the bottom alignment pins and slowly move the motherboard out the back of the chassis and set it aside.
Figure 3: Remove the motherboard
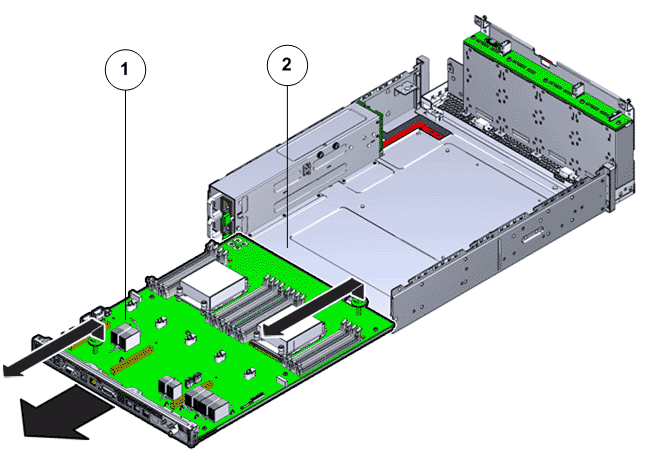
- Legend
1 Motherboard 2 Replication Engine chassis
- Place the motherboard on an antistatic mat holding the motherboard handles or thumb screws.