- Disconnect any external cables that remain connected to the HBAs in the risers.Note: Also disconnect any internal cables attached to the HBAs, if that will ease removing the HBA.Tip: Make a note of the positions of all existing cable connections before removing any cables. Replacing HBAs or their cables into the incorrect position in the riser may result in a loss of performance or functionality.
- Note the position of the HBAs installed on the riser.Tip: Make a note of the slot numbers of all existing HBAs before removing any HBAs.
- Using a Phillips Number 2 screwdriver, loosen the two Phillips Number 2 captive screws on either side of the riser that hold the riser to the Replication Engine motherboard.Note: The riser on the opposite end of the power supply has a latch that must be disengaged to remove the riser from the Replication Engine chassis
Figure 1: Captive screws to secure the risers
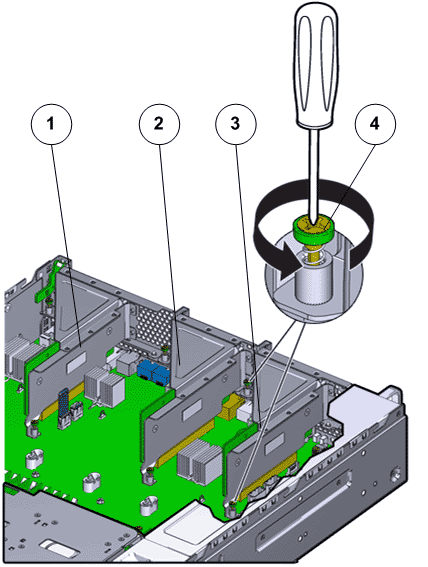
- Legend
1 Riser 3 with latch 3 Riser 1 2 Riser 2 4 Captive screws that secure riser
To remove riser 3, unlock the latch to release the riser from the Replication Engine motherboard.Figure 2: Unlock Riser 3 latch
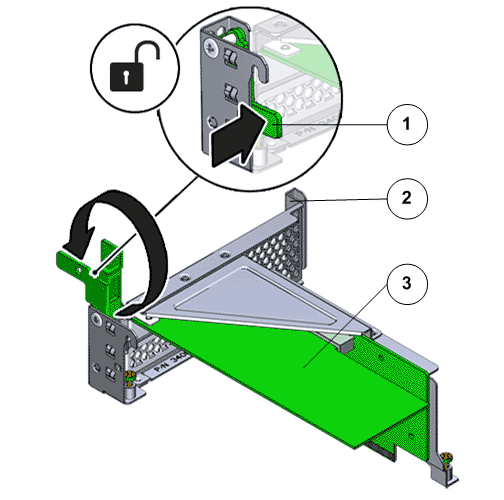
- Legend
1 Riser 3 latch 3 HBA 2 Riser 3
- Carefully pull the riser straight up and place it aside.
Figure 3: Remove riser
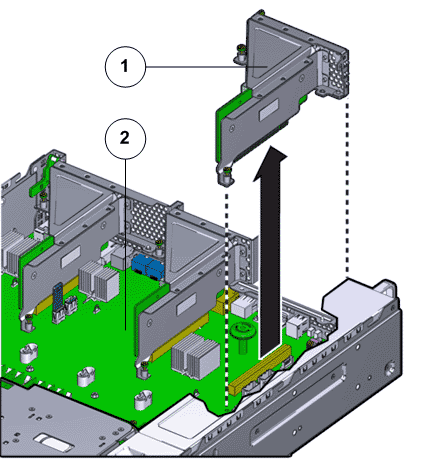
- Legend
1 Riser 2 Replication Engine motherboard