The motherboard is the primary circuit board of the Replication Engine. All Replication Engine components are connected to the motherboard using electrical circuits and communicate with the motherboard to ensure normal Replication Engine operation. A failed motherboard can cause the Replication Engine to fail and must be replaced as soon as possible.
- Prerequisites:
Ensure that you have a Phillips Number 2 screwdriver with at least a 4-inch shaft.
Before handling a component, touch a grounded surface to discharge any static electricity.
Attach an electrostatic discharge (ESD) wrist strap to your wrist, and stand on an ESD mat while replacing components.
Ensure that there is a workbench available to place the Replication Engine chassis if it is removed from the rack for servicing.
Ensure that you have thermal grease and syringe available to clean the CPU and heat sink during the replacement procedure.
Make sure that you have a Torx Number 10 screwdriver.
Ensure that there is a static protected surface or workbench available to place the components temporarily when they are removed from the motherboard during the replacement process.
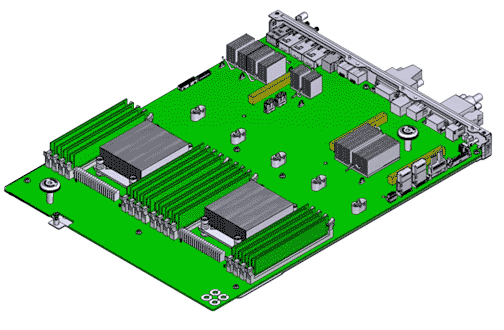
Each Replication Engine has a motherboard that is located on a tray at the bottom of the chassis. The Replication Engine motherboard is a field replaceable unit (FRU) on which the various Replication Engine components (FRUs and CRUs) are located. Replacing a motherboard requires you to bring the Replication Engine offline. The following figure shows the Replication Engine motherboard.
Figure 1: Replication Engine motherboard
Hardware CRUs or FRUs that can be easily damaged like DIMMs, NV-DIMMs, CPUs, and heat sinks are handled only once during the replacement procedure.
The replacement motherboard that has been secured in the Replication Engine chassis provides the best support for installing the components.
Moving the hardware components directly from the failed motherboard to the replacement motherboard ensures that they are installed in the correct locations.