Business Re-structuring in the corporate management is the act of reorganizing Ownership, Operational or other structures of the company for making it more profitable or better organized for its present needs. Other reason for restructuring is demerger or a response to major change in the business such as repositioning or buyout.
Business restructuring operations can be:
· Merge- Two dimension nodes are merging into one. Here the source nodes are many and the target node will be one. The entities can be copied from the source to target or else can be moved to the target without retaining them in the source. In this scenario, the existing source mapping needs to be deleted and the new mappings should be created for the target.
· Split- A dimension node is splitting into two. Here the source node will be one and the target node will be many. The entities can be copied from the source to target or can be moved to the target without retaining them in the source. In this scenario, the existing source mapping needs to be deleted and the new mappings should be created for the target.
· Add- A new dimension node is getting added. Here the source node can be many and the target node will be one. The entities are copied from the source to the target. In this scenario, new mappings should be created for the target. Workflow will be called only for the target.
· Close- A dimension node is getting closed. In this scenario, the existing mappings should be deleted. The source node can be many or one. Workflow will be called only for the source.
Based on the role that you are mapped to, you can access, read, modify, or authorize the Business Restructure definitions. For all the roles and descriptions see Appendix A. The roles mapped to Business Restructure are as follows:
· RESTRACC- Restructure Access
· RESTRMOD- Restructure Edit
· RESTREXEC- Restructure Execute
· RESTRREAD- Restructure Read
· RESTRSUMM- Restructure Summary
· RESTRWRITE- Restructure Write
To access Business Restructure, navigate to Object Administration tab and click Utilities. In the Utilities window, click Restructure.
For the first time when you use this utility, you need to do Restructure Metadata Reload. Afterwards when a change in model or map definitions happens, then only you have to reload the metadata.
Navigate to the Restructure window and click Metadata Reload. From the Metadata Reload window, click Initiate Reload. A message is displayed indicating the status of the metadata reload.
This feature allows you to define and manage the Dimension for which you are doing the business restructuring. In the Configuration, you need to select the Dimension and Fact tables which will be participating in the restructuring process. Additionally, you have to specify what kind of entity operation you want to do, that is, Move or Copy operation.
This option allows the administrators to create a new configuration for business restructuring. You should be mapped to the role RESTRWRITE to create configuration.
To create a new configuration
1. From the Restructure window, click Configuration. The Configuration Summary window is displayed.
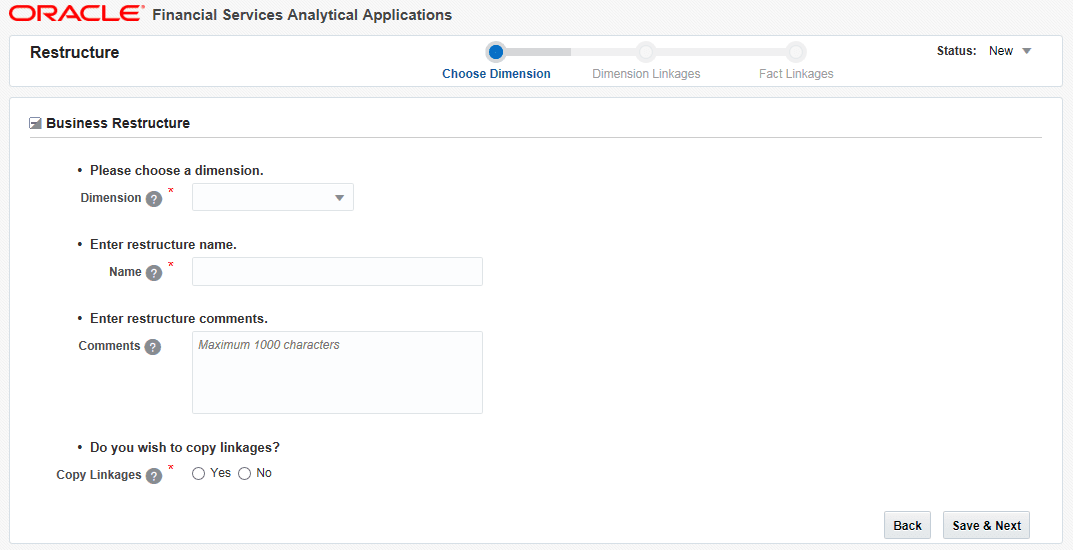
2. Click Create from the Restructure Configuration Summary toolbar. The Business Restructure window is displayed.
3. Enter the details as shown in the following table:
|
Field |
Description |
|
Fields marked in red asterisk (*) are mandatory. |
|
|
Dimension |
Select the dimension to be configured for the business restructure, from the drop-down list. The list displays all the Business Dimensions scoped for restructuring. |
|
Name |
Enter the name of the configuration. |
|
Comments |
Enter any additional information if any. |
|
Copy Linkages |
Select Yes to copy the linkages of the Fact tables related to the selected dimensions. |
4. Click Save & Next. The “Save Successful” message is displayed and the status is changed to Draft.
5. Click OK. The Restructure Configuration window is displayed.
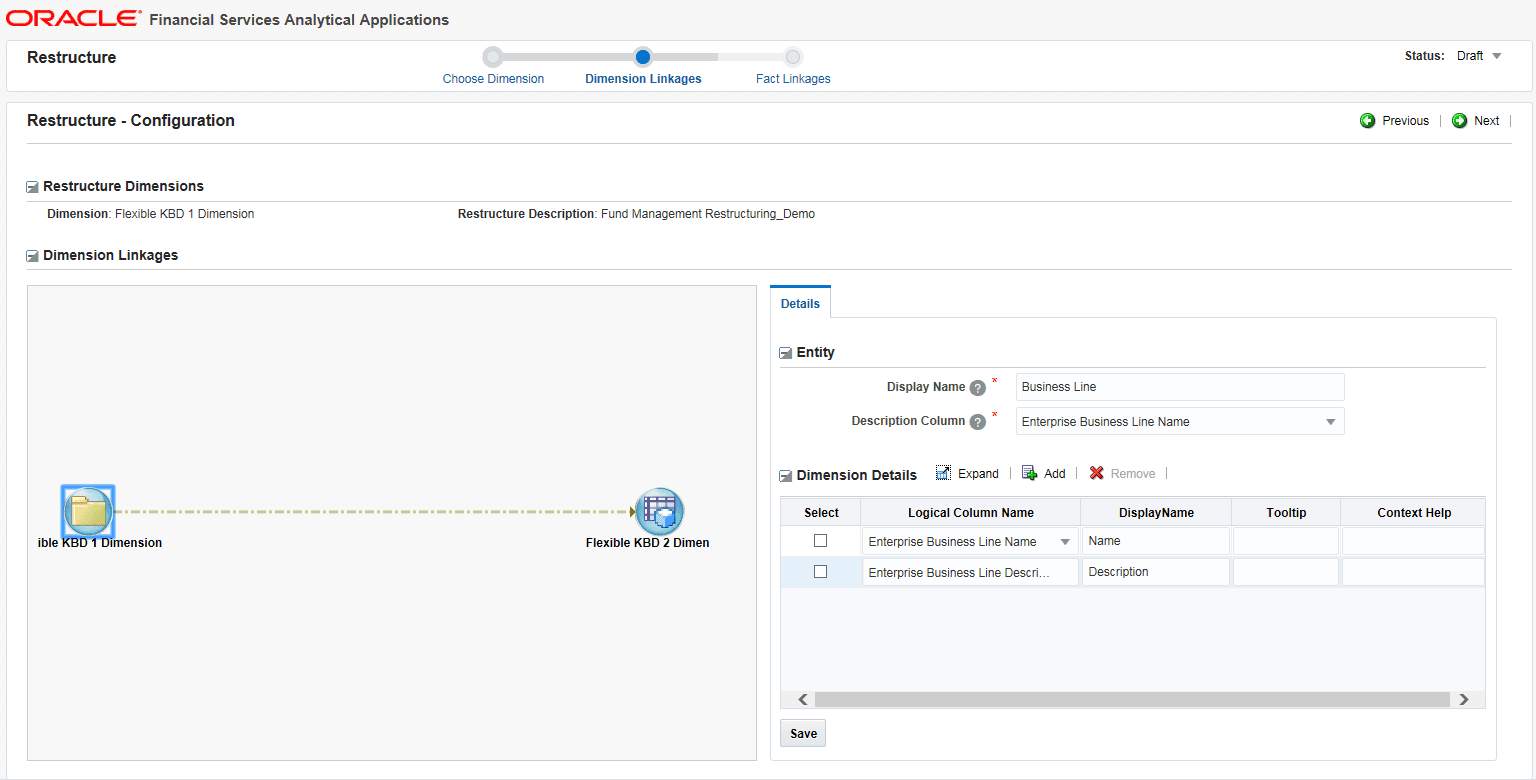
The Dimension Linkages pane shows the linkages of the selected dimension to other dimensions. The Dimension names displayed are the logical names used in the Data Model.
You can right-click a node from the Dimension Linkages pane and click Delete to remove it. Click Reset to undo the delete operation(s). If you have deleted 2 nodes and then click Reset, both nodes will be reverted back. You need to enter the Entity details again.
|
NOTE |
You can do Delete and Reset of nodes if the Configuration is in the Draft status. |
6. Click the Dimension whose details you want to add/ edit, from the Dimension Linkage pane. The Entity and Dimension details are displayed in the Details pane.
7. Enter a Display Name for the Dimension. This name will be displayed instead of the actual Dimension name in the Manage Restructure screens.
8. Select the Description Column of the Dimension, from the drop-down list. The list displays all columns in the Dimension table.
9. Click Add in the Dimension Details grid.
10. Select a column from the Logical Column Name drop-down list and enter a Display Name, Tooltip and Context Help for the selected column. The drop-down list displays the logical name given to the columns present in the selected Dimension table.
11. Click Save.
|
NOTE |
You need to complete the details for all the dimension nodes in the Dimension Linkages pane to move to the next step. |
12. Click Next. The Configuration window is displayed.
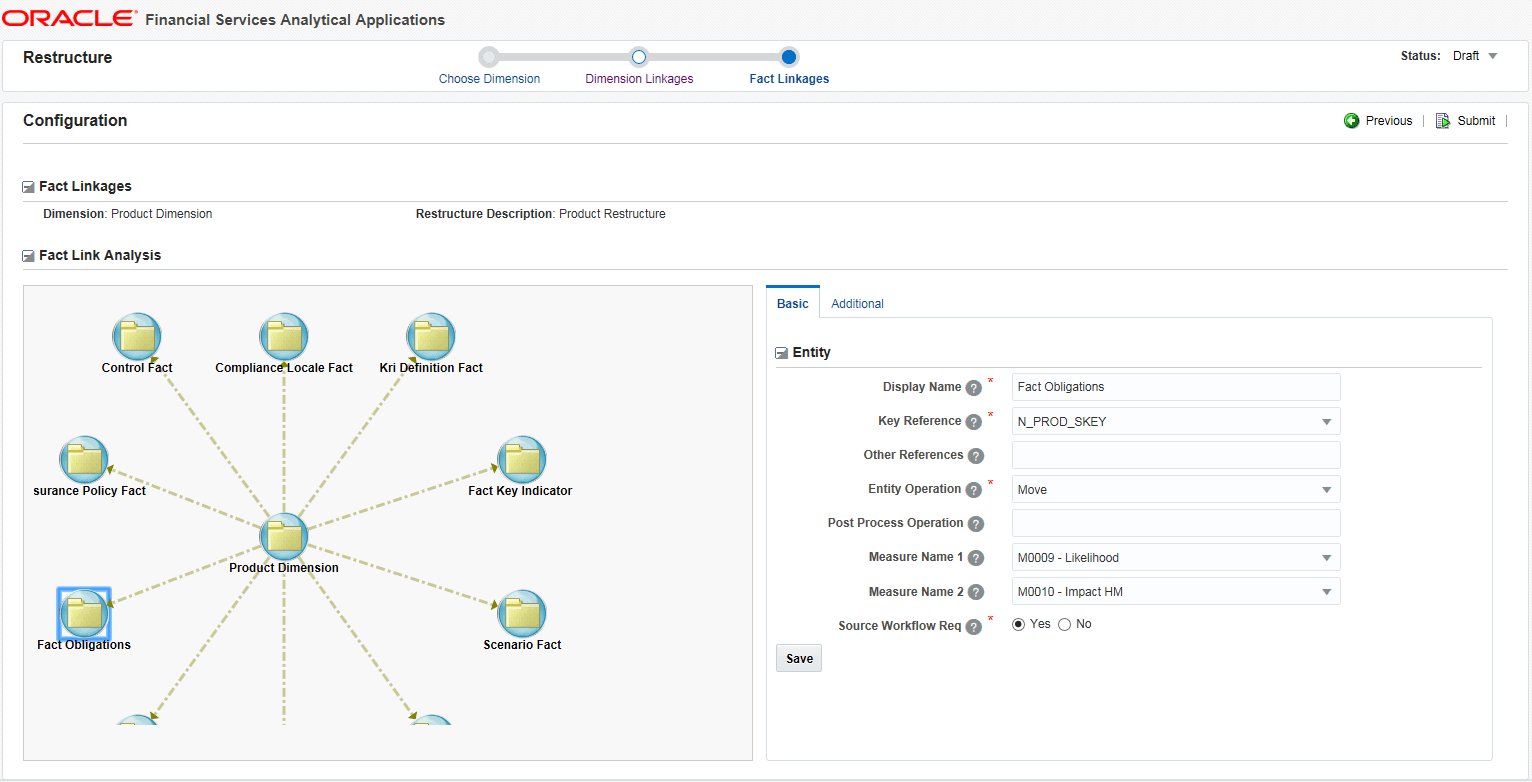
The Fact Link Analysis pane shows various Fact tables related to the selected dimension.
Right-click a Fact table and click View Mapping to view the linkages of the selected Fact table to other Fact tables.
You can right-click a node from the Fact Link Analysis pane and click Delete to remove it from participating in restructuring. Click Reset to undo the delete operation(s). If you have deleted 2 nodes and then click Reset, both nodes will be reverted back. You need to enter the Entity details again.
13. Click a Fact table. The Basic tab displays the details of the selected Fact table.
14. Enter the details in the Entity pane as given below:
|
Field |
Description |
|
Fields marked in red asterisk (*) are mandatory. |
|
|
Display Name |
Specify a name for the selected Fact table which will be displayed in the Managing screens. |
|
Key Reference |
Select the key reference column for the selected Fact table, from the drop-down list. |
|
Other References |
Click the field. All reference columns of the selected entity (Fact table) are displayed. Select the required references. |
|
Entity Operation |
Select the entity operation you want to do for the selected Fact table. The options are Move and Copy. |
|
Post Process Operation |
Specify the Class that implements the Post Processing Operation for the entity. |
|
Measure Name 1 |
Select the first Measure Name that will be calculated and summarized in the manage restructure list of the entity. |
|
Measure Name 2 |
Specify the second Measure Name that will be calculated and summarized in the manage restructure list of the entity. |
|
Source Workflow Req |
Click Yes if source workflow call is required. |
15. Click the Additional tab. You can provide additional details for the columns of the selected Fact table.
16. Click Add and a row is displayed inside the Entity Details grid.
17. Select a column from the Logical Column Name drop-down list. The list displays all the columns of the selected Fact table. The already added columns are disabled.
§ Enter a Display Name.
§ Set whether it is a User Column or not.
§ Select the Default User if it is a user column, from the drop-down list.
§ Select the Hierarchy Description of the column from the drop-down list. This is required if the selected Dimension is a part of the security mapper definition.
§ Enter the Tooltip and Context Help displayed for the selected column.
18. Click Submit. If it is submitted successfully, the status is changed to Submit. You cannot modify any fields once it is submitted.
This option allows you to modify configurations which are in Draft status.
To modify a configuration
19. From the Restructure window, click Configuration. The Configuration Summary window is displayed.
20. Click the configuration ID. The Restructure- Configuration window is displayed. For more information, see Creating a new Configuration.
This option allows you to close a configuration which is in the Submit status and is no more in use. You cannot close a configuration which is in Draft status; you will be prompted to delete it.
To close a configuration
21. From the Restructure window, click Configuration. The Configuration Summary window is displayed.
22. Select the checkbox corresponding to the configuration you want to close and click Close. The status of the configuration will be changed to Closed.
This option allows you to delete a configuration which is in the Draft status. Once deleted, it is removed from the Summary grid.
To delete a configuration
23. From the Restructure window, click Configuration. The Configuration Summary window is displayed.
24. Select the checkbox corresponding to the configuration you want to delete and click Delete.
This feature allows the business users to manage and execute business restructuring. The stages involved are:
· Creating a new Business Restructure
· Submitting the Business Restructure
· Executing Business Restructure
This option allows you to create a new business restructure based on a selected configuration. You can select only those configurations which are in the Submit status. You should be mapped to the role RESTRWRITE to create Business Restructure.
To create Business Restructure
25. From the Restructure window, click Management. The Manage Restructure Summary window is displayed.
26. Click Create from the Manage Restructure Summary toolbar. The Business Restructure window is displayed.
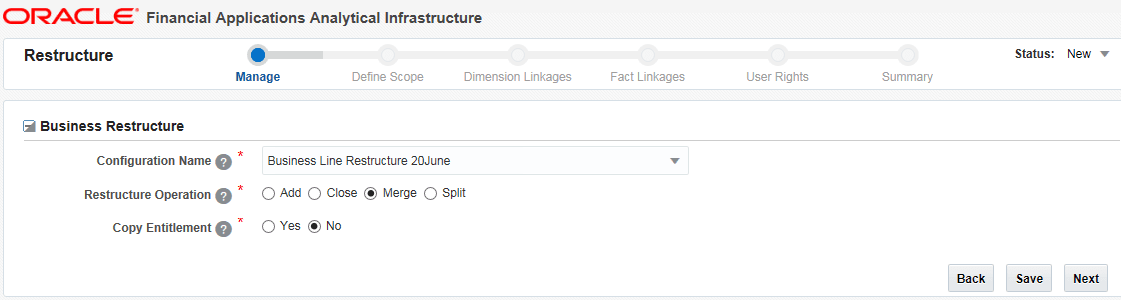
27. Enter the details as shown in the following table:
|
Field |
Description |
|
Fields marked in red asterisk (*) are mandatory. |
|
|
Configuration Name |
Select the configuration defined for the business restructure, from the drop-down list. The list displays all the Configurations in the Submit status. |
|
Restructure Operation |
Select the required restructure operation. The options are Add, Close, Merge and Split. For more information, see Restructuring Operations. |
|
Copy Entitlement |
This option is enabled if the selected dimension is part of the Security Mapper definition. Click Yes, then the source mappings will be done based on the Restructure Operation. If No is selected, no mappings will be copied. Then you need to do the mappings freshly after executing the Restructure operation. |
28. Click Next. The “Save Successful” message is displayed and the status is changed to Draft. The Business Restructure- Scope window is displayed.
This option allows you to select the required nodes in the source Dimension which will be copied/ moved to the target node(s). The behavior is explained for each restructure operation:
· Merge – You can select multiple source nodes, but you are restricted to select only one target node, since you are merging multiple nodes into a single one. It performs copy/move operation based on the selected configuration.
· Split – You are restricted to select only one source node, but allowed to select multiple target nodes, since you are splitting a single node into multiple. It performs copy/move operations based on the selected configuration.
· Add – You can select multiple source nodes, but allowed to select only a single target. It performs only copy operation.
· Close – You can select single or multiple source nodes. The target node will be same as the source node. No provision will be provided to select target.
To define scope of the Business Restructure:
29. From the Restructure window, click Define Scope from the path. The Business Restructure- Scope window is displayed.
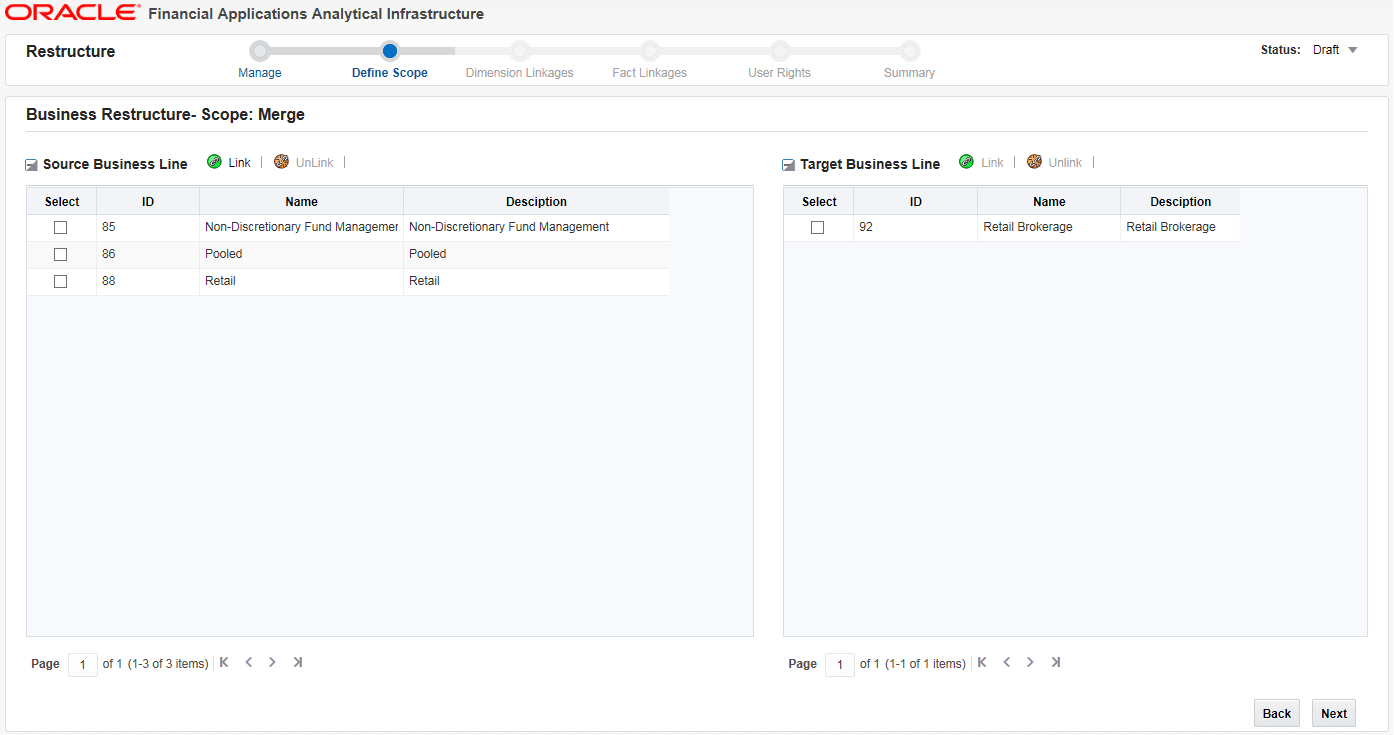
The names of the source and target dimensions and their nodes are displayed as per the Display Names given in the Configuration.
30. Click Link from the Source pane.
31. Select the required nodes in the source Dimension(s) for which the restructuring is done and click Ok.
|
NOTE |
You can select a linked node and click Unlink to remove it. |
32. Click Link from the Target pane and select the required target node(s).
33. Click Next. The status will become In Progress. The workflow tasks will be sent to the App business users.
This option allows you to view and analyze the dimension and fact tables which are affected by the business restructure. After reviewing, you need to submit it. If multiple applications are using the selected Dimension, one of the users from each application needs to submit the Restructure.
Once the restructure scope is defined, all app users will get a task in their Inbox. Click the hyperlink under the EntityName column. The Manage Restructure Summary window is displayed. You need to select the Business Restructure which is in the In Progress status.
To submit the Business Restructure
34. From the Restructure window, click Dimension Linkages from the path. The Business Restructure- Related Dimensions window is displayed.
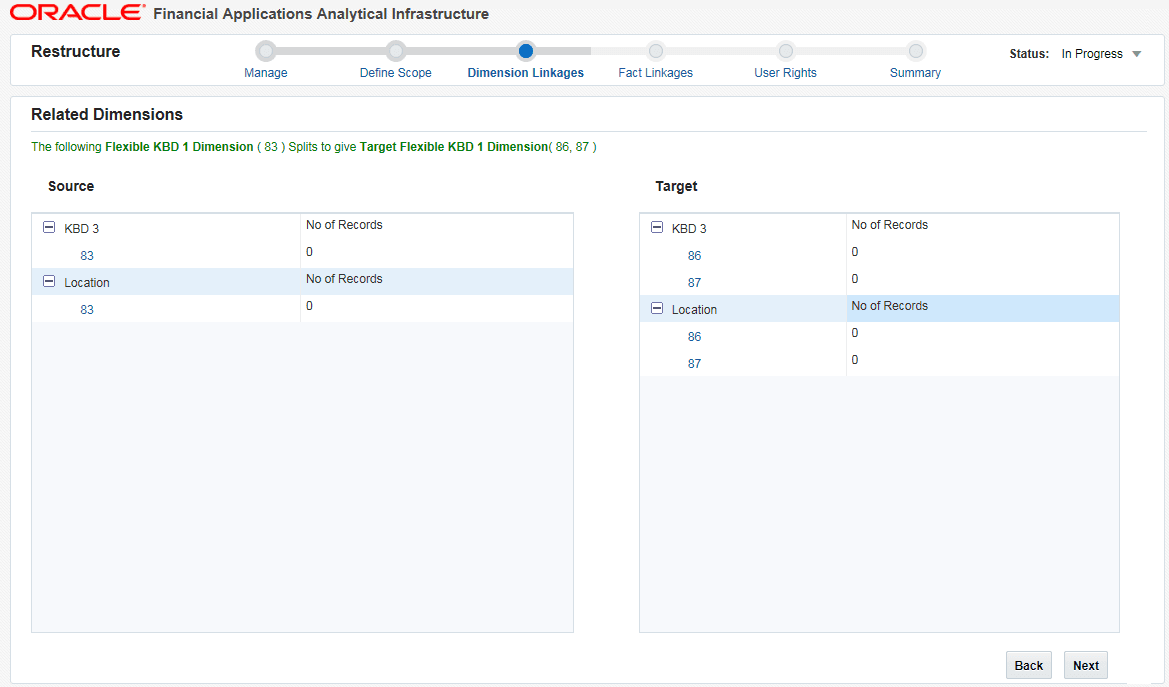
You can view the source and the target Dimensions along with their nodes, which are getting affected by the restructuring under the Source and the Target pane respectively. On expanding the source dimension, you can view the count of nodes getting impacted.
35. Click the node hyperlink in the Source pane. The Source Records grid displays the records in the node entity.
36. Review the details and click Ok.
37. Similarly, expand the Target dimension and click the node hyperlink in the Target pane. The Target <Dimension Name>-<Node Name> window is displayed.
The Linked Records grid displays the records which are linked to the Target dimension.
38. Select a record and click Unlink to remove it.
39. From the Unlinked Records grid, select a record and click Link to link it to the target dimension.
|
NOTE |
You can only link or unlink the existing/ system generated nodes; you cannot add a new link. |
40. Click Next. The Related Facts window is displayed.

You can view the number of records getting impacted by restructuring, for the selected Fact tables.
41. Click the node hyperlink in the Source pane to display the impacted records. Review the details and click OK.
42. Similarly, click the node hyperlink in the Target pane. You can view the linked and unlinked records.
43. Select a record and click Unlink to remove it.
44. From the Unlinked Records grid, select a record and click Link to link it to the target dimension.
|
NOTE |
You can only link or unlink the existing/ system generated nodes; you cannot add a new link. |
45. Click Next. The User Rights window is displayed.
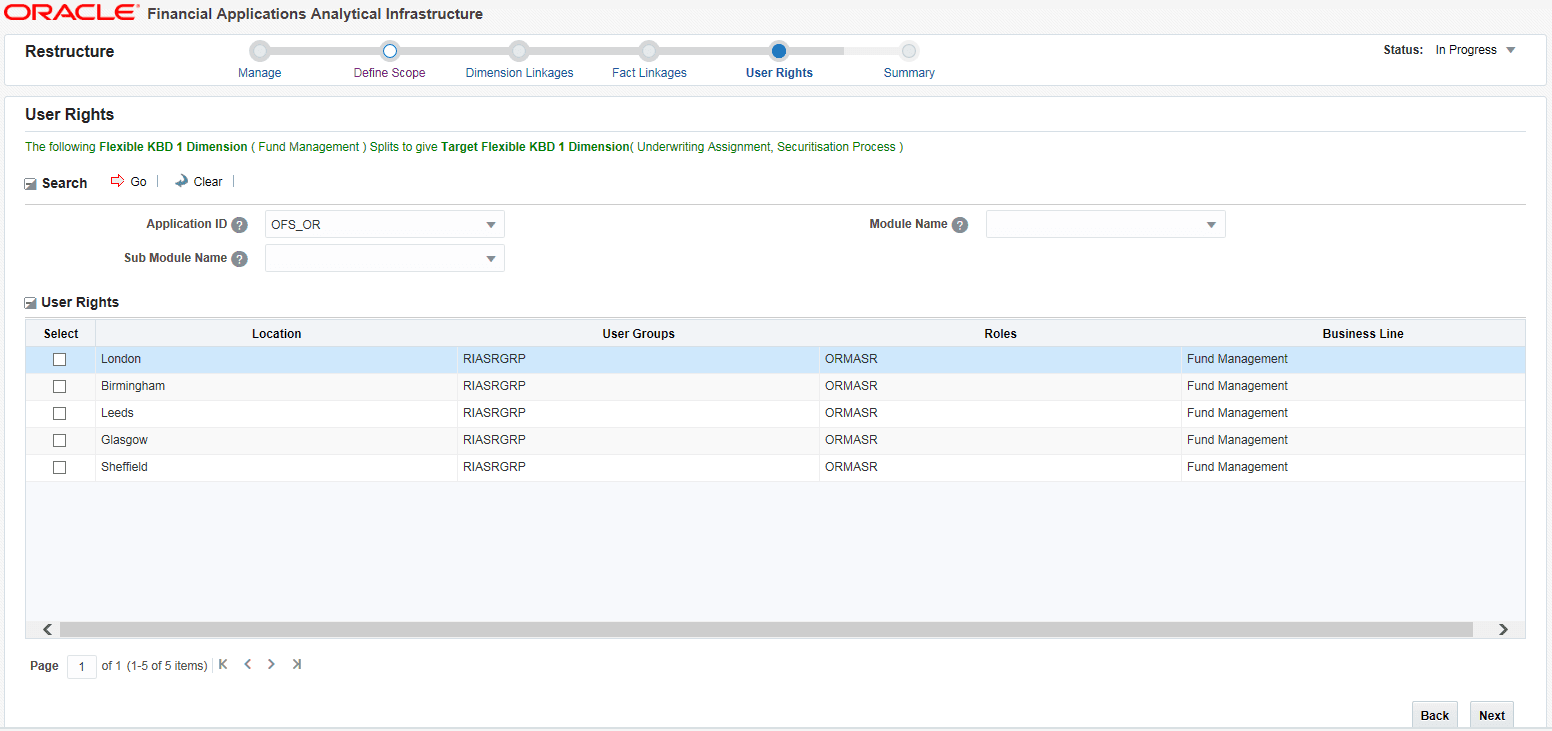
You can view the user roles and user groups mapped to the source dimension(s).
46. Click Next. The Summary page is displayed.
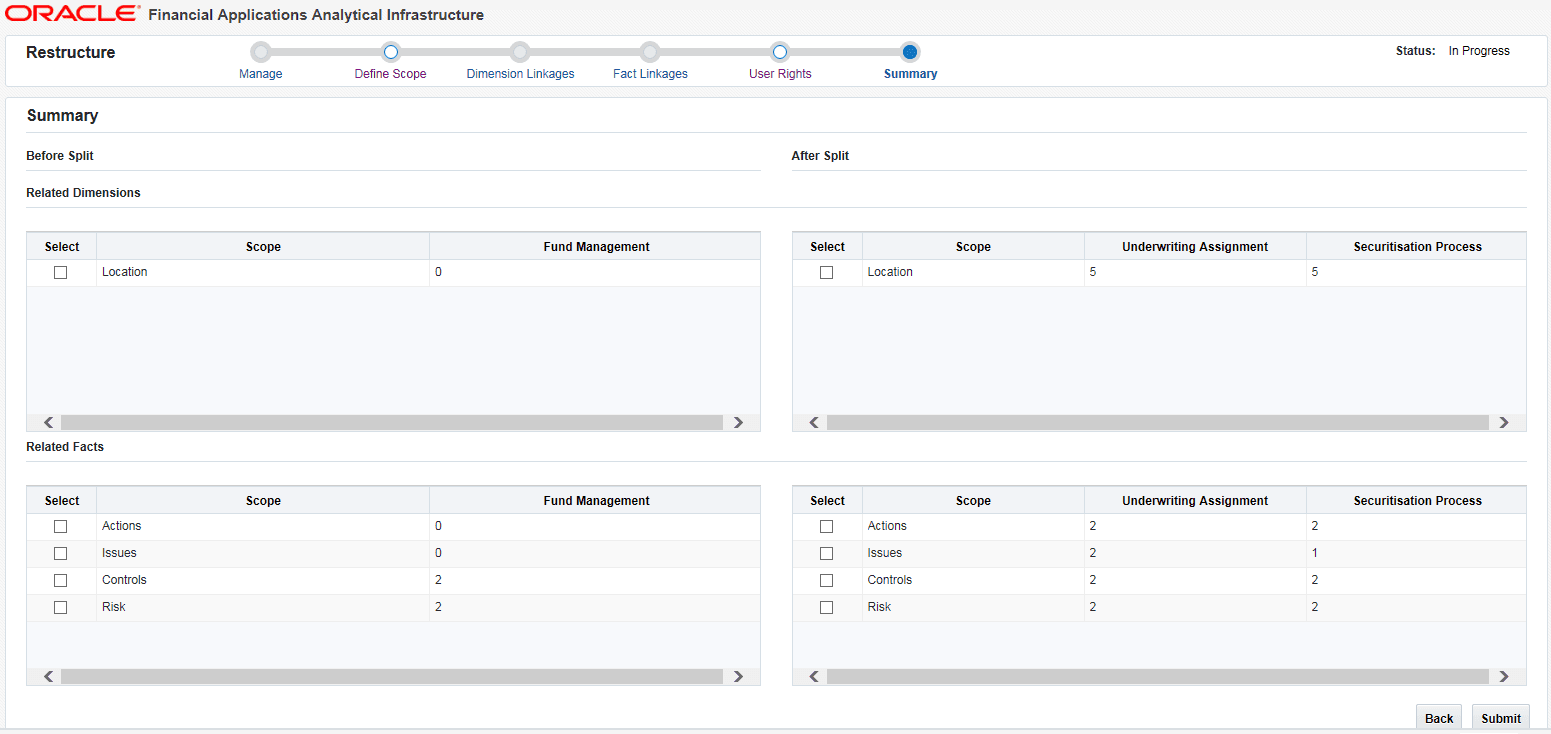
You can view the summary of Source/ Target Dimensions and Facts/entities before and after the Business restructuring.
47. Click Submit. If multiple applications are using the selected Dimension, a user from each application needs to submit the Restructure. Then only the status will be changed to Submit.
You can execute a Business Restructure if it is in the Submit status. You should be mapped to the user role RESTREXEC (Restructure Execute) to do the execution. You can either execute it from the utility itself or create a batch and execute it later from the Operations module.
To execute the Business Restructure:
48. From the Restructure window, click Summary from the path.

49. Click Execute Restructure to create a batch and fire execution immediately. The status will be changed to Execution Initiated. After execution, the status will be changed to Executed if it is successful or Failed if execution is failed.
50. Click Create Batch to create a batch and execute it later from the Operations module. The status will be changed to Batch Created.
This option allows you to delete a Business Restructure which is in Draft status.
To delete a Business Restructure
51. From the Restructure window, click Management. The Manage Restructure Summary window is displayed.
52. Select the checkbox corresponding to the Business Restructure you want to delete and click Delete.