 from
the Function Maintenance tool bar. Add button
is disabled if you have selected any function in the grid. The New
Function window is displayed.
from
the Function Maintenance tool bar. Add button
is disabled if you have selected any function in the grid. The New
Function window is displayed.System Administration refers to a process of managing, configuring, and maintaining confidential data in a multi-user computing environment. System Administration in Security Management involves creating functions, roles, and mapping functions to specific roles. System Administration also involves maintaining segment information, holiday list, and restricted passwords to ensure security within the Infrastructure system.
You can access System Administrator in Navigation List to the left of Security Management. The options available under System Administrator are:
A function in the Infrastructure system defines the privileges to access modules or components and to define or modify metadata information associated. Function Maintenance allows you to create functions for users to ensure only those functions are executed which are specific to the user's role.
You can access Function Maintenance by expanding System Administrator section within the tree structure of Navigation List to the left. The Function Maintenance window displays the function details such as Function Code, Function Name, Description, and the number of Roles Mapped to the function. The Function Maintenance window also facilitates you to view, create, modify, and delete functions within the system.
You can also make use of Search and Pagination options to search for a specific function or view the list of existing functions within the system.
To create function in the Function Maintenance window:
1. Select from
the Function Maintenance tool bar. Add button
is disabled if you have selected any function in the grid. The New
Function window is displayed.
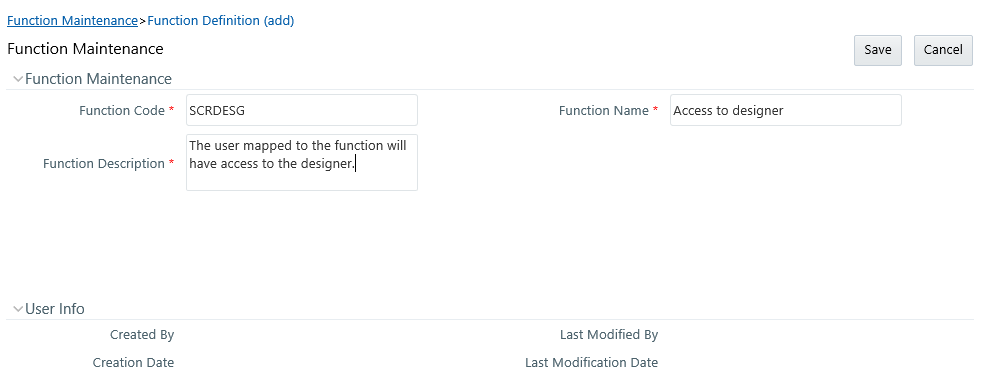
2. Enter the function details as tabulated. You can also see pre-defined Function Codes for reference.
Field |
Description |
Fields marked in red asterisk (*) are mandatory. |
|
Function Code |
Enter a unique function code. Ensure that there are no special characters and extra spaces in the code entered. For example, DATADD to add dataset. |
Function Name |
Enter a unique name for the function. Ensure that the Function Name does not contain any special characters except “(“, “)”, “_”, “-“, “.” |
Function Description |
Enter the function description. Ensure that the Function Description does not contain any special characters except “(“, “)”, “_”, “-“, “.” |
3. Click Save to upload the function details.
The User Info grid at the bottom of Function Maintenance window display metadata information about the function created.
You can view individual function details at any given point. To view the existing user details in the Function Maintenance window:
1. Select the checkbox adjacent to the Function Code.
2. Click  button
in the Function Maintenance tool bar.
button
in the Function Maintenance tool bar.
The View Function Details window is displayed with the details such as Function Code, Function Name, and Function Description.
To update the existing function details (other than system generated functions) in the Function Maintenance window:
1. Select the checkbox adjacent to the required Function Code.
2. Click  button
in the Function Maintenance tool bar. The Edit Function
Details window is displayed.
button
in the Function Maintenance tool bar. The Edit Function
Details window is displayed.
3. Update the required information. For more details, see Create Function.
NOTE |
Function Code cannot be edited. |
4. Click Save to upload the changes.
You can remove only those function(s) created by you and which are no longer required in the system, by deleting from the Function Maintenance window.
1. Select the checkbox adjacent to the Function Code whose details are to be removed.
2. Click  button
in the Function Maintenance tool bar.
button
in the Function Maintenance tool bar.
3. Click OK in the information dialog to confirm deletion.
A role in the Infrastructure system is a collection of functions defined for a set of users to execute a specific task. You can create roles based on the group of functions to which users are mapped.
You can access Role Maintenance by expanding System Administrator section within the tree structure of Navigation List to the left. The Role Maintenance window displays the role details such as Role Code, Role Name, Role Description, and the number of Users Mapped to the role. The Role Maintenance window also facilitates you to view, create, modify, and delete roles within the system.
You can also make use of Search and Pagination options to search for a specific role or view the list of existing roles within the system.
To view the default roles defined within the Infrastructure application, see Role Mapping Codes.
To create role in the Role Maintenance window:
1. Select from
the Role Maintenance tool bar. Add button is
disabled if you have selected any role in the grid. The New
Role window is displayed.
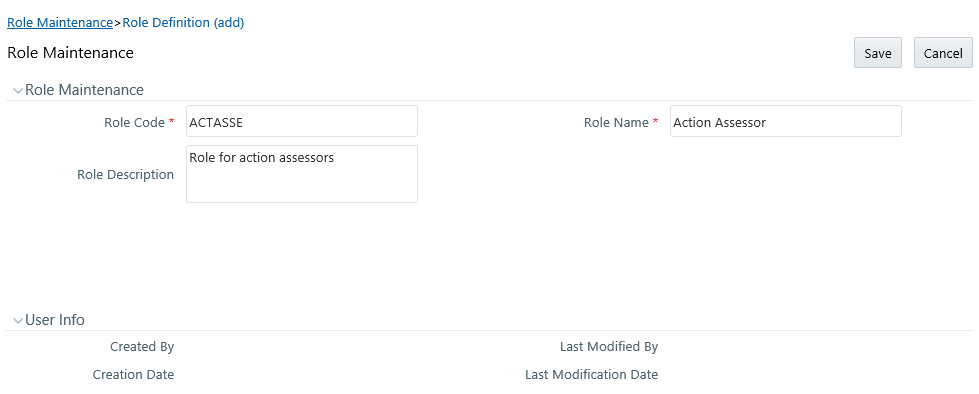
2. Enter the role details as tabulated. You can also see pre-defined Codes for reference.
Field |
Description |
Fields marked in red asterisk (*) are mandatory. |
|
Role Code |
Enter a unique role code. Ensure that there are no special characters and extra spaces in the code entered. For example, ACTASR to create Action Assessor. |
Role Name |
Enter a unique name for the role. Ensure that the Role Name does not contain any special characters except space. |
Role Description |
Enter the role description. Ensure that the Role Description does not contain any special characters except space. |
3. Click Save to upload the role details. The User Info grid at the bottom of Role Maintenance window display metadata information about the role created.
You can view individual role details at any given point. To view the existing role details in the Role Maintenance window:
1. Select the checkbox adjacent to the Role Code.
2. Click button
in the Role Maintenance tool bar.
The View Role Details window is displayed with the details such as Role Code, Role Name, and Role Description.
To update the existing role details in the Role Maintenance window:
1. Select the checkbox adjacent to the required Role Code.
2. Click button
in the Role Maintenance tool bar. The Edit Role
Details window is displayed.
3. Update the required information. For more details, see Create Role.
NOTE |
Role Code and Role Name cannot be edited. |
4. Click Save to upload the changes.
You can remove only those role(s) which are created by you, which does not have any users mapped, and which are no longer required in the system by deleting from the Role Maintenance window.
1. Select the checkbox adjacent to the Role Code whose details are to be removed.
2. Click  button
in the Role Maintenance tool bar.
button
in the Role Maintenance tool bar.
3. Click OK in the information dialog to confirm deletion.
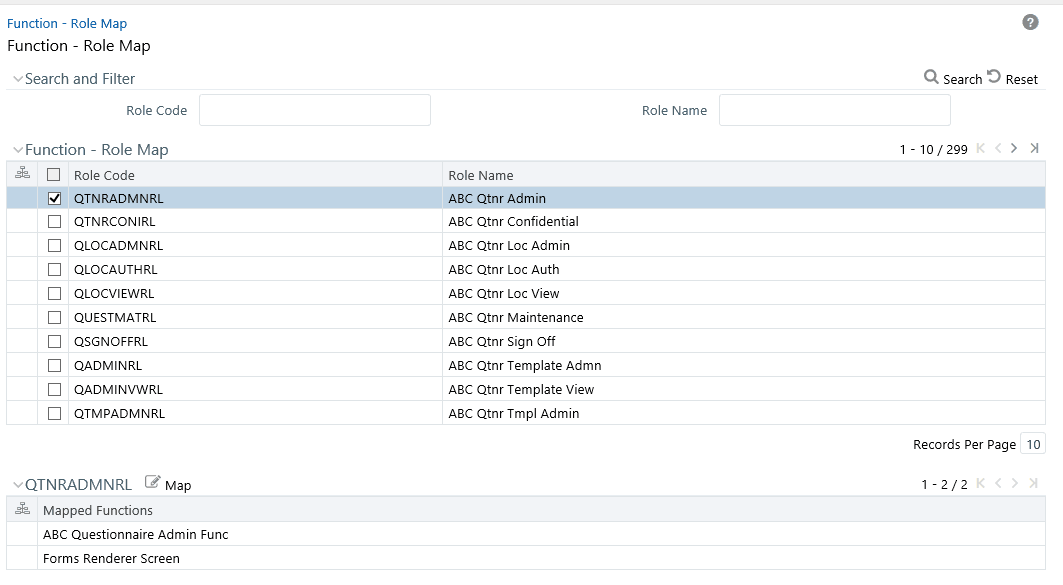
Function Role Map facilitates you to view and map a set of function(s) to a specific role within the Infrastructure system. Functions can only be mapped to a defined set of roles to ensure effective Infrastructure system security.
You can access Function – Role Map by expanding System Administrator section within the tree structure of Navigation List to the left. The Function – Role Map window displays a list of available Role Codes in alphabetical order with the Role Name. On selecting a particular Role Code, the Mapped Functions are listed in the Mapped Functions grid of Function – Role Map window.
You can also make use of Search and Pagination options to search for a specific role or view the list of existing roles within the system.
To view the default Function – Role mapping defined within the Infrastructure application, see Function Role Mapping.
To map a role to a function in the Function – Role Map window, do the following:
1. Select the checkbox adjacent to the required Role Code. The Function – Role Map window is refreshed to display the existing mapped functions.
2. Click button
in the Mapped Functions section tool bar. The Function
Role Mapping window is displayed.
3. In the Function Role Mapping window, you can search for a function using the Search field and edit the mapping.
§ To map a function to a role, select the function
from the Members list and click .
You can press Ctrl key for multiple selections.
.
You can press Ctrl key for multiple selections.
§ To map all the functions to the selected role,
click  .
.
§ To remove function mapping for a specific role,
select the function from Select Members pane and click  .
.
§ To remove all function mapping for a role, click
 .
.
4. Click OK to save the mappings and return to Function – Role Map window.
Segment is used to control access rights on a defined list of objects. It is mapped to an information domain.
Segment Maintenance in the Infrastructure system facilitates you to create segments and assign access rights. You can have different segments for different Information Domains or same segments for different Information Domains.
User scope is controlled by segment/ folder types with which the object is associated.
· Objects contained in a public folder will be displayed irrespective of any user.
· Objects contained in a shared folder will be displayed if user belongs to a user group which is mapped to an access type role with the corresponding folder.
· Objects contained in a private folder will be displayed only to the associated owner.
You can access Segment Maintenance by expanding System Administrator section within the tree structure of Navigation List to the left. The Segment Maintenance window displays a list of available segments with details such Domain, Segment Code, Segment Name, Segment Description, Segment/Folder Type, Owner Code, and the number of Users Mapped to the segment. You can view, create, modify, and delete segments within the Segment Maintenance window.
You can also make use of Search and Pagination options to search for a specific role or view the list of existing roles within the system.
To create segment in the Segment Maintenance window:
1. Select button
from the Segment Maintenance tool bar. Add button
is disabled if you have selected any checkbox in the grid. The New
Segment window is displayed.
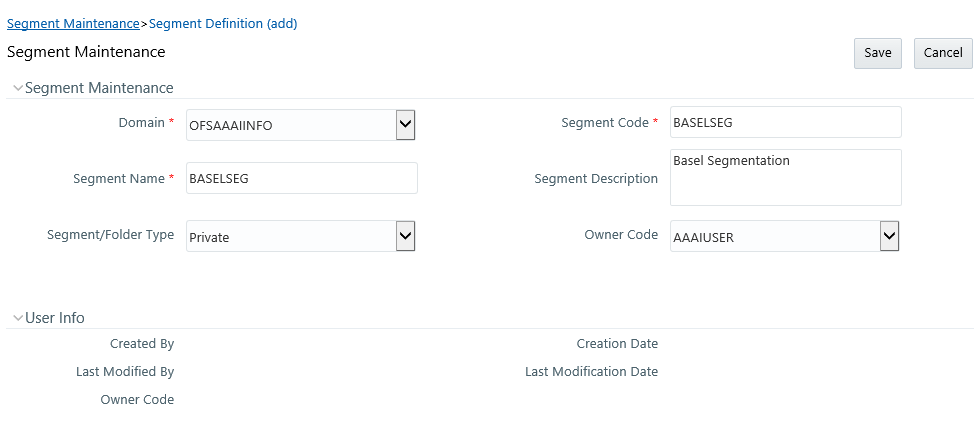
2. Enter the segment details as tabulated.
Field |
Description |
Fields marked in red asterisk (*) are mandatory. |
|
Domain |
Select the required domain for which you are creating a segment, from the drop-down list. |
Segment Code |
Enter a unique segment code. Ensure that the segment code does not exceed more than 10 characters and there are no special characters except underscore or extra spaces. |
Segment Name |
Enter a unique name for the segment. Ensure that there are no special characters in the name entered. |
Segment Description |
Enter the segment description. Ensure that there are no special characters in the description entered except spaces, “(“, “)”, “_”, “-“, and “.”. |
Segment/Folder Type |
Select the type of the segment/folder from the drop-down list. The options are Public, Private, and Shared. |
Owner Code |
Select the owner code from the drop-down list. |
3. Click Save to upload the segment details.
The User Info grid at the bottom of Segment Maintenance window displays metadata information about the segment created.
You can view individual segment information at any given point. To view the existing segment details in the Segment Maintenance window:
1. Select the checkbox adjacent to the required segment.
2. Click button
in the Segment Maintenance tool bar.
The View Segment Details window is displayed with the details such Domain, Segment Code, Segment Name, Segment Description, Segment /Folder Type, and Owner Code.
To update the existing segment details in the Segment Maintenance window:
1. Select the checkbox adjacent to the segment.
2. Click button
in the Segment Maintenance tool bar. The Edit Segment
Details window is displayed.
3. Update the Segment Description, Segment/Folder Type, and Owner Code. The others fields are view only and are not editable. For more details, see Create Segment.
4. Click Save to upload the changes.
You can remove only those segment(s) which are created by you, which does not have any users mapped, and which are no longer required in the system by deleting from the Segment Maintenance window.
1. Select the checkbox adjacent to the segment whose details are to be removed.
2. Click button
in the Segment Maintenance tool bar.
3. Click OK in the information dialog to confirm deletion.
NOTE |
This feature will not be available if Authentication is configured to SSO Authentication and SMS Authorization. |
Holiday Maintenance facilitates you to create and maintain a schedule of holidays or non-working days within the Infrastructure system. On a holiday, you can provide access to the required users and restrict all others from accessing the system from the User Maintenance window.
You can access Holiday Maintenance by expanding System Administrator section within the tree structure of Navigation List to the left. The Holiday Maintenance window displays a list of holidays in ascending order. In the Holiday Maintenance window you can create and delete holidays.
To add holiday date in the Holiday Maintenance window:
1. Select from
the Holiday Maintenance tool bar. Add button is disabled if you have selected
any checkbox in the grid. The New Holiday
window is displayed.
2. Click  button and specify
date using the calendar.
button and specify
date using the calendar.
For more information on selecting a date, see Calendar section.
3. Click Save to upload changes.
You can remove a holiday entry by deleting from the Holiday Maintenance window.
1. Select the checkbox adjacent to the holiday which has to be removed.
2. Click button
in the Holiday Maintenance tool bar.
3. Click OK in the information dialog to confirm deletion.
NOTE |
This feature will not be available if Authentication Type is selected as SSO Authentication and SMS Authorization from System Configuration> Configuration. |
Restricted Passwords facilitates you to add and store a list of passwords using which users are not permitted to access the Infrastructure system.
You can access Restricted Passwords by expanding System Administrator section within the tree structure of Navigation List to the left. The Restricted Passwords window displays a list of restricted passwords and allows you to add and delete passwords from the list.
You can also make use of Search and Pagination options to search for a specific password or view the list of existing passwords within the system.
NOTE |
While searching for any pre defined restricted password, you have to key in the entire password. |
To add restricted password in the Restricted Passwords window:
1. Select from
the Restricted Passwords tool bar. Add button
is disabled if you have selected any checkbox in the grid.
The Add Restricted Passwords window is displayed.
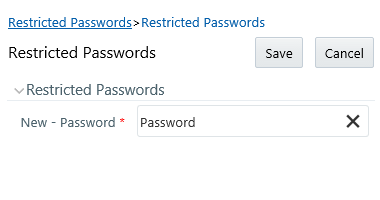
2. Enter the password in the New – Password field. Ensure that the password is alphanumeric, without any spaces, and the length should be between six and 20.characters.
3. Click Save to upload new password.
You can de-restrict a password by deleting from the Restrict Passwords window.
1. Select the checkbox adjacent to the password which has to be removed.
2. Click button
in the Restricted Passwords tool bar.
3. Click OK in the information dialog to confirm deletion.