| Oracle® Argus Analytics Installation Guide Release 8.0 E58916-01 |
|
|
PDF · Mobi · ePub |
| Oracle® Argus Analytics Installation Guide Release 8.0 E58916-01 |
|
|
PDF · Mobi · ePub |
This appendix comprises the following sections:
To create users and groups, refer to the Creating Users and Groups in Oracle Argus Analytics section in this Installation Guide.
Follow the steps listed below, to create new application role(s):
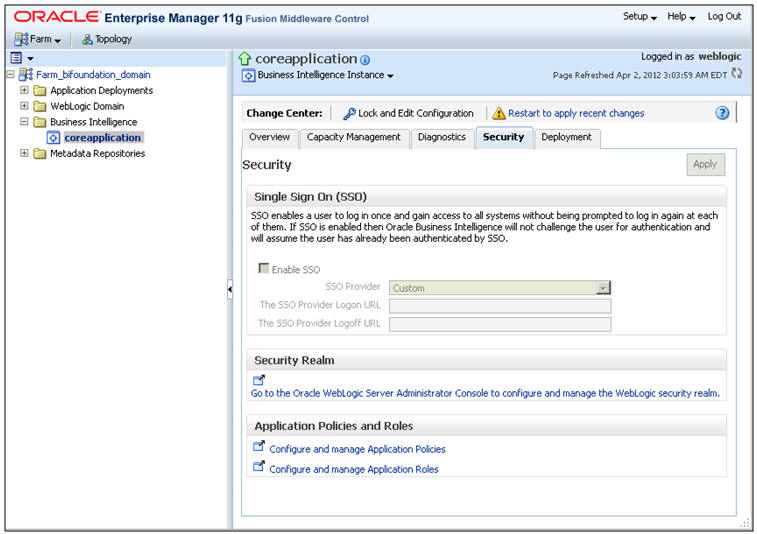
Open a new browser window for the Enterprise Manager for Fusion Middleware Control and navigate to the Business Intelligence > coreapplication overview page, as shown below:
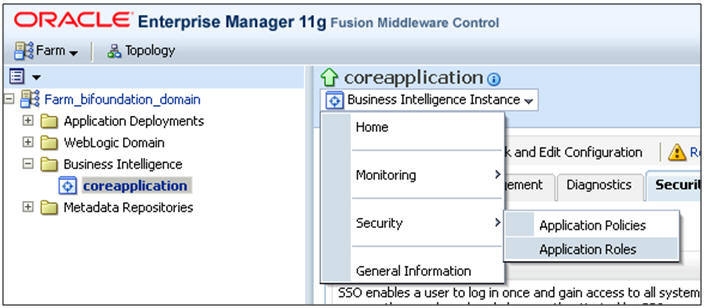
Invoke the Application Roles by choosing from the menu drop-down list at Business Intelligence Instance > Security > Application Roles, as shown below:
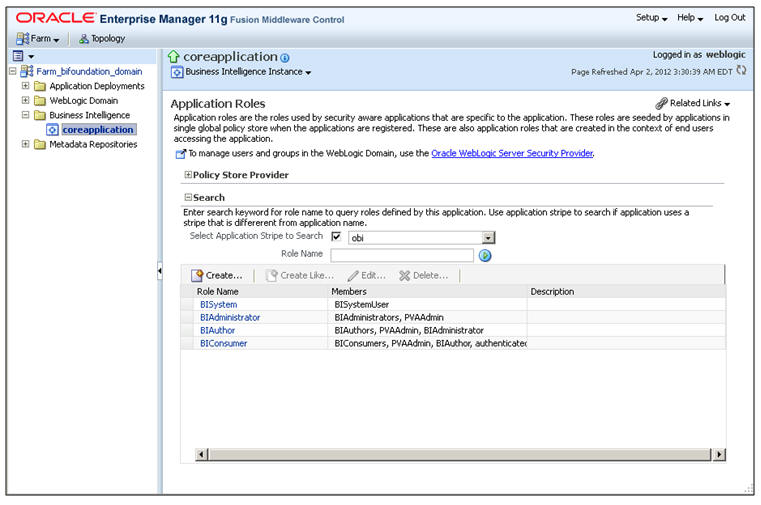
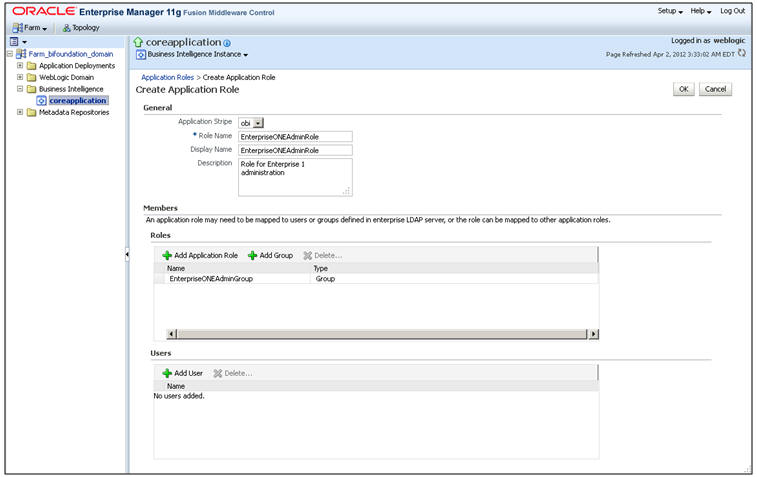
Click Create and provide the new role details to be created, as shown below: Example: Role Name: EnterpriseONEAdminRole Display Name: EnterpriseONEAdminRole Description: Role for Enterprise 1 Administration
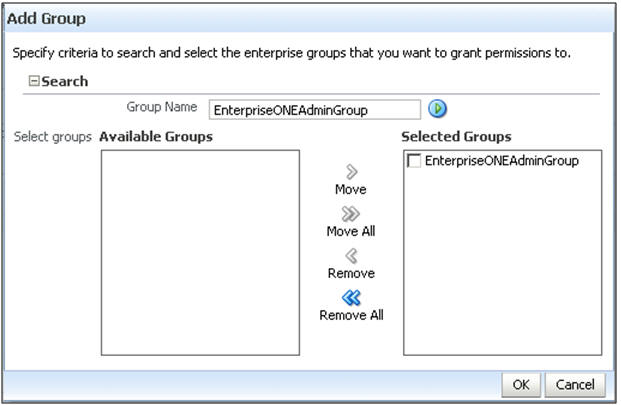
Click Add Group and search for the Group. Example: EnterpriseONEAdminGroup On the search results, select the group and click the Move button.
Click OK.
Click OK.
Repeat the steps listed above, to create roles and assign the required user group(s) to the role(s).

Note:
For further details, refer to the Managing Security Using the Default Security Configuration section in the Oracle® Fusion Middleware Security Guide for Oracle Business Intelligence Enterprise Edition 11g Release 1 (11.1.1).Click here to view the section referred above.
Follow the steps listed below, to maintain catalog privileges:
Login to the OBIEE application using any admin user credentials.
Click the Administration link and navigate to Security > Manage Privileges.

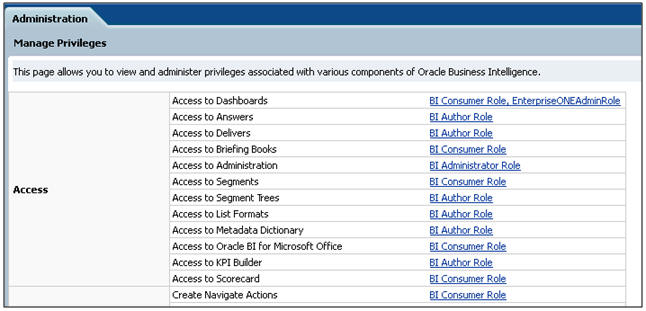
The Manage Privileges page is displayed, as shown below:

This page lists all the privileges associated with various components of Oracle Business Intelligence. This page allows you to view and administer the listed privileges.
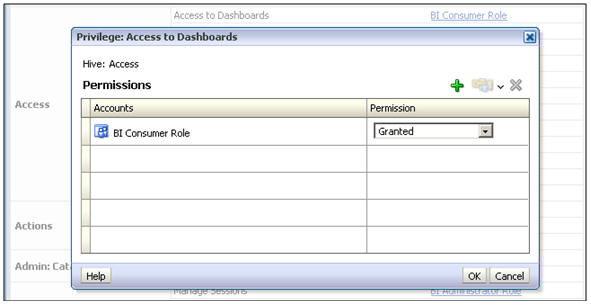
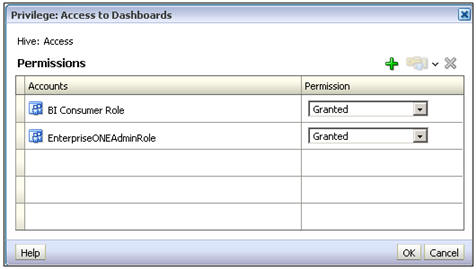
Example: Modify the Access to Dashboards privilege, to provide EnterpriseONEAdminRole with Access privilege. To modify this privilege, execute the following steps:
Click the BI Consumer Role link adjacent to Access to Dashboard. This will open up the Privilege window, as shown below:
Click the + (Add) sign. This opens a selection window.
Enter the required application role, such as EnterpriseONEAdminRole. Select Application Role from the list and click Search. This will list the available application roles based on the entered criteria, as shown below:
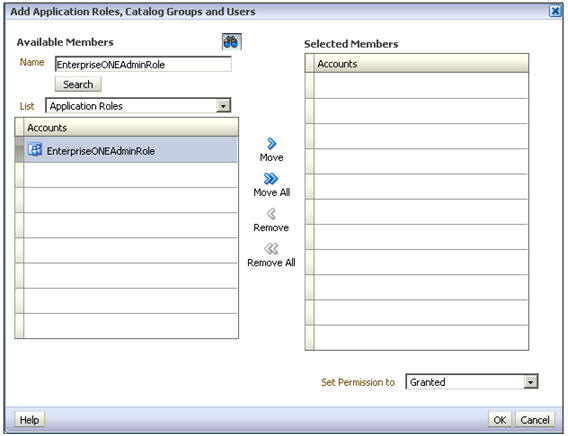
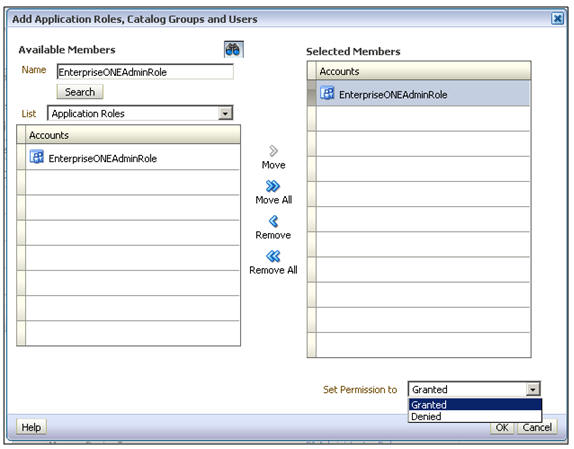
Select the required role and click Move.
Select Set Permission to as Granted [Permission can either be Granted or Denied], as shown below:
Click OK. This system will return to the Privileges window with the newly added role. The following screen is displayed:
Click OK to complete. The following screen is displayed:
In this way, you can grant or deny privileges for any given role.
Note:
For further details, refer to the Managing Security for Dashboards and Analyses section in the Oracle® Fusion Middleware Security Guide for Oracle Business Intelligence Enterprise Edition 11g Release 1 (11.1.1).Click here to view the section referred above.
This section comprises the following sub-sections:
Execute the following steps to create a new catalog folder:
Login to the OBIEE application using any administrator user credentials.
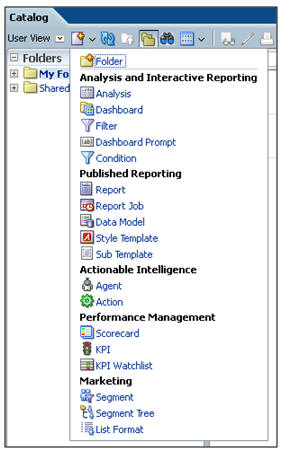
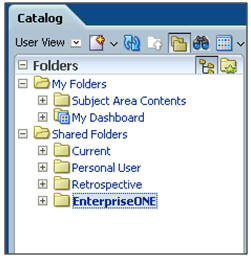
Navigate to Catalog.
Click Shared Folders under the Folders tree. Click New from the Folders toolbar.
Click Folder. Enter the required folder name, such as EnterpriseONE.
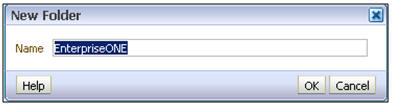
Click OK. The new folder is created, as per the given name.
Execute the following steps to manage permissions for catalog folders or saved requests:
Login to the OBIEE application using any administrative user credentials.
Navigate to Catalog.
Click Shared Folders under the Folders tree. The right-hand panel lists all the catalog folders available under Shared Folders. [For the request, select the folder in which the request is saved. Click the More corresponding to the specific request]
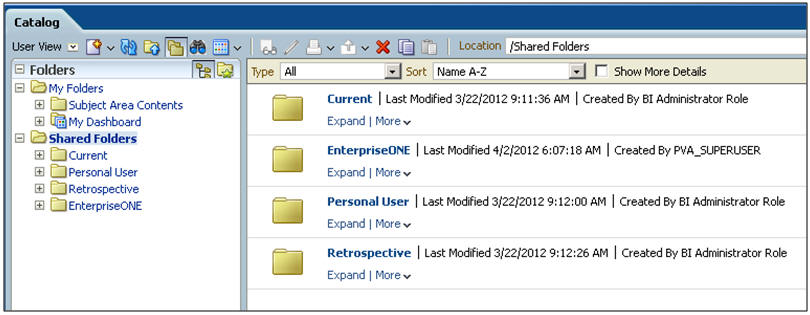
Click More for the folder for which you need to manage the permissions, such as for the EnterpriseONE folder. Click Permissions.

The Permissions window is displayed, as shown below:
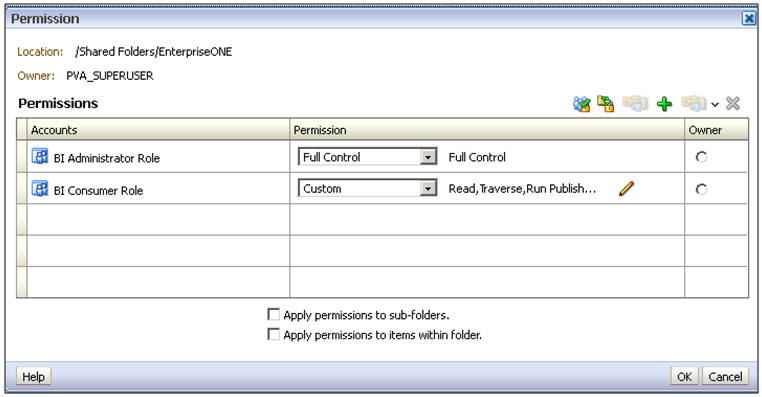
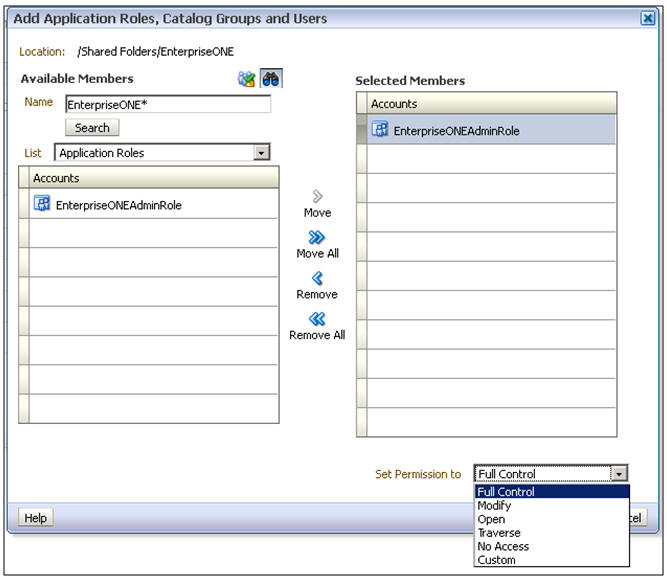
Click the + (Add) symbol to add the new Application Roles/Catalog Groups or Users. This will open up the Selection window. For example, to provide Full Control access to this folder for application role called EnterpriseONEAdminRole, enter the required Application Role. Select Application Role under List and click Search. This will list the available Application Roles for the given criteria.
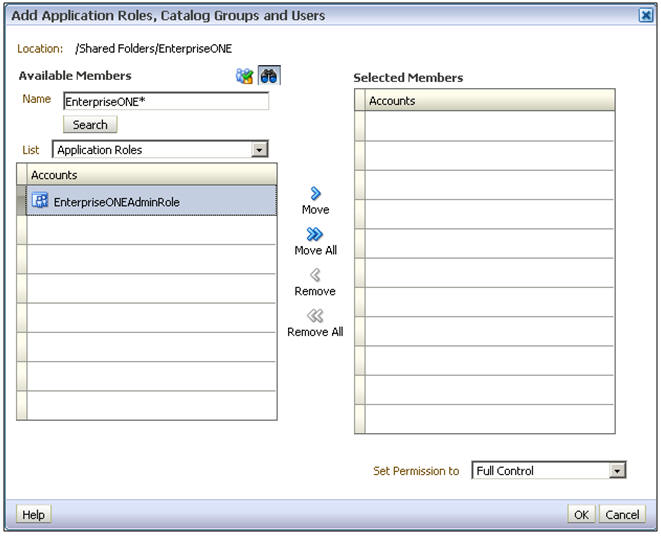
Select the required Application Role and click Move. Select the Role and select Set Permission to as Full Control.
Click OK. The system will return to the Permissions window, listing the newly added role and the associated permissions.
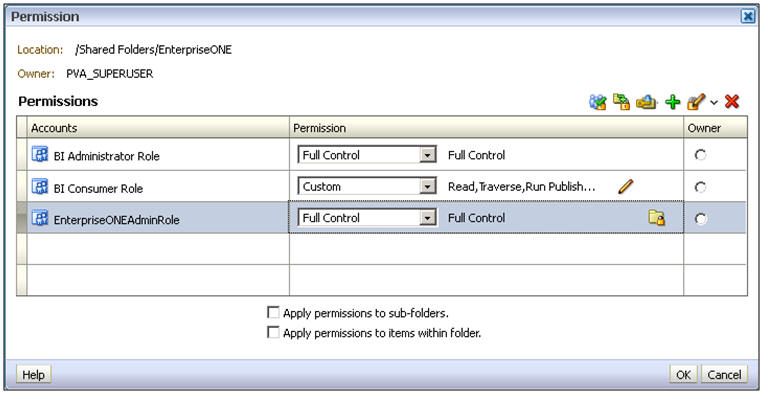
To apply the same permissions to the sub-folders and items within the folders appropriately, select the checkboxes and click OK.
|
Copyright © 2015, Oracle and/or its affiliates. All rights reserved. Legal Notices |
|