| Oracle® Retail Xstore Point of Service Manager's Guide Release 18.0 F12255-02 |
|

 Previous |
 Next |
| Oracle® Retail Xstore Point of Service Manager's Guide Release 18.0 F12255-02 |
|
Previous |
Next |
This chapter includes information about the functions that can be performed in the Back Office, but are not closely associated with a specific functional task. Like other Back Office functions, these activities are logged by the system for accountability and reporting purposes.
The following functions are included in this section:
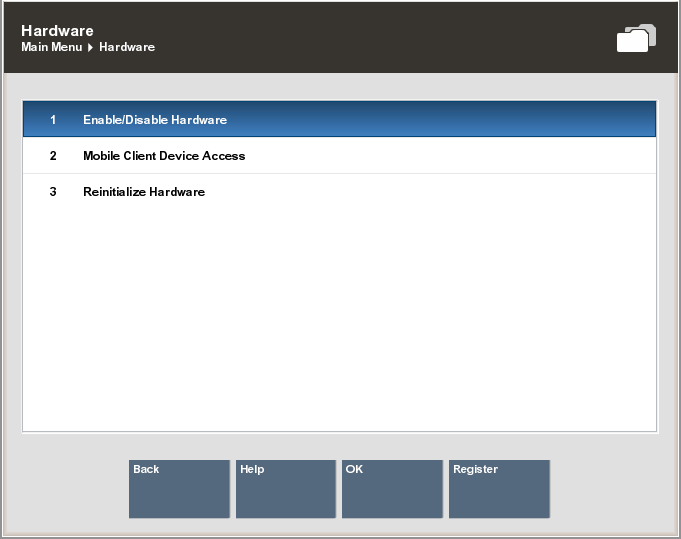
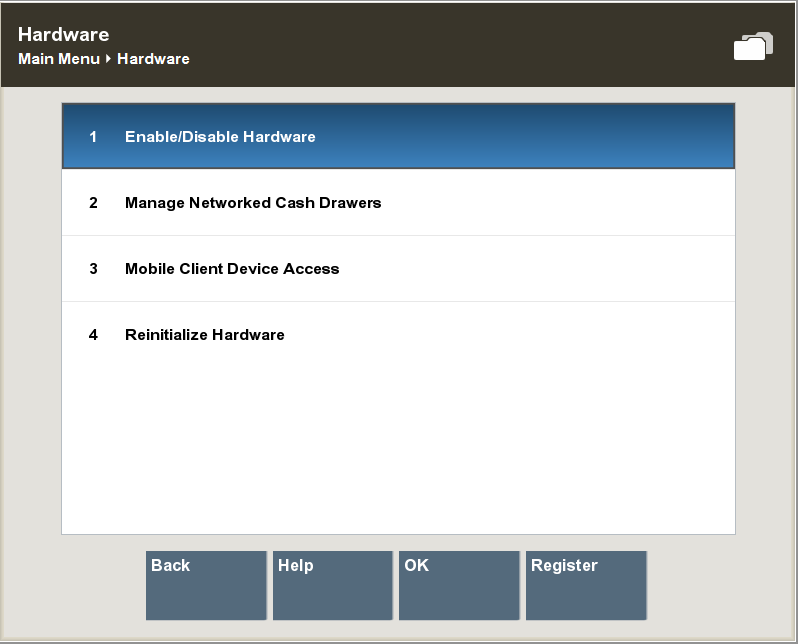
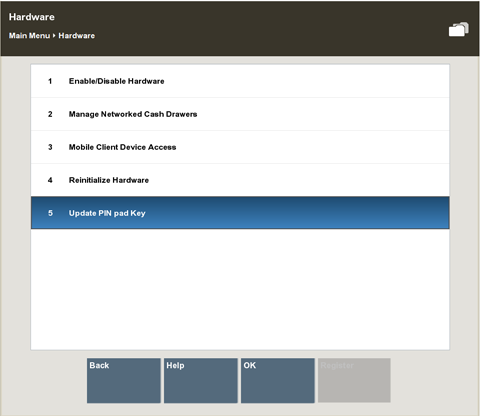
Enabling/Disabling Hardware - See Enabling and Disabling Hardware.
Reinitializing Hardware - See Reinitialize Hardware.
Managing Networked Cash Drawers - See Managing Networked Cash Drawers.
Configuring Networked Cash Drawers - See Configuring Networked Cash Drawers.
Releasing Cash Drawers - See Releasing a Cash Drawer
Mobile Client Device Access - See Mobile Client Device Access.
Updating the PINpad key - See Update PINpad Key (TransArmor).
This option provides a way to temporarily disable and then enable hardware devices. This process writes out a hardwareconfig.xml file to a patch directory for the devices that have been disabled, reloads the hardware configurations, and then re-initializes the hardware.
To begin, select the Enable/Disable Hardware option from the Back Office Main Menu.
To disable a device or devices, go to To Disable a Hardware Device.
To enable a device or devices, go to To Enable a Hardware Device.
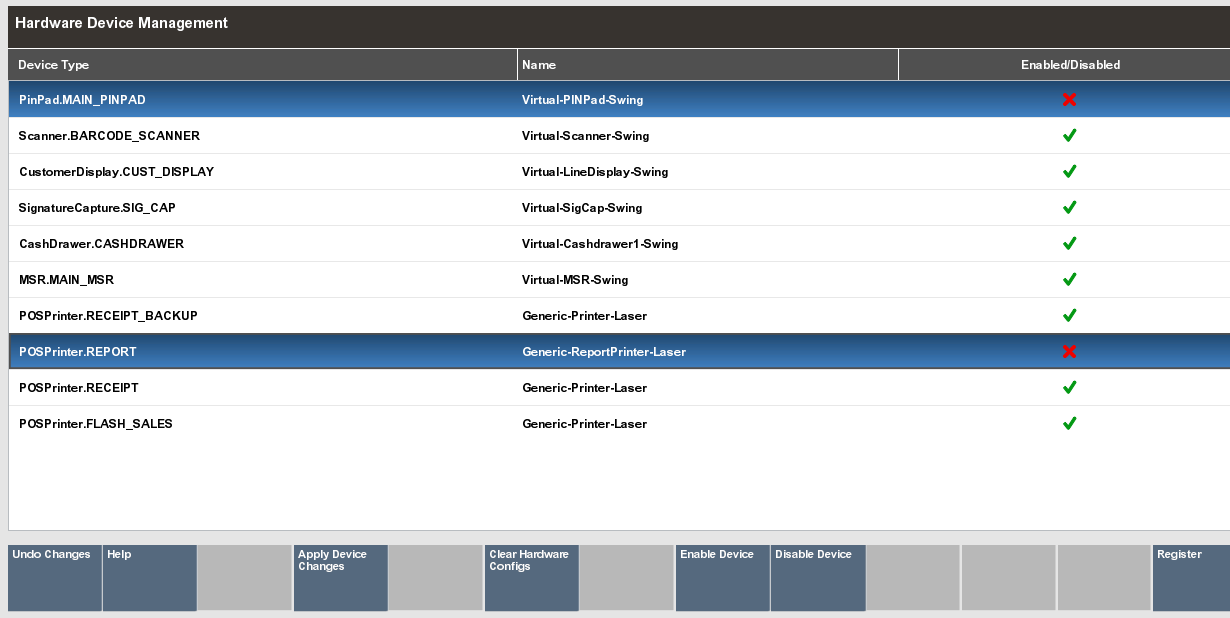
Press the Spacebar to select a hardware device-or devices-to be disabled, then select Disable Device.
|
Note: The green check mark next to the device name indicates the device is currently enabled. next to the device name indicates the device is currently enabled.
The selected device(s) will be highlighted in blue. |
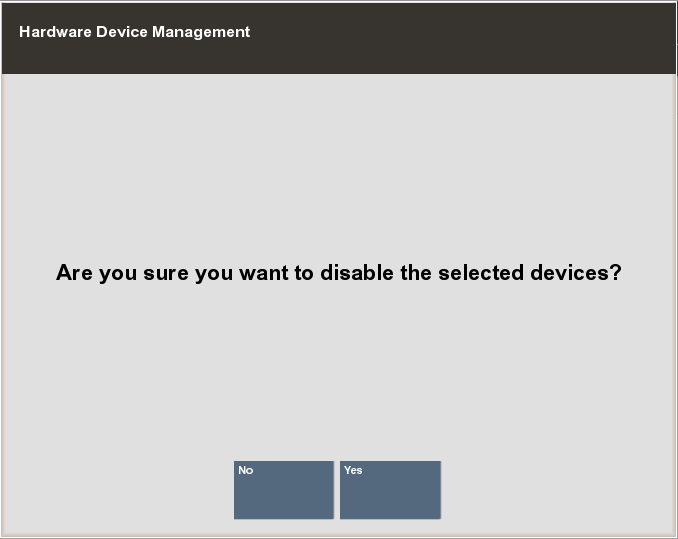
When prompted, press Y to confirm you want to disable the selected device(s).
On the Hardware Device Management screen, the red indicates the device is disabled. Verify this is the device or devices you want to disable and select Apply Device Changes.
When prompted, press Y to confirm you want to disable the selected device(s). The system writes out a temporary hardwareconfig.xml file with the devices that have been disabled.
|
Note: You have two options to enable a hardware device:
|
Select a hardware device, or devices, to be enabled.
The red x next to the device name indicates the device is currently disabled.
Enable the device(s).
To enable one or more selected devices:
Select the disabled device(s) in the list and select Enable Devices.
Select Apply Device Changes.
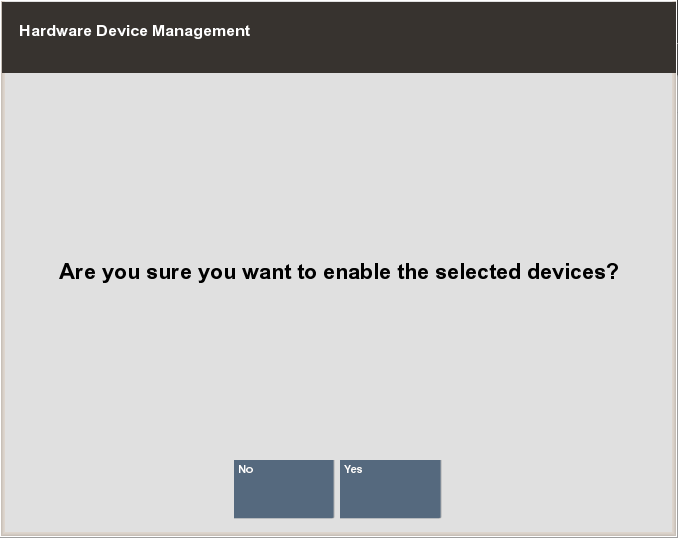
When prompted, press Y to confirm you want to enable the selected devices.
<OR>
To enable all disabled devices at once:
Select Clear Hardware Configs. You do not need to select a hardware device in the list when using this option. All disabled devices are enabled by default.
When prompted, press Y to confirm you want to remove all the configuration overrides in the temporary hardwareconfig.xml file.
The hardware devices are enabled.
|
Note: If there are any device errors detected when enabling a device, the system displays a warning message about the non- functional devices. |
Select the Reinitialize Hardware menu option to reset the peripheral hardware devices. The system performs the following process for the hardware devices:
close -->release-->claim-->open
When prompted, select Yes to confirm you want to re-initialize the hardware.
|
Note: Reinitializing hardware is also used to register a VeriFone device with TransArmor. |
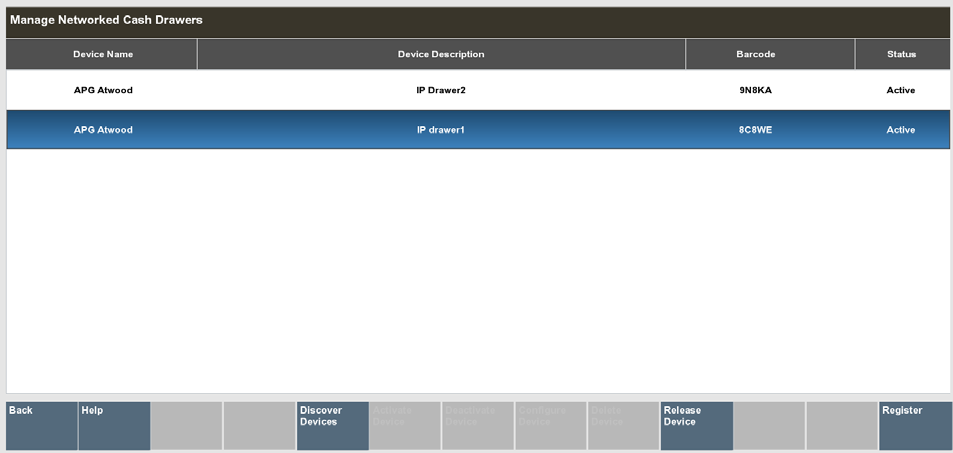
This section describes the networked cash drawers:
When working with Xstore Mobile devices, networked cash drawers allow monies to be collected.
Select the Manage Hardware option from the Back Office Main Menu.
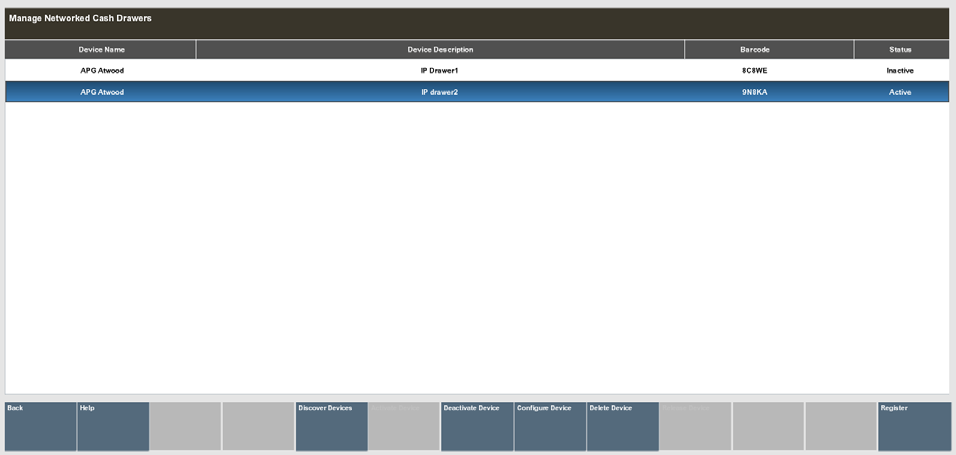
Select the Managed Networked Cash Drawers option from the list.
Upon navigating to the screen, a discovery is performed to identify all networked cash drawers on the network.
A list of all discovered networked cash drawers are displayed.
The status of the cash drawer may be:
New - Configuration has not been entered.
Active - The cash drawer is available to use.
Inactive - The cash drawer is not available to use.
Reset - Restored to factory settings and configuration needs to be entered.
Select a cash drawer from the list.
You can Activate and Deactivate cash drawers by selecting the correlating button. The Activate button changes the status to ACTIVE. The Deactivate changes the status to INACTIVE.
You can delete the cash drawer from the Database by selecting the Delete Device button. Use the Discover Devices button to find new networked cash drawers on the network.
|
Note: The Activate, Deactivate, Delete and Configure activities are controlled by user security. An employee must have the proper security privileges to use these buttons. |
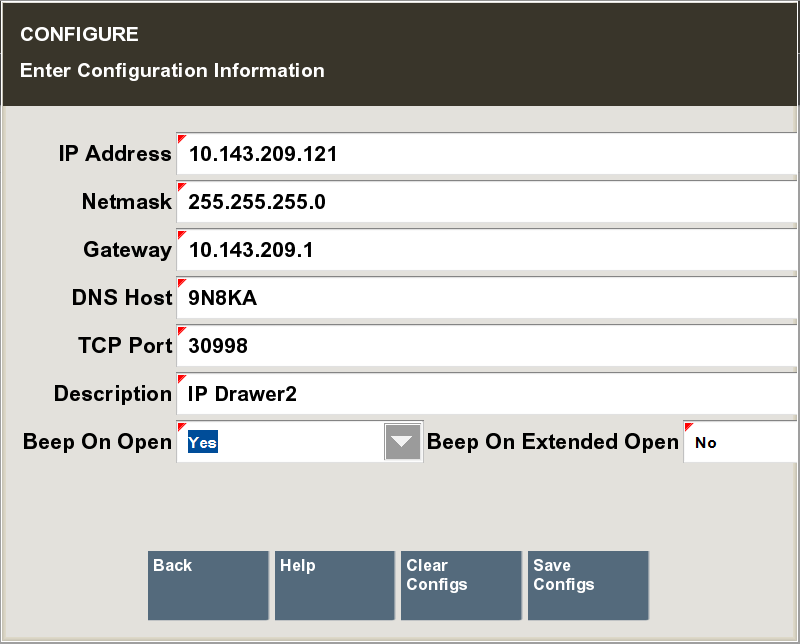
Select the Configure Button on the Manage Networked Cash Drawers screen.
Enter the required data to configure the screen. If the drawer is an existing drawer, the configurable values will be shown with the option to change the values.
Select the Save Configs button to apply the changes to the Configure screen. You are returned to the Manage Networked Cash Drawers screen.
|
Note: You can clear all configurations by selecting the Clear Configs button. |
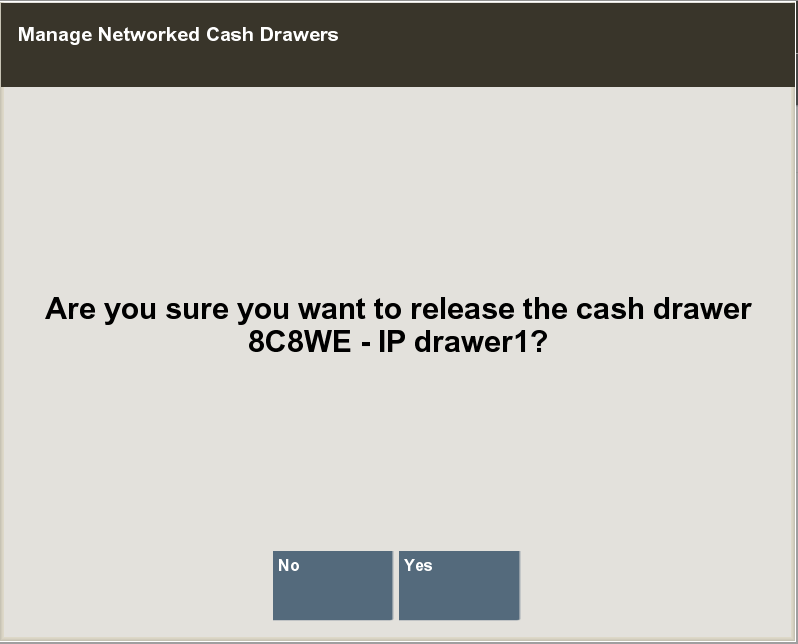
On occasions when the cash drawer cannot be opened (maybe due to a network loss), it is possible to manually release the cash drawer in-use and allow other users to use them.
|
Note: Ensure there is no current transaction taking place prior to using this process. |
Navigate to the Manage Networked Cash Drawers screen.
Select the in-use cash drawer from the list of cash drawers.
Select the Release Device button.
|
Note: The Release Device button is controlled by user security. An employee must have the proper security privileges to release the cash drawer. |
Confirm you want to release the cash drawer: "Are you sure you want to release the cash drawer <cash drawer id and name>?"
Select Yes on this prompt, to continue.
The cash drawer is manually released from being in-use and is available to use again.
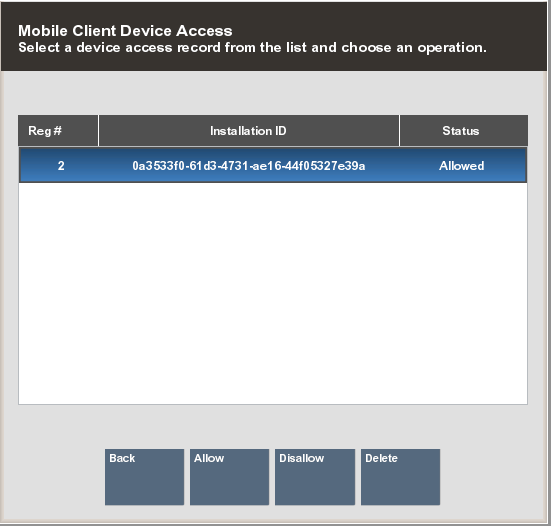
This option allows you to manage the mobile devices to function as a register in the store. When installing a new mobile device the Xstore Mobile server will initially block that device from running Xstore until an administrator goes into this function to enable the newly configured device.
From the Hardware menu, select the Mobile Client Device Access option.
To enable the mobile device to function as a register in the store select the Allow button or select the Disallow button to disable access to any currently enabled mobile device.
Select the Delete button to remove the device configuration from the Xstore register.
See also the Xstore Point-of-Service Mobile User Guide for more information about operating the mobile device.
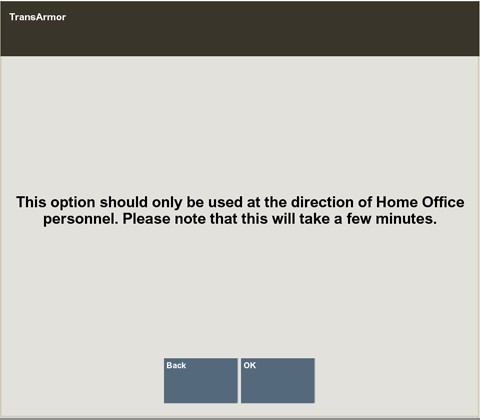
If your store is using TransArmor for credit card authorizations, use the Update PINpad Key option to advance the Device Derivation Key (DDK) when needed.
Select the Update PINpad Key option from the Hardware Menu.
A warning prompt displays indicating that this option should only be used at the direction of the Home Office. Select OK to proceed or press Enter to return to the main menu.
If the update is successful, Xstore prompts: PINpad device key is successfully updated.
If the update is not successful, Xstore prompts: PINpad is no longer usable because the device key update was not successful. Call the Help Desk.