| Oracle® Retail Xstore Point of Service User Guide Release 18.0 F12254-01 |
|

 Previous |
 Next |
This chapter describes the Oracle Retail Xstore Point of Service screen and documentation conventions and provides brief descriptions and examples of the methods used to initiate Oracle Retail Xstore Point of Service features.
Refer to the Documentation Conventions section below for a description of the documentation conventions used in this User Guide.
Refer to the Touch-Screen Functions section for touch-screen and key functions.
Refer to the Register Screen Conventions Overview section for a description of the Oracle Retail Xstore Point of Service application features.
Refer to the Prompts and Forms section for a description of the prompts and screens that Xstore Point of Service uses to provide or request information.
The following explains the conventions used throughout the Oracle Retail Xstore Point of Service User Guide to denote task-related information, highlight information for special emphasis, or to bring your attention to an important point.
Due to the flexibility of the system, menu options in this guide are not identified by a function key number (for example, [F2] or [F3]). Instead, the name on the button is used throughout the procedures and processes.
Table 1-1 Documentation Conventions in the User Guide
| When you see... | Then... |
|---|---|
|
Select xxxxx |
Refers to a menu button or list option displayed on the Oracle Retail Xstore Point of Service application screen. The bolded text is the button or menu option text. Since all menu text is configurable, the text you see on your screen may be different than the text used in the procedure. |
|
Press [xxx] |
Refers to a key on the keyboard. The text inside the brackets is the name of the key. |
|
Blue text |
Indicates the tagged text is a link to another area of the user document. Click the link to jump to related information. This feature is used when viewing the document online. For printed documents, a page number has also been provided. |
Special information can be called out in the document.
|
Note: This information is provided to improve your understanding, simplify a task, or point out special circumstances. |
|
Caution: This information is important for the user to be aware of. For example, information that can help prevent the loss of data. |
|
Warning: This information calls attention to a situation that is potentially hazardous to people. |
The following sections explain how to navigate with a touch-screen or keyboard.
Oracle Retail Xstore Point of Service uses multi-touch gesture navigation throughout to allow for full touch-screen transactions.
|
Note: Touch-screen navigation is configurable by your corporate office; all features may not be activated on your system. |
The Sale screen contains the following touch components.
Table 1-2 Touch-Screen Actions
| Touch-Screen Action | Description |
|---|---|
|
Tap Customer Loyalty Banner |
If no customer is attached, Oracle Retail Xstore Point of Service invokes the add-customer process.If a customer has been assigned to the transaction, Oracle Retail Xstore Point of Service opens the customer maintenance screen. |
|
Swipe Customer Loyalty Banner |
Swiping from left to right opens a prompt to remove the assigned customer. |
|
Tap Bar Code Graphic |
Invokes the find item feature. Oracle Retail Xstore Point of Service Base is set to open the item matrix. |
|
Tap Item ID |
Displays item information. |
|
Tap item quantity |
Invokes the change quantity process. This displays the numeric keypad. |
|
Swipe Item |
Swiping from left to right opens a prompt to void the item. |
|
Tap Unit Price |
Invokes the change price process. This displays the numeric keypad. |
|
Tap Associate Area |
Invokes the change commissioned associate process (with an item selected) |
|
Tap Amount Due |
Invokes Add Tenders. |
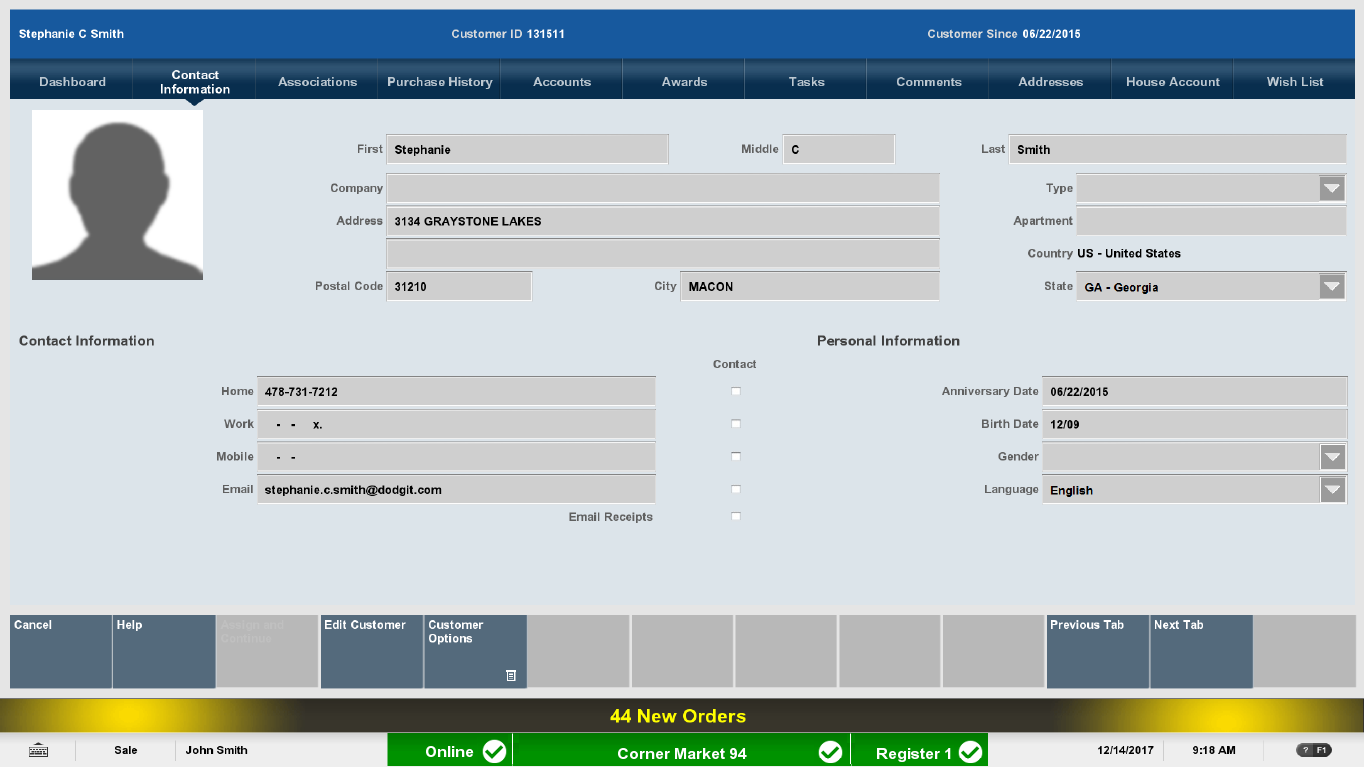
The following touch-screen components are available in the Customer Maintenance screen:
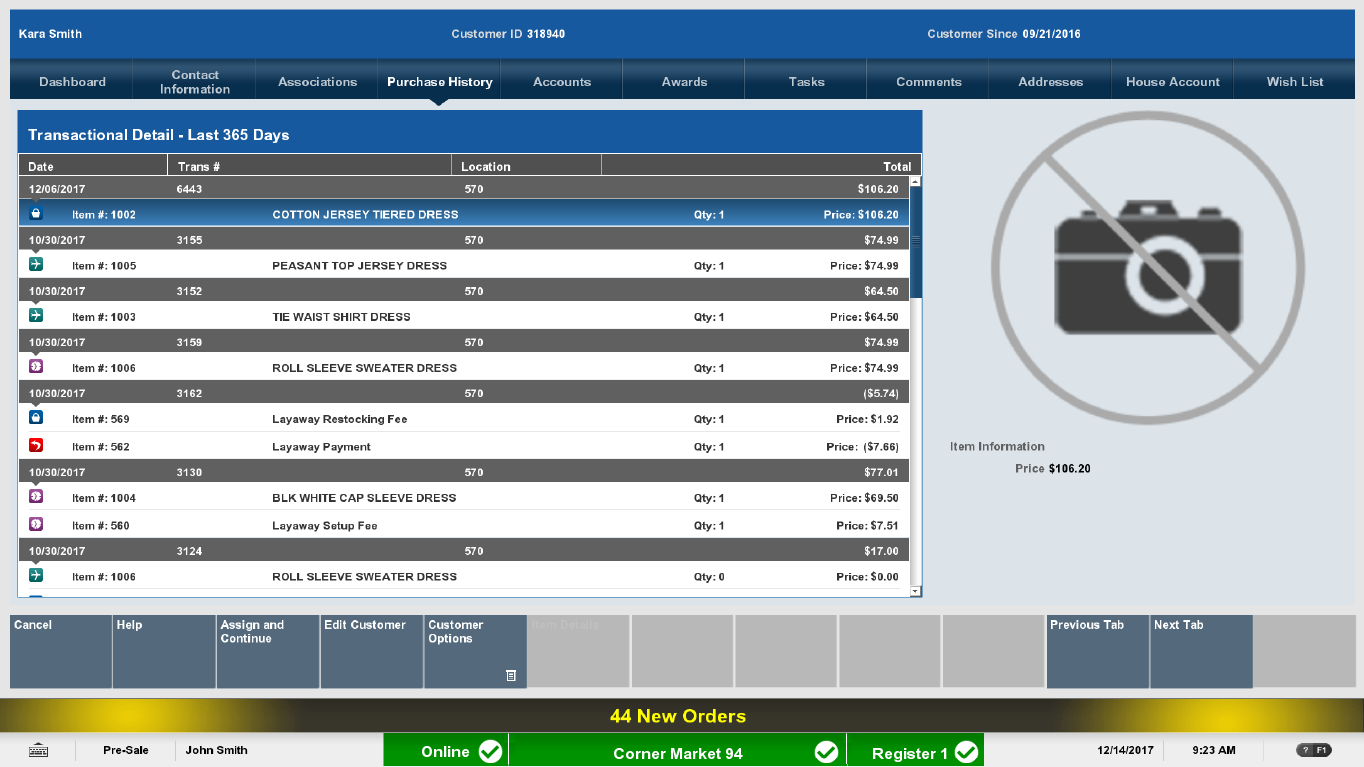
The Purchase History tab has the following touch-screen elements:
Table 1-4 Purchase History Tab Touch-Screen Navigation
| Touch-Screen Action | Description |
|---|---|
|
Swipe Transaction Detail Header |
Swipe from right to left in the Transaction Detail Header to collapse the history display. |
|
Swipe Transaction Detail Header |
Swipe from left to right in the Transaction Detail Header to open the history display. |
|
Tap Transaction Header |
Tap one Transaction Header to collapse the selected transaction. |
|
Tap Transaction Header |
Tap a collapsed Transaction Header to open the selected transaction. |
|
Tab Item |
Tap a specific item and the INFO tab to display the item detail. |
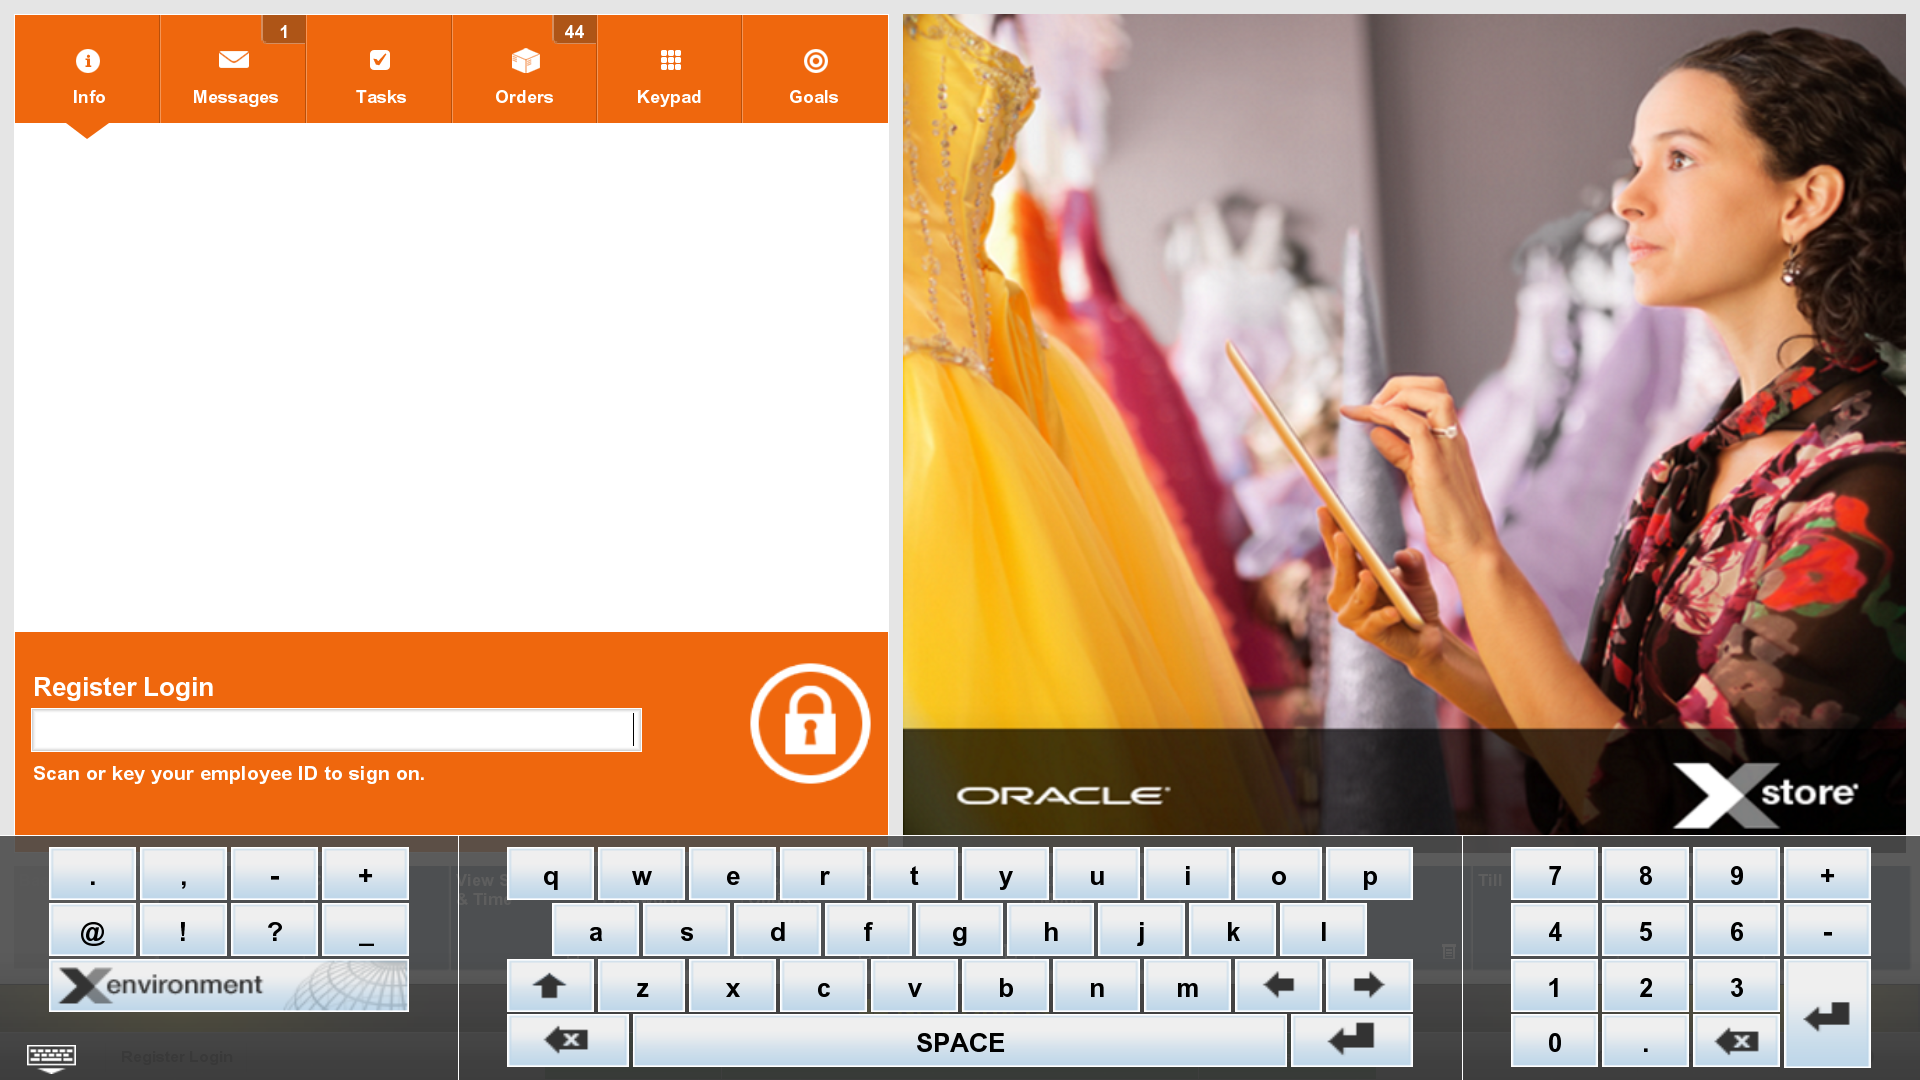
The following table describes how to use the virtual keyboard:
Table 1-5 Virtual Keyboard Navigation
| Function | Navigation |
|---|---|
|
Launch virtual keyboard |
Do one of the following:
|
|
Switch virtual keyboard layouts |
If your store has multiple keyboards configured, swipe left or right to select a different keyboard. |
|
Data entry |
Tap keyboard keys to enter information into a field. |
|
Close virtual keyboard |
Do one of the following:
|
|
Switch to Xenvironment |
Tap the Xenvironment button on the keyboard to open Xenvironment. To return to Oracle Retail Xstore Point of Service, tap or click the Start POS button. |
Use the following guidelines to navigate through the Oracle Retail Xstore Point of Service system:
Table 1-6 Active Keyboard Keys
| Key | Description |
|---|---|
|
arrows |
Use the up and down arrow keys to browse through list boxes. |
|
Enter |
Press Enter to select OK at any prompt that includes OK (Enter) as an option. Also press Enter in active list boxes to select the highlighted option. |
|
Esc |
Press Esc to exit any prompt that has Back or Cancel as an option. You can also press Esc to exit the current menu and return to the previous menu. In either case, if changes were made that were not saved, you must verify that you want to exit without saving your changes. |
|
Function keys |
On each Oracle Retail Xstore Point of Service window, the F1 through F12 function keys correspond to the menu options. Press the function key that corresponds to the option to choose it. |
|
Home/End |
Use these keys to jump to the top (Home) or bottom (End) of the current page of a report that you are viewing. |
|
Plus (+)/Minus(-) |
Use these two keys to increase (+) or decrease (-) the on-screen magnification level of a report that you are viewing. |
|
Shift+Tab |
Press Shift+Tab to move to the previous list box on an Oracle Retail Xstore Point of Service window. When the first list box is reached, press Shift+Tab to activate the last list box on the window. |
|
Tab |
Press Tab to move from the first list box to the next list box on the window. When the last list box is reached, press Tab to activate the first list box on the window. |
|
Spacebar |
Press Spacebar to select items in multiple-select lists. |
|
Ctrl+Tab |
Press Ctrl+Tab to access the Information, Coupon, Task, Message, Sales Goals, and Associated Items tabs and move one tab forward on the Register Login screen and the Back Office Login screen. |
|
Ctrl+Shift+Tab |
Press Ctrl+Shift+Tab to access the Information, Coupon, Task, Message, Sales Goals, and Associated Items tabs and move one tab backward on the Register Login screen and the Back Office screen. |
The Oracle Retail Xstore Point of Service system includes a variety of elements that comprise its user interface. Those elements have been grouped into the following categories, and each of the individual elements in them are described in this chapter.
Your store may be equipped with a dual screen which contains a customer facing display. The customer facing display is controlled by the corporate office. It may contain:
Videos
Suggested Items
Customer Messages
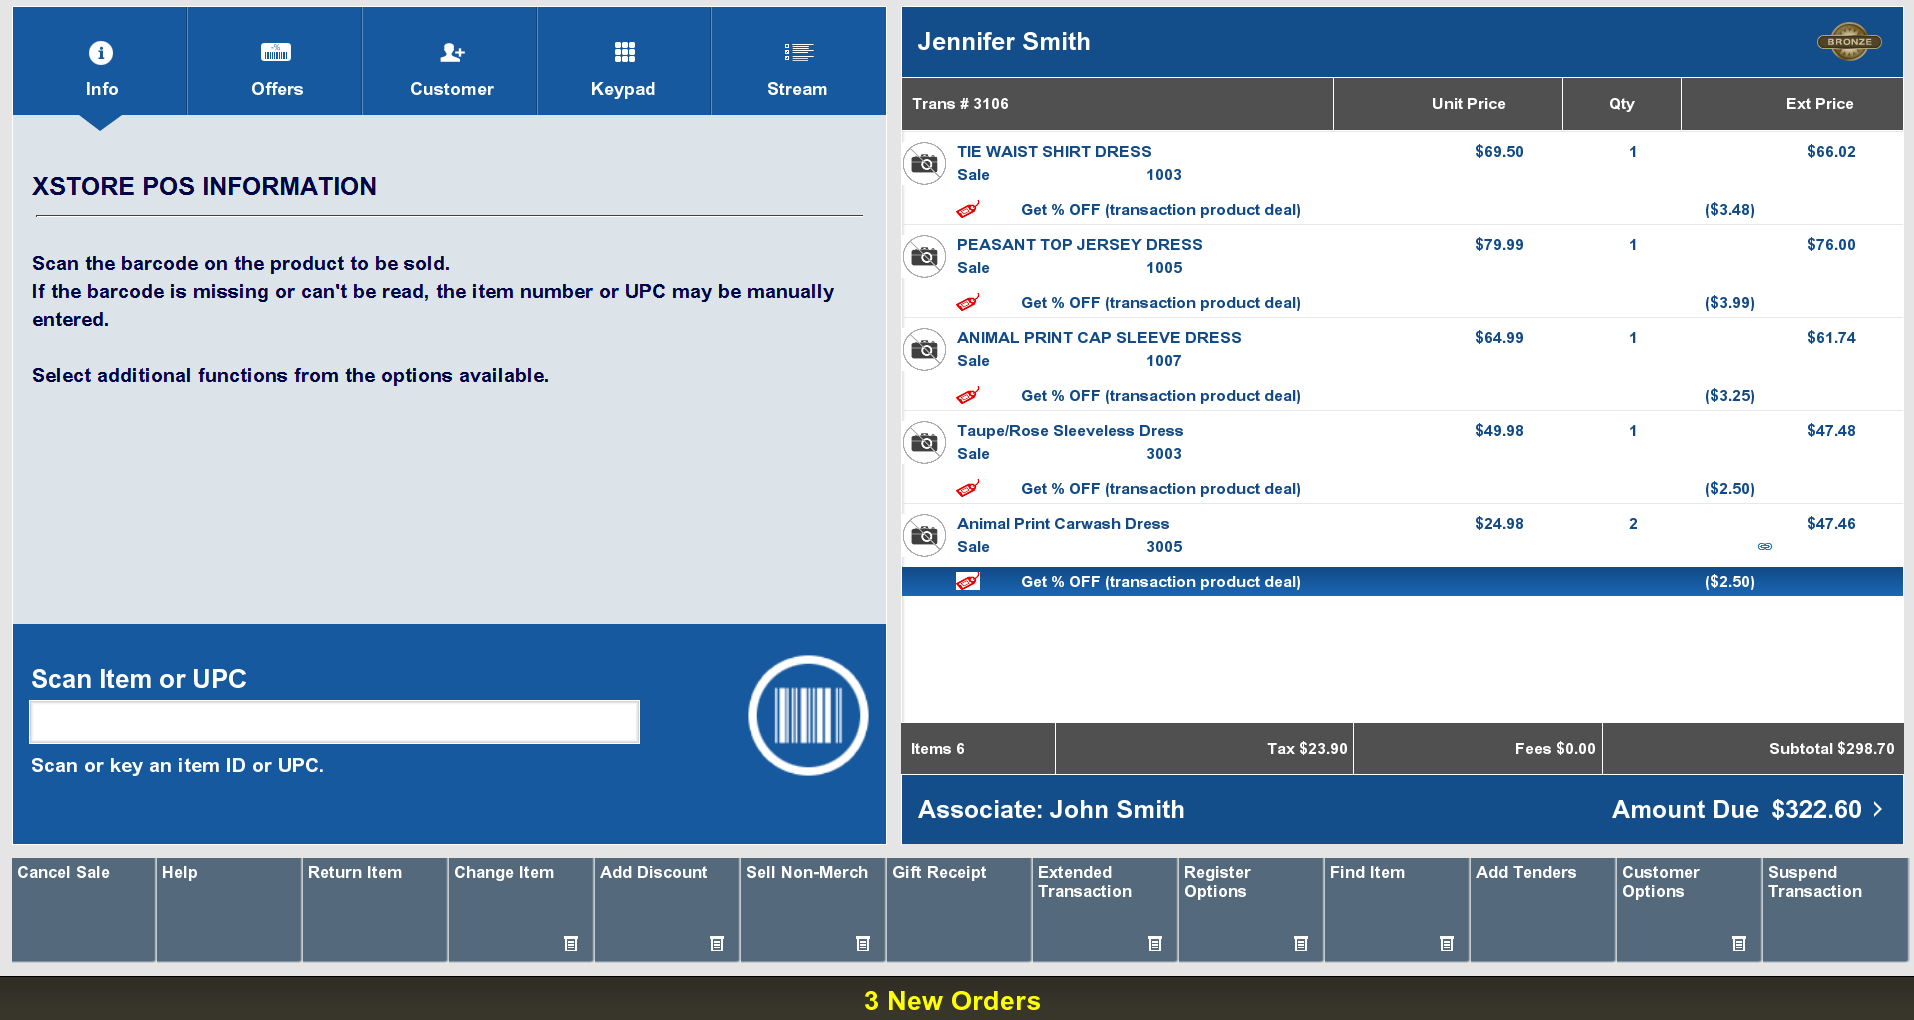
The layout and design for all screens used for register functions have the following organization:
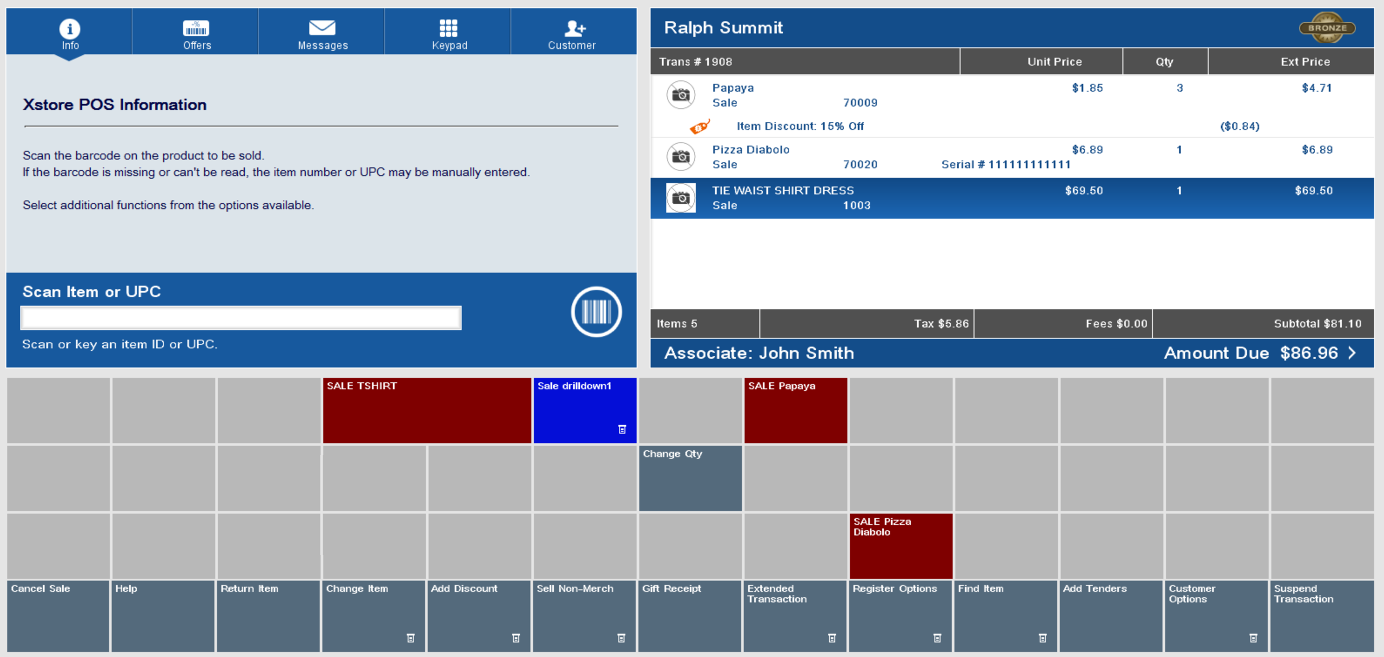
Item Selection Layout
An alternative sales screen layout is available that provides three rows of thirteen quick buttons above the bottom row of menu buttons. This matrix style layout with configurable button size and color allows quick selection of items and menus. The drill-down buttons lead to further options and the Home and Back buttons for navigation in this grid.
Both screen layout styles contain the following components:
Menu buttons can be found near the bottom of the screen. The buttons are used to perform actions specific to the functional area in which they are found.
Buttons with a pull-down menu icon in the lower-right corner indicate that the button will open a sub-menu of choices.
Buttons with a lock icon in the lower-right corner indicate that the button is not available to the current user.
An ellipsis (usually after the word More) indicate that there are additional menu buttons available at this screen. Clicking or tapping the button will display those menu buttons.
The Oracle Retail Xstore Point of Service menu buttons show the keyboard functions that appear on each Oracle Retail Xstore Point of Service window.
Each menu button has a function key F1 through F12 assigned to it. Because each Oracle Retail Xstore Point of Service menu is configurable, the button functions on your system may appear in a different order or have different text than examples shown in this manual.
Some menu buttons may not be available to every associate. Security configuration determines which options are available to an individual associate. Security may be configured for each associate, by employee group, or by register group.
|
Note: Because of the flexibility of the system, menu options in this guide are not identified by a function key number (F2, F3, and so on.). The procedures and processes in this guide use the name of the button. |
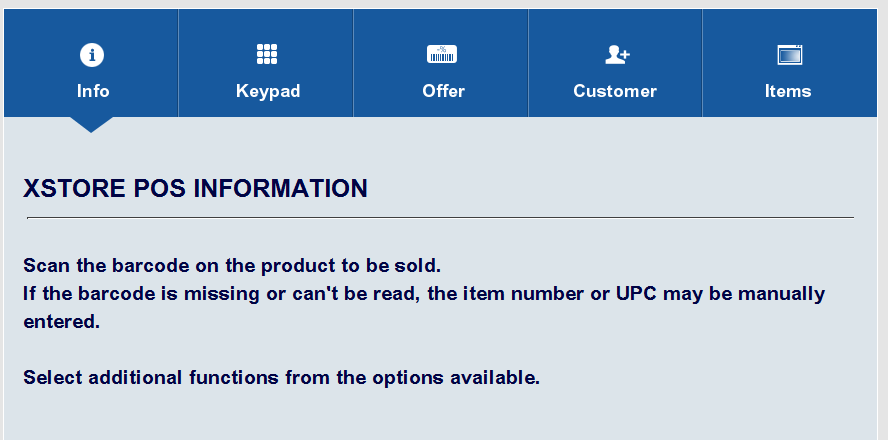
The message window is located in the left section of most register screens. This window displays different messages that are selected by the tabs at the top of the window.
In a base implementation, Oracle Retail Xstore Point of Service displays the following tabs:
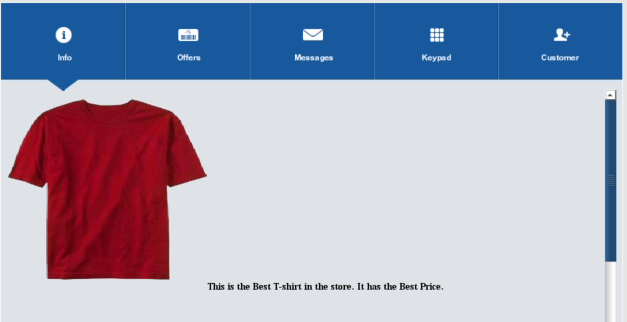
Info Tab: The Info tab may display product-specific information for an item-entry scenario, customer/item detail information for a layaway transaction, or instructions for recording a repair or alteration selection.
Only one message displays per item in the Info tab. This may be a text message, an image or a composite message (graphic and text). This information may relate to the item directly or to recommend other products that relate to the item being purchased. A couple examples of this would be a customer purchasing a shirt that has a coordinating jacket and tie. These two items, the jacket and tie, could be set up to display on the Information Tab in Xstore for the associate to recommend to the customer. Another example would be the purchase of an item that would require another purchase, for instance a watch that does not come with a battery.
If DisplayMessageAsNotify setting is configured, then multiple item text messages pop up in Xstore during the sales process.
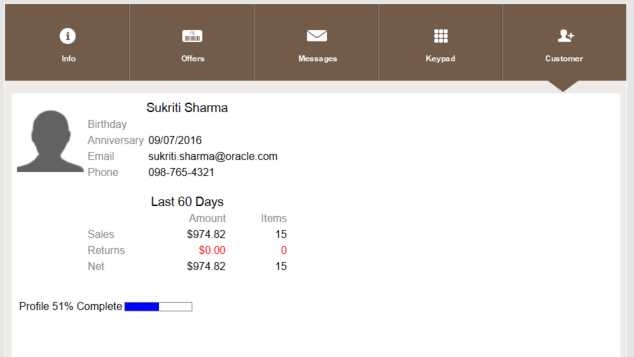
Customer Tab: Shows customer detail.
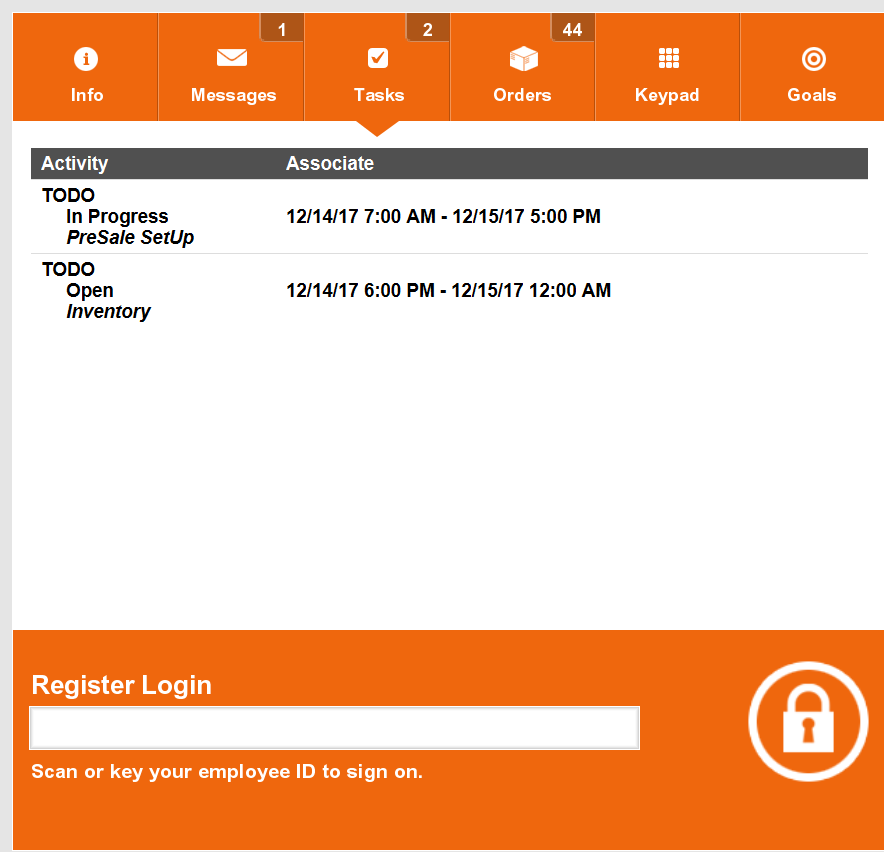
Tasks Tab: The Tasks tab displays open and in progress tasks with start date/time prior to the current date and end date/time equal to the current date or in the future. Tasks shown here are view only.
The following information is displayed for each task:
Activity - The type, status, and description associated with the task.
Associate - The assigned associate, appointment start date and time, and end date and time.
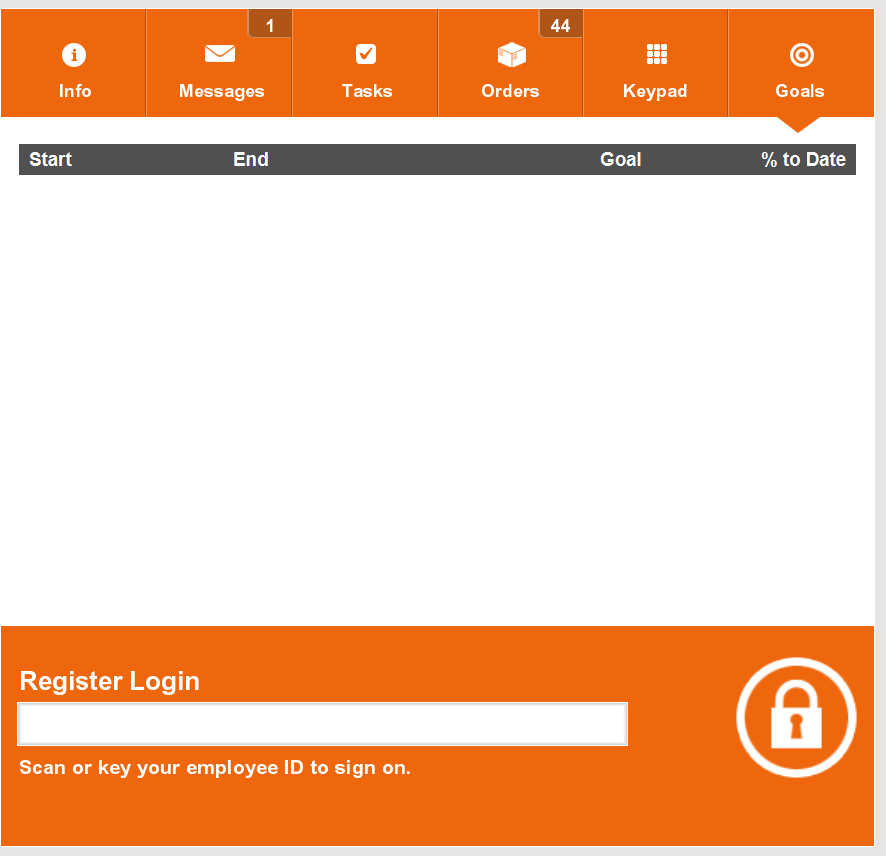
Goals Tab: The Goals tab displays information from the corporate office about the goals set for your store for a specified date range. You are not required to log in to view store goals. These goals are visible to all employees.
The goals are listed in the following order:
Completed goals
Active goals
Future goals
The goals are displays in color, based on their status:
Green - Goals completed and met.
Red - Goals completed but not met.
Black - Active, current, and future goals.
Each goal has an effective date and an end date. The store goal is shown in the Goal column and the current amount achieved toward the goal is shown in the % To Date column.
|
Note: Future goals display ”N/A”' in the % To Date column until they become active. |
Sales Goal to date progress is calculated using net sales. Progress toward store goals can also be found in the Store Goals report and on the Dashboard.
Offers Tab: The Offers tab displays e-awards, coupons and entitlements that are available and whether they have been applied to the transaction. When a customer is linked to a transaction, the number of offers is displayed. As qualifying items are added to the transaction, entitlements are automatically applied to the basket. Coupons need to be scanned or entered to be applied to the transaction. The different offer types are represented by distinguishing icons on both the offers tab and the sales display panel.
The following information is displayed for each offer:
Offer ID - ID for the e-award, coupon or entitlement.
Description - Description of the coupon.
Expires - Expiration of offer.
Applied? - Indicates whether the coupon has been applied to the transaction.
If a customer decides they do not want to use an offer for that transaction, it can be removed manually. To remove an offer, select the discount from the sales display panel and void the line from the transaction. The offer shows as canceled under the applied column.
Associated Items Tab: This tab allows users to call customers' attention to items they may be interested in, based upon their purchases. Oracle Retail Xstore Point of Service displays a picture of each item, with a description of the item beneath it.
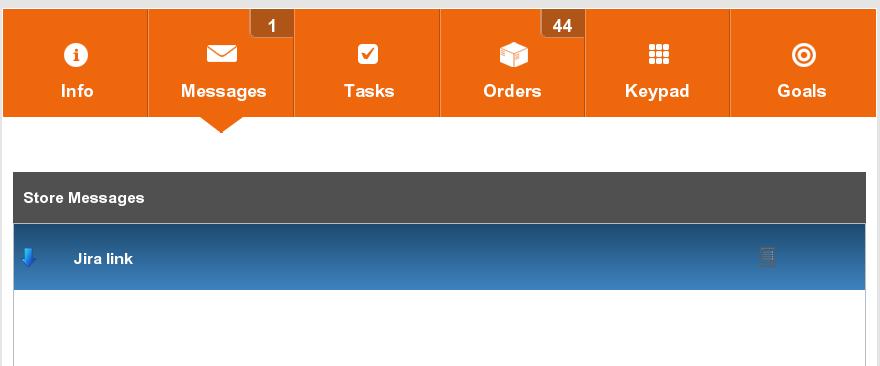
Messages Tab: You are not required to log in to view messages. These messages are visible to all employees. The information shown on the Messages tab may be from the corporate office, or from your store management.
Messages require no action, and may be store-specific (only displayed in your store, not corporate-wide) or register-specific (only displayed on a designated register).
These messages are time-based and do not display after the expiration date has passed.
|
Note: If the message contains a URL, click the link icon to open the URL. |
Messages use icons to indicate priority:
Exclamation Point - High priority
No icon - Medium priority
Down Arrow - Low Priority
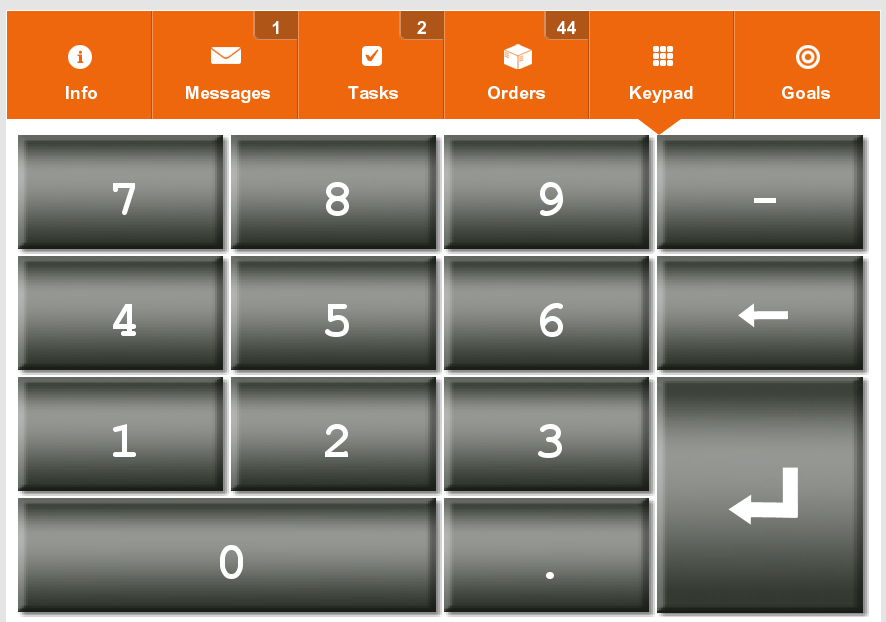
Keypad Tab (Touch-Screen Only): When using a touch-screen, the keypad option displays a numeric keyboard for entering numbers. The keypad automatically displays when you are in a field requiring a numeric value such as the Tender field.
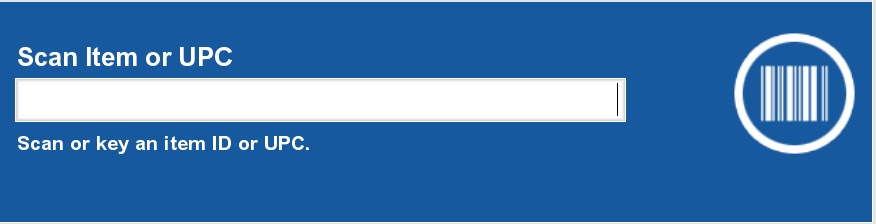
The focus bar new the lower-left corner of the screen provides a single-entry field, that is, a data entry form in which only one entry for a specified piece of data may be captured and then stored in the database.
The text above the data-entry field shows the title of the focus bar.
The message area below the data-entry field displays instructions for the current operations.
The focus bar changes color to indicate the specific function you are performing. The base version of Oracle Retail Xstore Point of Service uses the following color conventions:
Blue - sale transaction
Orange - login
Yellow - clock in
Red - return merchandise
Brown - send sale
Green - back office login
Purple - layaway and order transactions
Light Blue - pre-sale transaction
Olive Green - hold account transaction
Light Purple - special order transaction
|
Note: The image on the focus bar provides a visual clue for the type of data being entered. For example, on a login screen, a lock image indicates that an Employee ID number or password should be entered, which a fingerprint image indicates that a fingerprint should be scanned on a biometric device. |
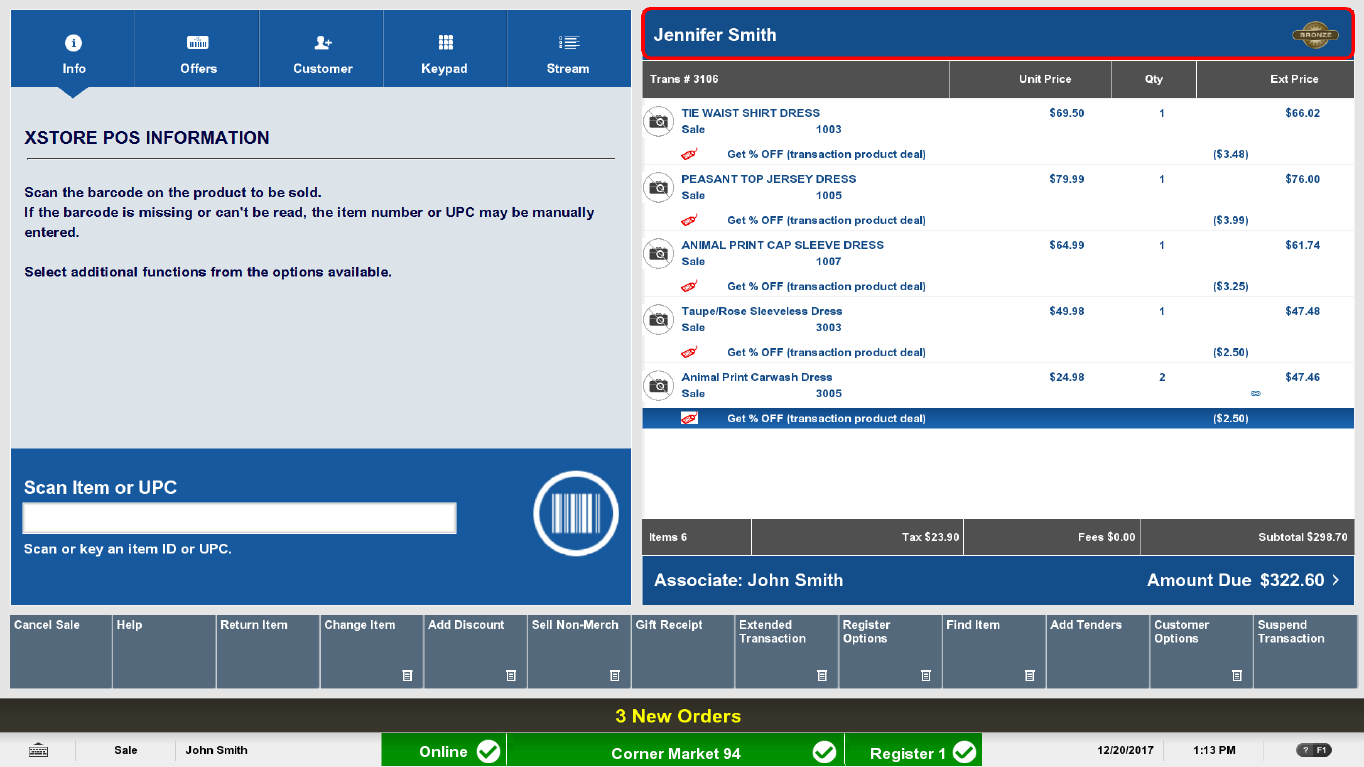
When a customer is attached to a transaction and your store has a loyalty program, a Customer Loyalty Banner opens in the upper-right corner of the screen.
The information in the Customer Loyalty Banner will depend upon the customer and your loyalty program:
If a customer is not signed up for the loyalty program, it will prompt whether the customer would like to sign up for the loyalty program.
If a customer is signed up for rewards, it will display the customer's reward information and a loyalty badge (if any).
If your store does not have rewards, it wild display your store banner.
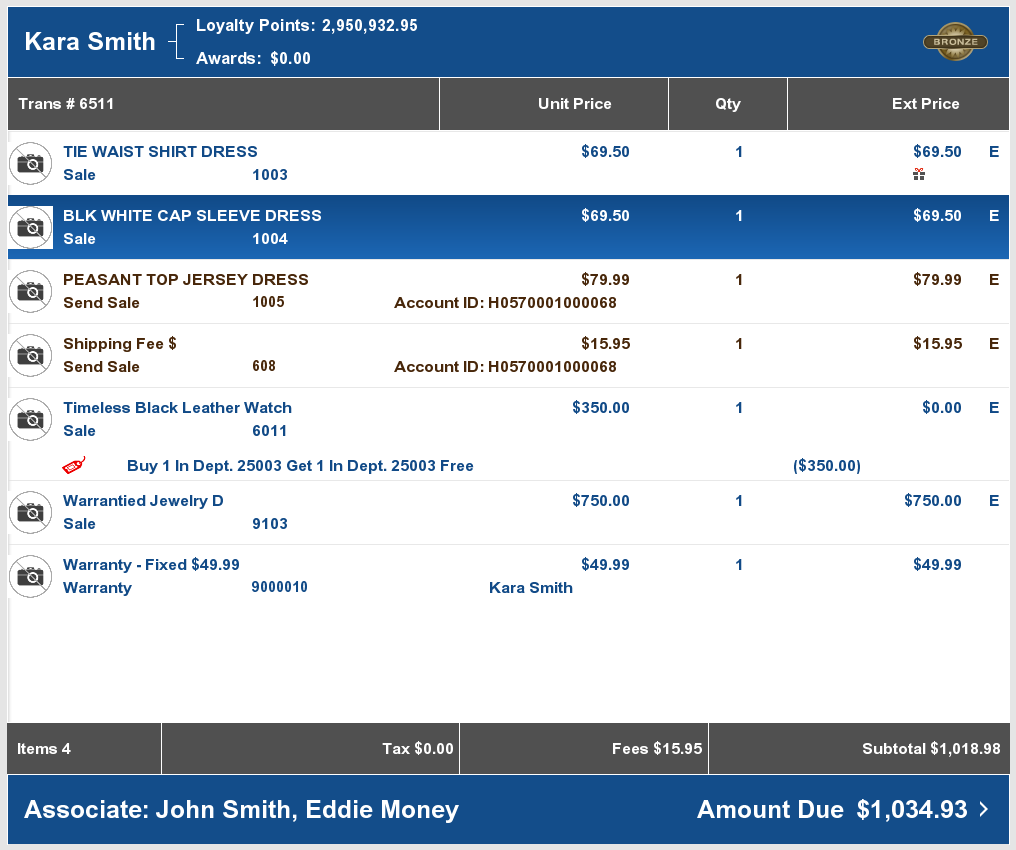
The View Port area opens in the middle right of the interface. It presents all relevant information about the current function to the register operator. For example, in a sale transaction, the View Port displays the sale transaction information for items, taxes, discounts, tenders or any other detailed data about the current sales transaction.
Item images are displayed on the left. If an item image does not exist, the image avatar (camera with line through) is shown.
|
Note: The ”Items” count in the lower left section of the View Port displays the number of items the customer will physically take out of the store. For example, if a customer has purchased a total of 3 items, but one of the items will be shipped directly to the recipient via a Send Sale process, the Items count will be 2. |
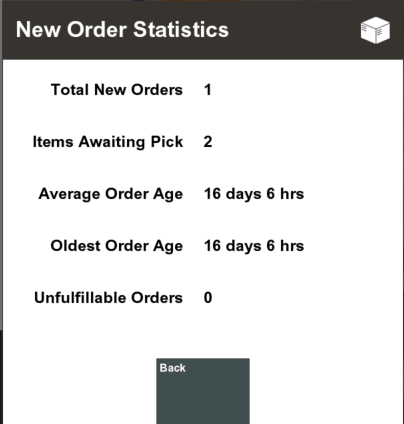
The message bar is located above the Status Bar. The Message Bar indicates when there are new orders. The yellow portions fade in and out when messages are available.
Select the message to view information about order statuses:
Total New Orders - The total number of new orders.
Ship Orders - The number of orders waiting to be shipped from this store.
Customer Pick Up Orders - The number of orders to be picked up in this store.
Items Awaiting Pick - The number of items that must be set aside for the orders.
Average Order Age - The average age of the orders awaiting fulfillment, in days and hours, or minutes.
Oldest Order Age - The age of the oldest order awaiting fulfillment, in days and hours, or minutes.
Unfulfillable Orders - The number of orders that cannot be filled.
See the Oracle Retail Xstore Point of Service Manager's Guide for more information about processing orders.
The Status Bar is found at the bottom of the screen. It displays color-coded information about the store and database:
Red - Not able to perform actions.
Yellow - System is able to perform some actions, but some functionality is not available.
Green - All functionality working.
The Status Bar displays the following information:
Keyboard Icon: The keyboard icon is displayed on touchscreen-enabled devices to indicate that the on-screen keyboard is available (see Virtual Keyboard).
Area Locator: Indicates where you are in the system (for example, Sale, Return, and so on).
Signed-In User Identifier: Identifies the currently signed-in user.
Database Status Indicator: Indicates the current status of the database.
Green indicates all data sources are online.
Yellow indicates at least one WAN data source is offline. The system is using the local data source.
Red indicates at least one LAN data source is offline. The system is using the offline process set up for your store.
|
Note: Touch-screen users can tap the indicator to open the Datasource Status window. |
Store Identifier: Identifies your store name and store number.
Green indicates the store is open.
Yellow or Red indicates the store is closed.
|
Note: Touch-screen users can tap the store identifier to open the store.Touch-screen users can also swipe the store identifier to the right to open the dashboard. |
Register Identifier: identifies the register number.
Green indicates the register is open.
Red indicates the register is closed.
|
Note: Touch-screen users can tap the register area to open the register. |
Date: Current register date.
Time: Current register time.
? F1: Click or tap to open the help window.
During various system operations, you may be prompted to confirm a procedure, select from a list of options, acknowledge a system action, enter/select information, and so on. Oracle Retail Xstore Point of Service provides several different types of prompts and forms to help you complete a task.
|
Note: On-screen buttons can be activated through keyboard shortcuts. |
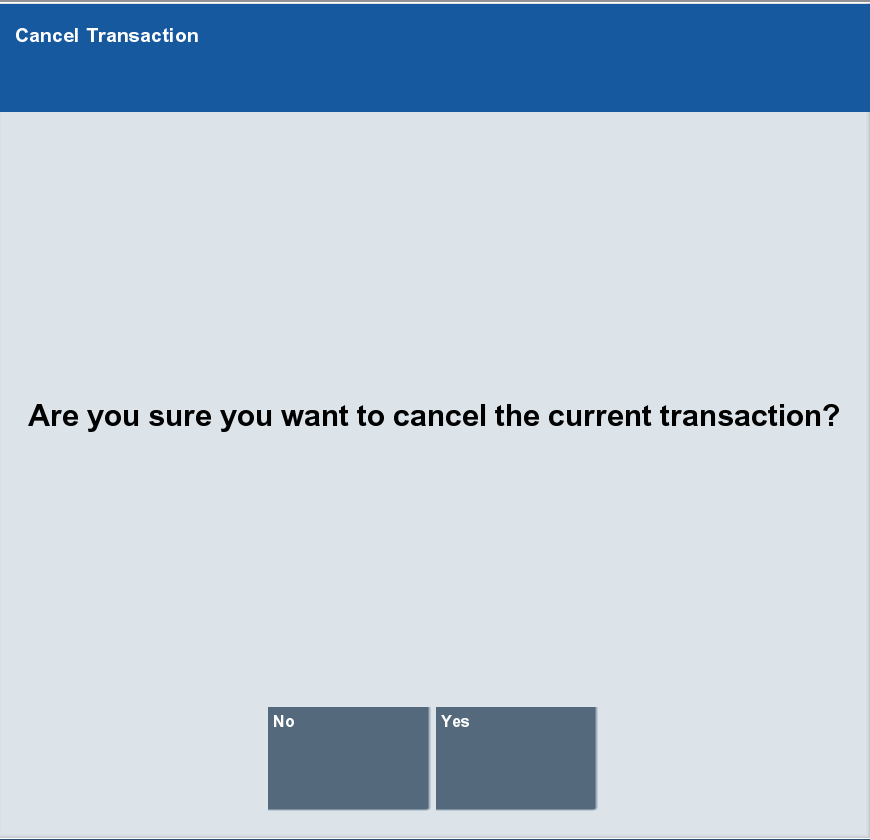
During a transaction process, you may be required to confirm an action. These prompts will require you to either confirm the action, or cancel the action and return to the transaction without making the change.
During a transaction process, you may be required to enter a value before continuing. Enter the necessary values, then either click or tap Process to continue. Or, if necessary, click or tap Back to cancel the action.
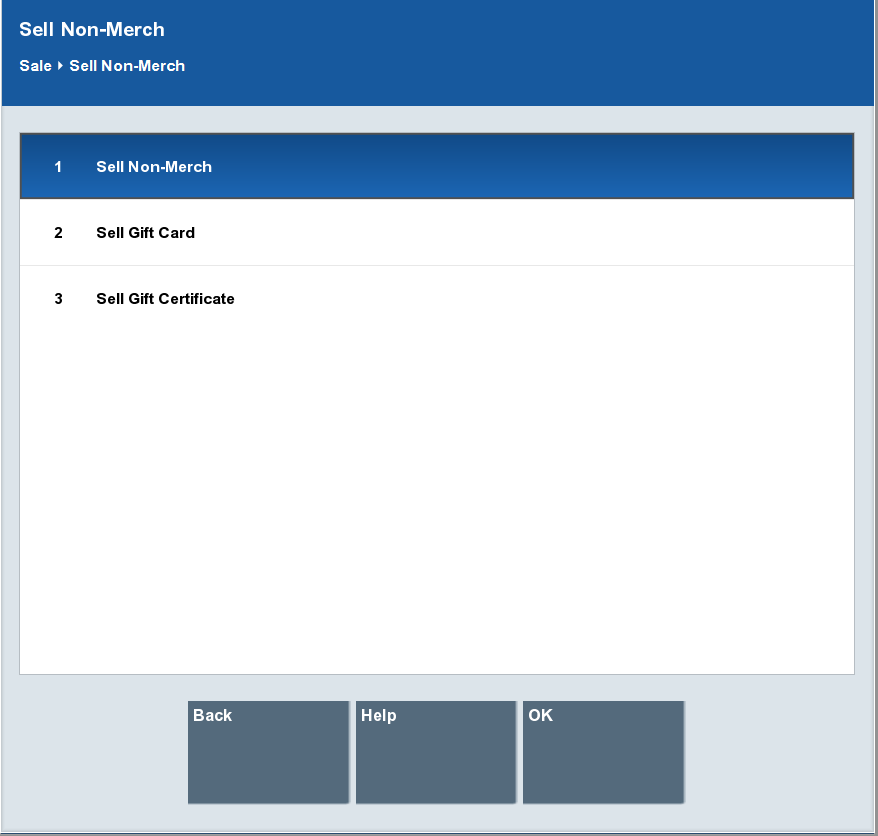
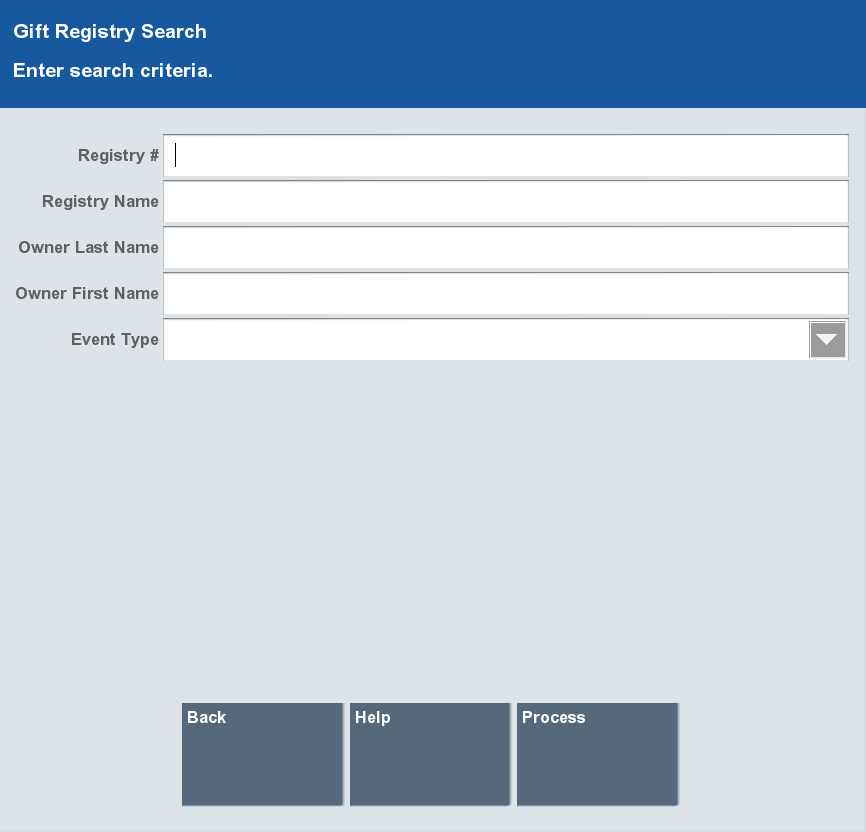
In a search form, enter parameters or criteria to initiate a database search. Oracle Retail Xstore Point of Service displays a search form automatically when you need to retrieve specific information.
To initiate a search, you need to enter only the first few letters or numbers in the appropriate search criteria fields. The more parameters you enter, the narrower the scope of the search becomes. That results in a decreased number of records being found. When one of the parameters is not matched, the system uses the remaining parameters to conduct a broader search. If the system cannot find any matches, Oracle Retail Xstore Point of Service displays a message indicating that no information was found.
Because each Oracle Retail Xstore Point of Service search form is configurable, the search parameters on your system may be different than the search forms described in this guide.
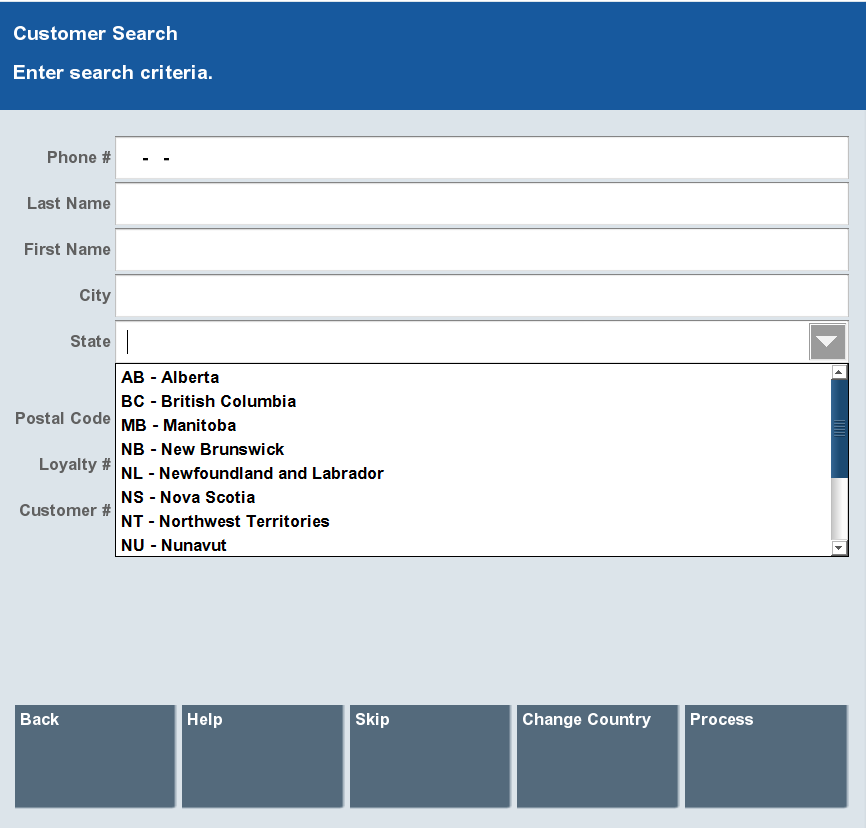
When applicable, a Change Country button associated with an address search will allow you to filter the values in drop-down menus to values for the selected country. This makes it easier to find the correct value in the drop-down menus.
Country-specific forms and address layouts are defined in the base config path directory and not in a configuration accelerator config path, so the layouts are accessible regardless of the country a store is running in.
When the Change Country function is used on any form that supports it such as Customer Search, Customer Maintenance, and so on, you can change to any of the country-specific layouts that exist.
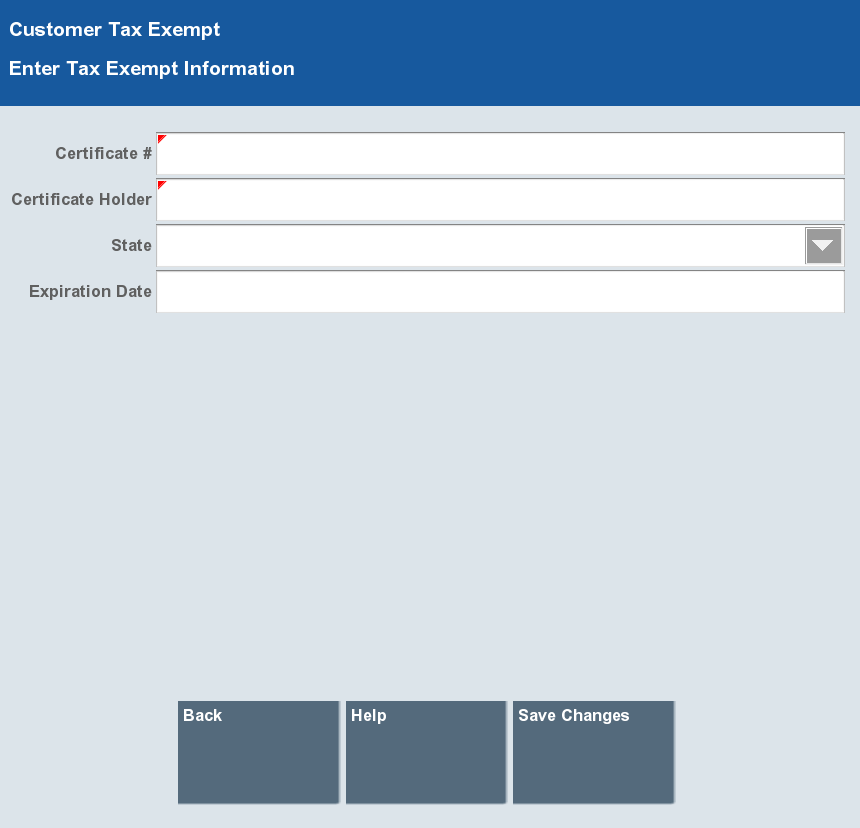
In a data entry form, you enter specific information about the initiated activity. Enter the information as required and click or tap Save Changes to continue, or click or tap Back to cancel the action.
If you click or tap Save Changes before completing all the required fields, Oracle Retail Xstore Point of Service displays a message explaining the error.
Oracle Retail Xstore Point of Service will sometimes prompt users with information to be acknowledged by users. For example, these prompts can display data entry errors, informational messages, or indications of the completion of actions. These prompts will only display one button to be tapped or clicked.
If Oracle Retail Xstore Point of Service encounters a major error that cannot be handled as part of an action, Oracle Retail Xstore Point of Service alerts you that you should contact the help desk for help with the error.
If you receive this message, do one of the following:
Acknowledge the message and continue.
Call the help desk phone number displayed on the screen and follow the instructions given to you by the help desk.
If available, select the Open Support Ticket option. Enter the requested information, then click or tap Process.
An e-mail is automatically sent to the help desk describing the date, time, location, and system where the problem occurred, as well as the entered information and additional system log files.