| Oracle® Retail Xstore Point of Service User Guide Release 18.0 F12254-01 |
|

 Previous |
 Next |
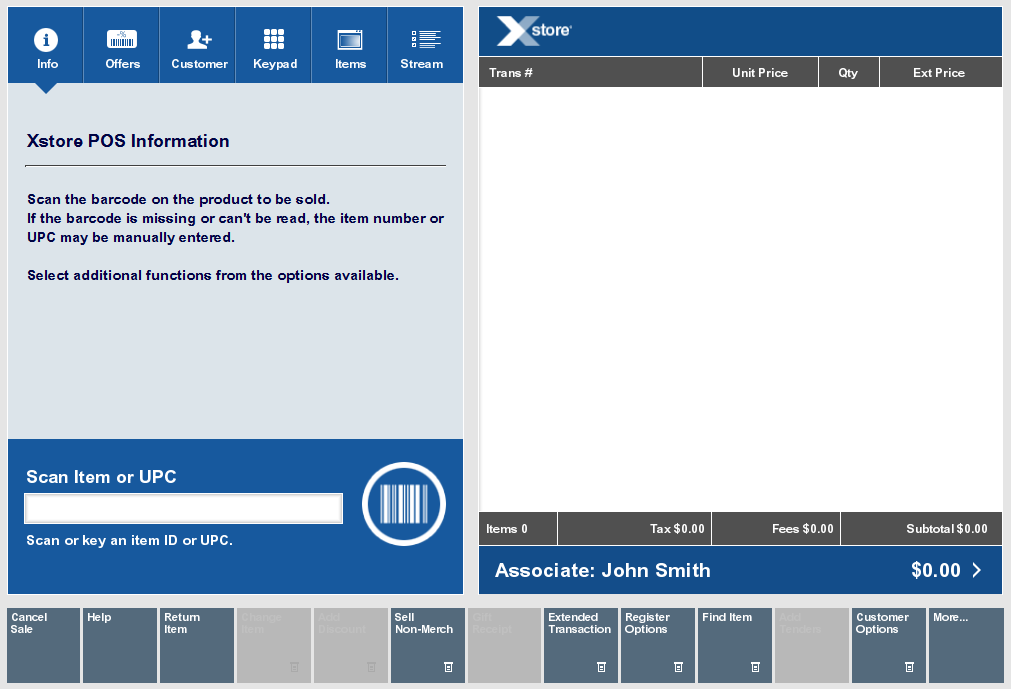
During a transaction you may need to search for a particular item. Xstore Point of Service provides the following methods for performing an item search:
Item Lookup searches for an item based on any of a number of criteria (for example, SKU, style, or department) and retrieves detailed information about the item. For kits, Item Lookup finds the component items that make up the kit.
Item lookups can be performed while Xstore POS is at a Register or Back Office login prompt without the need to login.
If item lookup is initiated from a sale, you can add the item to the sale directly from the lookup screen if all eligibility parameters have been met.
If your system has the Scan Items Prior to Adding to Transaction setting configured, the item is scanned to confirm it is the correct item being added to the transaction.
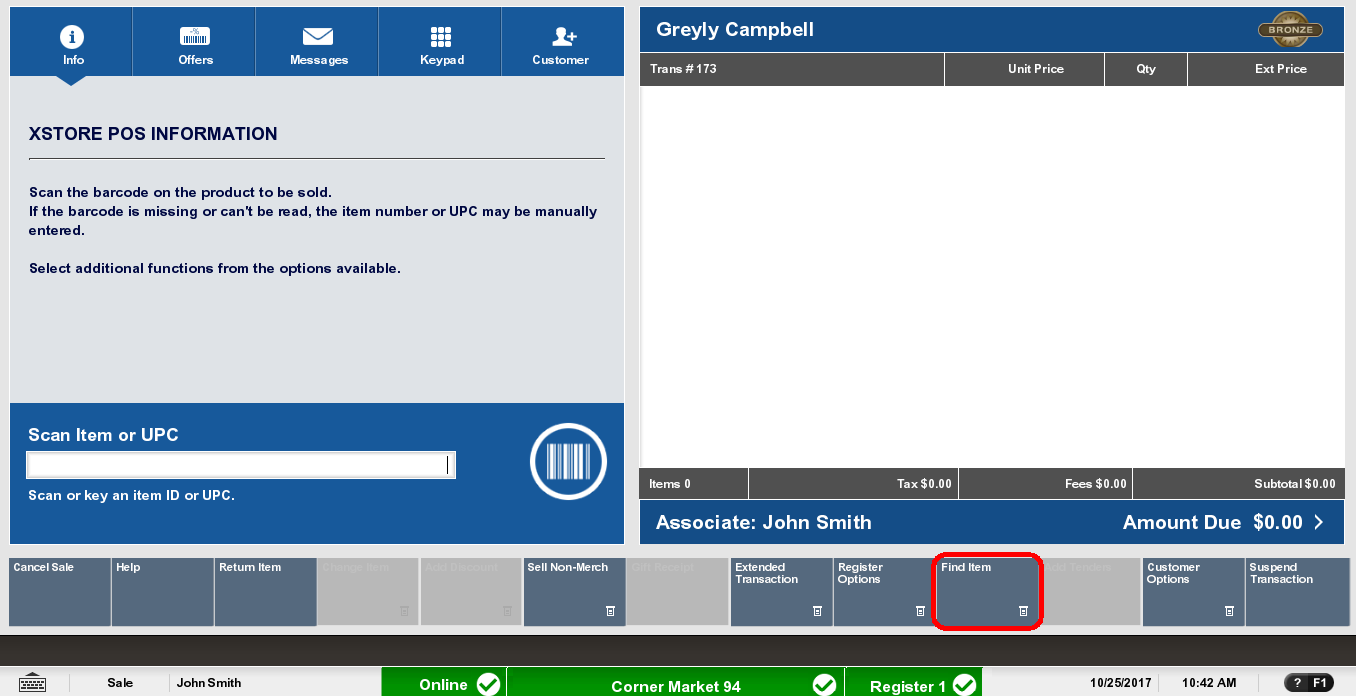
Click Find Item in the Register Sale screen.
Click Item Lookup.
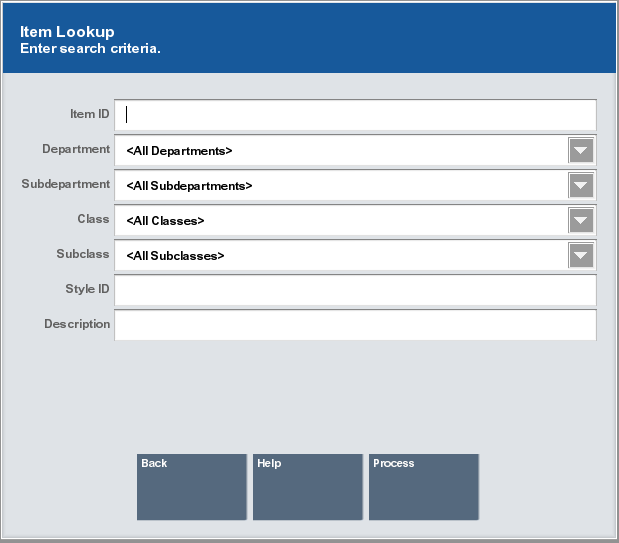
The Item Lookup window opens.
Enter the search criteria for the item:
Item ID - ID of the item.
Department - Department to which the item belongs.
Subdepartment - Subdepartment to which the item belongs.
Class - Class to which the item belongs.
Subclass - Subclass to which the item belongs.
Style ID - ID of the style assigned to the item.
Description - Content in the description of the item.
If advanced search options are configured on your systems, use the advanced options to further refine the search:
Select the value for any search criteria you are using.
Click Exclude for any unused search criteria.
Click Process.
If more than one item matches the search criteria, continue with Step 5.
If only one item matches the search criteria, the item opens in the Item Viewer.
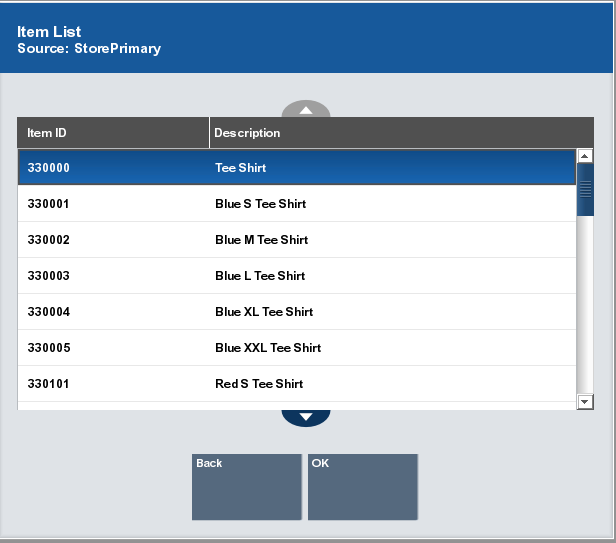
If necessary, select an item in the Item List window:
Click the item.
Use the up and down arrows to highlight the correct item, then press the Spacebar.
Click OK.
The item opens in the Item Viewer.
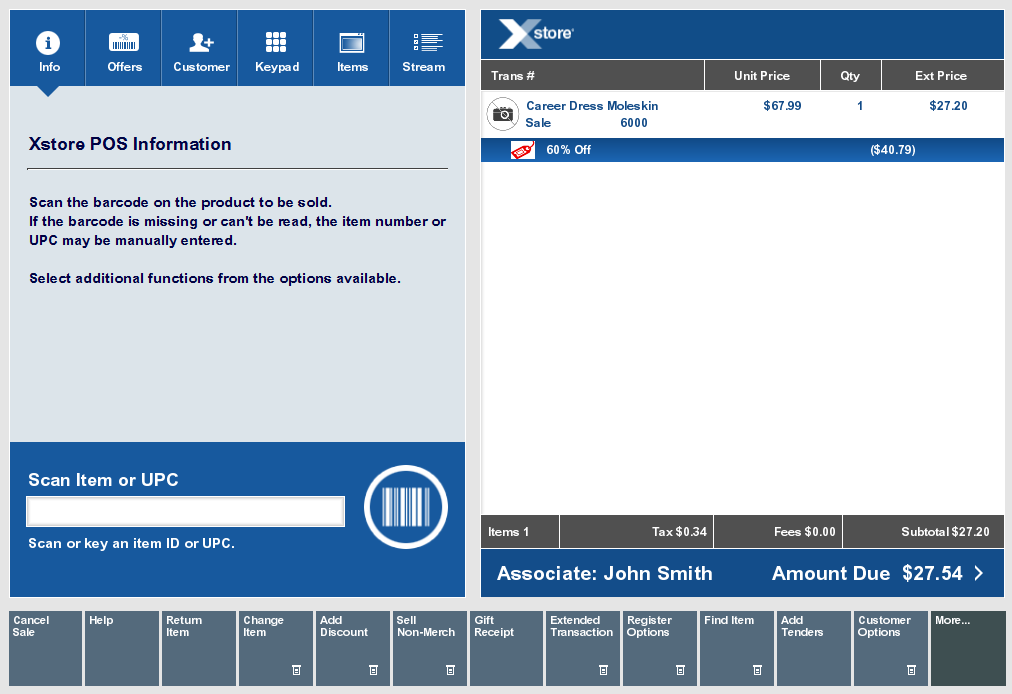
If your system has the Scan Items Prior to Adding to Transaction setting configured, you need to scan the item to confirm it is the correct item.
Select Exit to Scan. You are returned to the Sales screen and must scan the item in order to add it to the transaction.
Once an item is scanned it is added to the transaction:
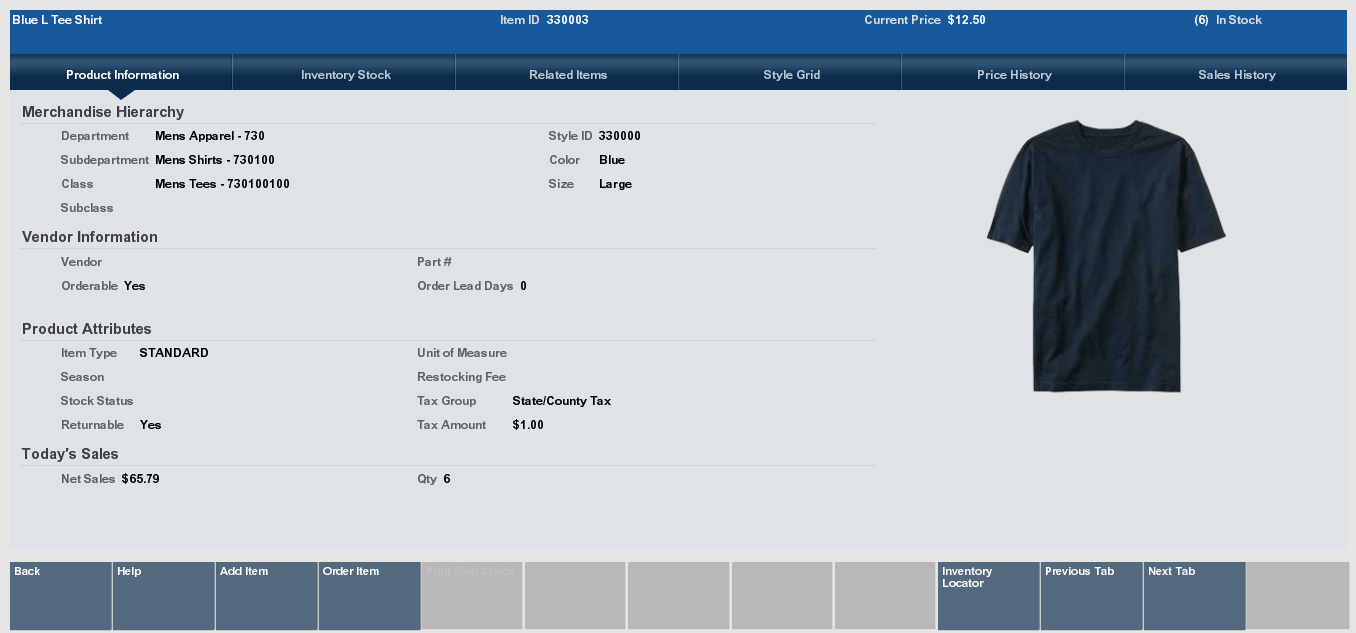
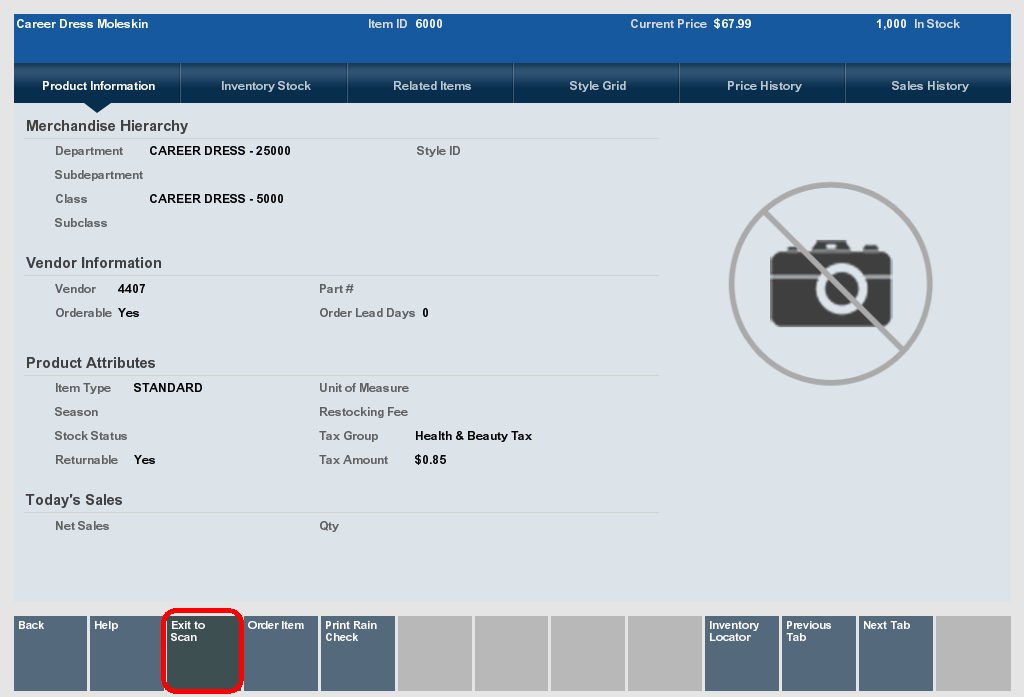
The Item Viewer provides information about an item. The Item Viewer displays the following information along the top of the screen:
Name of the item.
Item ID - ID of the item.
Current Price - Current price of the item.
Quantity of the item currently in stock.
The Item Viewer has the following tabs:
Product Information - Information about the item.
Inventory Stock - Current inventory information for the item.
Related Items - Information about items related to the selected item.
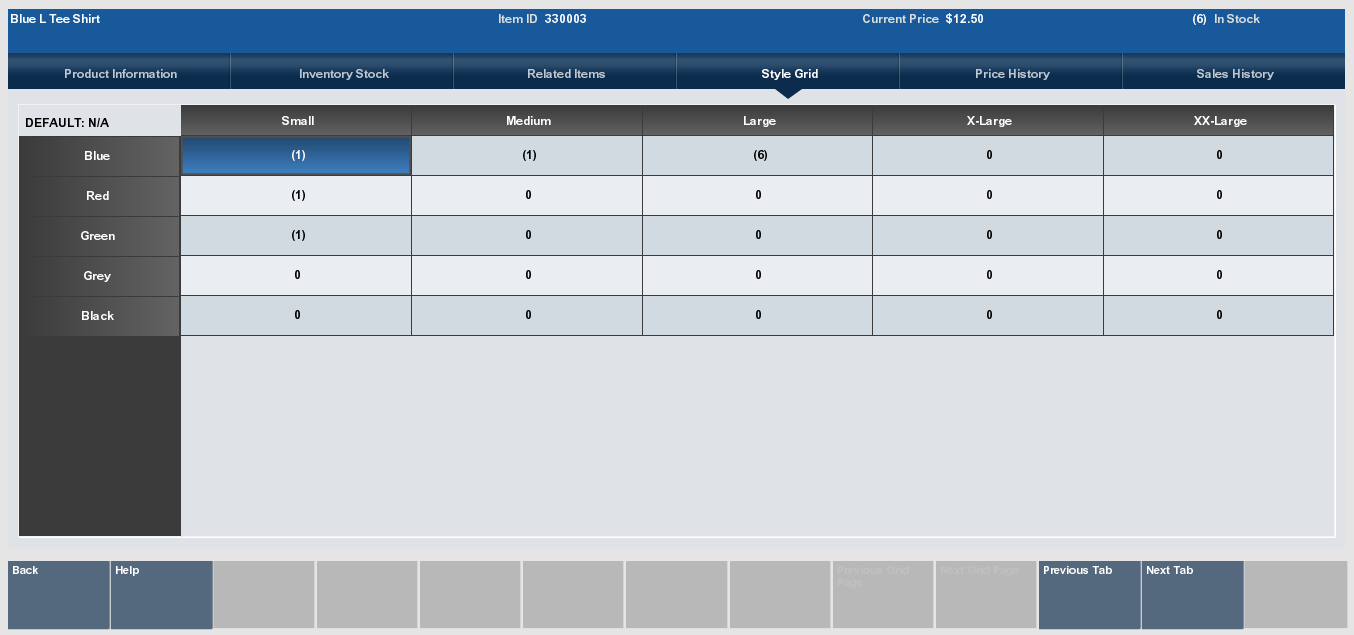
Style Grid - Grid showing on-hand quantities of the item with on dimension cross-referenced with another dimension.
Price History - Past prices for the item.
Sales History - Past sales data for the item.
You can also print a rain check from the Item Viewer. See Print a Rain Check.
The Product Information tab, (see Figure 6-4), displays the sections that display information about an item:
A picture of the item (if available).
Merchandise Hierarchy - Merchandise hierarchy to which the item is assigned.
Vendor Information - Vendor that provides the item.
Product Attributes - Attributes of the item.
Today's Sales - Sales information for the item on the current day.
The Merchandise Hierarchy section displays the following information:
Department - Item department.
Subdepartment - Item subdepartment.
Class - Item class.
Subclass - Item subclass.
Style ID - ID of the style for the item (if available).
Dimension information for the item.
The Vendor Information section displays the following information about the item's vendor:
Vendor - Name of the vendor.
Orderable - Indicates whether the item can be ordered.
Part # - Part number used by the vendor.
Order Lead Days - Number of lead days required when ordering the item.
The Product Attributes section displays the following information:
Item Type - Type of item.
Season - Season for the item.
Stock Status - Current stock status.
Returnable - Indicates whether the item can be returned.
Unit of Measure - Unit used to measure the item (if applicable).
Restocking Fee - Restocking fee applied to the item when it is returned (if applicable).
Tax Group - Tax group for the item.
Tax Amount - Amount of tax applied to the item.
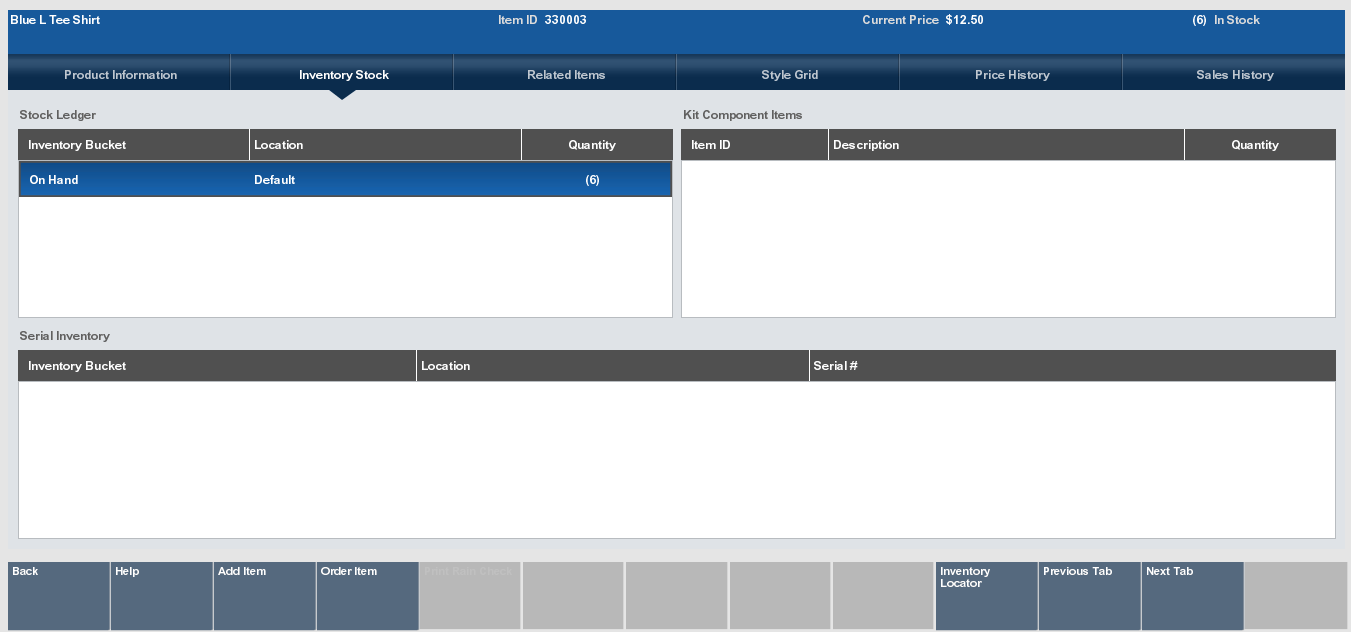
The Inventory Stock tab contains the following areas:
The Stock Ledger table displays the following information for each inventory bucket in which the item is located:
Inventory Bucket - Inventory bucket in which the item is located.
Location - Location of the item.
Quantity - Quantity of the item in the inventory bucket.
If the item is a kit, this table displays information about each item in the kit:
Item ID - ID of the kit item.
Description - Description of the kit item.
Quantity - Quantity of the item included in one kit.
If the item is a serialized item, the Serial Inventory table displays the following information about each serial number:
Inventory Bucket - Inventory bucket in which the serialized item is located.
Location - Location of the item.
Serial # - Serial number.
|
Note: No item quantity is displayed. For all items with one item ID, only one of those items will be assigned an individual serial number. |
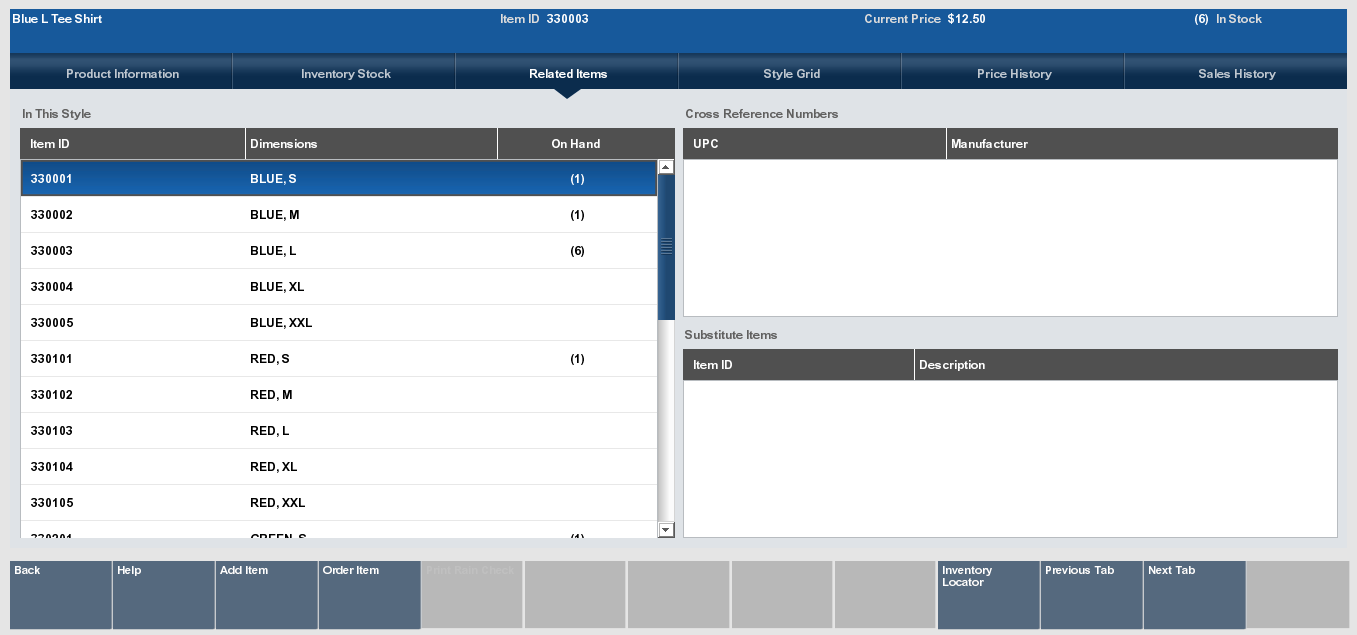
The Related Items tab includes information about items similar to the selected item. The following tables display information about related items:
In This Style - Displays information about items assigned to the same style as the selected item.
Cross Reference Numbers - Displays information about items cross-referenced with the selected item.
Substitute Items - Displays information about items indicated to be substitutes for the selected item.
The In This Style table displays the following information about each item that has the same style ID as the selected item:
Item ID - ID of the item.
Dimensions - Values of the dimension attributes configured for the item.
On Hand - Count of the item on-hand.
The Style Grid displays a grid showing the grid that shows the on-hand quantity of items with one dimension cross-referenced with another dimension.
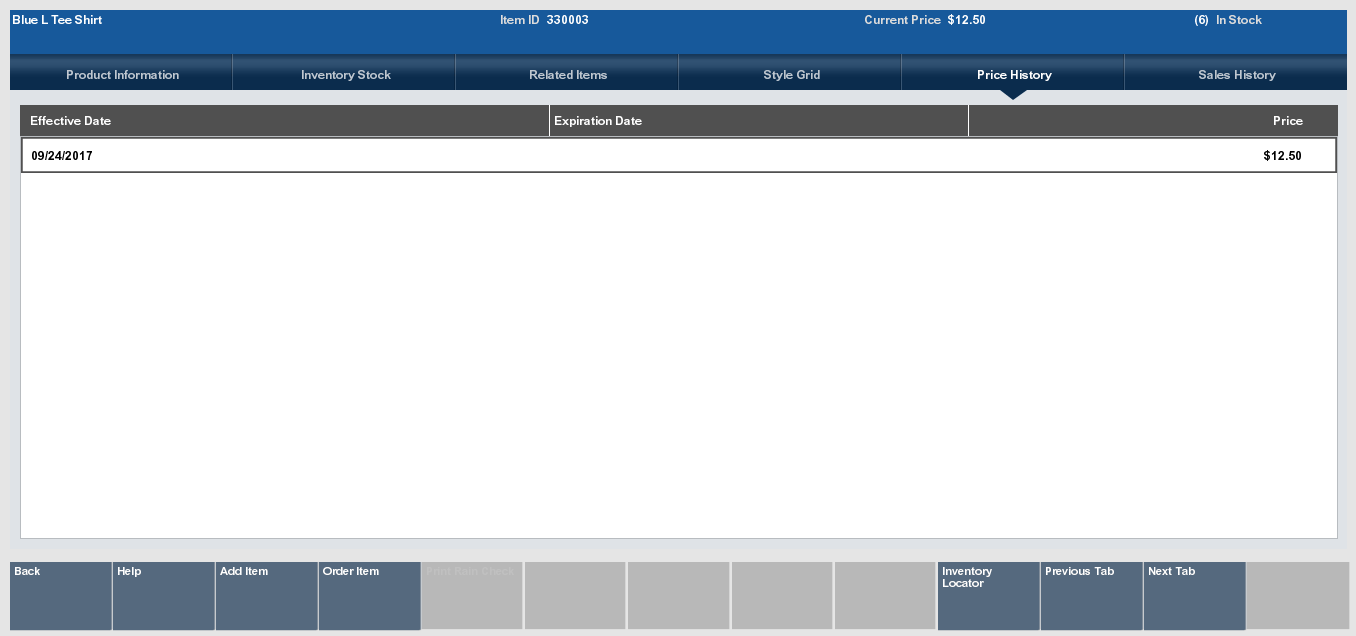
The Price History tab shows the past history of all prices that have been assigned to an item. The Price History shows the following information for each of the past prices:
Effective Date - Date on which the price first became effective.
Expiration Date - Date on which the price was not longer valid. This field will be blank for the current price.
Price - Price for the item from the Effective Date up to the Expiration Date.
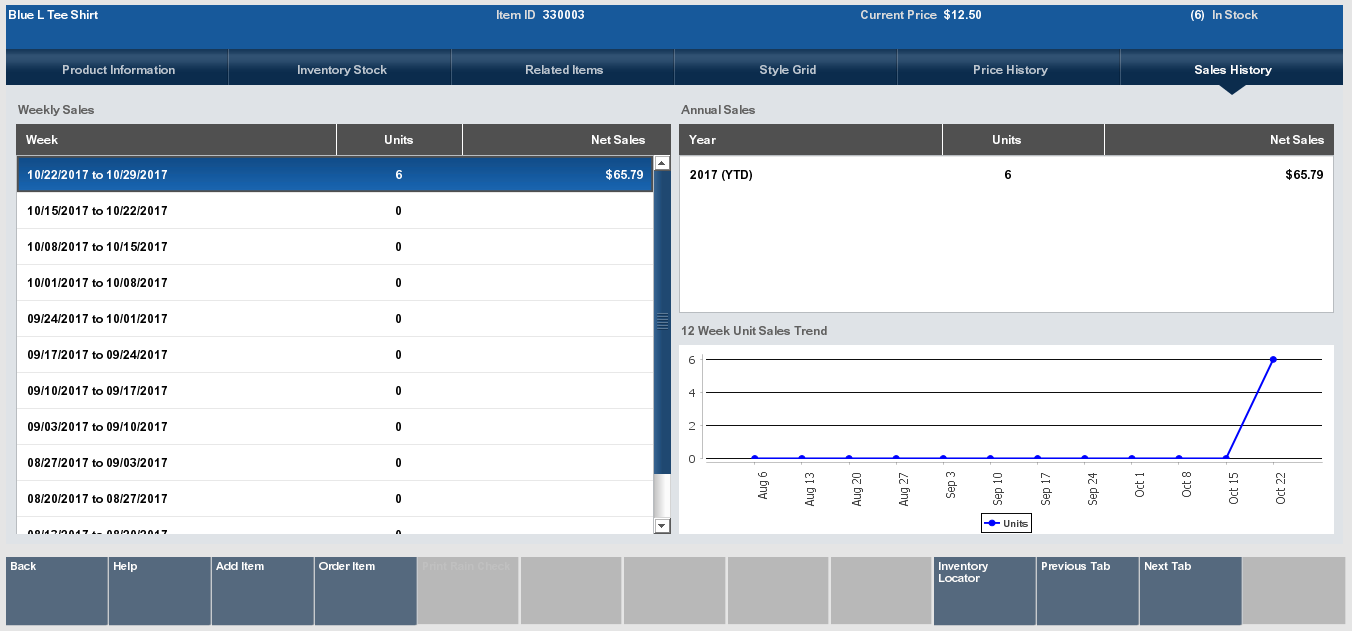
The Sales History tab displays sales data for the item. The Sales History tab displays the following information:
Weekly Sales - Table of weekly sales data for the item.
Annual Sales - Table of annual sales data for the item.
12 Week Unit Sales Trend - Graph of weekly sales data over the past twelve weeks.
Displays sales data for the item by week. This table displays the following sales information for each week:
Week - Date range for the week.
Units - Net quantity of the item sold.
Net Sales - Net amount of all sales and returns of the item.
A Rain check is an optional feature that allows customers to purchase out of stock items for the same price at a later date. To print a rain check:
Click Print Rain Check in the Item Viewer.
|
Note: The Print Rain Check button will be grayed out if a rain check cannot be issued for the item |
A confirmation prompt opens.
Click Yes to print the rain check.
Xstore Point of Service prints a rain check for the item.
Occasionally an item may not be available in your store inventory, but the customer would like to see which stores in your chain have the item in stock. You can use the inventory lookup process to search a centralized database to locate these items within a set parameter range. For example, you could locate a specified item at a store within 25 miles of your location that has at least three of the specified item on hand.
To perform an inventory lookup:
Click Find Item in the Register Sale screen (Figure 6-1).
Click Inventory Lookup.
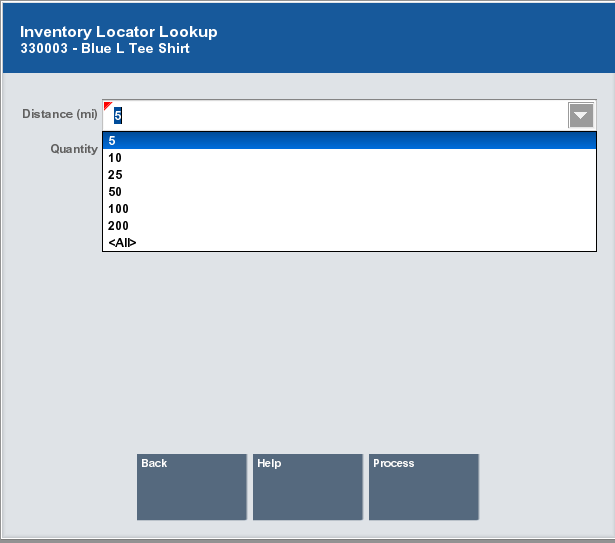
The Inventory Locator Lookup window opens.
Enter the lookup information for the item:
Item ID - ID of the item.
Style ID - ID of a style assigned to the item.
|
Note: Either the Item ID or Style ID field must be populated. Information in the Style ID field is ignored if the Item ID field is also populated. |
Distance - Distance from the local store.
Quantity - Minimum quantity of the item that the store must have on hand. For example, if the customer needs three of the item, enter ”3”.
Click Process.
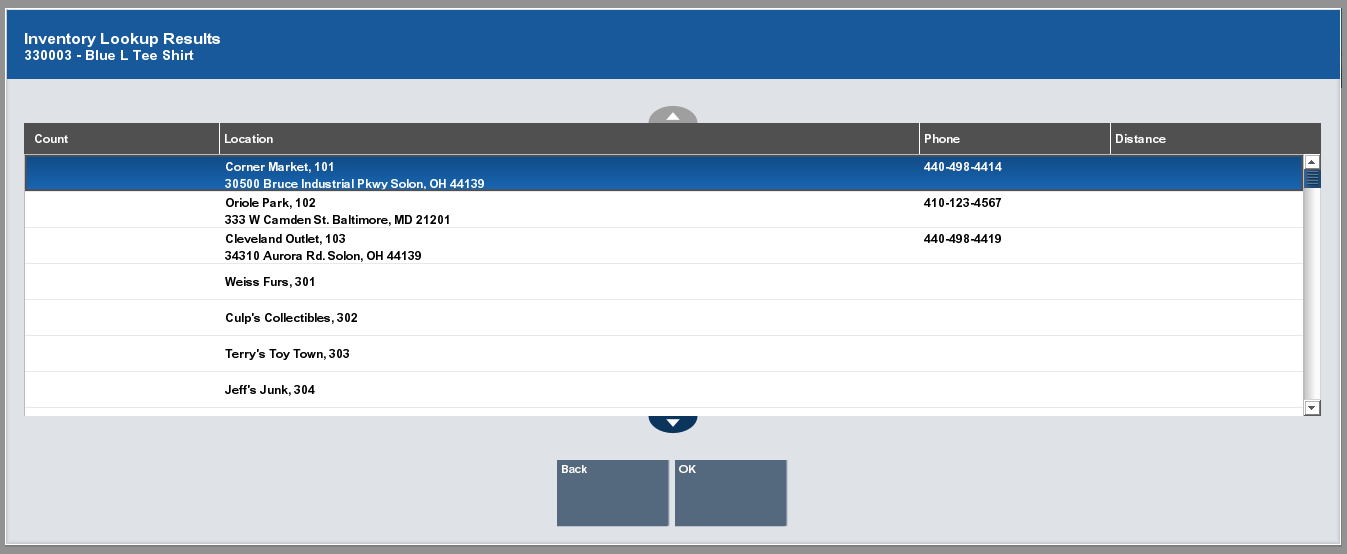
Xstore Point of Service returns a list of stores with the item. The following information will be displayed for each location:
Count - On-hand quantity of the item at the store.
Location - Address for the store.
Phone - Phone number for the store.
Distance - Distance of the store from the local store.
Click OK to close the window.
The Item Matrix can be used to find items by navigating through the merchandise hierarchy. Starting at the Department level, you can move to the lowest level of merchandise hierarchy and find a specific item. The merchandise hierarchy levels are color-coded to help you navigate through the different levels. When the item is located, it can be added to the sale transaction.
|
Note: Item Matrix is configured off by default. |
To find an item in the Item Matrix:
Click Find Item in the Register Sale screen (Figure 6-1).
Click Item Matrix.
The Item Matrix window opens at the highest merchandise level.
Click the next merchandise level in which the item is located.
Repeat Step 3 until the Item Matrix displays the correct item.
Click the item to add it to the transaction.