| Oracle® Retail Xstore Point of Service Mobile User Guide Release 19.0 F25674-03 |
|

 Previous |
 Next |
| Oracle® Retail Xstore Point of Service Mobile User Guide Release 19.0 F25674-03 |
|
Previous |
Next |
Oracle Retail Xstore Mobile is a mobile point-of-sale (POS) extension of the Xstore register software. Using Xstore Mobile POS, all of the actions that employees normally performed on a register can now be performed out on the sales floor.
Xstore Mobile POS is built utilizing the existing Xstore core frameworks and work flows to ensure a consistent experience for the associate. It is platform independent and runs on iOS, Android, and Windows 10 based Oracle Workstation 610 and 310 UI. The application is built as a thin client, enabling speed of deployment and without operating system dependencies. The UI is simple to use and takes advantage of the look and feel of the current desktop application where relevant.
|
Note: The appearance of Xstore Mobile differs depending upon the operating system and the specific device on which it runs. Therefore, your screens may differ from the screens that appear in this manual. Also, screen shots are taken from a variety of devices, some configured to use the new color themed user interface. |
This chapter covers the following topics:
The Oracle Retail Xstore Mobile POS Mobile User Guide describes how to perform the functions available in Xstore Mobile Handheld, Mobile Tablet and Thin Client. For a complete list of functionality available on each device see Feature Availability.
This guide is broadly separated into two halves: the first half covering the functions of the point of service such as sale transactions, item and transaction modifiers, such as discounts and price overrides, multiple tender types, item lookup, gift card sales, and inquiry and serialized item support, and the second half covering the point of service maintenance functions. These functions are usually performed outside of a sale. Store employees can perform non-customer facing activities within the store such as start and end day, banking, employee role and security maintenance, time and attendance maintenance along with analytical reporting.
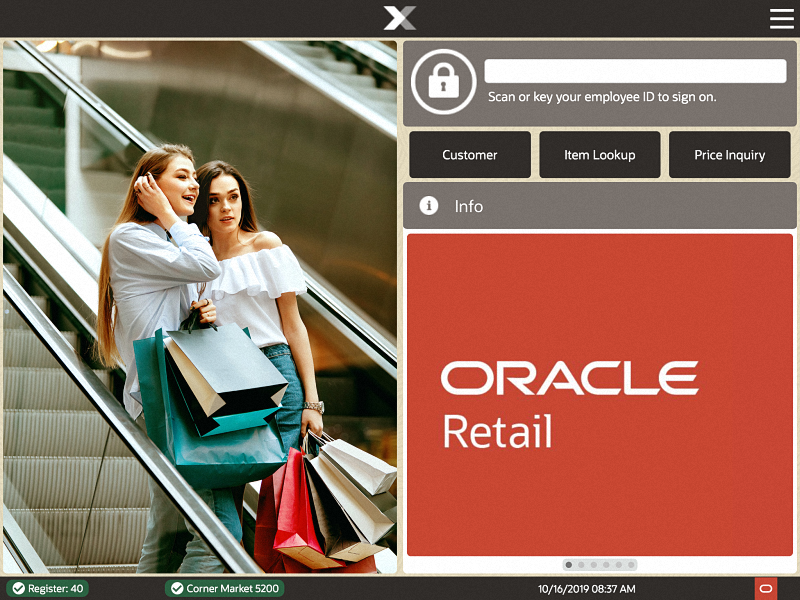
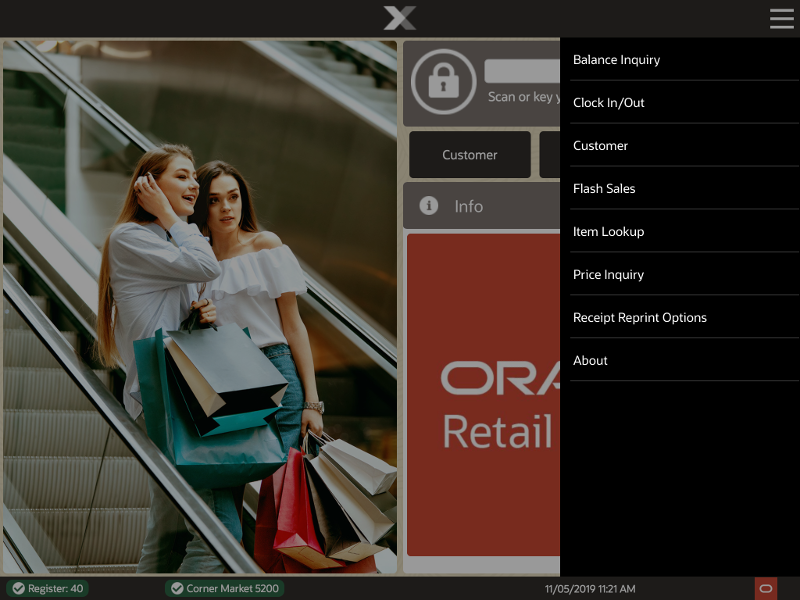
An example of the home screen on a tablet is shown below:
The Mobile Device Login area at the top of the screen allows you to enter your employee ID and subsequently, your password. When configured, you can scan your badge to login after selecting the lock icon instead of entering your employee ID. Login opens the Main Menu to allow you to start a transaction or access the maintenance functions.
Quick Action Buttons provide quick access to Customer, Item Lookup, and Price Inquiry, from the Home screen. Device login is still required for these options and you can access the full POS functions from this route. Whenever an input is required, an on-screen keyboard opens on the mobile device, which you can use to enter the requested information.
The tabs (now known as a scrolling list) below the Login area, are shown on the right hand side rather than the left. This is because most associates will hold a tablet in their left hand and naturally drive the device with their right hand. This is a configurable option so for left-handed users the format can be transversed. See Scrolling List /Tabs.
Selecting the top tab drops down the list of tabs. Rolling your finger up and down the tab section will give you access to the list selection. Select an option to put it in the focus area. Similarly, the tabs can be swiped left - to - right or vice versa to view each tab.
The Status Bar at the bottom is a screen component that displays several items of store-related information, and is always visible from every screen.
The Context Menu in the upper-right hand corner of the screen is not only a touch icon that will present a menu, but the action of dragging from left to right across the screen and right to left will bring out and put away menus.
The menus are context-sensitive and equivalent of the function key options seen on the desktop version. Depending on where you are in the transaction, the menu references the appropriate options that are available in that particular feature.
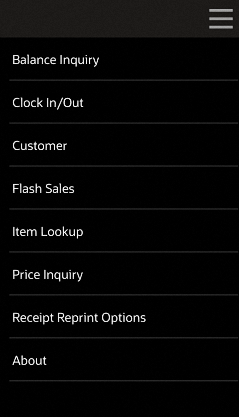
The context menu has the following options when in the Home screen.
Table 1-1 Mobile Tablet and Thin Client Context Menu Options
| Main Menu Option |
|---|
|
Balance Inquiry |
|
Clock in/Out |
|
Customer |
|
Flash Sales |
|
Item Lookup |
|
Price Inquiry |
|
Receipt Reprint Options |
|
About |
Figure 1-3 Home Screen Showing Context Menu Options
Select the respective option to access the appropriate functionality or return to the home screen.
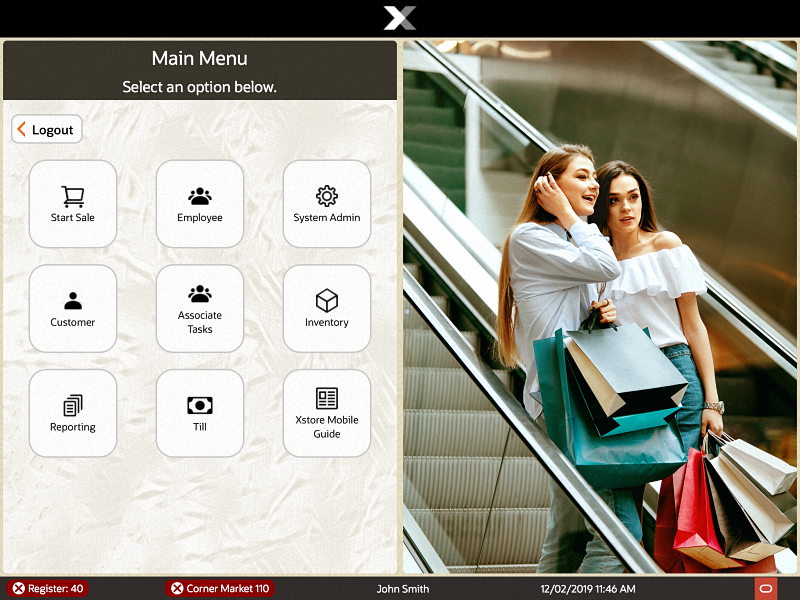
The main menu is the first screen displayed when opening the application via the security login from the home screen. It has been designed specifically for use with tablets (8-inch, 10-inch, or 11-inch).
Xstore Mobile POS offers a configurable button layout as an alternative to the traditional list layout menu style.
Figure 1-4 Mobile Tablet/Thin Client Main Menu
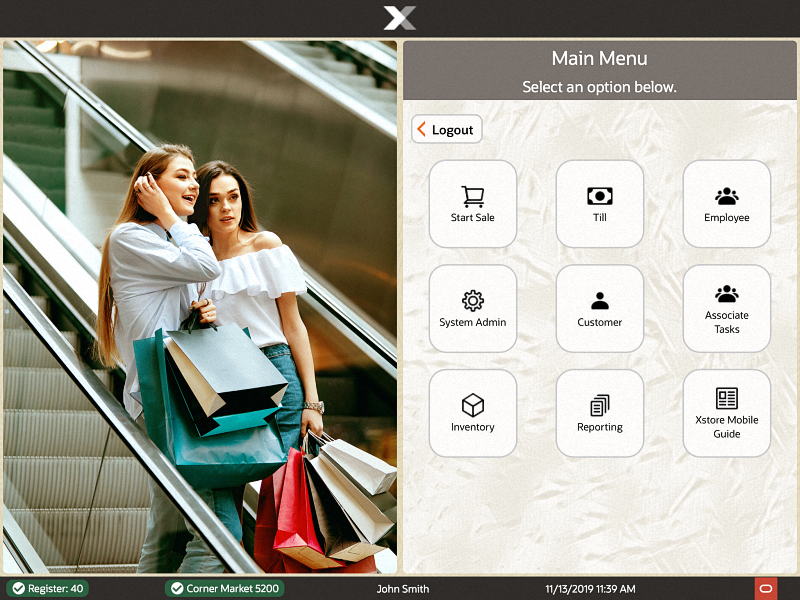
Select the respective option to access the appropriate functionality. See Feature Availability for more information regarding functionality available on the Mobile Tablet and Thin Client device.
Table 1-2 Mobile Tablet and Thin Client Main Menu Options
| Main Menu Option | Description |
|---|---|
|
Logout |
Logs you out of the device. |
|
Start Sale |
This option provides access to all aspects of a POS transaction from associating customers, adding items, changing quantities, adding discounts, processing tenders, and providing receipts. |
|
Till |
Used to manage operations such as opening and closing the registers and store, store safe management, and all till functions as found on the desktop. |
|
Employee |
This option covers all employee maintenance tasks including: Associate Advance, Employee Borrow, Employee Scheduling, Message Maintenance, Time and Attendance including Payroll. |
|
System Admin |
Hardware and configuration is accessed via this option. |
|
Customer |
Includes activities that relate to entering new customers into the customer database and updating customer information. |
|
Associate |
Change Password, Associate Tasks, View Schedule and Timecards. |
|
Inventory |
Perform inventory actions such as: Inventory Adjustment, Inventory Counts Options, Inventory Replenishments, Item Lookup, Item Transfer, Receiving, and Shipping. Also includes Print Shelf Labels and Exchange Serial Number options. |
|
Reporting |
Provides access to view and print reports. Dashboard, Customer Reports, Electronic Journal, Employee Reports, Inventory Reports |
|
Xstore Mobile Guide |
Outside of a sale, a link to the online Xstore Mobile Guide for help on the processes. |
The Sales screen is where transactions are performed. For basic transactions, simply enter an item ID, or select the barcode icon and scan items using the device camera. In the viewport, you will see the item, the price, the quantity, and the extended price. Note, we have the taxes, the fees, if applicable, and the subtotal. We also have a running items list count. When ready to tender, select the amount due to show a list of tenders and continue payment to complete the transaction.You can select one of the Quick Action Buttons such as Return Item, New Order, Pickup/Cancel Order, or Xcommerce if configured. For other transactions such as special orders, or to sell non-merchandize gift cards, or to add a discount, select the Context Menu in the upper-right hand corner of the screen.
The mobile device also provides all functions for maintaining the POS operations. You can manage the store and registers such as opening and closing, and reconciliation, set up customers, schedule rotas for employees, perform inventory tasks and view and print reports. See Maintenance Functions for more information.
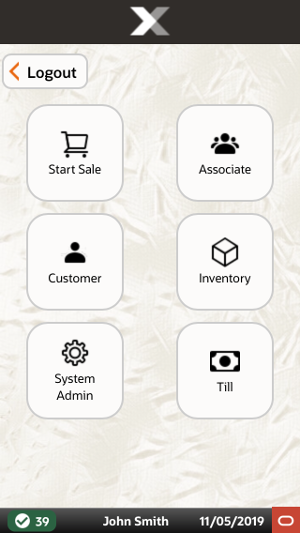
The main menu for Xstore Mobile Handheld is the first screen displayed when opening the application after login. This screen displays a list of buttons, each of which accesses certain areas of Xstore Mobile. It is designed for a two-by-four form factor, whether that be an Android or an iOS device.
Select the respective option to access the appropriate functionality. See Feature Availability for more information regarding functionality available on the Mobile Handheld device. The Mobile Handheld device offers less functionality due to the size restraint of the screen.
Table 1-3 Mobile Handheld Main Menu Options
| Main Menu Option | Description |
|---|---|
|
Logout |
Logs you out of the device. |
|
Start Sale |
This option provides access to all aspects of a POS transaction from associating customers, adding items, changing quantities, adding discounts, processing tenders, and providing receipts. |
|
Till |
Used to manage operations such as opening and closing the registers and store, store safe management, and all till functions as found on the desktop. Includes: Change Business Date, Force Close, Print Till Summary Receipt, and Refresh Promotions. |
|
System Admin |
Hardware and configuration is accessed via this option. Includes: Datasource Status, EFTLink Admin Functions, Mobile Device Access, Mobile Device Quick Config, and Reinitialize Hardware. |
|
Customer |
Includes activities that relate to entering new customers into the customer database and updating customer information. Includes: Balance Inquiry, Customer Maintenance, Order Options and Receipt Reprint Options. |
|
Associate |
This option allows you to change your password. |
|
Inventory |
Perform inventory actions such as: Inventory Adjustment, Inventory Counts Options, Inventory Replenishments, Item Lookup, Item Transfer, Receiving, and Shipping. Also includes Print Shelf Labels and Exchange Serial Number options. |
Xstore Mobile POS can be installed as a thin client on an Oracle Workstation 610 or Oracle Workstation 310. All the functions available on the tablet version of Xstore Mobile POS are available on the thin client.
The Oracle Workstation 310 device has a detachable head that can become a tablet for portability.
The table below shows the functionality available on each device type. Some functionality is not available on the handheld due to screen size restraints. Mobile Tablet and Thin Client offer the full functionality.
Table 1-4 Feature Availability by Device
| Main Category | Feature | Desktop | Thin Client | Tablet | Handheld |
|---|---|---|---|---|---|
|
Associate |
Change Password |
✓ |
✓ |
✓ |
✓ |
|
Associate |
Clock In/Out |
✓ |
✓ |
✓ |
✓ |
|
Associate |
Help Feature |
✓ |
✕ |
✕ |
✕ |
|
Associate |
Task Mgmt. /Create, view, update, my tasks |
✓ |
✓ |
✓ |
✕ |
|
Associate |
Training Mode |
✓ |
✕ |
✕ |
✕ |
|
Associate |
User Guide - Documentation Manual |
✕ |
✓ |
✓ |
✕ |
|
Associate |
View Schedule & Time |
✓ |
✓ |
✓ |
✕ |
|
Customer |
Add new Customer |
✓ |
✓ |
✓ |
✓ |
|
Customer |
Assign/View/Edit Customer |
✓ |
✓ |
✓ |
✓ |
|
Customer |
Balance Inquiry |
✓ |
✓ |
✓ |
✓ |
|
Customer |
Customer Maintenance |
✓ |
✓ |
✓ |
P |
|
Customer |
Digital Cart |
✓ |
✓ |
✓ |
✕ |
|
Customer |
Enroll in Loyalty |
✓ |
✓ |
✓ |
✓ |
|
Customer |
Gift Card Balance Inquiry |
✓ |
✓ |
✓ |
✓ |
|
Customer |
House Account Set Up |
✓ |
✓ |
✓ |
✕ |
|
Customer |
Receipt Reprint Options |
✓ |
✓ |
✓ |
✓ |
|
Customer |
Tax Exemptions |
✓ |
✓ |
✓ |
✓ |
|
Customer |
Wish List |
✓ |
✓ |
✓ |
✕ |
|
Employee |
Associate Advance |
✓ |
✓ |
✓ |
✕ |
|
Employee |
Employee Borrow |
✓ |
✓ |
✓ |
✕ |
|
Employee |
Employee Maintenance |
✓ |
✓ |
✓ |
✕ |
|
Employee |
Employee Schedule |
✓ |
✓ |
✓ |
✕ |
|
Employee |
Maintain Employee Time Off |
✓ |
✓ |
✓ |
✕ |
|
Employee |
Message Maintenance - create, edit, delete |
✓ |
✓ |
✓ |
✕ |
|
Employee |
Payroll & Timecard Maintenance |
✓ |
✓ |
✓ |
✕ |
|
Employee |
Shift Maintenance |
✓ |
✓ |
✓ |
✕ |
|
Global |
Country Packs |
✓ |
✓ |
✓ |
✓ |
|
Global |
Tax Free Invoices - Issue, Reprint, Void, Returns |
✓ |
✓ |
✓ |
✓ |
|
Inventory |
Inventory Replenishment |
✓ |
✓ |
✓ |
✓ |
|
Inventory |
Location Based Inventory |
✓ |
✕ |
✕ |
✕ |
|
Inventory |
Physical, Cycle, Supply Counts |
✓ |
✓ |
✓ |
✓ |
|
Inventory |
Receiving |
✓ |
✓ |
✓ |
✓ |
|
Inventory |
Shipping |
✓ |
✓ |
✓ |
✓ |
|
Orders |
Message Alerts - for Orders |
✓ |
✕ |
✕ |
✕ |
|
Orders |
Order Maintenance |
✓ |
✓ |
✓ |
✓ |
|
Orders |
Order Statistics |
✓ |
✕ |
✕ |
✕ |
|
Reports |
Reports |
✓ |
✓ |
✓ |
✕ |
|
Sale |
24 Hour Trading - End Retail Period |
✓ |
✓ |
✓ |
✕ |
|
Sale |
Add All Discount Types |
✓ |
✓ |
✓ |
✓ |
|
Sale |
Add Coupon |
✓ |
✓ |
✓ |
✓ |
|
Sale |
Add Line Item Comment |
✓ |
✓ |
✓ |
✓ |
|
Sale |
Airside Functionality |
✓ |
✓ |
✓ |
✓ |
|
Sale |
Assign to a Gift Registry |
✓ |
✓ |
✓ |
✓ |
|
Sale |
Black Book |
✓ |
✕ |
✕ |
✕ |
|
Sale |
Cancel Sale |
✓ |
✓ |
✓ |
✓ |
|
Sale |
Change Item |
✓ |
✓ |
✓ |
✓ |
|
Sale |
Change Kit Serial Number |
✓ |
✓ |
✓ |
✓ |
|
Sale |
Change Sale Associate |
✓ |
✓ |
✓ |
✓ |
|
Sale |
Change Tax details |
✓ |
✓ |
✓ |
✓ |
|
Sale |
Foreign Currency Maintenance |
✓ |
✓ |
✓ |
✕ |
|
Sale |
Gift Receipt |
✓ |
✓ |
✓ |
✓ |
|
Sale |
Gift Registry Setup |
✓ |
✓ |
✓ |
✓ |
|
Sale |
Hold |
✓ |
✓ |
✓ |
✓ |
|
Sale |
House Account |
✓ |
✓ |
✓ |
✕ |
|
Sale |
Inventory Locator |
✓ |
✓ |
✓ |
✓ |
|
Sale |
Item Lookup |
✓ |
✓ |
✓ |
✓ |
|
Sale |
Layaway |
✓ |
✓ |
✓ |
✕ |
|
Sale |
Layaway Maintenance |
✓ |
✓ |
✓ |
✕ |
|
Sale |
Lock Register |
✓ |
✓ |
✓ |
✓ |
|
Sale |
Modify Discount |
✓ |
✓ |
✓ |
✓ |
|
Sale |
No Sale |
✓ |
✓ |
✓ |
✓ |
|
Sale |
Orders |
✓ |
✓ |
✓ |
✓ |
|
Sale |
Post Void |
✓ |
✓ |
✓ |
✓ |
|
Sale |
Pre-Sale |
✓ |
✓ |
✓ |
✓ |
|
Sale |
Price Inquiry |
✓ |
✓ |
✓ |
✓ |
|
Sale |
Product Information |
✓ |
✓ |
✓ |
P |
|
Sale |
Rain Check |
✓ |
✓ |
✓ |
✓ |
|
Sale |
Return Item |
✓ |
✓ |
✓ |
✓ |
|
Sale |
Sales and Returns |
✓ |
✓ |
✓ |
✓ |
|
Sale |
Sell Non-Merchandise |
✓ |
✓ |
✓ |
✓ |
|
Sale |
Send Sales |
✓ |
✓ |
✓ |
✓ |
|
Sale |
Special Order |
✓ |
✓ |
✓ |
✕ |
|
Sale |
Special Order Maintenance |
✓ |
✓ |
✓ |
✕ |
|
Sale |
Store Open Close Indicator |
✓ |
✓ |
✓ |
✕ |
|
Sale |
Suspend/Resume Transaction |
✓ |
✓ |
✓ |
✓ |
|
Sale |
Tab Features |
✓ |
✓ |
✓ |
✕ |
|
Sale |
Tender with all Tender Types |
✓ |
✓ |
✓ |
✓ |
|
Sale |
Void Line |
✓ |
✓ |
✓ |
✓ |
|
Sale |
Warranty |
✓ |
✓ |
✓ |
✓ |
|
Sale |
Work Order |
✓ |
✓ |
✓ |
✓ |
|
Store Safe |
Open Store Safe |
✓ |
✓ |
✓ |
✕ |
|
Store Safe |
Bank Deposit |
✓ |
✓ |
✓ |
✕ |
|
Store Safe |
Safe Bag |
✓ |
✓ |
✓ |
P |
|
Store Safe |
Store Safe Audit |
✓ |
✓ |
✓ |
✕ |
|
Store Safe |
Store Safe Cash Deposit |
✓ |
✓ |
✓ |
✕ |
|
System Admin |
Datasource Status |
✓ |
✓ |
✓ |
✓ |
|
System Admin |
EFTLink Admin Functions |
✓ |
✓ |
✓ |
✓ |
|
System Admin |
Enable/Disable Hardware |
✓ |
✓ |
✕ |
✕ |
|
System Admin |
Manage Networked Cash Drawers |
✓ |
✓ |
✓ |
✕ |
|
System Admin |
Mobile Device Access |
✓ |
✓ |
✓ |
✓ |
|
System Admin |
Mobile Device Users |
✓ |
✓ |
✓ |
✕ |
|
System Admin |
Mobile Device Quick Configuration |
✓ |
✓ |
✓ |
✓ |
|
System Admin |
Reinitialize Hardware |
✓ |
✓ |
✓ |
✓ |
|
Till |
24 Hour Trading |
✓ |
✓ |
✓ |
✓ |
|
Till |
Attach/Remove Other Till or Cash Drawer Till |
✓ |
✓ |
✓ |
✓ |
|
Till |
Attach/Remove Till or Cash Drawer Till |
✓ |
✓ |
✓ |
✓ |
|
Till |
Cash Pickup |
✓ |
✓ |
✓ |
✓ |
|
Till |
Cash Transfer |
✓ |
✓ |
✓ |
✓ |
|
Till |
Change Float |
✓ |
✓ |
✓ |
✕ |
|
Till |
Count Till |
✓ |
✓ |
✓ |
✕ |
|
Till |
End Count Other Till |
✓ |
✓ |
✓ |
✕ |
|
Till |
Issue/Return Till |
✓ |
✓ |
✓ |
✕ |
|
Till |
Mid-day Deposit |
✓ |
✓ |
✓ |
✕ |
|
Till |
Open/Close Networked Cash Drawer |
✓ |
✓ |
✓ |
✕ |
|
Till |
Paid In / Paid Out |
✓ |
✓ |
✓ |
✕ |
|
Till |
Print Till Summary Receipt |
✓ |
✓ |
✓ |
✓ |
|
Till |
Remove Other Till - Till Mode |
✓ |
✓ |
✓ |
✓ |
|
Till |
Remove Till - Till Accountability Mode |
✓ |
✓ |
✓ |
✓ |
|
Till |
Tender Exchange |
✓ |
✓ |
✓ |
✕ |
|
Till |
Till Audit |
✓ |
✓ |
✓ |
✕ |
|
Till |
Till Counts |
✓ |
✓ |
✓ |
✕ |
|
Work Order |
Work Order Maintenance |
✓ |
✓ |
✓ |
✓ |
P - Partial exposure of functionality on handheld due to the size of the form factor.
No transactions or maintenance can be performed until you log in at the Home screen. This prevents unauthorized personnel from accessing the device/register. Logging in also allows the system to record each associate's sales, calculate commissions, and compare sales to employee goals.
Depending upon your system's configuration, you may be required to clock in before logging in. For more information about the clock-in procedure, refer to Clock In/Out.
The following example shows logging on to a Mobile Tablet, but the procedure is the same for other mobile devices such as the Mobile Handheld and Thin Client.
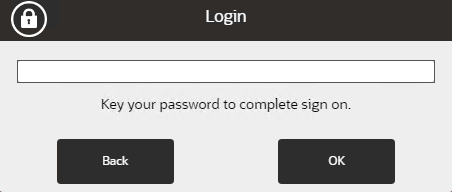
To log in to a mobile device:
1. Enter your Employee ID. The password prompt is displayed.
2. Enter your Password using the on-screen keyboard.
3. Select OK.
Depending upon your store policy, you may be required to clock in before logging in. You may also be required to clock in and out for meal breaks. If meal break clock-out and clock-in is enforced, you cannot clock back in after a meal break until a specified period of time has elapsed.
The time clock area in Xstore Mobile provides users with the ability to clock in, clock out, and change the work code used for logging their time. All time clock options are accessed through the Clock In/Out button on the Context Menu on the Home screen.
The following procedures are covered:
Clock In - Describes how to clock in.
Clock Out - Describes how to clock out.
Change Work Code - Describes how to change the work code under which your time is to be logged.
|
Note: You must be clocked out to clock in. |
In order for your timecard to accurately reflect the number of hours worked, you must clock in and out by performing the following steps.
To clock in:
Select Clock In/Out from the Context Menu in the Home screen. See Figure 1-10.
Figure 1-11 Mobile Tablet and Thin Client Clock In Login Screen
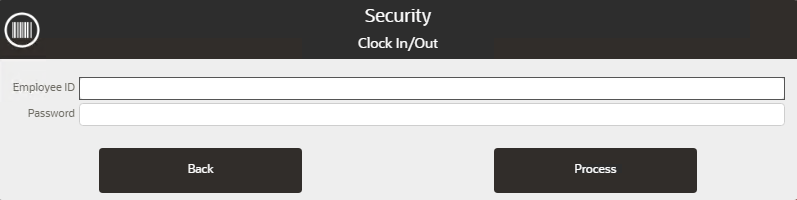
Figure 1-12 Mobile Handheld Clock In Login Screen
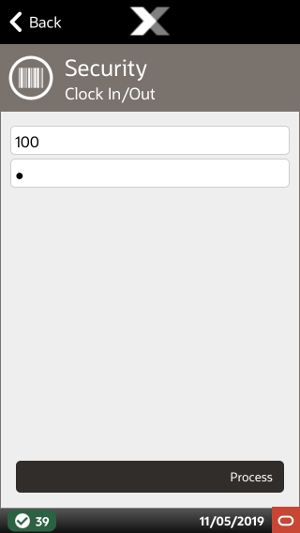
Enter your Employee ID and Password.
Select Process.
Select the proper work code.
You are now clocked in. Xstore Mobile returns to the Home screen.
|
Note: You must be clocked in to clock out. |
To clock out:
Select Clock In/Out from the Context Menu in the Home screen. See Figure 1-10.
Enter your Employee ID and Password.
Select Process.
Figure 1-15 Mobile Tablet and Thin Client Change Work Code or Clock Out
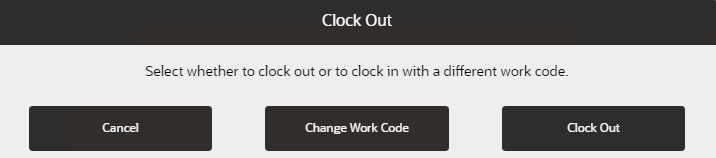
Select Clock Out.
You are now clocked out. Xstore Mobile returns to the Home screen.
|
Note: You must be clocked in to change your work code. |
To change your work code:
Select Clock In/Out from the Context Menu in the Home screen. See Figure 1-10.
Enter Employee ID and Password.
Select Process.
Figure 1-17 Mobile Tablet and Thin Client Change Work Code or Clock Out
Figure 1-18 Mobile Handheld Change Work Code or Clock Out
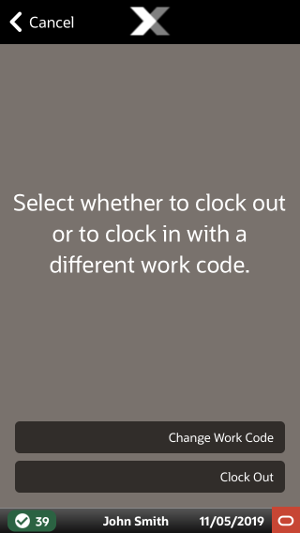
Select Change Work Code.
Figure 1-19 Mobile Tablet and Thin Client Select Work Code
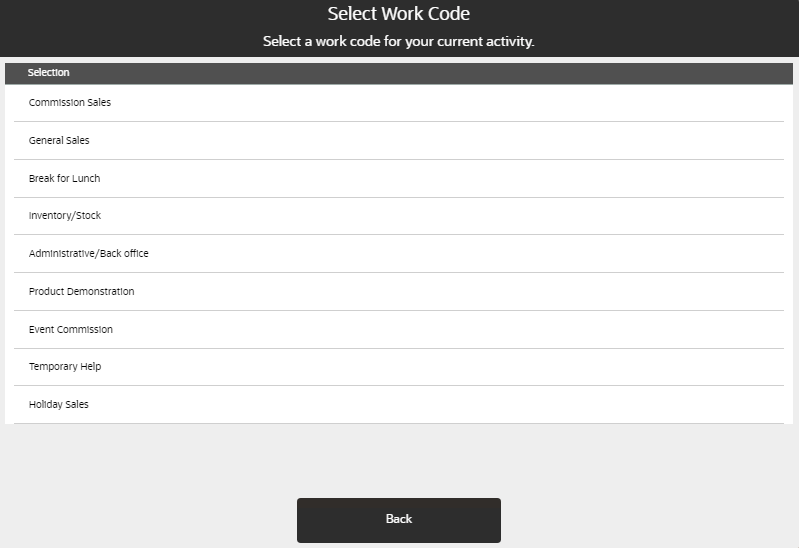
Figure 1-20 Mobile Handheld Select Work Code
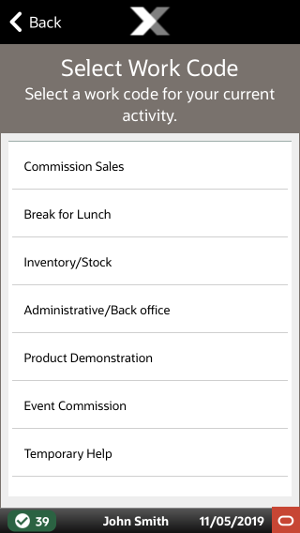
Select the proper work code.
Your work code has been changed. Xstore Mobile returns to the Home screen.