3 Creating Remedy Tickets
You can create tickets automatically or manually. The following sections explain how to create both types.
Note:
At least one ticketing connector must be configured and enabled in order to create a ticket using either method.3.1 Automatically Creating a Ticket
To automatically create a ticket in Remedy Service Desk, you need to create a rule that specifies the event or incident condition on which the ticket should be created. In this rule, you also specify the ticket template to be used with the Remedy Service Desk connector.
To create a rule to automatically create a ticket in Remedy Service Desk:
-
From the Enterprise Manager console, click Setup, then Incidents and Incident Rules.
-
Click Create Rule Set. On the Create Rule Set page, enter a name and description.
-
Click the Rules tab.
As you proceed below, the wizard interface explains various rules and their usage. For detailed information, refer to the "Using Incident Management" chapter in the Oracle Enterprise Manager Cloud Control Administrator's Guide.
-
For events —
This is the typical option to choose to create a ticket for an event, such as a target down availability event.
Click Create and select Incoming events or updates to events as a type of rule to create from the pop-up window. Follow the steps below to create a rule.
-
For incidents —
Click Create and select Newly created incidents or updates to incidents as a type of rule to create from the pop-up window. Follow the steps below to create a rule.
-
-
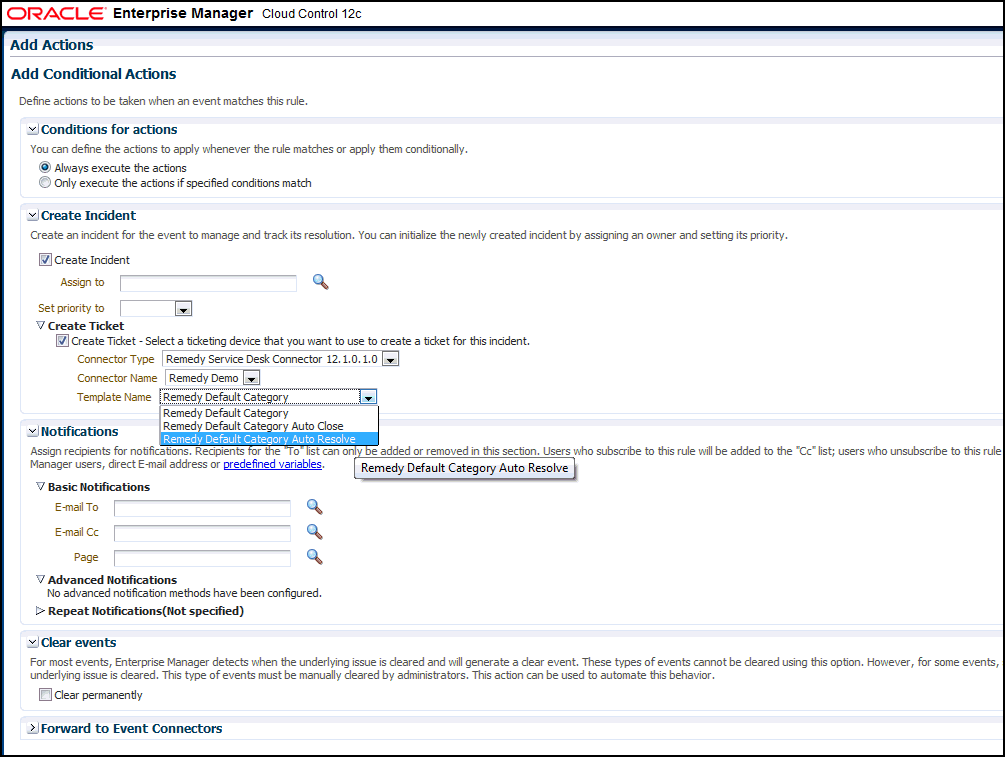
While configuring the above rule under the Add Actions page:
-
For events —
Select the Create Incident check box. This makes the Create Ticket option visible. Then, select the Create Ticket check box. It will display the combo box to select Connector Type, name, and template.
-
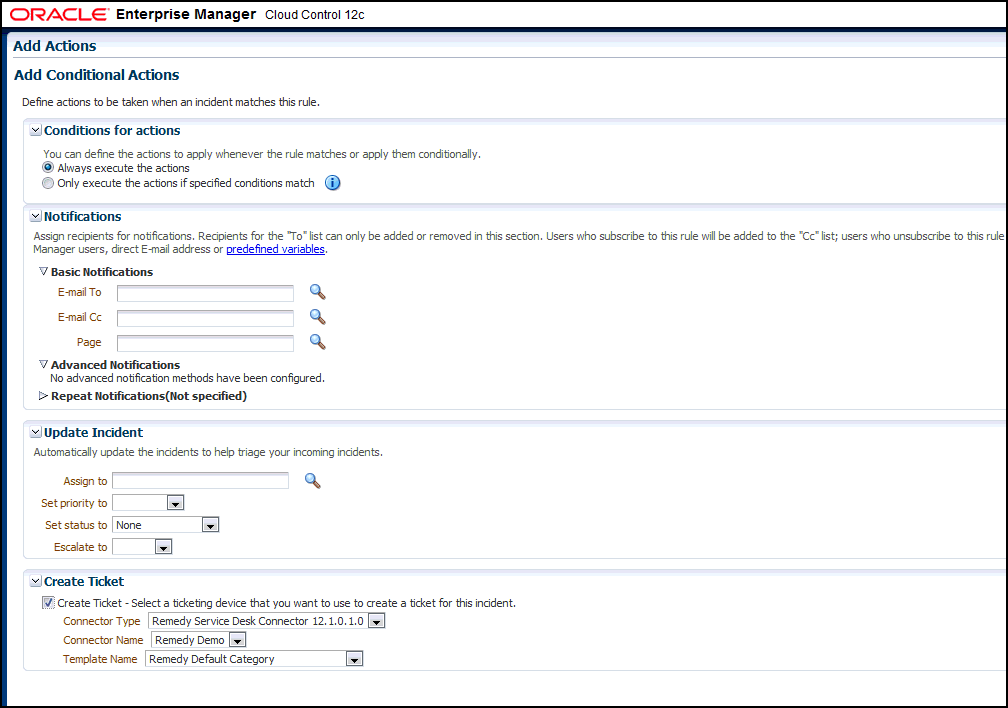
For incidents —
You can use this option to create tickets based on incident attributes, such as priority 1 incidents or incidents based on fatal or critical severity.
Select the Create Ticket check box. It will display the combo box to select Connector Type, name, and template.
Figure 3-1 shows the Add Actions page for events, and Figure 3-2 shows the Add Actions page for incidents.
-
-
After selecting an appropriate connector and template, click Save.
The following process occurs after you create the event or incident rule:
-
A request is sent to the Remedy Service Desk Connector when a incident is created due to an event that matches your rule.
-
The ticket is created or updated on the Remedy Ticket system.
-
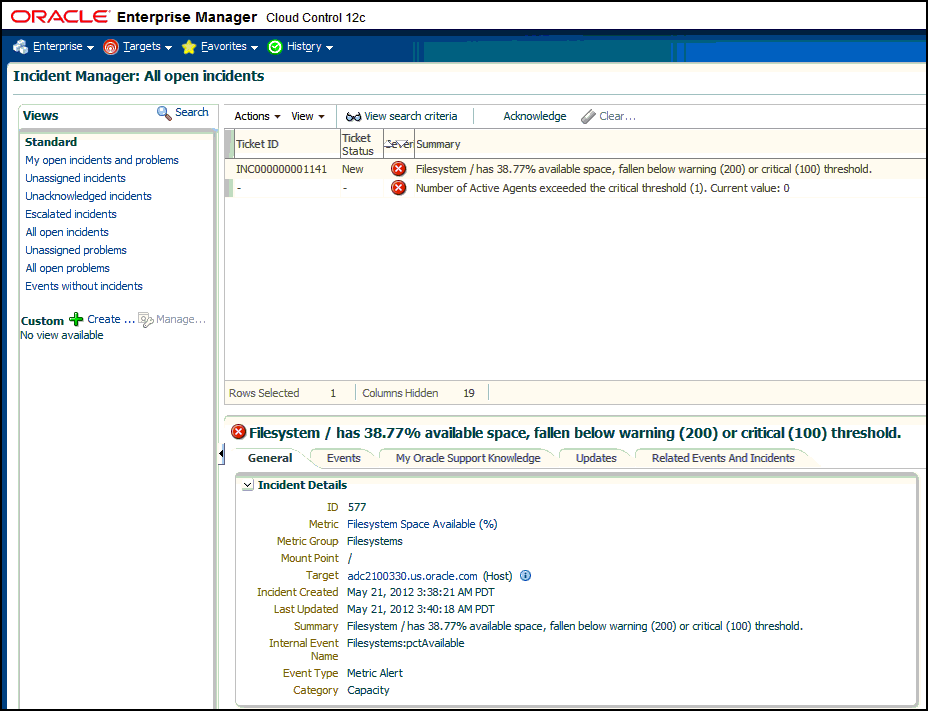
In Enterprise Manager, the incident is annotated with a comment on the Updates tab to indicate that a ticket was created or updated, as shown in Figure 3-3. Additionally, the incident is updated with the ticket ID, ticket status, and ticket URL under the Incident Tracking section.
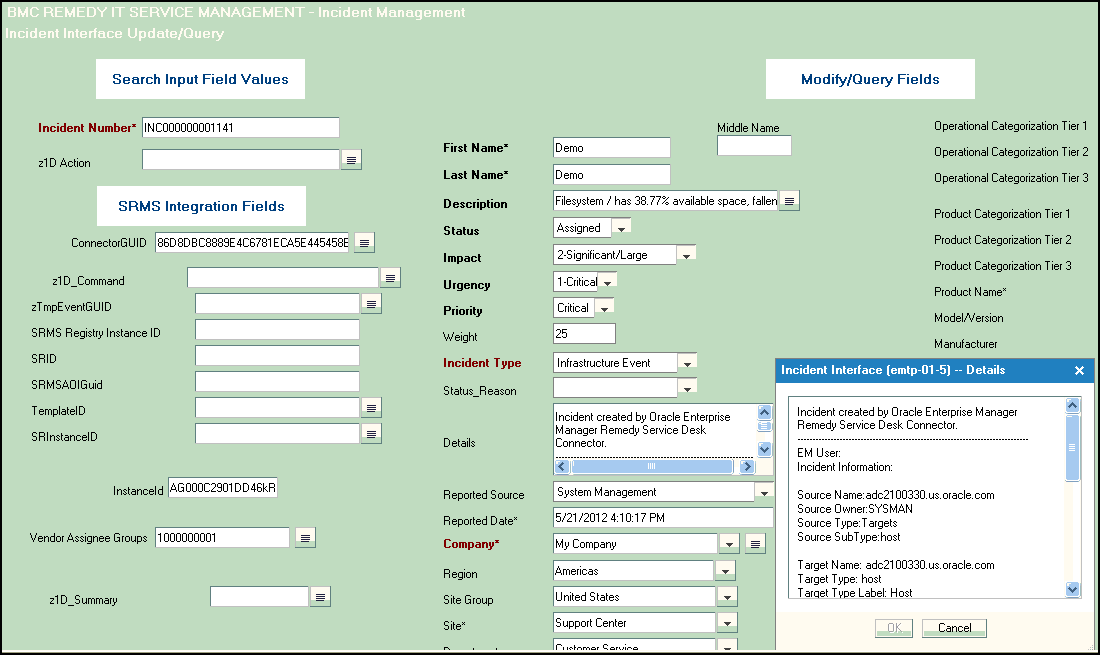
A ticket is updated if there is an existing active ticket for an incident. Figure 3-4 shows the ticket in the Remedy console.
To configure Remedy to return the ticket status to Enterprise Manager, see Chapter 6, "Advanced Ticketing Configuration."
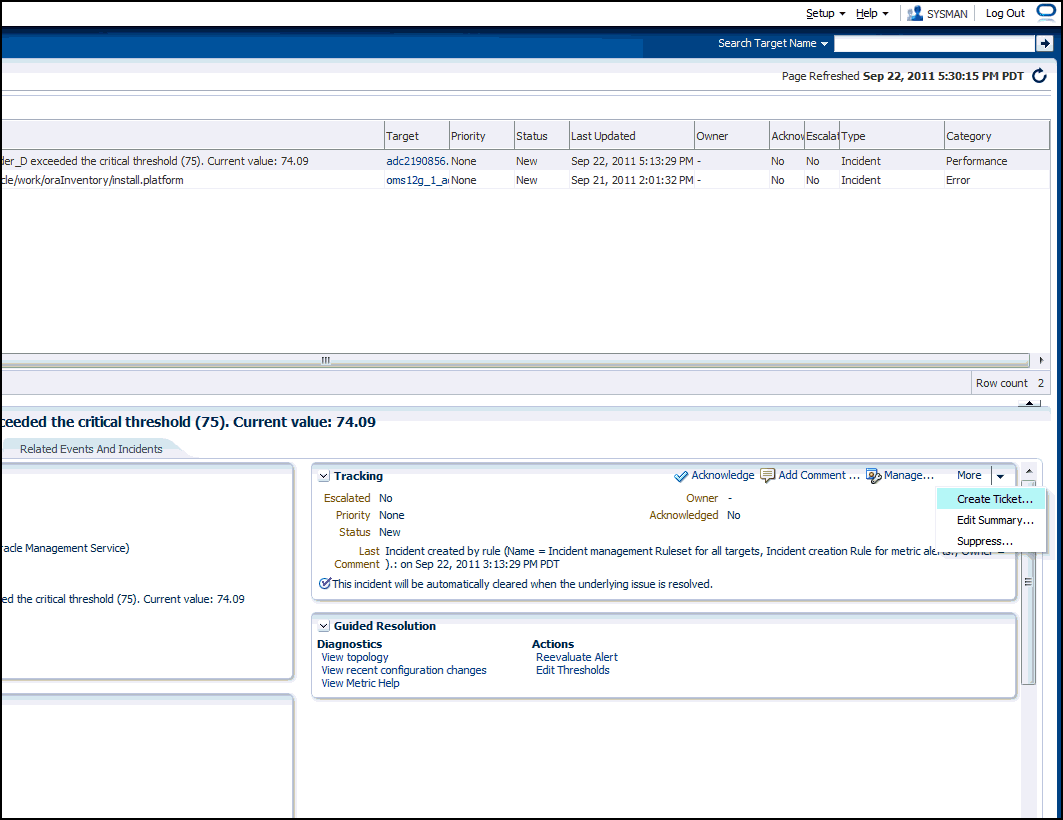
3.2 Manually Creating a Ticket
Perform the following steps to manually create a ticket:
-
From the Enterprise menu of the Enterprise Manager console, select Monitoring, then Incident Manager.
The Incident Manager page appears, showing all open incidents.
-
Select any incident from the list in the table.
-
In the Tracking section, click More, then Create Ticket, as shown in Figure 3-5.
-
In the Create Ticket pop-up window, select a ticket template from the Template Name drop-down menu as shown in Figure 3-6, then click OK.
If you do not see the desired template, you can add one using the emctl command. See Section 2.7.1, "Adding Ticket Templates".
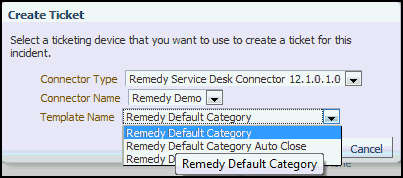
If creating ticket is successful, the ticket ID appears in the tracking section for the incident. If the Web console settings are configured and enabled, the ticket ID appears as a link to the ticket page in the Remedy Service Desk.