3 Configuring Siebel Enterprise Targets
This chapter provides information on the following topics:
-
Discovery Process of the Siebel Enterprise in Enterprise Manager
-
Adding Non-Siebel Targets to an Existing Siebel Enterprise Target
-
Defining Manually Added Non-Siebel Targets as Critical Targets for a Service
Prerequisites for Adding a Siebel Enterprise or Target
Ensure the following prerequisites are met before adding a Siebel enterprise or a Siebel target:
-
The Management Agent should be installed in the Gateway target host, and it's status should be ”up” and running.
-
The Management Agent user should have read access to the siebel files,
siebns.dat,andsiebenv.sh. -
In case the gateway install location will not be provided as an input during discovery, the Management Agent should have read access to
vpd.propertiesfile. -
The Management Agent user should have execute permission to the
srvrmgrutility (to validate that the providedsrvrmgrcredentials are correct). -
For complex networks, wherein the Siebel host name is different when compared to the host name discovered in Enterprise Manager, the user has to add mapping entries in the
siebelserverconfig.xmlfile. This file is located in<agentinstalldir>/siebelserverconfigdirectory of the gateway host.
Adding a Siebel Enterprise
Siebel Enterprise enables administrators to logically organize distributed targets for efficient and effective management and monitoring.
To add a Siebel Enterprise to Cloud Control for monitoring, perform the following steps:
-
From the Targets menu, select Siebel.
-
On the Siebel page, select the Enterprises tab, then click Add.
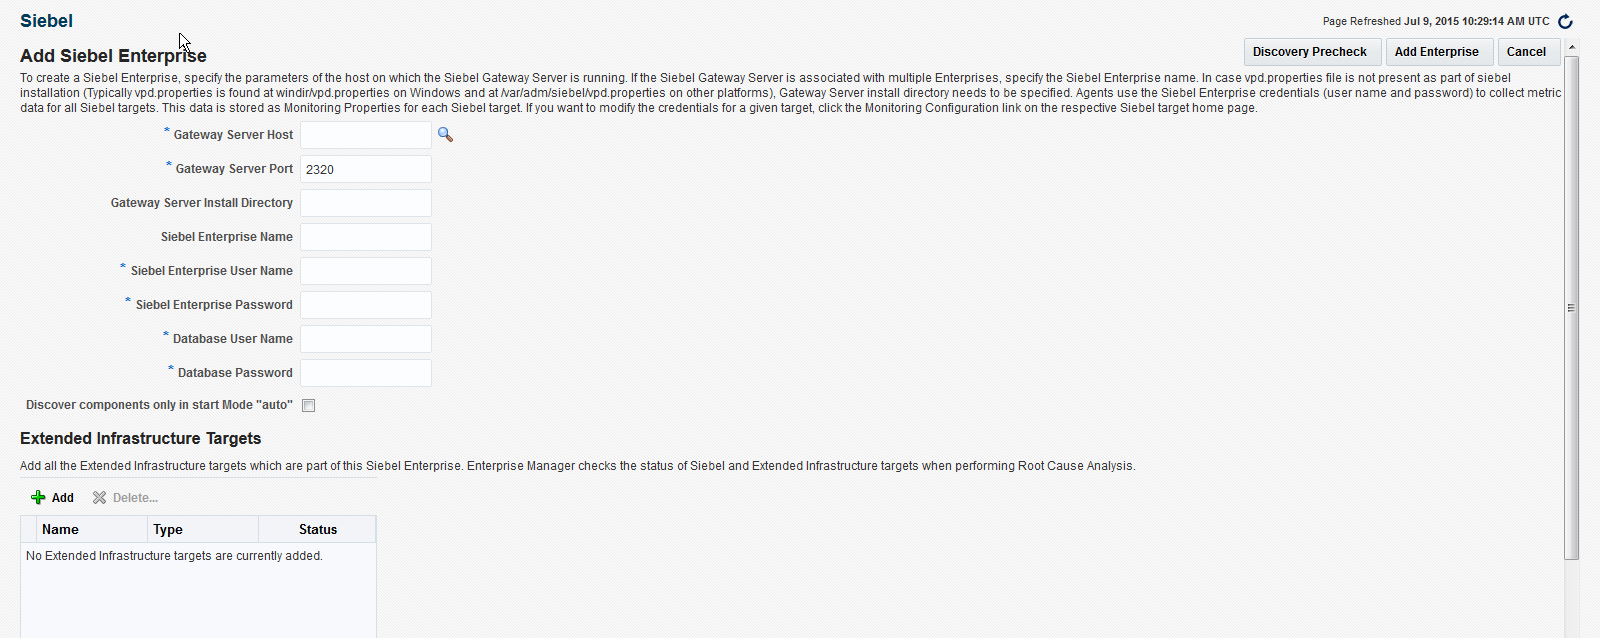
The Add Siebel Enterprise page appears, as shown in Figure 3-1.
-
Enter the details and credentials. You can also select Auto Start Mode to discover only those components for which the start mode is set as ’auto'. Selecting this option will ignore all the components for which the start mode is set as ’manual'.
Note:
For typical installations, the gateway server port is 2320. -
After entering the credentials, you can either choose to continue with adding the enterprise by clicking Add Enterprise, or perform the Discovery Precheck.
-
To perform the Precheck, click Discovery Precheck.
Clicking Discovery Precheck opens the Discovery Precheck wizard, which displays whether the Precheck was performed successfully. Click Close to proceed to the Precheck Details page.
Discovery Precheck performs the following checks, the detailed results of which are displayed on the Precheck Details page.
-
Gateway Check
-
Discovery Check
-
Server Manager Check
-
Server Check
-
Enterprise Check
-
Host Check
After reviewing the details on the Precheck Results page, click Proceed to Discovery. You can proceed with the discovery only if the Precheck is successful.
If the Precheck fails, check all the credentials provided, and if the Enterprise already exists in the Enterprise Manager Repository.
The progress page notifies you when the Siebel Enterprise and its associated targets are created.
Note:
The discovery will fail if there is a mismatch in the host name of the Siebel server and the host name discovered in Enterprise Manager (EM).There is a possibility of a mismatch in complex Siebel network configurations such as virtual host or cluster Siebel servers/gateways, where the Siebel host mentioned in Siebel configuration does not match with the host monitored in EM. In such cases, the
siebelserverconfig.xmlfile provides mapping between these hosts.The
siebelserverconfig.xmlfile should be used to add mapping host entries for discovery. The file can be found in<agent_inst>/sieblserverconfigdirectory. Thesiebelserverconfigdirectory is not available in a fresh plug-in deployment. It will be created after the first siebel target discovery. Thereby, Siebel servers with mismatched hosts will not be discovered in the first discovery attempt. -
Discovery Process of the Siebel Enterprise in Enterprise Manager
This section explains how the Siebel Enterprise is discovered by Enterprise Manager. The steps below show the process followed for the discovery.
-
The user enters information on the Discovery screen.
-
OMS connects to the agent running on the gateway host which internally calls the perl file (
siebelDiscovery.pl) located in empa discovery plug-in. -
The
siebelDiscovery.plfile executes a Java command to populate the list of targets. -
The Java code parses the Siebel files and generates the target list.
-
The list of targets are sent to the OMS.
-
The OMS parses the list of targets and performs a set of validations.
-
The targets are created in the OMS repository.
-
These targets are sent to the Management Agent for monitoring.
Note:
The discovery will fail if there is a mismatch in the host name of the Siebel server and the host name discovered in Enterprise Manager (EM).There is a possibility of a mismatch in complex Siebel network configurations such as virtual host or cluster Siebel servers/gateways, where the Siebel host mentioned in Siebel configuration does not match with the host monitored in EM. In such cases, the siebelserverconfig.xml file provides mapping between these hosts.
The siebelserverconfig.xml file should be used to add mapping host entries for discovery. The file can be found in <agent_inst>/sieblserverconfig directory. The siebelserverconfig directory is not available in a fresh plug-in deployment. It will be created after the first siebel target discovery. Thereby, Siebel servers with mismatched hosts will not be discovered in the first discovery attempt.
Updating the Siebel Enterprise
After you add or remove Siebel servers or server components from your Siebel Enterprise, you must update the Enterprise, and check the relations between the Siebel Enterprise and Enterprise Manager targets.
Perform the following steps to update the Enterprise:
-
From the Targets menu of the Enterprise Manager Console, select Siebel.
-
Click on the Siebel enterprise you want to update.
-
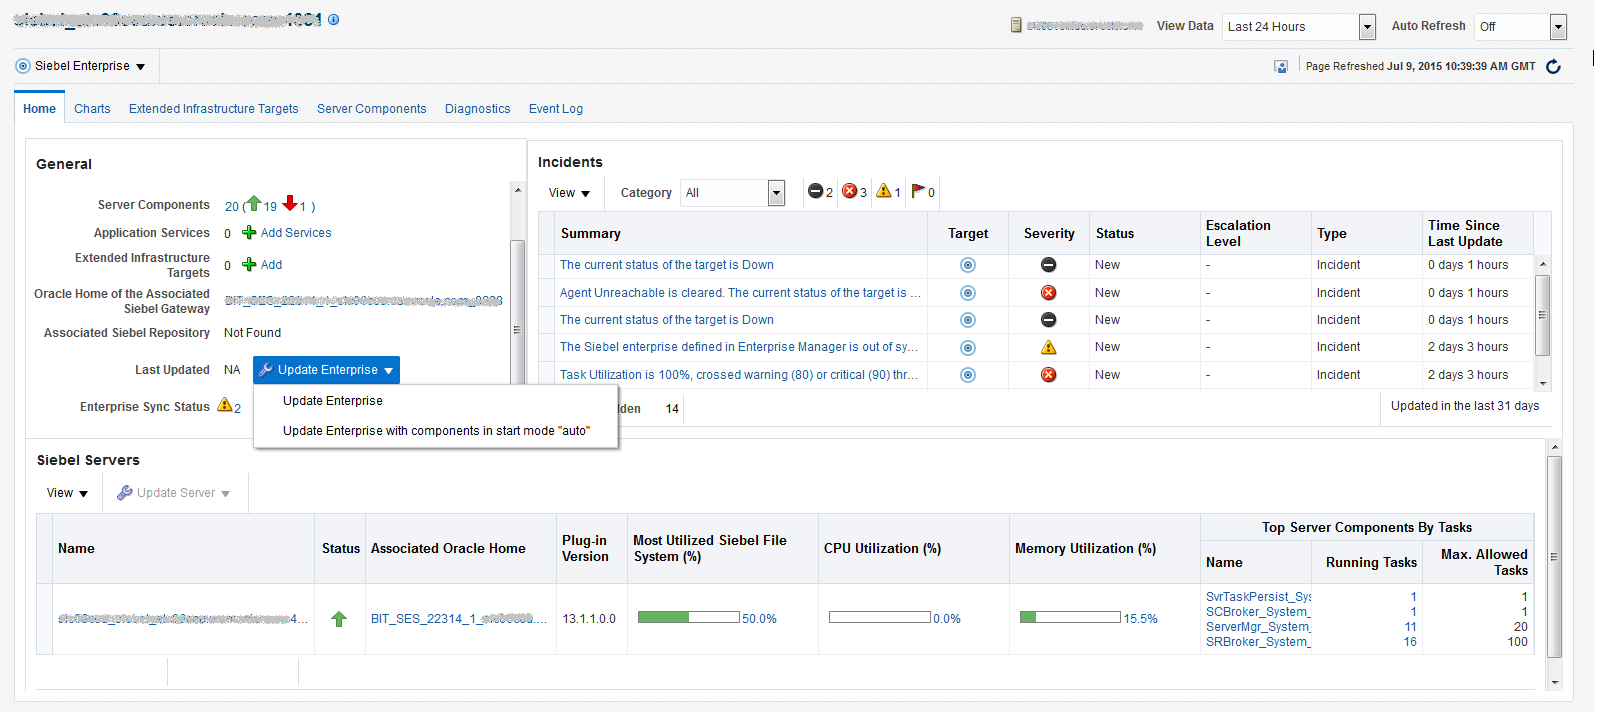
On the Siebel Enterprise Home page, in the General section, click Update Enterprise.
Clicking Update Enterprise gives you the following options:
-
Update Enterprise, which updates all components in an enterprise, whether components are in manual start mode, or start ’auto' mode.
-
Update Enterprise with Components in Start Mode ’Auto', which updates only those components in an enterprise which are in start ’auto' mode.
The Siebel Enterprise Home page appears, as shown in Figure 3-2.
-
-
Review the report that is displayed, and click Close.
Clicking Close opens the Configuration Change Report page, with the details on the report of the relations between Siebel Enterprise and Enterprise Manager targets.
-
After reviewing the report, click Update to update the Enterprise.
If the report displays errors, click Cancel.
Updating the Siebel Servers
To synchronize the topology for Siebel Servers, perform the following steps:
-
From the Targets menu, select Siebel.
-
Click the Siebel server target, and on the Siebel Server home page, in the General section, click Update Server.
Clicking Update Server gives you the following options:
-
Update Server, which updates all components in a server, whether components are in manual start mode, or start ’auto' mode.
-
Update Server with Components in Start Mode "Auto" which updates only those components in a server which are in start ’auto' mode.
The Siebel Server Home page appears, as shown in Figure 3-3.
-
-
Review the report that is displayed, and click Close.

Siebel Compliance Standards
To associate Siebel Compliance Standards, follow these steps:
-
From the Siebel Enterprise Home page, select Siebel Enterprise, then select Compliance, and select Standard Associations.
-
On the Standard Associations page, click Edit Association Settings.
-
On the Target Compliance Standard Association page, click Add.
-
On the Compliance Standards window, select the compliance standard to be associated, and click OK.
To check the rules associated, follow these steps:
-
From the Siebel Enterprise Home page, select Siebel Enterprise, then select Compliance, and select Results.
-
On the Compliance Results page, check the rules associated under the compliance standards.
Adding Non-Siebel Targets to an Existing Siebel Enterprise Target
To add Siebel targets to a Siebel Enterprise target, you can use the Update Now functionality available on the Siebel Enterprise home page.
To add a non-Siebel target to a Siebel Enterprise target:
-
Go to the Oracle Technology Network (OTN) site:
http://www.oracle.com/us/products/enterprise-manager/index.html
-
Download the appropriate third party plug-in, and create the respective target in Enterprise Manager.
-
From the Targets menu of the Cloud Control console, select Siebel.
-
In the Enterprises tab, click the name of the Siebel Enterprise target to which you want to add the non-Siebel target.
-
Select the Extended Infrastructure Targets tab, then click Add.
-
Search for and select the required non-Siebel target, then click Select.
Defining Manually Added Non-Siebel Targets as Critical Targets for a Service
After manually adding non-Siebel targets to an enterprise, if you want to make these targets available to the Root Cause Analysis functionality available in Enterprise Manager, you need to tag these targets as Key Components.
Perform the following steps to make your non-Siebel target a critical target for any Siebel application service:
-
From the Targets menu of the Cloud Control console, select Siebel.
-
Select Services.
-
Click the name of the Siebel application service that the required non-Siebel target is added to.
The Siebel Application Service home page appears.
-
From the Siebel Application Service menu, select Administration, then select System Configuration.
-
In the Key Component column, select the required non-Siebel target. Click OK.
Removing Servers or Components From an Existing Enterprise
After creating a Siebel Enterprise target, you can manually remove individual servers or components from the enterprise. However, this deletes the respective target information from the Enterprise Manager repository.
After this entry is deleted, Enterprise Manager does not monitor this target anymore. If you perform a manual resynchronization for this enterprise, Enterprise Manager includes the component in the new system topology.
The two possible paths for manually removing components from an existing enterprise are:
-
From the All Targets page, move your mouse over the server or component you want to delete, right-click, select Target Setup from the menu, then Remove Target.
-
From the Siebel home page, select the Enterprise tab, and then select the enterprise you want to remove. Select the radio button next to the enterprise name, then click the Remove button.
This option removes the Siebel server, targets, and all the enterprise components.
Patching Siebel Targets
This section describes how to patch Siebel targets in Cloud Control using patch plans. It consists of the following sections:
Note:
Only Siebel Server and Siebel Gateway Server targets are supported for patching in Cloud Control.Prerequisites for Patching Siebel Targets
Ensure that you meet the following prerequisites:
-
The Siebel Server and the Siebel Gateway Server targets that you want to patch are discovered in Cloud Control.
-
You must have the 13.1.1.0 Enterprise Manager for Oracle Siebel plug-in deployed in your system.
For information on how to deploy a new plug-in or upgrade an existing plug-in, see Oracle Enterprise Manager Cloud Control Administrator's Guide.
Procedure for Patching Siebel Targets
Follow these steps to patch your Siebel Server and Siebel Gateway Server targets:
-
Create a patch plan and add the patches that you want to apply on your Siebel Server and Siebel Gateway Server targets.
For information on creating a patch plan, see Oracle Enterprise Manager Lifecycle Management Administrator's Guide.
-
Analyze and deploy the patch plan that you created.
For information on analyzing and deploying a patch plan, see Oracle Enterprise Manager Lifecycle Management Administrator's Guide.
User Roles and Privileges
The recommended privileges for the Agent user on the Siebel hosts are:
-
Read permissions for the following files:
-
all the Siebel files
-
vpd.properties
-
siebenv.sh (in non windows env)
-
siebns.dat
-
-
Should be a part of the Siebel group
-
Execute permissions for the following:
-
The server manager command. For example:
/bin/sh -c ”. $siebel_location/siebenv.sh; exec $siebel_location/bin/srvrmgr -g <gateway_name> -e <enterprise_name> -s <server_name> -u <user_id> –p <password>” -
The
odbcsqlcommand from the server host. For example:/bin/sh -c ”. $siebel_location/siebenv.sh; exec $siebel_location/bin/odbcsql /s <server_name> /u <user_id> /p <password>”
-
To understand the roles and privileges for an OEM user refer to Configuring Privileges and Role Authorization in the Oracle Enterprise Manager Cloud Control Security Guide.
The out-of-the-box Enterprise Manager roles to manage plug-ins are:
-
EM_PLUGIN_OMS_ADMIN: Enables you to manage the lifecycle of plug-ins on Management Server instances.
-
EM_PLUGIN_AGENT_ADMIN: Enables you to manage the lifecycle of plug-ins on Management Agents.
-
EM_PLUGIN_USER: Enables you to view the plug-in lifecycle console.