6 Configuring RUEI
This chapter describes the procedure for initially configuring RUEI. This task is performed by the individual within your organization who has been assigned the role of RUEI Super Administrator (this is, the admin user). For more information about roles, see the Oracle Real User Experience User's Guide.
It is strongly recommended that a network engineer within your organization validates collected network traffic after configuring RUEI. The procedure to do this is described in Appendix F, "Verifying Monitored Network Traffic".
6.1 Introduction to Configuring RUEI
In order to get RUEI up and running, you will need to have prepared the server systems for RUEI, and installed the RUEI software. This is described in Chapter 2, "Installing the RUEI Software". After that, you are required to specify the installation type and mail setup (described in Section 6.2, "Performing Initial RUEI Configuration"), and then perform some post-installation configuration (described in Section 6.4, "Performing Post-Installation Configuration"). This is necessary in order to start reporting. It includes deciding how pages and users will be identified, and specifying the scope of monitoring in your network environment. Finally, you will need to define the system's initial users, as described in Section 6.4.6, "Authorizing Initial Users". Note that if you are installing a split-server configuration, you will need to configure each Collector system. This is described in Section 6.3, "Configuring Collector Systems".
The configuration of RUEI should be discussed with someone with a detailed knowledge of your organization's network topology.
6.2 Performing Initial RUEI Configuration
In order for RUEI to start data monitoring and reporting, it must be configured with some information about your network infrastructure. Once completed, user traffic reporting is available. Note that this initial configuration can be changed later, as necessary. It is only intended to provide RUEI with sufficient information to start real-user monitoring and reporting.
To perform the initial RUEI configuration, do the following:
-
Start the Initial setup wizard by pointing your browser at the following URL:
https://Reporter/ruei.where
Reporterspecifies the host name or IP address of your RUEI installation. The dialog shown in Figure 6-1 appears. -
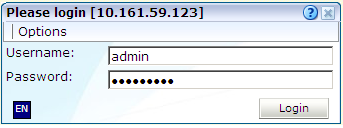
Specify the
adminuser, and the password defined with theset-admin-passwordscript (defined in Section 2.5.6, "Installing the Reporter Software"). When ready, click Login. The dialog shown in Figure 6-2 appears.Note that the first time a user logs on, they receive a warning that the web server was unable to verify the identify of the site's certificate. Depending on your security policies, you can either choose to accept this certificate permanently, temporarily for this session, or reject the certificate. Alternatively, you can purchase a certificate from a Certificate Authority (CA). You can also create an SSL certificate. More information is available at the following location:
http://httpd.apache.org/docs/2.2/ssl/ssl_faq.html#realcert
-
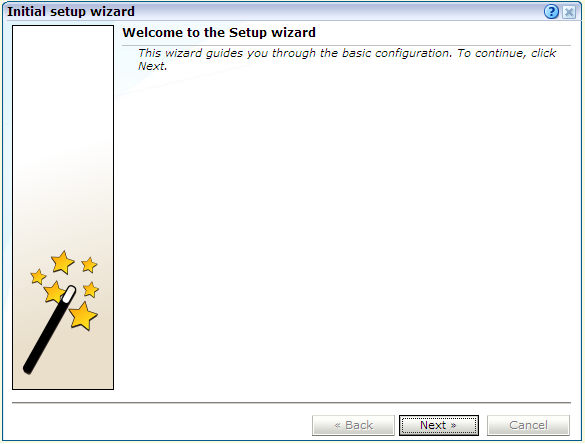
Click Next to proceed with configuration. The dialog shown in Figure 6-3 appears.
-
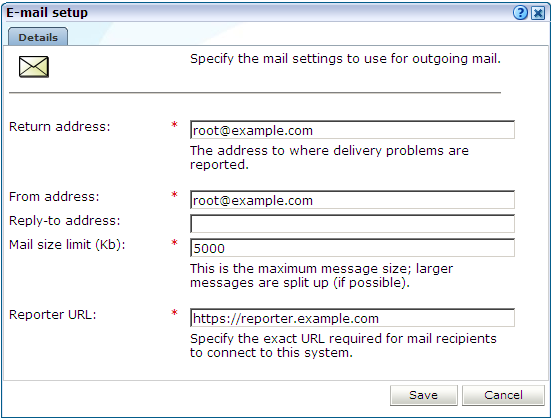
Specify the requested information as explained in Table 6-1.
Field Description Return address
Specifies the e-mail address to which failed or problem e-mails are reported. It is strongly recommended that this an address that is regularly checked.
From address
Specifies the address the recipient sees in their mail client.
Reply-to address
Specifies the address that users can click within an e-mail to reply to an e-mail. If this is not specified, the From address setting is used.
Mail size limit
Specifies the maximum message size (in kilobytes) allowed for e-mails. Note that if an e-mail contains reports that exceed this limit, the system will try to split up the reports into individuals e-mails to overcome this limitation. Reports that are too large to be sent individually are not sent, and the user is informed of the problem. The default mail size limit is 5000 Kb.
Reporter URL
Specifies the exact URL required for e-mail recipients to connect to the Reporter system. Typically, this is the same URL used by RUEI users to access the Reporter system.
The e-mail information is used to configure RUEI's interface to your internal network, and will be used for reporting problems. When you have entered the required information, click Next. The dialog shown in Figure 6-4 appears.
-
Check that the information specified in the settings overview is correct. You can use Back and Next to move between dialogs as necessary. When ready, click Next. The dialog shown in Figure 6-5 appears.
-
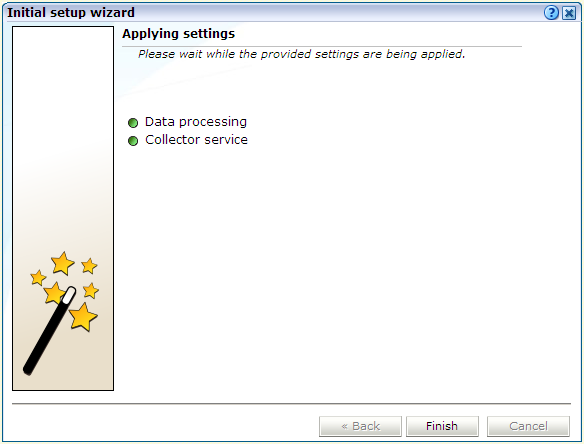
This dialog indicates how far the system has got in applying your specified settings. Typically, this process takes a maximum of 15 minutes. When finished, click Finish to close the dialog.

6.3 Configuring Collector Systems
To register Collectors to a Reporter system, do the following:
-
Install the Collector software on the required systems. This is described in Chapter 2, "Installing the RUEI Software".
-
Register the Collector systems with the Reporter. The procedure to do this is described in the Oracle Real User Experience Insight User's Guide.
-
If you expect high volumes of traffic and have installed the collector on a powerful system ( minimum of 12 cores, 32GB RAM or more), and RUEI is not monitoring servlet forms traffic, you can configure the collector to take advantage of the more powerful hardware using the procedure described in the Configuring Collector Systems chapter of the Real User Experience Administration Guide.
6.3.1 Resetting Collector Systems
If for any reason you need to register a Collector system with a different Reporter system than earlier configured, do the following:
-
Logon to the Collector system as the
moniforceuser, and remove the Collector's currently defined Reporter assignment by issuing the following commands:su - moniforce appsensor delete wg
-
Follow the procedure described in the Oracle Real User Experience Insight User's Guide to register the Collector with the required Reporter.
6.4 Performing Post-Installation Configuration
In order to start reporting, the RUEI needs certain information about the monitored network environment. It is important to understand that RUEI is designed to work within a wide range of network environments. Therefore, the configuration choices you make will affect the accuracy and usability of the reported data. It is strongly recommended that you carefully review the settings described in this section.
6.4.1 Specifying the Cookie Technology
Within RUEI, session information is based on cookies. Therefore, RUEI needs to know and understand the cookie technology (or technologies) your organization is using. The procedure to configure this, together with the structure of supported cookie technologies, is described in the Oracle Real User Experience Insight User's Guide.
If cookie information is not available, user tracking is based on visitor IP address. This can lead to unreliable session information. For example, in the case of users behind a proxy server, all users coming from that network would be identified as the same user.
6.4.2 Adding/Uploading HTTPS SSL Keys
Uploading SSL keys to the system is extremely important if most of your HTTP traffic is based on SSL sessions. Without the SSL keys being available to the system, the Collector will not be able to decrypt the SSL session traffic. In these circumstances, further configuration of cookies, user identification, and application pages would make little sense. Ensure that you upload and activate your HTTPS SSL keys as early on as possible in the configuration process. The management of SSL keys is fully described in the Oracle Real User Experience Insight User's Guide.
6.4.3 Specifying How Users are Identified
Within RUEI, user identification is first based on the HTTP Authorization field. After that, it is derived from the supplied GET/POST argument within URLs. Therefore, if you are using arguments within URLs, the item within these used for user identification must be specified in order to provide reliable results. This is fully described in the Oracle Real User Experience Insight User's Guide.
6.4.4 Defining Applications and Page Identification
Page identification within RUEI is based on defined applications. Essentially, an application is a collection of web pages. This is because pages on a web site are typically bound to a particular application. For each page that the system detects, it uses the available application definitions to assign a name to it. Note that information about any pages that could not be identified using these definitions is discarded, and, therefore, not available through reports and the data browser. This is fully described in the Oracle Real User Experience User's Guide.
In addition to generic applications, dedicated support is available for the monitoring of certain Oracle Enterprise architectures (such as Oracle E-Business suite, Siebel, and WebLogic Portal). If you are using any of the currently supported architectures within your monitored environment, it is strongly recommended that you make use of this facility. It not only saves you time in defining your applications, and makes applications within suites more compatible, but also ensures that these architectures are monitored correctly.
6.4.5 Specifying the Scope of Monitoring
Within RUEI, you control the scope of traffic monitoring by specifying which TCP ports the SYSTEM should monitor. Obviously, no information is available for non-monitored ports. In addition, you can restrict monitoring to specific servers and subnets. This is fully described in the Oracle Real User Experience Insight User's Guide.
6.4.6 Authorizing Initial Users
In order for users to start working with RUEI, you will need to authorize the required users. Only one user, admin, is available after installation. The procedure to set the initial admin user password is described in Section 2.5.6, "Installing the Reporter Software". All other required users must be created and assigned the necessary roles and access permissions through the Reporter GUI. In particular, it is recommended that you create a dedicated Security Officer account to finalize the security-related configuration. User roles, and the creation and management of user accounts are described in the Oracle Real User Experience Insight User's Guide.
Note that user names and passwords are case sensitive. For ease of entry, it is recommended that you do not include any diacritic characters, such as umlauts, within passwords.
6.5 Verifying and Evaluating Your Configuration
To ensure the quality and quantity of data being collected and analyzed by your RUEI system, it is strongly advised that you verify the system's configuration using some core metrics. These are described in the following sections.
6.5.1 Viewing Traffic Summary
You can open an overview of the monitored network traffic by selecting System, then Status, and then Data processing. This provides you with immediate information about hits, pages, and session processing, as well as the system load. An example is shown in Figure 6-6.
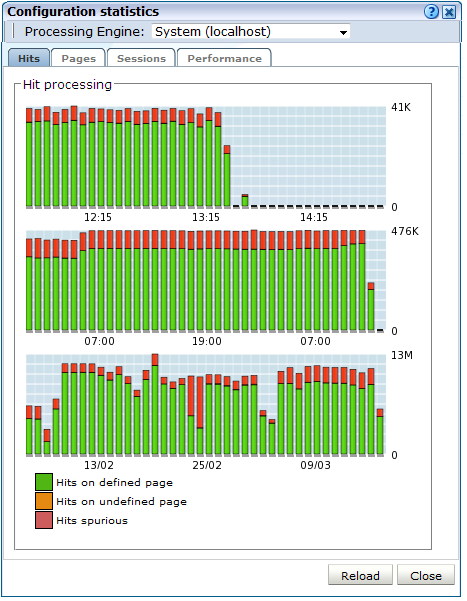
The precise number of percentage of identified sessions, page views, and hits relies heavily on your exact configuration. If you intend to measure all traffic, it is recommended that at least 80% of sessions, page views, and hits are reported as "identified". It is also recommended that you regularly review the reported numbers and percentages to ensure the quality and quantity of reported data.
Important:
After initial configuration of cookies, user identification, and application page structure, the system will take at least 5 - 10 minutes before the Sessions/Hits/Page views tabs are updated with green bars. If, after 20 - 30 minutes after initial configuration, there are no green bars showing on any of the tabs, please review your initial RUEI configuration. If the bars do not indicate any activity at all, please review your system's network card configuration as outlined in Section 1.7, "Server Requirements"6.5.2 Confirming Data Collection
At this point, RUEI should be collecting data from each of its associated Collectors. You can easily check the status of these Collectors by selecting System, then Status, and then Collector status. This opens the Network data collectors window. This is fully described in the Oracle Real User Experience Insight User's Guide.
It is important to understand that the data being collected by Collector system(s) is offered to the RUEI data processing module for further analysis. If no data is collected, there is no means by which it can be processed.
6.6 Configuring Support for the T3 Protocol
RUEI 13.2.1.1 includes limited support for the T3 protocol. T3 is an Oracle proprietary protocol for communication to and between Oracle WebLogic Server instances. With this release of RUEI you can monitor service calls between Oracle WebLogic Server instances, however future releases of RUEI might change how T3 is supported and any 13.2.1.1 configuration might not be backwards compatibility.
To configure support for the T3 protocol:
-
Configure the T3 port in RUEI. Select Configuration, then Security, and select the Protocols option. The resulting screen is described in the Managing Security-Related Information chapter of the RUEI User's Guide. Select HTTP for the T3 protocol or HTTPS for the ST3 protocol and enter the port number, typically 7001.
-
Create a suite of the type T3 Java RMI as described in the Working With Suites and Web Services chapter of the RUEI User's Guide. Note that the T3 Java RMI type will only be available option after you have configured the T3 protocol port as described in step 1.
-
Modify the newly defined suite as required to monitor T3 traffic. Note that data masking and identification using content messages are not supported for the T3 protocol.