7 Configuring the Oracle Access Manager
This chapter describes the procedure for configuring the Oracle Access Manager (OAM) for identifying user IDs within OAM-based traffic. The procedure described assumes that you already have a working OAM server. Note that the procedure may need to be modified to reflect the specific configuration of your OAM server.
7.1 Configuring OAM 10g
This section describes the procedure for configuring OAM 10g version 10.1.4.x (or higher). For information on configuring OAM 11g see Section 7.2, "Configuring OAM 11g."
7.1.1 Downloading and Installing the Access Gate Software
Do the following:
-
Download and install the GCC libraries. These can be obtained from either your operating system vendor or
http://gcc.gnu.org. Note that a description of the contents of the Oracle Access Manager 10.1.4 third-party integration disks is available at the following location:http://www.oracle.com/technetwork/middleware/ias/downloads/10gr3-webgates-integrations-readme-154689.pdf
-
Download the 64-bit OAM Access Server SDK from the following location:
http://download.oracle.com/otn/linux/ias/101401/oam_int_linux_v7_cd3.zip
-
Extract, unzip, and copy the GCC libraries using the following commands:
cat as_linux_x86_gcc_runtime_lib_access_manager_101401.cpio | cpio -idmv
unzip Oracle_Access_Manager10_1_4_0_1_linux_GCClib.zip
cp lib* /usr/local/lib/
7.1.2 Configuring the Access Gate Software on the RUEI Server
Do the following:
-
Unzip the OAM Access Server SDK distribution set, and run the installer, by issuing the following commands:
unzip oam_int_linux_v7_cd3.zip
./Oracle_Access_Manager10_1_4_2_5_linux64_AccessServerSDK
By default, the OAM Access Server SDK is installed in the
/opt/netpoint/AccessServerSDK/directory.Note:
The user specified while running the Access Gate SDK installation wizard should be the same as that specified for RUEI_USER in theruei.confconfiguration file (see Table 2-3). -
Create a trust between RUEI and the Access Server by creating XML files using the
configureAccessGateutility. Issue the following commands:cd /opt/netpoint/AccessServerSDK/oblix/tools/configureAccessGate ./configureAccessGate -i /opt/netpoint/AccessServerSDK/ -t AccessGate
-
As the utility runs, specify the following information based on the configuration of the Access Gate you created earlier:
Please enter the Mode in which you want the AccessGate to run : 1(Open)
2(Simple) 3(Cert) : 1

Please enter the AccessGate ID : short_name

Please enter the Password for this AccessGate :

Please enter the Access Server ID : accessSrv1

Please enter the Access Server Host Machine Name : fully_qualified_hostname

Please enter the Access Server Port : 6021

Preparing to connect to Access Server.  Please wait.

AccessGate installed Successfully.

Press enter key to continue ...
Where
short_namespecifies the Access Gate ID, andfully_qualified_hostnameis the OAM Access Server system host name. -
At this point, the RUEI Reporter system is connected to the OAM Access Server. Update the
OBACCESS_INSTALL_DIRvariable in the/etc/ruei.confconfiguration file to reflect the installation path of the Access Server SDK. In the case of the default installation path, the required line would be as follows:export OBACCESS_INSTALL_DIR=/opt/netpoint/AccessServerSDK/
-
Re-start RUEI processing by selecting System, then Maintenance, then System reset, and select the Restart system processing option. When ready, click Next. When prompted, confirm the restart.
7.1.3 Configuring the Required Session Traffic Definitions
In order to enable correct tracking of OAM-based sessions, you need to specify the following configuration information within RUEI:
-
Configure all required applications for user identification based on OAM. To do so, click the User ID tab within each required application overview, and then click Add new source. Within the Source type menu, select the "Oracle Access Manager" option. When ready, click Save.
-
Select Configuration, then Applications, and then Session tracking. Ensure that the "Oracle Access Manager" item is included in the list of cookie technologies configured for your RUEI installation. By default, this uses the cookie name
ObSSOcookie.
Note:
In order for OAM-based traffic to be correctly reported, the masking of the OAM cookie must be configured as "Plain" within the Cookie masking facility (Select Configuration, then Security, then Masking, and then Cookie masking).Note that until an OAM request has been processed by the RUEI system Access Gate, the following message is shown when requesting the Access Servers listing for your Access Gate:
Not Responding
AM service status mismatch
7.1.4 Creating an OAM Access Gate for RUEI
Do the following:
-
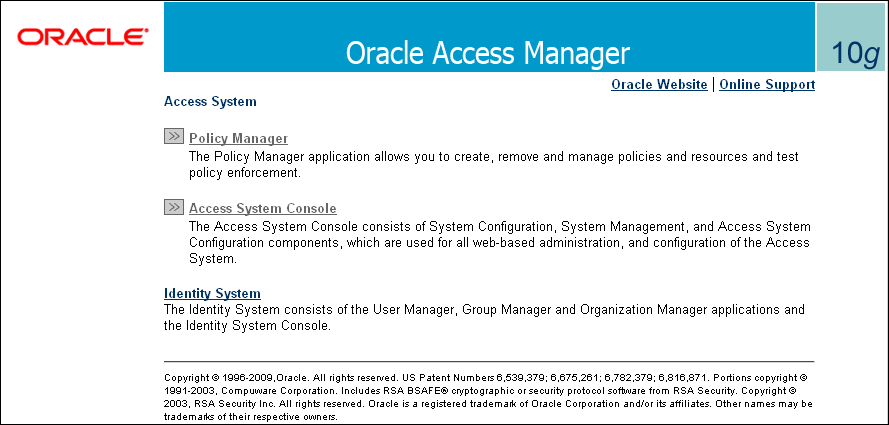
Direct your web browser to The Oracle Access Manager server interface. If you are unsure of the required URL, you should contact the OAM system administrator. The page shown in Figure 7-1 appears.
-
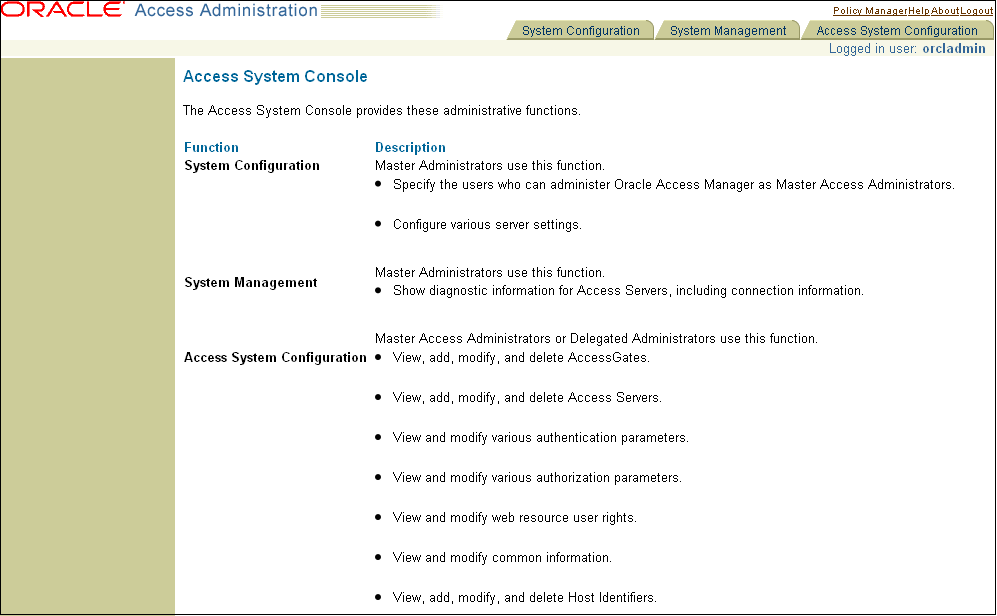
Click the Access System Console link. The page shown in Figure 7-2 appears.
-
Click the Access System Configuration tab. The page shown in Figure 7-3 appears.
Figure 7-3 OAM Access System Configuration Page
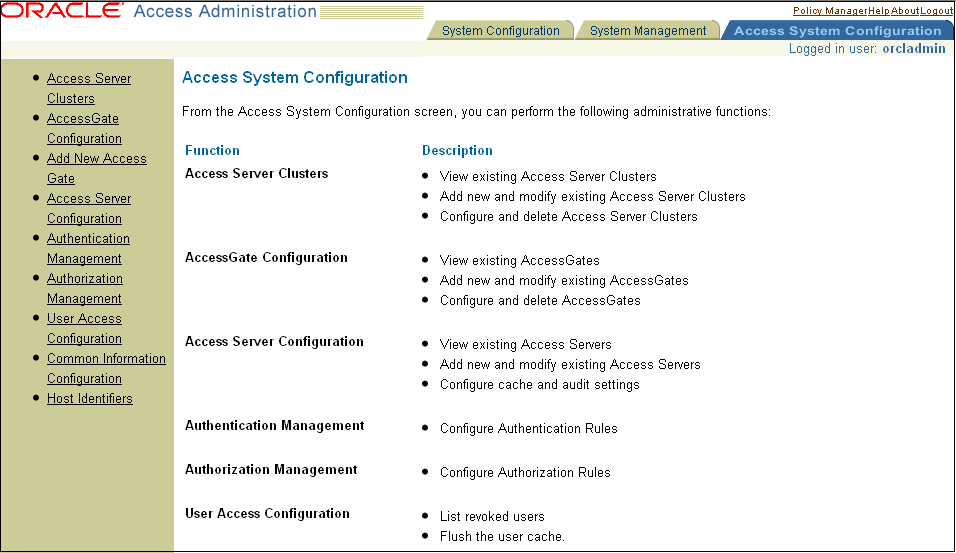
Description of ''Figure 7-3 OAM Access System Configuration Page''
-
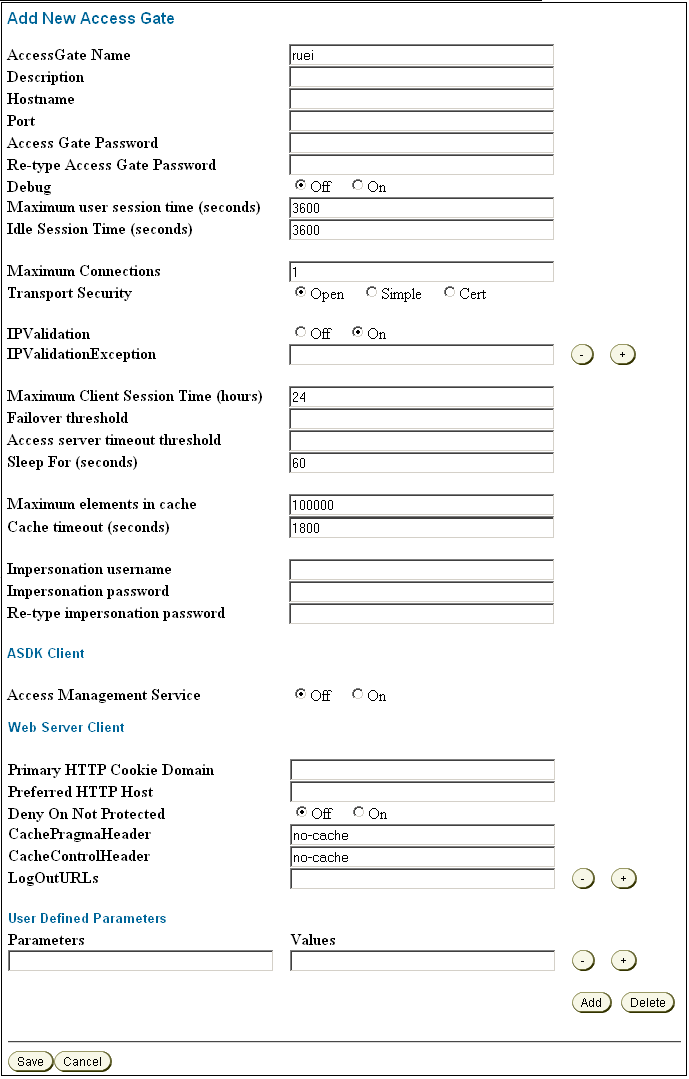
Click the Add New Access Gate option on the left-hand side of the page. The page shown in Figure 7-4 appears.
-
Provide the following information:
-
Access Gate Name: specify a unique ID for the new Access Gate. For example,
ruei. -
Hostname: specify the hostname of the RUEI Reporter system.
-
Port: specify the port RUEI should monitor for OAM-based traffic. This should be port 443.
-
Access Gate Password: specify the password that should be used to authorize the RUEI Reporter system to access the OAM server.
-
Re-Type Access Gate Password: confirm the authorization password.
-
Preferred HTTP Host: specify
SERVER_NAME.
Note that the remaining fields can be left blank or with default values specified.
When ready, click Save.
-
-
Click the List Access Servers command button to connect the newly created Access Gate with the required Access Server. Select the required Access Server from the displayed list and, when ready, click Add.
Note that if no Access Server is listed, Click Add and add the new access gate to the default Access Server.
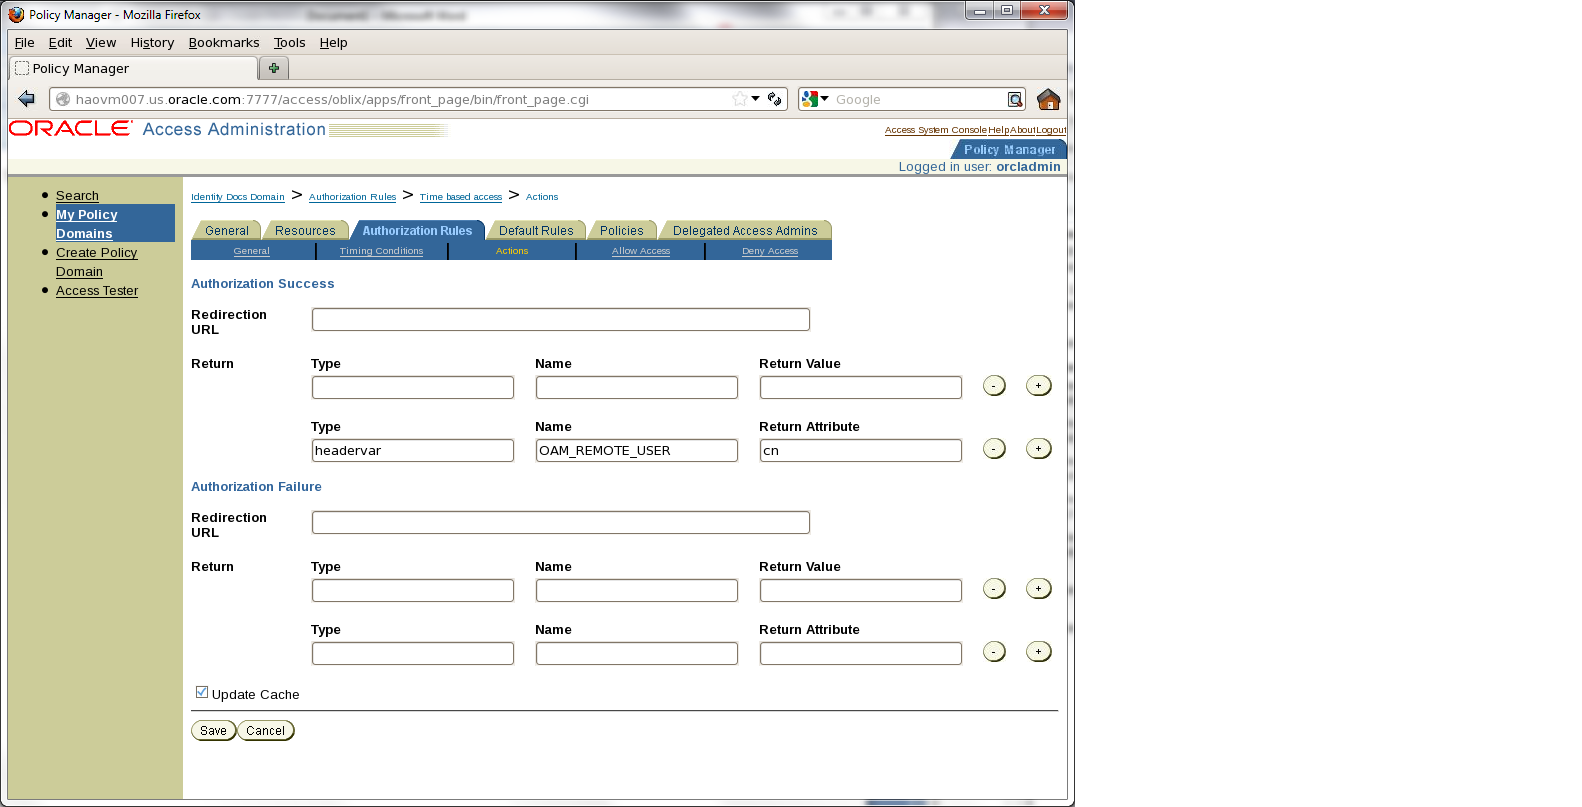
7.1.4.1 Configuring the OAM_REMOTE_USER Header Variable
To configure the OAM_REMOTE_USER header variable, complete the following:
-
Click the Policy Manager link, as shown at the top of the screen in Figure 7-1, "OAM Server Interface".
-
From the Authorization Rules tab, click Time based access, then click Actions.
-
Under ”Authentication Success”, configure the following header variable:
Type=headervar, Name=OAM_REMOTE_USER, and Return Attribute=cn.
-
Click Save.
The following shows the Access Administration screen.
7.2 Configuring OAM 11g
This section describes the procedure for configuring OAM 11g. For information on configuring OAM 10g see Section 7.1, "Configuring OAM 10g."
RUEI is able to monitor OAM 11g (R2PS3 BP02) secured web applications in order to report on user identification information provided by OAM. OAM provides this information for each user session in an encrypted cookie which, once properly configured, is monitored and decrypted by RUEI. The user identification (user id) is extracted from the decrypted content and used within RUEI.
7.2.1 Exporting and Importing the OAM 11g AES key
A shared AES key is available for each OAM server which can be used by RUEI to decrypt the OAM 11g cookie (OAM_DIAG_CTS). This key needs to be extracted from the OAM server and uploaded to the RUEI Reporter. RUEI allows you to upload a 'global' OAM AES key and and allows key uploads per application. An application OAM AES key overrides the global OAM AES key.
7.2.1.1 Exporting an OAM 11g AES key
Export the key using the exportEncryptionKey script as described in the Oracle Fusion Middleware Application Security Guide.
During the export a JKS key store file will be created containing the AES secret in encrypted form using a by the end user provided password.
7.2.1.2 Importing an OAM 11g AES key
On the RUEI side use the oam-key.sh tool to add or remove OAM AES keys. Either import a global key, or import one or more application specific keys.
-
You must specify a collector profile name during the import process, to list all profiles, enter:
execsql config_get_profiles
-
If you want to use an application specific key, you must specify an application name during the import process, to list all application names, enter:
execsql get_matches
-
Gather the required passwords. During import the following passwords are requested:
-
original key password - this is the password provided during the JSK export from the OAM server. This password is used to decrypt the JKS keystore file.
-
key storage passphrase - this is the password RUEI uses to safely store and encrypt the AES key.
-
-
To import a global key, enter:
oam-key.sh install PATH_TO_JKS_FILE 'Collector Profile Name'
where PATH_TO_JKS_FILE is the location of the JKS file created during export.
-
To import an application specific key, enter:
oam-key.sh install PATH_TO_JKS_FILE 'Collector Profile Name' 'Application Name'
where Application Name is the name of the application.