32/49
To import the customizations:
Importing Datastores
You must import the datastores prior to importing the customized ETL tasks.
Note:
The following steps are implemented in the DEV repository only. For migrating changes to TEST and PROD repositories, refer to BI Applications 11.1.1.7.1 – Migrating Configurations and Customizations from Development to a Test OR Production Environment, My Oracle Support Document 1587872.1- Launch the ODI Studio client and connect to the ODI Repository for BI Applications 11.1.1.10.1.
- Navigate to Designer > Models > Oracle BI Applications (folder) > Oracle BI Applications (Model)
- Create original and custom versions of the model.
- Right click the model, select Version and then Create Version. Create an initial version.
- Perform these steps again to create the version with customizations.
Once the second version is complete, the two versions will match. However, after the customizations are imported, the two will no longer match. The original version reflects the out-of-the-box datastores while the new version reflects the merged datastores, allowing comparison between the two. - Import the customized datastores.
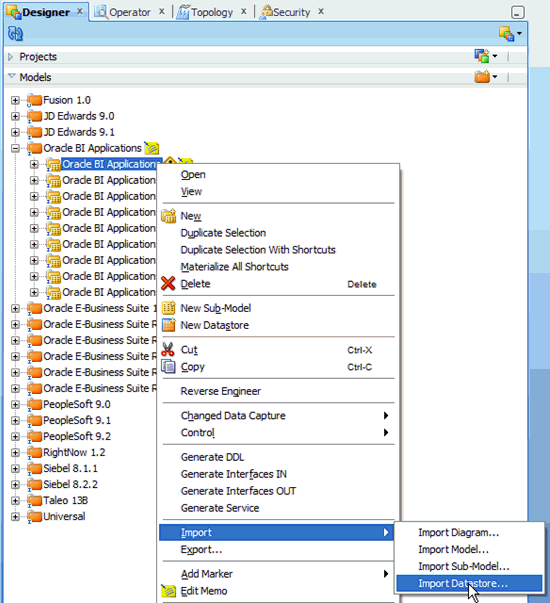
- Right click the Oracle BI Applications model.
- Select the Import… and the Import Datastore… option.
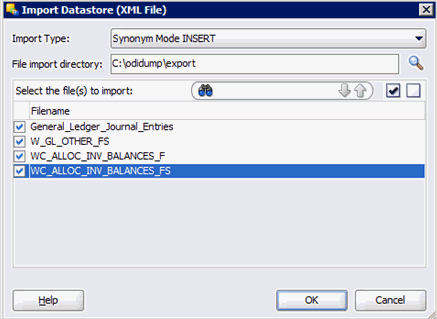
- In the Import Datastore window, ensure that Import Type is Synonym Mode INSERT. Update mode will update existing columns to reflect their pre-upgrade state while Insert/Update mode will delete columns that were introduced in the upgrade repository but do not exist in the pre-upgrade repository.
- Navigate to the directory where you previously exported the custom datastores.
- Select the check boxes for each datastore to be imported and click OK.
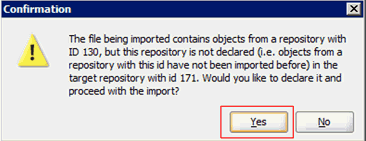
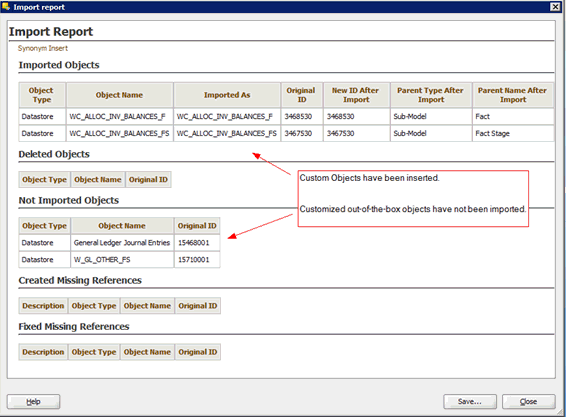
If prompted to declare the repository ID and continue with the import, select Yes. You may see this prompt multiple times, click Yes each time.When the import completes, you should see a summary report similar to the following.
The upgrade datastores will now be merged with the pre-upgrade customizations.
- Review the customized out-of-the-box datastores that have been imported by navigating to the Columns tab.
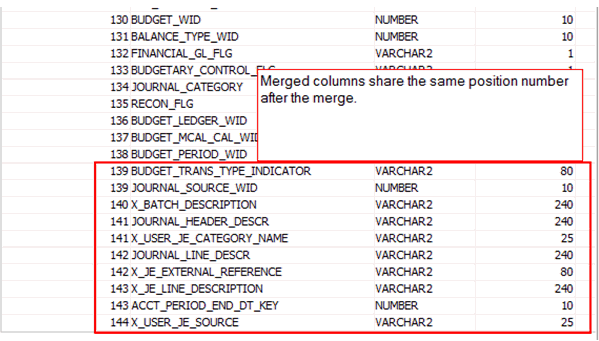
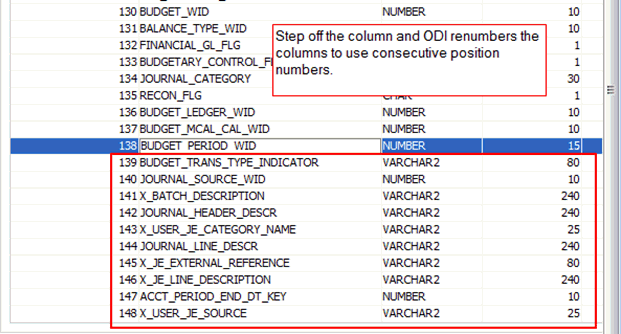
In INSERT mode, the import will bring in the custom columns into datastore. In the 11.1.1.9.2 repository, these are usually the last columns. In the 11.1.1.10.1 repository, Oracle may have added columns and these will have a conflicting position ID, or a column simply may have moved between 11.1.1.9.2 and 11.1.1.10.1. These columns will appear to have the same position number but this does not cause any issues. As an optional step, you can have ODI recalculate the position numbers.
- Double click on any column in the datastore. Without making any changes, now select another column. ODI will automatically recalculate the position numbers. Save the datastore.
