6. Account Creation
This chapter contains the following sections:
- Section 6.1, "Multiple Asset"
- Section 6.2, "Account Details/Light Finances"
- Section 6.3, "Ar Rahnu Account Details"
- Section 6.4, "Event Checklist"
- Section 6.5, "Down Payment Details"
- Section 6.6, "Inactive Account Details"
- Section 6.7, "Finance Simulation"
- Section 6.8, "Sales Confirmation"
6.1 Multiple Asset
This section contains the following topic:
6.1.1 Creating Multiple Assets
Finance Accounts in the Islamic Financing module represent the receivable accounts that you create while disbursing finance. These accounts derive their feature from the Finance Product. Finance Accounts are mapped to the Asset GL through the accounting Role LOAN_ACCOUNT. This role has to be mapped to the respective Asset GL of the Bank. You can override some product features at the account level.
The system allows you to do the following actions on the Finance accounts:
- Account Main Details Maintenance/Light Finances
- Liability details and UDE Values Maintenance
- Account Preferences/Defaults
- Account Component schedules
- Charges Maintenance and Settlement details
- Linkages Information
- Events, Events Due and Events Overdue
6.2 Account Details/Light Finances
This section contains the following topics:
- Section 6.2.1, "Creating Account Details/ Light Finances"
- Section 6.2.2, "Main Tab"
- Section 6.2.3, "Preferences Tab"
- Section 6.2.4, "Components"
- Section 6.2.5, "Charges Tab"
- Section 6.2.6, "Linkage Details Tab"
- Section 6.2.7, "Advices Tab"
- Section 6.2.8, "Fields Tab"
- Section 6.2.9, "Check List Tab"
- Section 6.2.10, "Asset Details Tab"
- Section 6.2.11, "Other Applicants Button"
- Section 6.2.12, "Party Details Button"
- Section 6.2.13, "Payment Mode Details Button"
- Section 6.2.14, "Internal Rate of Return Details Button"
- Section 6.2.15, "Events Button"
- Section 6.2.16, "General Ledger Query Button"
- Section 6.2.17, "Installment Query Button"
- Section 6.2.18, "Documents Button"
- Section 6.2.19, "Hamish Jiddayah Details Button"
- Section 6.2.20, "Vendor Payment Details Button"
- Section 6.2.21, "Ijarah Button"
- Section 6.2.22, "Insurance Details Button"
- Section 6.2.23, "Inventory Tracking Button"
- Section 6.2.24, "Collaterals Button"
- Section 6.2.25, "Party Details Button"
- Section 6.2.26, "Block Details Button"
- Section 6.2.27, "Multiple Asset Button"
- Section 6.2.28, "Multifinance Button"
- Section 6.2.29, "Viewing Summary for CL Accounts"
6.2.1 Creating Account Details/ Light Finances
The account screen accepts the Customer, Currency and Amount Financed and creates a Light Finance. This is a default Finance that takes all other details from the defaults the product provides. For creating simple accounts in the Islamic Financing module, you can follow this simple process. These Finances are called Light Finances in the Islamic Financing module. You can invoke the ‘Islamic Account’ screen by typing ‘CIDACCNT’ in the field at the top right corner of the Application tool bar and clicking the adjoining arrow button.

You can specify the following in the Account Details screen:
Product Code
Click on the option list to select a Product Code from the list of values. Double click on a
Product Code to select a particular code. The product codes are maintained in the Product Definition screen.
Click ‘P’ button to populate the Product Category, Value Date, Maturity Date based on the Product Code selected, the main screen will display all these values.
Product Category
The system displays the product category in this field.
Application Number
The system displays the Application Number in this field.
Note
This is applicable only if the origination of the finance is in Oracle FLEXCUBE or is interfaced.
Version Number
The system displays the current Version Number of the account. A new version number is created when changes like Roll over, Amendment are made to a finance.
Branch
The system displays the Branch Code of the branch into which the user has logged in, for which the UDE values are maintained.
Account Number
Based on the parameters that setup at the branch level, the account number would be either auto generated or would have to be captured in this field.
Contract Status
After you enter the account number, the system displays the status of the account in this field. This is based on the products status maintenance rules.
Alternate Account Number
Enter the alternate account number in this field. It can be an account number in the existing system from which the account has migrated to Oracle FLEXCUBE.
6.2.2 Main Tab
You can specify the following customer details:
Customer ID
To select a customer ID, click on the option list button. A new screen called Find Customer Details is displayed. You can enter search criteria in this screen. For instance, you can enter the customer name or number and click on the ‘Search’ button. The system then fetches you all the details corresponding to the Customer name or account. Once you find all the details, click on OK to return to the account details screen.
The Customer ID can be picked using a query type LOV as shown below. Enter the relevant search conditions and the satisfying set of records can be selected.
The Search Customer pattern can be provided in the main screen and this will be used along with other selections made in the query LOV screen.

Fund ID
Select the fund id from the adjoining option list. The system defaults the value of ‘Default Mudarabah Fund’ as fund ID.
The system populates the fund MIS details for a contract which is linked to the Fund ID.
Currency
To select a currency, click on the option list button. A list of currencies is displayed. Double click to select a currency.
Total Sales Value
The system displays the total of principal and profit amount as of initiation date. If the box ‘Recompute schedule on IRR’ is checked in the ‘Product Maintenance’ screen for the linked product and balloon amount is provided, the system will compute this value as the sum of principal, normal profit, balloon principal and balloon profit.
Securitization status
The system displays the securitization status. The status can be anyone of the following:
- Blank – Indicates account is not involved in securitization, that is it not part of the securitization pool
- Marked for securitized – Indicates finance account is part of securitization contract (on batch); however, the securitization batch is not executed yet.
- Securitized – Indicates the successful completion of batch process.
6.2.2.1 Finance Contract Input against Murabaha Bills
When a finance is associated to a Murabaha bill you need to provide the bill details when you input a finance contract.
Bill Reference Number
Select the Bill reference number from the option list. The option list contains all active, authorized bill contracts that have not been linked to a finance, yet to be crystallized and have the crystallization type set as linked finance.
For such finance contracts, the counterparty is same as that of the bill. The value date of the finance is defaulted to the maturity date of the bill.
The finance amount is computed from the various amounts input in the crystallization preferences of the Murabaha bills contract. It is computed as the sum of the bill amount to be crystallized and the charge amount being transferred (if charges are not being liquidated as a part of the bill).
Once a finance is linked to the Bill, amendment of the crystallization parameters for the bill is not allowed. When the bill reference number is linked and the finance is saved, the BLNK event is triggered in the Murabaha bill.
Event reversals in Bills/Finances
For linked finances, reversal of specific events is allowed. As the finance comes into existence after the bill is liquidated, subsequently, it is similar to an independent finance contract. Then all events and event reversals allowed for a normal finance are allowed for the linked finance as well.
Wakala Reference Number
Select the reference number of the from the option list. The option list contains all Wakala account numbers. The period of Wakala is from value date of Wakala account to value date of Murabaha account.
Note
While booking the Murabaha account the system will calculate the profit amount for the Wakala period, which is linked with Wakala account.
6.2.2.2 Payment and Liquidation of Bills linked to finances
Partial payments of bills with linked finances, is allowed to the extent of the bill outstanding amount minus the amount of the finance.
Partial Liquidation of the bill from collaterals is allowed to the extent of the collateral available with the bill after reducing the collateral that has been earmarked to be used for liquidation during the crystallization.
Collateral taken over
This check box is checked if the collateral linked is been taken over.
Click 'Takeover Details' button to view details of the take over.

You can view the following details in this screen:
- Collateral Code – The system displays the collateral code.
- Amount Settled – The system displays the amount settled.
- Date of Take Over – The system displays the date of taken over.
- Branch Code – The system displays the branch code.
- Account Number- The system displays the account number.
- Taken over reference – The system displays the taken over reference number.
- Event Sequence Number – The system displays the event sequence number of MLIQ event fired during takeover process.
Effective Date
You can specify the following detail here:
Effective Date
The effective date is used to pick the UDE value and apply it for the given period. The system displays this date from the General UDE maintenance screen.
For a product + currency combination, if the UDE values are not maintained for the effective date, then the system defaults ’0‘. You can edit it. You can maintain different effective dates for the same UDE with different values. For instance, you can give different effective dates for different rate types maintained for the moratorium UDE.
User Defined Element Values
The UDE values for each Account are maintained here. After clicking the ‘Product Default’ button, the UDE values default from the UDE values maintenance for the Product, Currency, effective dates combination. The system disables this section. These can be overridden by providing account level UDE values. For this, you need to click the ‘Edit UDE Details’ button. After changing the details, the system re-computes the schedules. On saving the contract, the system prompts the changed details.
However the UDE are only those defined at the product level. No new UDEs can be introduced at the account level.
The system checks whether the UDE values fall within the minimum and maximum limits specified for the UDEs linked to the product. If a UDE value falls outside the permissible limits, the system will throw an error message,
If there are no product level UDE values maintained, the system will default the UDE value to Zero. However, at the time of saving, if UDE values are zero or any invalid value, then an override will be raised with an appropriate error message. If required this can be configured as an error message. In case of an ERROR, you will have to give a valid value. While if it is an OVERRIDE, you can overlook the message and continue and if it is for an ONLINE AUTHORIZATION the parameter should be authorized appropriately.
You can specify the following details for the UDE values:
User Defined Element ID
To select a UDE Id, click the option list. A list of UDE Ids is displayed. Double click to select a UDE ID.
User Defined Element Values
Specify the Actual Value for the UDE based on the effective Date in this field. The value specified here should fall within the minimum and maximum limits maintained for the UDE linked to the underlying product.
Note
Input to this field is mandatory if you maintain a UDE.
Rate Code
Select the code for the Floating Rates if any and the spread on it applicable in this field by clicking the option list. A list of values is displayed. Double click on a value to select it.
Code Usage
Select the Code usage which can be periodic or automatic in this field.
Resolved Value
This denotes the final value of a UDE. Resolved value = Rate code value taken from Floating Rate Maintenance + the spread [UDE Value].
6.2.3 Preferences Tab
The defaults are maintained by the bank. Depending upon the combination of various preferences, the bank can have various account preferences. The defaults primarily are based on product definition and can be overridden.

6.2.3.1 Account Preferences
Check Book Facility
If you select this option, Checks or coupon books (for disbursement) can be written against the Finance account.
Atm Facility
If you select this option, you can access the finance account through ATM operations.
Passbook Facility
If you select this option, you can get a Passbook issued to the finance account holder and the passbook operations such as Updating are available for the account.
Amend Past Paid Schedule
This preference determines if you can modify any feature such as profit rate, installment amount which affects already paid schedules. If you select this is option then the paid schedules are recalculated and liquidations on them are recognized as pending as appropriate.
Liquidate Back Valued Sch
While making payments to several schedules that are overdue, you can maintain a default Order upon which all components of a schedule are cleared.
Liquidate Residual Value
If you select this option, the residual amount automatically liquidated with the last EMI schedule.
Maximum Renegotiations
Specify the maximum number of renegotiation allowed for the account.
Note
If maximum renegotiation is not maintained, system will perform renegotiation without any restrictions. If the maximum renegotiation value is given as ‘zero’, system will raise override in the first renegotiation itself.
Renegotiation No
The system displays the renegotiation count. This is the number of renegotiations that are already performed on the account.
6.2.3.2 Specifying Grace period
Supplier
The system displays the supplier grace period and frequency for Murabaha contracts maintained at the product level, based upon this period the first installment date of the finance contract will be derived. However you can modify it. After modification you can edit and explode the schedules from the ‘Components’ tab. The modified schedules will be displayed after explode.
Customer
The system displays customer grace period and frequency for Murabaha contracts maintained at the product level, based upon this period the first installment date of the finance contract will be derived. However you can modify it. After modification you can edit and explode the schedules from the ‘Components’ tab. The modified schedules will be displayed after explode.
Note
- The grace period and frequency will be disabled for the copy operation
- The grace period and frequency can be kept blank, if you do not want to have the grace period
6.2.3.3 Loan Settlement Notice
The system displays the following loan settlement details based on the values specified at ‘Value Dated Amendments’ level:
- Loan Settlement Request
- Notice Date
- Expected Closure Date
6.2.3.4 Status Change Mode
Select the status change mode. The options available are:
- Auto
- Manual
The system defaults Auto as the status change mode.
While processing End of Day, the system picks only those accounts with Auto as status change mode. The processing of the accounts which are picked up is based on the status options set at the product level.
6.2.3.5 Liquidation Preferences
You can maintain the following liquidation preferences:
Liquidation Mode
The system defaults the mode of liquidation from the product level. However you can modify the same to indicate the mode of liquidation that you are maintaining. You can select one of the following options:
- Manual
- Auto
- Component
Partial Liquidation
If you select this option, system will perform partial auto liquidation.
Auto Liqd Reversed Pmt
If auto liquidation has been reversed in an account, it will be retried depending upon the status of this field. If this option is selected, then the auto liquidation is retried.
Retries Auto Liquidation Days
When auto liquidation option is chosen and funds are not available, the number of times the system can retry auto liquidation is determined by this field.
If blank, the number of retries is infinite.
Retries Advice Days
Number of retries for an advice is defaulted here from the product maintenance level; however, you can modify if needed. The value should be less than the value maintained for ‘Retries Auto Liquidation Days’.
Close Collateral
Check this box if you need to close the collateral automatically on full payment, during auto liquidation.
6.2.3.6 Profit Sharing Details
For Mudaraba accounts, you can capture profit sharing details between the Mudarib and Rabbul-Mal using the ‘Islamic Account Details - Preferences’ screen. Note that the following fields are applicable only for account under products under the Mudaraba product category:
- Bank Share %
- Customer Share %
Refer the section ‘Creating a Mudaraba Account’ in the chapter titled ‘Defining Islamic Product Categories and Products’ in this User Manual for further details about this screen.
6.2.3.7 Track Receivable Preferences
If you select this option, it tracks the amount to be liquidated as a receivable if funds are not available. So upon any subsequent credit, the receivables are blocked and allocated to the pending liquidation.
Auto Liquidation
Selecting this option implies that the Track receivable option is for Auto Liquidations
Note
By default, the system selects this option.
Manual Liquidation
Selecting this option implies that the Track receivable option is for Manual Liquidations
Note
By default, the system selects this option.
6.2.3.8 Rollover Preferences
Auto or Manual
This option is used to determine if the Rollover is system driven or not .If you select the option Auto Rollover, then upon maturity, the Account will be rolled over automatically by the system Rollover batch run in BOD.
If you select the option Manual roll over, then the system does not perform the auto rollover and you can perform a manual rollover.
Note
By default, the system selects the ‘Auto’ option.
Rollover Type
The options are:
- Special Amount: If your rollover is a special amount, select this option and capture the amount that has to be rolled over.
- Custom: If the rollover type is ‘Custom’, then select the ‘Component Names’ that have to be rolled over.
6.2.3.9 UDE Rollover Preferences
If you select this option, you determine if at the time of rollover the UDE value would be defaulted from the product or from the account.
6.2.3.10 Schedule Basis Preferences
This flag will determine if at the time of rollover the schedule would be defaulted from the product or from the account.
Multiple Down Payment Required
Check this field to do multiple down payments. You can check this field only when Auto disbursement option is selected at product level.
6.2.3.11 Rollover Components
This option is applicable when Rollover Type is Custom. The option list provided will display the components relevant to the account from which you can choose the components that are to be rolled over.
6.2.3.12 UDE Rate Plan
Start Date
Specify the start date of the rate plan.
End Date
Specify the End date of the rate plan.
Note
Customer will be sent a notice prior to the completion of the rate plan period. Customer can change the rate plan within the rate plan period by doing a value dated amendment. If you try to amend the rate plan after the rate plan period, then the system displays the configurable override message as ‘UDE plan cannot be changed’.
If the customer does not contact bank to change the rate plan within the specified time period, then the bank will continue with the current rate plan.
6.2.3.13 Intermediary Details
You can capture the Intermediary Details at the finance account level to keep track of the accounts created through Intermediaries. Islamic account details screen allows linking of multiple intermediaries to a single finance. In case of multiple intermediaries, you need to maintain the applicable intermediary percentage against the finance.
Intermediary Initiated
Check this box to indicate that the finance has been initiated by an intermediary.
Intermediary Code
If you have checked the box 'Intermediary Initiated', you need to specify the code of the intermediary who has initiated the finance. The adjoining list of values displays all valid and active intermediary codes maintained in the system. You can select the appropriate one. Using this option you can link multiple intermediaries along with the respective percentage for the individual intermediary against the finance amount.
Intermediary Name
The system defaults the name after code and ratio is entered.
Intermediary Ratio
Specify the ratio of individual intermediary contribution against the finance amount.
Note
Sum of intermediary’s ratio need not be equal to 100.
6.2.4 Components
Clicking against ‘Components’ tab in the ‘Account Details’ screen invokes the following screen:

You can specify the following details for the components:
Component Name
The components defined for the selected product get defaulted here.
Description
After you specify the component Name, the system displays the description of the component in the adjacent field.
Waive
Select this option to waive the component for the account.
Main component
The system selects the component of the finance designated as main component in the product level in this field.
Capitalized
Select this option if the scheduled amounts are to be capitalized.
Liquidation Mode
The system defaults the mode of liquidation from the product level. However you can modify the same to indicate the mode of liquidation of the component from the drop-down list. The following options are available for selection:
- Auto
- Manual
Note
This is applicable only if ‘Liquidation mode’ is selected as ‘Component’ at the account preference level.
Component Ccy
The system displays the currency associated with the component in this field. The value is defined at Product level.
Penal basis Comp
The system displays the basis for calculating compensation component in this field.
Special Profit
Select this option to denote if the component is a special Profit type. This implies that the computed value of the component can be overridden with the entered value.
Special Profit Amount
Enter the amount for the special profit in this field.
When a value-dated change is made to decrease the account maturity date, outstanding amount in profit and principal is equally divided and added to the remaining schedules. In such cases, the system displays the outstanding profit amount in this field.
Settlement Ccy
Click on the option list to choose a settlement currency from the list of currencies.
Double click on a value to select it.
The settlement currency is maintained as a default for both Credits and Debits.
Payment Mode (Dr/Cr)
The system defaults the values from the payment mode details specified in the ‘Account Details - Main’ screen. However, you can modify this if you have checked the option ‘Allow Corporate Access’ in ‘Branch Parameters – Detail View’ screen. The options for debit mode are CASA, Credit Card, Debit Card, Clearing, External Account, Electronic Pay Order, Internal Check, Instrument, GIRO and Cash/Teller.
The options for credit mode are CASA, Clearing, External Account, Instrument, and Cash/Teller.
The values in these modes are:
- CASA
- Branch: Click on the option list to choose the branch in which the customer account resides. . Double click on a branch to select it.
- Account: Click on the option list to choose the account in the branch
selected. Double click on an account to select it. Credit Card / Debit
Card
- Card Number: This field captures either the Credit No or the Debit No details based on the selection.
The card must be a valid card whose number can be checked with a modulo logic or maintenance file.
- Clearing Network
- Clearing Bank Code: Click on the option list to select the bank code as per clearing maintenance. Double click on a bank code to select it.
- Clearing Branch Code: Click on the option list to select the clearing bank branch. Double click on a branch code to select it.
- Instrument No: Enter the number on the instrument presented for clearing in this field. Double click on a value to select it.
- Routing No: Enter the routing number of the branch selected for clearing in this field.
- Clearing Product Code: Click on the option list to choose a product code if the clearing is using a Oracle FLEXCUBE clearing product. Double click on a branch to select it.
- End Point: This field picks up the end point maintained in the clearing system.
- Sector Code: Click on the option list to choose the clearing sector code. Double click on a sector code to select it.
- External Account
- Clearing Bank Code: Click on the option list to choose the external bank code as per clearing maintenance.
- Clearing Branch Code: Click on the option list to choose the external bank branch used for clearing.
- Ext Acc No: Enter the external account number in this field.
- Ext Acc Beneficiary Name: Enter the name of the beneficiary of the external account in this field.
- GIRO
- Auto/Manual GIRO – Select Auto GIRO for automatic direct debit or else select Manual.
- Bank/Plus GIRO – Select the GIRO clearing system used, which can be either Bank or Plus.
- GIRO Number – This is applicable only for corporate customers and not for individual customers. You have to enter the GIRO number.
- Payer Bank Name – Specify the name of the bank from which the amount is paid.
- Payer Branch - Specify the branch from which the amount is paid.
- Payer Account - Specify the account from which the amount is paid.
- Payer Bank Address - Specify the address of the bank from which the amount is paid.
- Instrument / Cash / Teller
- AC Branch: Click on the option list to choose branch where the account is serviced. Double click on a branch to select it.
- Product or Account: If the payment mode is Account, this field specifies the CASA/GL account to be debited. If the payment is through Instrument/Cash, it denotes the teller product to be used.
Note
The system will allow you to specify the credit and debit payment modes only if you have checked the option ‘Allow Corporate Access’ in the ‘Branch Parameters – Detail View’ screen. If you have not checked the option, the system will default the values as maintained in the fund branch account. You will not be allowed to modify this.
Use Guarantor Details
Check this box to indicate whether the guarantor accounts have to be used for debit settlement.
6.2.4.1 Guarantor Account Details
While booking an account, you can capture the guarantor’s accounts along with the default settlement account. In case of insufficient funds in the default settlement account during any liquidation event, the system will utilize funds from the customer’s current or savings account. If funds are still insufficient, the system will look into the guarantor’s accounts instead. You can have multiple guarantors for an account. The system will check for funds in all the accounts of one guarantor and go to the other only if the schedule is not liquidated fully.
You can capture the guarantor and guarantor account details in the ‘Guarantor Details’ screen. To invoke this screen, you need to click ’Guarantor’ button in the ‘Account Details – Component’ screen.

Guarantor CIFs
Seq No
This is a display only field. It will indicate the order in which the guarantors will be considered for settlement, until the full settlement amount gets covered by the funds available. This means that the system will check for funds availability in all the Current and Savings accounts belonging to a CIF and then move to the next CIF only if the required amount is not achieved.
Customer No
You can select the guarantor’s CIF from the option list. This list displays all valid and authorized CIF ids whose status is ‘Normal’.
Customer Name
Here the name of the customer is displayed based on the CIF id chosen.
Guarantor Accounts
Here you need to specify details of the guarantor accounts that have to be considered for settlement. These accounts will be considered only if the schedule amount has not been covered by the funds available across all current and savings accounts belonging to the guarantor CIF specified in the above section.
Seq No
This is a display only field. It will indicate the order in which the guarantor’s accounts will be considered for settlement, until the full settlement amount gets covered by the funds available.
Branch
The system displays the branch in which the chosen account resides.
Account No.
Here you can specify the account number that should be considered as the guarantor account for settlement. You can select the account number from the option list which will display all open Current and Savings Accounts.
This account will be debited if the other accounts belonging to guarantor CIF ids are not able to meet the required amount.
Note
Advice generation for guarantor’s accounts, if debited, will be processed following split settlements process.
CCY
This is a display only field. The guarantor account currency will be defaulted here.
Customer No
Based on the account chosen, the guarantor’s CIF is displayed here.
If the option ‘Verify Funds’ for the component is selected, the system will first check the default settlement account for availability of funds. In case of insufficient funds, system will liquidate the schedule amount to the extent of available funds in the default settlement account. For the remaining amount, the system will look for funds in the customer’s current/savings accounts after the days specified in the ‘Customer CIF A/C After: Days’ field in the ‘Product Maintenance – Preferences’ screen. The system will first scan the customer’s current accounts followed by the customer’s savings accounts for the availability of funds. If sufficient funds are available, the required amount will be liquidated.
However, if funds are insufficient in the customer’s accounts, then after the days specified in the ‘Guarantor CIF A/C After: Days’ field in the ‘Product Maintenance – Preferences’ screen, the system will first scan the guarantor’s current accounts followed by the guarantor’s savings accounts for the availability of funds. The system will look up the relevant accounts based on the maintenance in the ‘Guarantor Details’ screen. For a guarantor CIF, if there are no accounts maintained in the ‘Guarantor Details’ screen, then system will process all the current and savings account of the guarantor CIF randomly.
The batch processing will continue following the same pattern if funds are not available at primary settlement account level on the next day too.
If the option ‘Verify Funds’ for the component is not selected, the system will utilize funds only from the default settlement account and will not consider customer accounts or the guarantor CIF’s current and savings accounts.
6.2.4.2 Settlement Mode
Click ’Debit Settlement Mode’ tab after clicking ‘Payment Settlement Mode’ button in the ‘Account Details – Components’ screen.

Dr Prod Ac
Specify the product/account used to debit the finance account in this field.
Dr Acc Brn
Click on the option list to choose the branch of the customer account which is to be debited. Double click on a value to select it.
Click ’Credit Settlement Mode’ tab after clicking ‘Payment Settlement Mode’ button in the ‘Account Details – Components’ screen

Here you need to specify the following details:
Cr Prod Ac
Enter the details of the product/account used to credit the finance account in this field.
Cr Acc Brn
Click on the option list to select the branch of the customer account which is to be credited from the list of values.
Double click on a value to select it.
Service Branch
Click on the option list to select the branch the services the customer account.
Double click on a value to select it.
Service Account
Click on the option list to select the account in the service branch.
Double click on a value to select it.
All modes except CASA needs service account. Adjustments, etc. will be settled through this account.
IRR Applicable
Check this option to indicate that the component is to be considered for IRR calculation for the account. This field is applicable to profit, charge and fee components. For adhoc charge, charge, compensation and prepayment compensation components, the value will be defaulted from the product level and you will not be able to modify it.
This field will not be available for input if ‘Accrual Required’ and ‘IRR Applicable’ are left unchecked at the product level.
Note
- For bearing type of component formula this option will be enabled only if ‘Accrual Required’ is checked for the component at the product level.
- For discounted or true discounted type of component formula this option will be allowed irrespective of whether the ‘Accrual Required’ option is checked or not at the product component level.
- If the option ‘Accrual Required’ is unchecked and ‘IRR Applicable’ is checked, then discounted component will be considered as a part of total discount to be accrued for Net Present Value (NPV) computation.
- If both ‘Accrual Required’ and ‘IRR Applicable’ are checked, then discounted component will be considered for IRR computation.
- Upfront Fee component will be considered for IRR only when ‘Accrual Required’ and ‘IRR Applicable’ both are checked.
- For upfront fee component, if ‘IRR Applicable’ is checked, then ‘Accrual Required’ has to be checked.
Funded during Rollover
Select this option if the component can be funded during the rollover process.
Funded During INIT
This field indicates if the component can be funded during the INIT event.
Original Exchange Rate
The base or actual exchange rate between the account currency and settlement currency gets displayed here.
Exchange Rate
For a customer availing any Relationship Pricing scheme, the customer specific exchange rate derived by adding the original exchange rate and the customer spread maintained for the relationship pricing scheme gets displayed here.
You can change the defaulted rate provided the change is within the variance level maintained for the underlying product.
If Relationship Pricing is not applicable, Exchange Rate will be the same as the Original Exchange Rate.
For more details on customer specific exchange rates, refer the section titled ‘Specifying Pricing Benefit Details’ in Relationship Pricing user manual.
6.2.4.3 Maintaining Schedule Details
Specify the following details.
Type
Select the type of schedule from the option list. Schedule can be a payment, a disbursement or a rate revision schedule.
Schedule Flag
Select the option for the Schedule flag from the option list.
The options are Normal or Moratorium.
Select the option Moratorium if there are no scheduled repayments for the component for the Moratorium period. However the component is accrued for a certain Moratorium period.
Formula
Enter the formula used to compute the component for that schedule.
First Due Date
Enter the first due date for the schedule for the component. The first due date can be defined based on the value date for the finance or a calendar date.
Note
Amortization schedule start date added with a given frequency in ‘Maturity Details’ screen, will give the first due date.
No.
Enter the number of times the schedule is repeated for a chosen frequency for the schedule. If the Frequency is Monthly and Number is 1, it implies once a month.
Freq
This implies the number of times the schedule will repeat for a Unit. If it is 2 and the Unit is Monthly, it implies twice a month.
Unit
Enter the installment unit for the component for the schedule. The units of frequency definition can be Daily, Weekly, Bullet, Monthly, Quarterly, Half Yearly or Yearly.
Select the unit of the schedule from the option list.
Due Date On
This option may be used to schedule an installment on a particular date of the month.
End Date
End date for the component for the schedule will be computed from the start date, frequency, unit and number for the schedule
Amount
The amount of payment done, disbursement or repayment, is displayed in this field.
Capi
Select this option if the schedule amounts are to be capitalized.
Note
The system by default does not select this option.
Waive
Select this option to specify if you need to allow a waiver of the component payments for the schedule.
Note
The system by default does not select this option.
A schedule can be either applicable or capitalized or waived.
Down Payment Amount
Specify the down payment amount for each schedule.
6.2.4.4 Schedule Details
Click ’Explode’ button to view the following Schedule details:
Schedule No
The system generates and displays a sequential schedule number for installments.
Due Date
The system displays the due date of the payments and disbursements in this field.
Amount Due
The system displays the amount due for the schedule in this field.
Amount Settled
The system displays the settlement amount for the schedule in this field.
Emi Amount
The EMI that should be repaid in this schedule is displayed in this field.
Amort Prin
The system displays the principal that has to be amortized in this field. This field will be relevant for the Profit component that is being amortized.
Accrued Amount
In this field, the system displays the amount accrued for the component for the schedule.
Capit
The flag is used to display that the schedule installment is capitalized.
Waive
Select this option to indicate if this particular amount which is due will be waived or not.
6.2.4.5 Editing the Default Schedule
In case of a forward Ijarah having property handover, you need to manually edit the exploded payment schedules for the main profit component. Click ’Edit’ button to make any change to the scheduling and after you have made changes, click ’Explode’ button to see the changes made.
If you select any component and click ’Edit’ button, you can make changes to the schedules which are defaulted from the product to the account. You will have to specify repayment schedules for the profit component during the moratorium period and the handover period.
If you click the ‘Explode’ button, other components will get adjusted according to change made to any of the attribute. The system will also compute the Internal Rate of Return (IRR) on clicking this button. If the box ‘Recompute schedule on IRR’ is checked for the linked product, the system will recalculate schedules based on IRR.
Select the Principal Component. Click on ‘Disbursals’ to see the Disbursal schedule. This gives the list of Schedules for the disbursements and their corresponding Disbursement amounts.

You can check the details of the due date of the schedule and the Amount to be disbursed from the ‘Schedule Due Date’ field and the ‘Amount To Disburse’ field respectively.
In this screen, you can also enter the following details of a contractor for each of the disbursals done:
Purpose
Specify the purpose of disbursement from the option list. This can also be maintained in the field ‘Type’ in the ‘Limits Type maintenance’ screen.
CIF Id
Specify the CIF for each contractor from the option list.
Amount
Specify the amount to be disbursed against the CIF Id for the purpose mentioned.
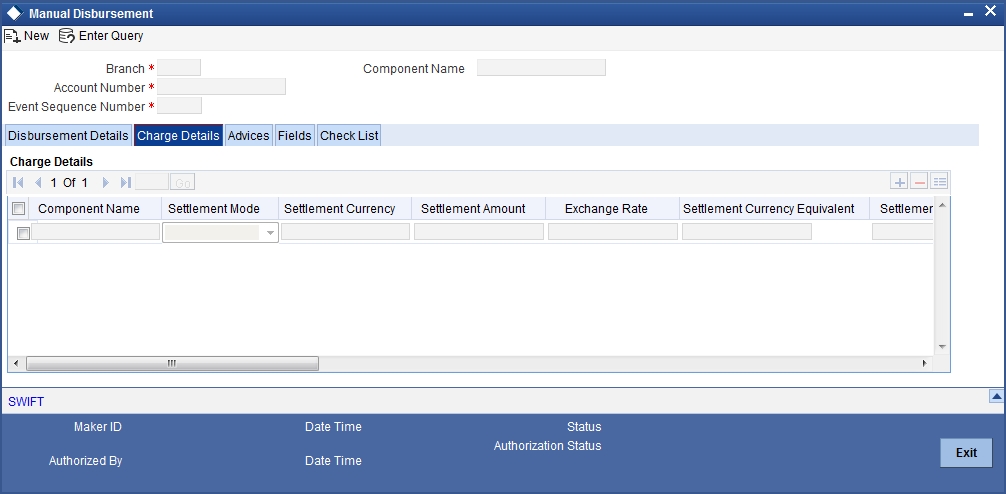
Note
- You can override the settlement details at the ‘Manual Disbursement’ screen
- The system displays an override if the disbursement is done before the projected schedule date
- The system displays an override if the disbursement amount given for a particular contractor is more than the projected amount specified for that schedule.
- The system throws an error if the disbursement amount for a particular contractor is more than the sum of the entire projected amount given for a contract.
- In case of auto-disbursement, if the box ‘Property Handover’ is not checked, the system will not allow final disbursement.
6.2.4.6 Schedule- wise Split Settlement for Auto Disbursement
Oracle FLEXCUBE allows you maintain split details for schedule-wise auto disbursement in a finance account, only if you have set the disbursement mode to ‘Auto’ in the Account Preferences tab of the Islamic Financing Product screen
In the Islamic Account (CIDACCNT) screen, click ‘Product Default’ button after entering product code, customer ID, currency and the amount, to default the product level component and schedule details of the selected product in the component tab of the account details screen.
You can view the disbursement schedule and maintain the schedule- wise finance split details for auto disbursement in the Disbursal screen. To do this, first select the principal component in the component tab and then click on ‘Disbursals’ button.
The system displays the list of Schedules for the disbursements and their corresponding Disbursement amounts.
Schedule Due Date
The system displays the due date of the schedule.
Total Disbursement Amt
The system displays the total disbursement amount for the specified finance account.
Amount to Disburse
The system displays the amount to be disbursed.
Already Disbursed Amt
The system displays the amount which has been disbursed.
Note
Oracle FLEXCUBE allows auto disbursal only for the principal component.
Split Details
You can maintain the following split details:
Percentage
Specify the split percentage of the disbursement amount.
Note
The system displays an error, if the information on amount or percentage is missing.
Amount
Specify the split amount for the schedule. Split amount is calculated based on the percentage and the disbursal amount.
If you specify only the amount and not the percentage, the system calculates the percentage of the amount to be disbursed and displays it in the percentage field.
Note
- The system validates if the amount and percentage are not entered and if split for the same disbursement schedule is available
- If one disbursement schedule maintains one split with percentage and other split with amount, system maintains either amount or percentage for the disbursement schedule.
- If the total amount is less than the amount to disburse for the schedule, system adjusts the rest of the amount in last split of the particular schedule and percentage gets calculated based on the amount.
- The system displays an error, if you specify an amount greater than that of the disbursement schedule
- The system displays an error, if the total amount or total percentage maintained exceeds the amount to disburse or 100 percent.
Settlement Account Branch
Specify the branch of the customer account. The adjoining option list displays the list of valid open branches maintained in the system. You can choose the appropriate one.
Settlement Account Number
Specify the settlement account number. The adjoining option list displays the valid accounts maintained for the given branch. You can choose the appropriate one.
Split sequence number
The sequence number for each split is auto generated by the system on save.
Payment Mode
The system displays ACC as the payment mode for disbursal.
Settlement Account Currency
Once you choose the account number, the currency of the settlement account gets defaulted.
Customer
Once you choose the account number, the customer id gets defaulted.
It is mandatory to re-enter the split settlement details during VAMI, if there is a change in the disbursement schedule. For the disbursed schedules, the split settlement amendment would be ignored during VAMI.
During BOD, the system checks the finance split settlement details before taking the Credit Settlement details of the principal component. The credit settlement details of the principal component /Service account would be considered only in the absence of split settlement details for that particular schedule.
6.2.4.7 Rate Revision Schedule
Select a component which has rate revision defined. To view the details of the Rate revision schedule, click on the ’Revisions’ button. This lists the details of the revisions done on the Components. This lists the revision date against the component name. This also has an application option which displays if the revision was applied or not.

You can check the details of the name of the component that is revised and the date when it has been revised from the field Component name and Revision date respectively.
6.2.4.8 Maintaining Nominal Disbursal Schedules for Principal Component
If you select the ‘Construction Period Profit Basis’ as ‘Nominal’ in the ‘Product Maintenance’ screen, then it is mandatory to maintain nominal disbursal schedules. Click on the ’Nominal Disbursals’ button to capture nominal disbursals.

Start date
The start date of the Disbursement Schedule is defaulted from the product. However, you can modify this date.
End date
The end date of the Disbursement Schedule is defaulted from the product. However, you can modify this date.
Amount
The system equally divides the amount financed across number of disbursal schedules and displays it in this field the following scenario.
- If disbursement mode is ‘manual’ and the construction period profit basis is ‘nominal’
- However, you can modify the disbursal amount in case the construction period profit basis is ‘nominal’ and the disbursement mode is ‘manual’.
Purpose
Specify the purpose of disbursement from the option list. This can also be maintained in the field ‘Type’ in the ‘Limits Type maintenance’ screen.
CIF Id
Specify the CIF for each contractor from the option list.
Amount
Specify the amount to be disbursed against the CIF Id for the purpose mentioned.
Note
- You can override the settlement details at the ‘Manual Disbursement’ screen
- The system displays an override if the disbursement is done before the projected schedule date
- The system displays an override if the disbursement amount given for a particular contractor is more than the projected amount specified for that schedule.
- The system throws an error if the disbursement amount for a particular contractor is more than the sum of the entire projected amount given for a contract.
6.2.5 Charges Tab
This module is used for calculating and applying charges on an account. To calculate the charges that we would like to levy on an account, we have to specify the basis on which we would like to apply charges. For example, we may want to apply charges on the basis of the debit turnover in an account. When we define a Charge product, we have to specify the Charge basis. When we apply the charge product on an account or an account class, charges for the account will be calculated on this basis.
The following details are captured:
Component Name
The system displays the name of components defined as type ‘Charge’ for the associated product.
Component Ccy
The system displays the currency associated with the component. The component currency is defaulted from the Product level
Settlement Ccy
Click on the option list to choose the details of the currency in which the payments are to be made in this field. A list of currencies is displayed. Double click on a value to select it.
Dr Payment Mode
Click on the option list to choose the details of the mode of payment (For debit payments) in this field. A list of values includes CASA, Cash/Teller, Instrument, External Account, Electronic Pay Order, Internal Check, Clearing, Debit Card, Credit Card and PDC.
Note
If the Debit Settlement mode is selected as PDC, then the other debit settlement details are not maintained.
If the debit Settlement is PDC then the liquidation mode of the component should be manual.
The Debit Settlement can be chosen as PDC only when contract is amortized.
Note
The system will allow you to specify the debit payment mode only if you have checked the option ‘Allow Corporate Access’ in the ‘Branch Parameters – Detail View’ screen. If you have not checked the option, the system will default the values as maintained at the fund level. You will not be allowed to modify this.
Cr Payment Mode
Click on option list to choose the mode of payment by which the account is credited. The list of values includes A list of values includes CASA, Cash/Teller, Instrument, External Account, and Clearing.
Service Account
Enter the details of the Product/Account to be used for payments in this field. The adjustments etc will be settled through this account.
Service Branch
Click on option list to choose the details of the branch where the dr/cr account resides. A list of values is displayed. Double click on a value to select it.
Due Date
Enter the date on which the charge is applicable.
Amount Due
Enter the details of the amount due for repayment in this field.
Waive
Select this option to waive off the charges.
Funded during INIT
Select this option if the component can be funded during finance initiation.
Funded during Rollover
Select this option if the component can be funded during the rollover process.
For each component, the following details are displayed:
- Event Code
- Component Name: A component will be of type ‘Charge’
- Amount Due: The amount due for repayment in this field
- Amount Settled: The settled amount in this field
- Schedule Due Date: The scheduled date for repayment in this field
- Waive: If this option is checked, the charge defined for event is waived off
6.2.6 Linkage Details Tab
At the time of Finance account capture, the Linkages to securities backing the finance are captured. They include:
- The reference number of the Collateral, Collateral Pool, Line, Account, Amount block, Guarantee Collection Bill is linked.
- The amount which is attributed to the particular reference number is also captured.
- The account input screen captures the Linkages as shown below

You can specify the following collateral and linkage details:
Collateral Linkage Details
You can maintain the following collateral details here:
Linkage Type
Select a type of linkage to which you need to link the specified account from the adjoining drop-down list. This list displays the following values:
- New Collateral – Select if you need to link the account to new collateral.
- Collateral – Select if you need to link the account to existing collateral.
- Collateral Pool – Select if you need to link the account to collateral pool.
- Facility – Select if you need to link the account to a facility.
Linkage Reference No
Specify a valid linkage reference number for the selected linkage type from the adjoining option list. Linkage reference number is not applicable for ‘New Collateral’ linkage types.
Note
If you maintain ‘Linkage Type’ as ‘New Collateral’ and maintain linkage reference number, then the system displays an error message.
Description
Description of the linkage type is defaulted here; however, you need to specify description if the ‘Linkage Type’ is ‘New Collateral’.
Linkage Branch
Branch code of the branch in which the linkage is maintained is defaulted here; however, you need to specify branch code if the ‘Linkage Type’ is ‘New Collateral’, from the adjoining option list.
Linkage Currency
Currency code of the currency maintained for linkage is defaulted here; however, you need to specify the currency, if the ‘Linkage Type’ is ‘New Collateral’, from the adjoining option list.
Overall Amount
Specify overall amount of the collateral if you have selected ‘Linkage Type’ as ‘New Collateral’. The system displays values of different parameters based on the linkage type.
- If the linkage type is ‘Collateral’, then the system displays the collateral value as the overall amount.
- If the linkage type is ‘Collateral Pool’, then the system displays the pool amount as the overall amount.
- If the linkage type is ‘Facility’, then the system displays the effective line amount as the overall amount.
Collateral Category
Category of the collateral is displayed here, if the ‘Linkage Type’ is maintained as ‘Collateral’; however, you need to specify collateral category if the ‘Linkage Type’ is ‘New Collateral’, from the adjoining option list.
Hair Cut %
Percentage of hair cut for the collateral is displayed here, if the ‘Linkage Type’ is maintained as ‘Collateral’; however, you need to specify ‘Hair Cut %’ if the ‘Linkage Type’ is ‘New Collateral’, from the adjoining option list.
Limit Amount
The system displays the following as limit amount based on the selected linkage type, on saving the finance account:
- If the ‘Linkage Type’ is ‘New Collateral’, then the system displays the value computed after applying Hair Cut percentage on the amount.
- If the ‘Linkage Type’ is ‘Collateral’, then the system displays the limit amount of the selected collateral as the limit amount of the account.
- If the ‘Linkage Type’ is either ‘Collateral Pool’ or ‘Facility’, then the system displays the overall amount as the limit amount of the account.
Linked Amount
The system displays the linked amounted computed after applying the linked percentage on the limit amount, on saving the finance account.
Linked %
Specify linked percentage you want to apply on the limit amount of the account.
Utilization Order
Specify a valid order in which you need to utilize the linkage linked to the account. The system utilizes the linkage in an ascending order.
Utilized Amount
Utilized amount of the account is displayed here.
Commitment Product
Commitment product of the selected collateral is displayed here, if the ‘Linkage Type’ is maintained as ‘Collateral’; however, you need to specify a valid commitment product, which is open and authorized if the ‘Linkage Type’ is ‘New Collateral’, from the adjoining option list.
Taken Over Collateral
The system displays the taken over collateral as ‘Yes’ if the collateral is taken over. The system defaults the status as ‘No’ if the collateral is not taken over.
Note
While saving an account:
- The system generates a unique collateral code for the collateral, automatically created. This unique code is the finance account number concatenated with a three digit unique number.
- The system validates if the Amount Financed is greater than the Linked Amount of the Collateral Linkage Details Block.
- If the amount is greater, then the system will auto track the remaining amount against the Liability ID of the customer.
- If the Liability ID does not have sufficient available balance, then the system displays the override message as ‘The liability does not have enough available balance. Do you want to continue?’.
- If the ‘Linkage Type’ is ‘New Collateral’, then the system creates and authorizes the collateral with ‘Collateral Type’ as ‘Normal’ and assigns the Liability ID of the customer. However, you can manually create collateral with different type and link it to the account.
When an account is deleted, the system re-instates the collateral if it is utilized by the account and closes the collateral that was created new, automatically.
Linkage Details
You can maintain the following linkage details here:
Linkage Type
Click on the option list to choose the details of the linkage type. A list of values is displayed. Double click on a value to select it.
The valid values are Line, Deposit, Guarantee, Amount Block, CASA Account, Collateral Pool, and Collateral.
Customer ID
Click on the option list to choose the ID of the customer to be used for corresponding linkage type. A list of values is displayed. Double click on a value to select it.
A customer can either be the primary applicant or any of the other applicants for which the linkage type has been maintained.
Linked Ref No
Click ‘L’ button to choose linkage reference number be used for corresponding field.
Linkage Amount
Enter the linkage amount in this field.
Secured Portion
Enter the part of the principal that is backed by some asset in this field.
Amount Block No
Specify the amount block number imposed on the linked account, if applicable.
6.2.7 Advices Tab
Advices that may be generated whenever the account level status changes or whenever a particular event is fired can be linked at the Product level. Priorities of the advice can be changed and also a particular advice for an event can be suppressed. Generation of an advice across the life of the account can also be suppressed.

You can specify the following Advice details:
Msg Type
The system displays all the advices for all the events for the account. The list will include all the advices that are defined at the product level.
Suppress
This field allows the user to suppress the generation of the advice for a particular event. The options are Yes and No.
Priority
Click on the option list to select the priority of generation. A list of values is displayed. Double click on a value to select it.
The options are High, Medium or Low.
6.2.7.1 Suppress Advices across the Account
The generation of an advice across the life of the account can be suppressed.
Message Type
Click on the option list to select the type of advice, the generation of which can be suppressed across the account. A list of values is displayed. Double click on a value to select it.
The list includes advices defined at the product level.
6.2.8 Fields Tab
The User Defined Fields are defined at the Product level. These fields are available in the UDF tab at the time of account creation.

The system shows all the UDF descriptions defined at the Product level.
Enter the UDF value against each field.
6.2.9 Check List Tab
The Check lists are defined at the Product level. These fields are available in the ‘Check List’ tab at the time of account creation.

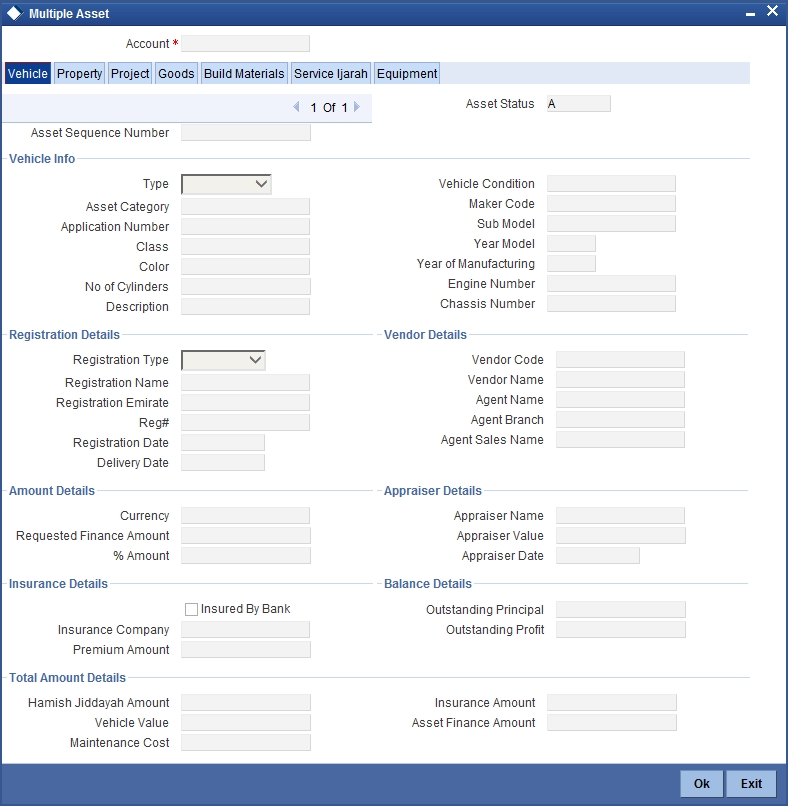
6.2.10 Asset Details Tab
You can capture the fixed asset details using this screen. Click on the ‘Asset Details’ tab to invoke this screen. This screen is enabled provided the ‘Lease Asset Booking’ is checked for that product.

You can capture the following fixed asset details:
Fixed Asset Product
Here the system displays the fixed asset product defined in the Ijarah Lease product.
Fixed Asset Contract Reference Number
This will be a display item that will be used to display the fixed assets contract reference number. The fixed asset reference number would be generated on the launch of the Asset details form.
Fixed Asset User Reference Number
This is a text item. This will be defaulted to the FA contract reference number and can be modified. This will be populated as the user reference number of the asset that will be uploaded.
Finance Currency
Here in this field the system displays the currency of the lease account.
Asset Category
Here you can select one of the valid fixed asset categories from the option list given.
Description
In this field the system displays the description of the chosen category.
Location Code
Here you can select one of the valid fixed assets location codes maintained in the system from the option list.
Description
In this field the system displays the description of the chosen location.
Asset Cost
This field is used to display the cost of the asset created. This cost is nothing but the sum of ‘Amount Financed’ and the ‘Down Payment’ for the lease account..
Asset Status
Here in this field the system displays the text ‘Capitalized’.
Booking Date
Here the system displays the booking date of the asset. This is nothing but the booking date of the lease account.
Capitalization Date
Here the system displays the capitalization date of the asset. This is same as the value date of the lease account.
6.2.11 Other Applicants Button
The details of the liability parties to the account are maintained in this field. Other Applicants of a finance include Co-signers and Guarantors.
You can specify the following details of the Co-applicants:
Customer ID
To select the customer ID of the co-applicant, click on the option list. A list of customer IDs is displayed. Select the customer ID of the co-applicant.
Customer Name
After you enter the name of the Customer, the system displays the name of the customer in this field.
Responsibility
In this field, you can select the details of the co-applicants and their responsibility as a Co-signer or as a guarantor from the option list. You can enter the details like the guarantor, co-signer, main addressee, advice notice receiver, and borrower etc., who is relevant to a joint account relationship. During initiation of the account, the primary customer is defaulted to ‘Borrower’ with 100% Liability and value date as the effective date. Your are allowed to maintain multiple applicants (customer id) for a finance with the same responsibility (Borrower).
Note
While there is no processing impact, the difference will become important when the original debtor is absconding and the finance is unpaid etc.
Liability %
In this field, you can enter the contribution of the co-applicants to the Finance. You can specify the Liability of the co-applicant if any, in case of a Finance default. You can also specify the percentage of profit split among different co-applicants. It is not made mandatory to maintain ‘Liability %’ for the responsibility ‘Borrower’. There could be borrowers with 0% liability.
Note
The sum of ‘Liability %’ for all the customers of a finance to be equal to 100%
Liability Amount
The system calculates and displays the upper limit of the liability in terms of the amount in this field. You may override the computed value.
Effective Date
This field is used to capture the date from which the % profit split among co-applicants of the finance will be taken into consideration. During the initiation of the finance, the value date of the finance will be defaulted as the effective date. During VAMI, the same effective date will be retained, you can however edit it.
Note
The effective date can not be a date prior to the finance initiation date. It is also necessary that there is one record for the initiation date. The effective date for all the applicants is the same.
6.2.11.1 Holiday Periods
Ignore holidays
If you select this option, then while processing schedules, the system does not check if a schedule falls on a holiday.
Note
By default, the system selects this option.
Cascade Schedules
If you select this option, then when a particular schedule falls due on a holiday and it is moved to the next or previous working day based on the module level branch parameters, the movement cascades to other schedules too. If not, then only the affected schedule will be moved to the working day and other schedules will be unaffected.
Note
By default, the system selects this option.
Move across Month Allowed
If you select this option, the system allows you to move a schedule/value date etc falling on a holiday to the next / prior working day, which falls in a different month.
Note
By default, the system selects this option.
If Ignore Holidays is False and If Move Across Months is also false, then the system will have an inconsistency and so it will not consider the holidays.
Move across month – Forward /Backward
If you select the option ‘Move across month’ this option specifies if the movement can be forward or backward.
Note
By default, the system selects this option.
6.2.11.2 Maintaining the UDE values
The system displays the UDE values from that of the UDE values maintenance screen. These values can be overridden by providing account level UDE values. However, the value can be maintained only for those UDEs defined at the product level. No New UDEs can be introduced at the account level.
You can specify the following details for the UDE values:
Effective Date
The effective date is used to pick the UDE value. The system displays this date from the General UDE maintenance screen.
For a product + currency combination, if the UDE values are not maintained for the effective date, then the system defaults “0” which the user can then edit.
UDE ID
To select a UDE Id, click on the option list. A list of UDE Ids is displayed. Double click to select a UDE ID.
UDE Value
Enter the Actual Value for the UDE based on the effective Date in this field.
Note
Mandatory if a UDE is maintained.
Rate Code
Select the code for the Floating Rates if any and the spread on it applicable in this field by clicking on the option list button. A list of values is displayed. Double click on a value to select it.
Code Usage
Enter the Code usage which can be periodic or automatic in this field.
Customer A/C After: Days
Specify the days after which system should check the guarantor’s account for funds, in case funds are insufficient in the customer’s other accounts too.
6.2.12 Party Details Button
Click on the ‘Party Details’ button to view manual disbursals already done for the contractor. In this screen the system displays the progressive cash outflows that have been done so far and the details of each manual disbursement done by the Bank.

You can view the following details for each of the manual disbursal done:
- Date of disbursement (Value Date)
- Total Amount
- Contract status
- CIF of Contractor
- CIF Name
- Purpose
- Amount for each contractor (Settlement Amount)
- Currency
Click ’Party Details’ tab on the ‘Manual’ screen to view the customer details.

In this screen you can view the folowing details:
- CIF of Contractor
- CIF name
- Purpose
- Date – The latest disbursement value date
- Total Disbursal amount – The total amount to be disbursed throughout the life cycle of a finance
- Eligible Disbursal amount – The amount to be disbursed as of the schedule date of disbursement
- Actual Disbursal amount – The amount which is actually disbursed
6.2.13 Payment Mode Details Button
You can specify the mode of bill payment in Oracle FLEXCUBE. Click ‘Payment Mode Details’ button on the ‘Account Details’ screen and invoke the ‘Settlement Details’ screen.

Here, you can capture the following details.
Debit and Credit Payment Modes
Specify the mode of payment by which the account is debited and credited, in the respective fields. The option list provides the following values:
- CASA
- Credit Card
- Clearing
- Debit Card
- External Account
- Electronic pay order
- GIRO
- Internal Cheque
- Instrument
- Cash/Teller
Note
The system will allow you to specify the settlement details only if you have checked the option ‘Allow Corporate Access’ in the ‘Branch Parameters – Detail View’ screen. If you have not checked this option, the system will default the values as maintained in the fund branch account. You will not be allowed to modify this.
Debit and Credit product account
Enter the Product / Account to be used for Debit/Credit payments in this field.
Debit and Credit account branch
Click option list to choose the details of the branch where the Dr account resides. A list of values is displayed. Double click on a value to select it.
Click on option list to choose the mode of payment by which the account is credited. The list of values includes a list of values which includes CASA, Cash/Teller, Instrument, External Account, and Clearing.
Amount Financed
Specify the total principal amount of the finance.
Note
If Calculate Gross Principle is checked, then the amount financed is the gross principal.
Net Principal
The Net Principal is the actual principal amount financed. It is system calculated and excludes any other funded components.
Value Date
Enter the Value date of the finance in this field using the date button.
Maturity Date
Enter the maturity date in this field.
If you are not sure of the maturity date, enter the tenor of the finance in either days or months or years as say 3M for 3 Months etc. The system automatically calculates the date after you press the ‘Enter’ button.
Maturity Type
Select the Fixed or Call option to specify the type of finance maturity.
Note
The system by default selects the option Fixed. For the Call option, the maturity date will not be computed upfront.
If you choose the ‘Call’ option, IRR processing will not be applicable to the account.
Index Exch Rate
Enter the exchange rate for index currency in this field.
Hamish Jiddayah %
Specify the down payment percentage you need for Hamish Jiddayah. You can enter values between 1 to 100.
When you click ‘Product Default’ button, the system defaults the Hamish Jiddayah % maintained at the product level.
When the account is saved, the system validates the Hamish Jiddayah % with Minimum Hamish Jiddayah % maintained at the product level.
Even if the Hamish Jiddayah Minimum % is not maintained at product level you can proceed with the save operation by giving the % at the Islamic Finance account level.
Note
- The Hamish Jiddyah Percentage can be in decimals but not be <0.
- The minimum value is any percentage >0. Max value is 100.
Hamish Jiddayah Amount
In this field, enter the finance amount paid by the customer upfront– Owners contribution. In case of Ijarah contracts, for a financial lease the down payment will be considered entirely towards the principal. In case of an operational lease the entire down payment will be considered as income. Note that the down payment amount cannot be amended after authorization.
When you click on the ‘Enrich’ button and you have maintained values for both Hamish Jiddayah % and amount, then the system calculates and computes the Hamish Jiddayah % based on the value maintained for Hamish Jiddayah Amount.
Future D/P Receivable
Your customer need not pay the entire down payment amount in a single installment. The customer can pay it in parts. In such cases, you can specify the amount to be received in the future from the customer. The aggregate of down payments received and ‘Future D/P Receivable’ should be equal to the ‘Down Payment’ amount.
For instance, suppose the down payment is 10000 BHD, down payment received is 8000 BHD and future down payment is 2000 BHD, then Disbursement event will be triggered.
Note
Amount specified in this field cannot exceed the total down payment amount for the contract. This field should be operationally controlled, because the system does not track the ‘Future D/P Receivable’ amount which is received from the customer.
Total Amount
Specify the sum of amount financed and down payment.
Balloon Amount
Specify the amount that is being paid as balloon payment. This value cannot exceed the principal amount of the finance. You will be allowed to specify this value only if the following conditions are met:
- Contract is linked to a Murabaha product
- The box ‘Balloon Required’ is checked in the ‘Product Maintenance’ screen for the linked product.
- The box ‘Recompute schedule on IRR’ is checked in the ‘Product Maintenance’ screen for the linked product.
Bank Share%
The system displays the percentage of principal amount that is contributed by the bank. The value automatically increases or decreases based on principal increase or principal payment.
Customer Share%
The system displays the percentage of principal amount that is contributed by the customer based on the down-payment,
Note
The system will modify the bank’s share and customer’s share percentages if there is any principal increase or principal payment.However the same will be reset to previous values, on reversal of payment.
6.2.14 Internal Rate of Return Details Button
Click on the ‘IRR Details’ button and invoke the ‘IRR DETAILS’ screen. This screen displays the IRR value for the chosen component for different effective dates. The values are displayed in the descending order of the dates.

6.2.15 Events Button
An ‘event’ may be defined as any action starting from application entry to collections. This module captures the details of events applicable to the account. The screen has a separate out the processed and the unprocessed events under two different headings.
6.2.15.1 Processed Events
The processed events are all the events which have already taken place. This displays the details like the sequence number of the event. The date on which the event was processed, the value date, the event code, a brief description of the event by clicking on ‘Events’ button. The screen also displays the details of the events according to the events selected.

The following details are displayed:
Branch Code
The branch code of the account maintained in the valid tables of consumer lending is displayed here.
Account Number
Applicant’s account number, which is auto generated if it is so maintained under the branch parameter is displayed here.
Alt Acc No
Alternate account number of the applicant is displayed here.
Application Num
The application number captured at the time of finance initiation is displayed here.
Customer id
Applicant’s customer Id is displayed here.
Product Code
Product code of the product associated with the account, defaulted from Product definition is displayed here.
Product Category
The product category availed by the customer is displayed here.
Amount Financed
The total finance amount is displayed here.
Ccy
Currency in which the transaction will be conducted for the account is displayed here.
Down payment Amount
The amount paid by the customer upfront is displayed here. This is used for information only.
Maturity Date
Maturity date for the finance account is displayed here.
Value Date
Value date for the account is displayed here.
User Defined Status
The user defined status for the account is displayed here.
6.2.15.2 Events
Seq No
The sequence number for the account is displayed here.
Processed Date
The date on which the event takes place is displayed here. It is the same as system date.
Execution Due Date
The date of execution of the events as maintained in the valid table that is captured during application entry is displayed here.
Code
The event code is displayed here.
Description
A description for the event occurred is displayed here.
6.2.15.3 Advices
DCN
A system generated number for reference is displayed here.
Msg Type
The type of advice generated for the event is displayed here. This is applicable only if maintained at the product level for the particular event.
6.2.15.4 Entries
Dr/Cr
This field indicates if the event occurring is a Debit or Credit event.
Branch
The branch in which the event occurred is displayed here.
Account Number
The number of the account affected by the event as maintained in the valid table is displayed here.
Ac Ccy
The currency involved in the event is displayed here.
Event Fcy Amount
Foreign currency amount involved with the event, if any.
Exch Rate
Exchange rate associated with the account is displayed here.
Event Lcy Amount
Local currency amount involved with the event, if any is displayed here. These events are maintained in the Event entries table.
Value Date
Value date for the event as maintained in the valid date captured during the application entry is displayed here.
Transaction Date
Event transaction date is displayed here. It is same as the system date
Entry FCY Amt
Netted entry log for the foreign currency amount is displayed here. These values are stored in the daily logs.
Entry LCY Amt
Netted entry log for the local currency amount is displayed here. These values are stored in the daily logs.
Trn Code
Transaction code is displayed here.
Amount Tag
Amount tag for the transacted amount is displayed here.
Event Seq Number
Event sequence number is displayed here.
Event
Event name and identifier are displayed here.
GAAP indicator
Generally Accepted Accounting Principles (GAAP) applicable for the accounting entry is displayed here.
6.2.15.5 Archiving Processed Events
You can archive processed records from the events diary using the ‘Retail Lending - Bank Parameters’ screen.

In this screen, you can specify the following parameters to archive processed events:
Reference Date
This is the first date on which the archival will be initiated. If this date is NULL, no archival will be done.
Frequency
This is the frequency for archival. The options in the drop down list are:
- Daily
- Monthly
- Yearly
Unit
This is a numeric value. Let us suppose you select the frequency as Daily and Unit as 5. In this case archival will be done every 5th day.
A batch process will execute the archival by end of day. However, if you do not specify the parameters, archival will not be executed.
Note
A batch process will execute the archival by end of day. However, if you do not specify the above parameters, archival will not be executed.
6.2.15.6 Unprocessed Events
The Unprocessed event screen has all the details of the overdue and the Due events for the account.

6.2.15.7 Overdue Events
An event which has crossed the due date becomes an overdue event. The number of days after the due date is used by the bank to calculate compensation for the event.
The following Overdue event details are displayed:
Event Code
Unique event code is displayed here.
Execution Date
Date on which event occurred is displayed here.
Event Desc
Brief event description is displayed here.
Components
Component Name
Name of the component affected by the event is displayed here.
6.2.15.8 Due Events
The date on which the event is supposed to take place is the due date of the event. In case of repayments, the customer is informed by the bank regarding the due date.
The following details are displayed:
Event Code
Unique event code is displayed here.
Execution Date
Date on which event should have occurred is displayed here.
Event Desc
Brief event description is displayed here.
Components
Component Name
Name of the component affected by the event is displayed here.
6.2.16 General Ledger Query Button
Click ‘General Ledger Query’ button to view the ‘GL Details’ screen. This is a view only screen, which provides a single snapshot of the latest GL balances for the various components that are defined for an account.

The information displayed includes:
6.2.16.1 Account Details
Branch Code
The branch code of the account maintained in the valid tables is displayed here.
Account Number
Applicant’s account number, which is auto generated if it is so maintained under the branch parameter is displayed here.
Alt Account No
Alternate account number of the applicant is displayed here.
Customer ID
Applicant’s customer Id is displayed here.
Product Code
Product code of the product associated with the account is defaulted from Product definition.
Product Category
The product category availed by the customer is displayed here.
Amount Financed
The total finance amount is displayed here.
Currency
Currency in which the transaction will be conducted for the account is displayed here.
Value Date
Value date for the account is displayed here.
Maturity Date
Maturity date for the finance account is displayed here.
6.2.16.2 Components
Component Name
Name of the component defined for the product to which the account is linked is displayed here.
Description
Component description as defined at the Product level is displayed here.
6.2.16.3 GL Details
GL Code
This is the account head to which the component will be dr/cr. This is defined at the product level.
GL Type
GL category as defined in the GL chart of accounts is displayed here.
Status Code
GL type as defined in the GL chart of accounts is displayed here.
Balance
GL balance in terms of the account currency is displayed here.
Local ccy balance
GL balance in terms of the local currency is displayed here.
6.2.17 Installment Query Button
Click on ‘Installment’ button to access the Installments query screen. The installment query screen displays the details of the installments for the account. The information displayed includes the account details, installment details and the installment summary.

The following installment details can be captured:
6.2.17.1 Account Details
Branch
The branch code of the account maintained in the valid tables of consumer lending is displayed here.
Customer id
Applicant’s customer Id as maintained in the valid table is displayed here.
Account Number
Applicant’s account number, which is auto generated if it is so maintained under the branch parameter is displayed here.
Alt Acc No
Alternate account number of the applicant is displayed here.
Application Number
The application number of the customer is displayed here.
Amount
The total finance amount as maintained in the valid table is displayed here.
Currency
Currency in which the transaction will be conducted for the account is displayed here.
Product Code
Product code of the product associated with the account, is defaulted from Product definition.
Maturity Date
Maturity date for the finance account is displayed here.
Value Date
Value date for the account is displayed here.
Contract Status
The status for the account is displayed here
6.2.17.2 Installment Summary
Due Date
Installment due date is displayed here.
Currency
The currency for the installment is displayed here.
Total Amount Due
The total amount due for the installment is displayed here.
6.2.17.3 Installment Detail
Component Name
Names of all the components that make up a particular installment are displayed here.
Amount Due
Amount due for each of the components of a particular installment is displayed here.
Status
Installment status based on the status maintained at the installment level in the product is displayed here.
6.2.18 Documents Button
You can capture the customer related documents in central content management repository through the ‘Document Upload’ screen. Click ‘Documents’ button to invoke this screen.

Here, you need to specify the following details:
Document Category
Specify the category of the document to be uploaded.
Document Type
Specify the type of document that is to be uploaded.
Document Reference
The system generates and displays a unique identifier for the document.
Remarks
Specify the additional information, if any.
Upload
Click ‘Upload’ button to open the ‘Document Upload’ sub-screen. The ‘Document Upload’ sub-screen is displayed below:

In the ‘Document Upload’ sub-screen, specify the corresponding document path and click the ‘Submit’ button. Once the document is uploaded through the upload button, the system displays the document reference number.
View
Click ‘View’ to view the document uploaded.
6.2.19 Hamish Jiddayah Details Button
Using this screen, the system captures details of all down payments received against an account. Click ‘Hamish Jiddayah Details’ button in the ‘Account Details - Main’ to invoke ‘Hamish Jiddayah Details’ screen. You cannot modify it.

Note
On reversing an account, the system will not reverse the already received down payments.
6.2.20 Vendor Payment Details Button
You can view the vendor payment details at the contract level by clicking ‘Vendor Payment Details’ button in the ‘Account Details - Main’ screen to invoke ‘Vendor Payment Details’ screen. You cannot modify it.

For more details about vendor payments, refer the ‘Processing Vendor Payments’ chapter in this User Manual.
6.2.20.1 Default of the Basic Account Details
Once you finish entering all the values, check ‘Cancel’ button. On clicking this button, the basic account details from the Finance Product gets defaulted. Also, the ‘Account Number’ and ‘Version Number’ are created and the ‘Alternate Account Number’ gets defaulted as the ‘Account Number’. This is the Light Finance and can be saved as such or after making changes.
You have to first check this button and then save the details. After you have checked it, you can make further changes only from the Account details. This also holds good only till the first authorization. Any changes can be made only through Amendment operations.
Account Statistics
Once you select an Account Number, the system displays the current status of the account in terms of the outstanding principle, the Component Name, the Amount Overdue and the Date since when the amount had been overdue in this field.
Account Status Details
The Account creation and change updates the audit trail. In these details, the Account status is also displayed. An Account can be active or uninitiated. Once it is active, it can be reversed, deleted or liquidated based on the operations on it. This is displayed on the screen.
The Account details include the book date, the value date, the maturity date, and down payment amount of the Finance account. In case of Rolled over finances, the original start date is also stored. The details of the liability parties to the account are maintained. The Main Customer and description are displayed. Also other applicants of a finance such as Co-signers, Guarantors etc can be captured. These details of the co applicants, their responsibility as a Cosigner, guarantor etc, and the contribution of the co applicants to the Finance are provided here.
The UDE values for each Account are maintained here. The UDE values default from the UDE values maintenance for the Product, Currency, effective dates combination. These can be overridden by providing account level UDE values. However the UDE are only those defined at the product level.
If there are no product level UDE values maintained, the system will default the UDE value to Zero. However, at the time of saving, if UDE values are zero or any invalid value, then an override will be raised with an appropriate error message. If required this can be configured as an error message. In case of an ERROR, you will have to give a valid value. While if it is an OVERRIDE, you can overlook the message and continue and if it is for an ONLINE AUTHORIZATION the parameter should be authorized appropriately.
You can specify the following details:
Amount Financed
The Amount to be financed will default from the Main screen. If it needs to be changed, enter the new amount that is financed for the finance in this field.
Currency
The Finance Currency defaults from the Main screen. If you want to change it, select the currency by clicking on the option list. A list of currencies is displayed. Click on a value to select it.
Book Date
In this field, the current date when the finance details were entered is defaulted and cannot be modified.
Value Date
The Finance value date from the main screen will be defaulted. To change this, enter the Value date of the finance in this field i.e., enter the Finance initiation date.
Maturity Date
The Finance maturity date from the main screen will be defaulted. To change it, enter the scheduled Maturity date of the finance. The tenor can also be entered to compute the Finance Maturity Date.
Original Start Date
Enter the original start date of the finance in this field. This will be defaulted to the Finance Value date at the time of Finance creation.
Note
For rolled over contract, the system populates the new start date in the Value Date field and this field remains unchanged and will hold the original start date.
Original Construction Date
Capture the original construction date.
Construction End Date
Capture the construction end date. The nominal disbursement schedule end date should not be greater than construction end date. Principal disbursements should not happen beyond this date.
Property Handover
Check the box to indicate that property handover period is allowed for the Ijarah account. In case you don’t check this box even post the handover date, the system will automatically move the handover date based on the product level extension preferences. Holidays will be ignored while deriving the new handover date.
Handover Date
Specify the date on which the property is scheduled to be handed over. This date should be greater than the construction end date.
If there is no payment schedule on this date, the system will display an error message while saving the account.
Re-Schedule Amortization on Final disbursement
By default, this field displays the value maintained in the ‘Re-Schedule Amortization on Final disbursement’ field in the ‘Consumer Lending Product’ screen. You will not be able to modify this field after the first authorization of the account.
Note
In auto disbursement, the amortization schedule start date will be last disbursement date.
Net Principal
The Net Principal is the actual principal amount financed. It is system calculated and excludes any other funded components.
6.2.21 Ijarah Button
Click ’Ijarah’ button to capture lease related details.

You can specify the following details:
Dealer
Select one of the valid customers from the option list. Here the dealer settlement account which has to be credited with the lease amount should be maintained as the credit settlement account for the principal component.
Asset Cost
Specify the market price at which the asset has been acquired. Except for the residual amount calculation, there is no processing based on the asset cost. You cannot modify this field.
Residual Value Basis
You can select one of the below options which indicates the basis on which the residual amount has to be calculated:
- A percentage of Asset cost
- A percentage of Amount Financed
- Flat amount
Residual Value
Here you can enter the percentage or flat amount for the residual amount.
Residual Amount
Here the system displays the calculated residual amount and this should be less than the ‘Amount Financed’.
Note
On liquidation, this amount will be treated as Principal and Profit.
If a residual amount exists for the finance, then it would be the last schedule of the account with the due date as the maximum date supported. The components will be ‘PRINCIPAL’ and ‘PROFIT’. The residual amount in case of payment in advance includes the profit. For an Operational Lease this amount will be considered fully towards the profit. For a financial lease if the payment mode is ‘In Arrears’ then the residual amount will be considered fully towards the principal.
Lease Type
Here you can select the type of lease from options given below:
- Financial Lease (F)
- Operational Lease (O)
Lease Payment Mode
Here you can select the type of payment mode from options given below:
- Payment in Arrears (R) – In this case the payment is done at the end of the schedule. The formula type ‘Amort-Payment in Arrears’ is maintained to calculate the EMI amount.
- Payment in Advance (A) – In this case payment is done at the beginning of the schedule. The amortization schedules will start from the value date onwards. The First EMI which falls on the account value date is liquidated automatically, this is allowed only if the asset tracking is not required. The formula type ‘Amort-Payment in Advance’ is maintained to calculate the EMI amount.
6.2.22 Insurance Details Button
Insurance Required
Check this box to indicate that the insurance is applicable for the account. This value will be defaulted from the product.
Insurance Company
Here you can specify the insurance company.
Click ‘Insurance Details’ button in the ‘Account Details - Main’ screen to invoke ‘Insurance Details’ screen.

The following details can be captured in this screen:
Insurance Company
Here the system displays the insurance company.
Basis Amount
Specify the initial asset cost without considering the depreciation on which insurance amount to be calculated. This will defaults to the asset cost. This can be modified during the account input.
Basis Amount Currency
Here the system displays the account currency.
Insurance Start Date
The start date of the insurance policy is displayed here.
6.2.22.1 Insurance Details
Years
Specify the year for which depreciation and insurance rates are being defined. This is populated from the product till the end of the maturity year of an account.
Depreciation Rate
Specify the depreciation rate applicable during the tenor of the finance. These are defaulted from the product and this can be modified during the booking of an account.
Insurance Rate
Specify the insurance rates applicable during the tenor of the finance. Once the insurance rate is defined for the first year the same is defaulted to the other years and you can change the insurance rate for any year during the booking of an account.
Premium Amount
The system displays the premium amount based on the policy chosen.
Policy Number
Specify the insurance policy number.
Expiry Date
The system computes the expiry date of the policy as ‘Policy Start Date + 1 year’ and displays the date here.
Note
The ‘Ins’ button is enabled only if the ‘Insurance Required’ check box is selected.
The depreciation rates and insurance rates can be entered only during the new account input. You cannot enter or modify during the amendment.
In case of pre-closure of finance, post automatic renewal of policy, the system will display a configurable override and not post the following entries:
- refund entries (for the ADCH Event)
- INSURANCE_REC adjustment entries
6.2.22.2 Over draft Details
OD Branch
The branch where the chosen overdraft account is maintained, is displayed here.
Overdraft Account
Specify the overdraft account that should be linked to the Murabaha account if the option ‘Existing OD Account’ is selected. You can select the appropriate one from the adjoining option list. This list displays all accounts under the account class linked to the Murabaha product.
OD Rebate Rate
Specify the rebate rate that should be applied to the account.
Rate Code
If the rebate rate is specified as floating, specify the rate code that should be used. If rate code is linked, the system treats the value in rebate rate as spread.
Existing OD Account
Check this option to indicate that an existing overdraft account should be linked to the Murabaha account.
The calculation of rebate amount on the unutilized portion is handled using Profit and Charges processing as follows:
Note
The rebate amount is calculated using the following formula
(OD_BAL_TOD_LIMIT * OD_REBATE_RATE * DAYS) / (YEAR * 100)
The rebate is calculated based on the rate to be applied to the OD account.
6.2.23 Inventory Tracking Button
Click ‘Inventory Tracking’ button in the ‘Account Details - Main’ screen to invoke ‘Inventory Tracking Details’ screen. This button will be enabled only if the ‘Use Inventory’ option is selected at the product level.
The following details can be entered in this screen:
Asset Category
Specify the category of the asset from the option list. The option list contains all asset categories where ‘Use Inventory’ option is checked. Click ‘Populate Inventory’ button to populate all authorized inventory contracts.
Asset Cost
The system displays asset costs from the inventory contracts.
Quantity
The system displays asset quantity from the inventory contracts.
Unit Price
The system displays unit price from the inventory contracts.
Number Units Required
Specify the number of units required for the inventory contracts. However it depends on available quantity. The number of units required should be less than or equal to available quantity.
Total Cost
The system displays the total cost for each inventory based on the number of units required.
6.2.24 Collaterals Button
You can capture details of collaterals associated with the account using the ‘Collateral Details’ screen. Click ’Collateral’ button in the ‘Account Details – Account Details’ screen to invoke this screen.

Here you can capture the following details:
CIF
Specify the customer ID for which you wish to capture collateral details. The adjoining option list displays all open and authorized CIF maintained in the system. You can select the appropriate one.
Name
The system displays the name of the customer based on the CIF ID selected.
Collateral ID
Specify a unique code to identify the collateral. The code can be alphanumeric and can have upto 16 characters.
Currency
Specify the currency of the collateral. The adjoining option list displays all valid currency codes maintained in the system. You can select the appropriate one.
Value
Specify the value of the collateral.
Type
Specify the type to which the collateral belongs. The adjoining option list displays all types maintained using the ‘Types’ screen. You can select the appropriate one.
Start Date
Specify the start date of the collateral.
Revision Date
Specify the revision date for the collateral.
Expiry Date
Specify the expiry date for the collateral.
Issuer Name
Specify the name of the issuer of the collateral.
Description
Here you can capture additional details for collateral.
6.2.25 Party Details Button
Allow Multi Party
If you select this option, the system will allow you to capture of contractor details. This is applicable for Istisna Accounts only. You can capture the contractor details by clicking ’Party Details’ button in the ‘Account Details’ screen to invoke the ‘Party Details’ screen. It will show the contractor details.

You can enter the following details:
CIF
Specify the CIF id of the contractors from the option list.
Settlement Branch
Specify the branch of the bank from the option list, in which the settlement is going to take place.
Settlement Account
Specify the account of the contractor from the option list, through which the settlement is going to take place.
Details of the Primary Applicants
You can maintain the following details of the Primary applicants:
Customer ID
This detail is defaulted from the main screen. Enter the Customer ID of the primary applicant in this field.
Customer Name
After you enter the Customer ID, the system displays the Name of the primary applicant in this field.
6.2.26 Block Details Button
Oracle FLEXCUBE repays finance from multiple accounts. In Oracle FLEXCUBE, the finance settlement account is the primary account and all the other accounts linked to the primary account in the structure group act as cover accounts. While paying the settlement if the primary account has insufficient amount, the system will check the cover accounts for the remaining amount according to the preference.
In case of single account structure, the primary account will have only one cover account and the cover account will have only one primary account for making the account structure free of duplicate accounts. Every account has its own account structure. While closing an account under an account structure, you need to remove that account from the account structure manually else the system will not allow the closure of the account. If you want to amend an account structure, the system will check whether any amount block is open on the account structure. If any amount block is opened, then the system will throw an error. You can also configure the error code.
Amount Blocked
Check this box to indicate whether any amount block has to be created on the settlement account during the disbursement of the finance.
Amount
Here you can specify the amount that needs to be automatically blocked.
Remarks
Specify the remarks for the amount blocked. This can be modified.
For further details on amount block, please refer to ‘Capturing Escrow Transfer Details’ section in the ‘Maintaining Customer Accounts’ chapter if CASA User Manual
Click ’Block Details’ button in the ‘Account Details’ screen to invoke the ‘Amount Block Details’ screen. It will show the list of amount blocks created for the account during disbursement.

Sequence Number
Here the system displays a unique serial number for the amount block.
Date
Here the system displays the date on which the amount block is created.
Acc Branch
Here the Branch in which the account is used for amount block is indicated.
Account Number
In this field the system displays the account in which the block is created.
Account Ccy
In this field the system display the currency of the account.
Amount
Here the system displays the amount that is blocked.
Amount Currency
Here the system displays the Account currency.
Note
The ’Block Details’ button will be disabled during the new account input.
The following validations have to be done:
- The amount for blocking should be less than or equal to the finance principal amount in the account details.
- The amount block details can be inputted, only if the credit settlement mode for the component ‘PRINCIPAL’ is CASA in the manual disbursement.
- Amount block details are allowed to enter only during the new account creation and when Amount Blocked is checked.
- Amount block details are allowed to modify only before first authorization of an account.
6.2.27 Multiple Asset Button
Click ‘Multiple Asset’ button to capture additional details about multiple assets linked to the account. Based on the product code chosen, the system identifies the asset category linked to the account and displays the appropriate screen. For instance, if the asset type defined for the linked product is ‘Building Info’ then the following screen will be displayed on clicking this button.

Here you can capture the following details:
Account Number
The account number is defaulted from the ‘Account Details - Main’ screen.
Asset Sequence Number
The system generates a sequence number for the asset and displays it here.
Status
The status of the asset is displayed here. The statuses available are ‘Active’ and ‘Settled’. During account initiation the status will be ‘Active’. Once the prepayment of the asset begins the asset will be completely settled. Then the status will change to ‘Settled’. An asset can only be completely settled. No partial payment is allowed.
6.2.27.1 Capturing Building Material Information
Goods Type
Select the type of goods by clicking on the option list. The different types of goods that you have maintained using the ‘Limits Type Maintenance’ screen will be listed here for selection.
Description
Specify a description for the building material to be financed.
Hamish Jiddayah
Specify the amount paid as down payment.
Currency
Specify the currency of the account.
Asset Finance Amount
Specify the amount financed for the asset.
Vendor Code
Select the vendor code from the option list. This list displays all vendor codes maintained through the ‘Vendor Maintenance’ screen.
Vendor Name
The vendor name corresponding to the vendor code selected is displayed here.
Proforma Invoice Number
Specify the invoice number here.
Proforma Invoice Date
Specify the date of invoice creation here.
6.2.27.2 Capturing Balance Details
Outstanding Principal
The outstanding principal on the finance contract for this building material is displayed here.
Outstanding Profit
The outstanding profit on the finance contract for this building material is displayed here.
If the asset type defined for the linked product is ‘Vehicle Info’, then the following screen will be displayed on clicking ‘Multiple Asset’ button.
Here you can capture the following details:
Account Number
The account number is defaulted from the ‘Account Details - Main’ screen.
Asset Sequence Number
The system generates a sequence number for the asset and displays it here.
Status
The status of the asset is displayed here. The statuses available are ‘Active’ and ‘Settled’. During account initiation the status will be ‘Active’. Once the prepayment of the asset begins the asset will be completely settled. Then the status will change to ‘Settled’. An asset can only be completely settled. No partial payment is allowed.
Capturing Vehicle Information
Asset Type
Select the type of asset from the drop-down list. The options available are:
- New - New Asset
- Used - Used Asset
Asset Category
Select the category to which the asset belongs from the option list. This list displays all options maintained using the ‘Limits Type Maintenance’ screen.
Application Number
Specify the application number for the asset here.
Color
Specify the color of the vehicle.
Class
Specify the class of the vehicle.
Number of Cylinder
Specify the number of cylinders for the vehicle. This has to be a numeric value.
Vehicle Condition
Describe the condition of the vehicle.
Vehicle Description
Enter a description for the vehicle. For example: Car, Van etc.
Make
Select the code indicating the make of the vehicle from the option list. All the vehicle maker codes, that you have maintained in the ‘Vehicle Maker Details’ screen, are listed for selection.
Sub Model
Select the sub-model of the vehicle from the adjoining option list. This list displays all models maintained using the ‘Vehicle Maker Details’ screen.
Year Model
Specify the year when the model was first launched.
Year of Manufacture
Specify the year in which the vehicle was manufactured.
Engine Number
Specify the engine number of the vehicle here. This can be an alphanumeric value.
Chassis Number
Specify the chassis number of the vehicle here.
Specifying Registration Details
Type
Specify the registration type here. You can choose from the following values in the adjoining drop-down list:
- S – Self
- TP – Third Party
- N - None
Name
Specify the name in which the vehicle is registered.
Emirate
Select the emirate in which the vehicle was registered, from the option list. All the emirates maintained using the ‘Limits Type Maintenance’ screen will be listed for you to select.
Registration Number
Specify the registration number of the vehicle here.
Date
Specify the date on which the vehicle was registered.
Delivery Date
Specify the date on which the vehicle was delivered.
Specifying Vendor Details
Vendor Code
Select the vendor code from the option list. All the vendor codes maintained using the ‘Vendor Maintenance’ screen, are listed for you to select.
Vendor Name
Once the Vendor code is selected the corresponding vendor name is defaulted here.
Agent Sales Staff Name
Specify the name of the agent sales staff.
Agent Name
Specify the name of the agent.
Agent Branch
Specify the agent branch.
Specifying Amount Details
Currency
Specify the currency of the account.
Requested Amount
Specify the amount requested to be financed.
% Amt Financed/Appraised Value
Specify the percentage of amount financed that is appraised.
Specifying Appraiser Details
Appraiser Name
Specify the name of the appraiser here.
Appraised Value
Specify the value appraised.
Appraisal Date
Specify the date on which the appraisal was done.
Specifying Total Amount Details
Hamish Jiddayah
Specify the amount paid as down payment.
Vehicle Value
Specify the value of the vehicle.
Maintenance Cost
Specify the maintenance cost of the vehicle.
Insurance Amount
Specify the insurance amount for the vehicle.
Asset Finance Amount
Specify the amount financed for the asset.
Specifying Insurance Details
Insured By Bank
Check this box to indicate that the asset is insured by the bank.
Insurance Company
Select the name of the company through which the assets is insured.
Premium Amount
Specify the premium amount to be paid for the insurance.
Specifying Balance Details
Outstanding Principal
The outstanding principal on the account for this vehicle is displayed here.
Outstanding Profit
The outstanding profit on the account for this vehicle is displayed here.
If the asset type defined for the linked product is ‘Goods Info’, then the following screen will be displayed on clicking ‘Multiple Asset’ button.

Here you can capture the following details:
Account Number
The account number is defaulted from the ‘Account Details - Main’ screen.
Asset Sequence Number
The system generates a sequence number for the asset and displays it here.
Status
The status of the asset is displayed here. The statuses available are ‘Active’ and ‘Settled’. During account initiation the status will be ‘Active’. Once the prepayment of the asset begins the asset will be completely settled. Then the status will change to ‘Settled’. An asset can only be completely settled. No partial payment is allowed.
Goods Details
Brand
Select the brand of the goods by clicking on the option list. The different brands that you have maintained using the ‘Limits Type Maintenance’ screen will be listed here for selection.
Description
Specify a description for the goods brand.
Quantity
Specify the quantity of good here.
Delivery Location
Specify the location where the goods have to be delivered.
Delivery Date
Specify the date on which the goods have to be delivered.
Currency
Specify the account currency here.
Hamish Jiddayah
Specify the amount paid as down payment.
Asset Finance Amount
Specify the amount financed for the asset.
Specifying Vendor Details
Vendor Code
Select the vendor code from the option list. All the vendor codes maintained using the ‘Vendor Maintenance’ screen, are listed for you to select.
Vendor Name
The vendor name corresponding to the vendor code selected is displayed here.
Specifying Balance Details
Outstanding Principal
The outstanding principal on the account for the goods is displayed here.
Outstanding Profit
The outstanding profit on the account for the goods is displayed here.
If the asset type defined for the linked product is ‘Property Info’, then the following screen will be displayed on clicking ‘Multiple Asset’ button.

Here you can capture the following details:
Account Number
The account number is defaulted from the ‘Account Details - Main’ screen.
Asset Sequence Number
The system generates a sequence number for the asset and displays it here.
Status
The status of the asset is displayed here. The statuses available are ‘Active’ and ‘Settled’. During account initiation the status will be ‘Active’. Once the prepayment of the asset begins the asset will be completely settled. Then the status will change to ‘Settled’. An asset can only be completely settled. No partial payment is allowed.
6.2.27.3 Capturing Property Details
Property Type New
Select if the property is new or old. The options available are:
- Y - Yes
- N - No
Type of Property
Select the type of property from the option list. The types of properties that you have maintained using the ‘Limits Type Maintenance’ screen will be listed here for selection.
Description
Specify a description for the property.
Builder Name
Specify the name of the builder of the property.
Project Name
Specify the name of the project.
Building Name
Specify the name of the building for which finance is taken
Wing Name
Specify the name of the wing in which the property is.
District/Area (Hoz Raqam)
Select the district or area within the selected Emirate by clicking on the option list. The different districts within the Emirates that you have maintained using the ‘Limits Type Maintenance’ screen will be listed here for selection.
City
Select the city where the property is by clicking on the option list. The different cities that you have maintained using the ‘Limits Type Maintenance’ screen will be listed here for selection.
Area in another Country
Select the area in another country where the property is by clicking on the option list. The different areas in another country that you have maintained using the ‘Limits Type Maintenance’ screen will be listed here for selection.
Plot Number
Specify the plot number here.
Property Status
Specify the status of the property financed.
Property Area
Specify the area of the property.
Property Usage
Specify the usage of the property here. For example: Primary, Secondary etc.
Date of Completion
Specify the date of completion of the property construction.
Title Deed Number
Specify the title deed number. This has to be an alphanumeric value.
Registered on Name
Specify on whose name the property is registered.
Title Deed Issued From
Specify from where the title deed was issued.
Registration Number
Specify the registration number of the property here.
Date
Specify the date on which the property was registered.
Title Deed Issue Date
Specify the date on which the title deed was issued.
Villa/Apartment Number
Specify the number of the villa or the apartment.
Building Compound Name
Specify the name of the compound in which the building is located.
Street Name
Specify the name of the street in which the property is located.
PO Box
Specify the post office box number of the location where the property is located.
Emirate
Select the Emirate where the property is by clicking on the option list. The Emirates that you have maintained using the ‘Limits Type Maintenance’ screen will be listed here for selection.
Area within Emirate
Specify the area within the selected Emirate by clicking on the option list. The different areas with Emirate that you have maintained using the ‘Limits Type Maintenance’ screen will be listed here for selection.
Country
Specify the country where the property.
Mortgage Degree
Specify the degree of mortgage of the property.
Lot Number
Specify the lot number of the property.
6.2.27.4 Specifying Vendor Details
Vendor Code
Select the vendor code from the option list. All the vendor codes maintained using the ‘Vendor Maintenance’ screen, are listed for you to select.
Vendor Name
The vendor name corresponding to the vendor code selected is displayed here.
6.2.27.5 Specifying Amount Details
Currency
Specify the currency of the account.
Requested Amount
Specify the amount requested for finance.
Hamish Jiddayah
Specify the amount paid as down payment.
Property Value
Specify the value of the property here.
Insurance Value
Specify the amount for which the property is insured.
Asset Finance Amount
Specify the amount financed for the asset.
6.2.27.6 Specifying Insurance Details
Insurance Company
Select the name of the company from which insurance coverage is taken for the property.
Insurance Paid By
Specify by whom the insurance for the property is paid.
Premium Amount
Specify the premium amount to be paid for the insurance.
Insured Name
Specify on whose name the insurance is taken.
Insurance Expiry Date
Specify the date on which the insurance expires.
6.2.27.7 Specifying Evaluator Details
Name
Specify the name of the evaluator in this field.
Value
Specify the evaluation value in this field.
Date
Specify the date of evaluation in this field.
6.2.27.8 Specifying Balance Details
Outstanding Principal
The outstanding principal on the finance contract for this property is displayed here.
Outstanding Profit
The outstanding profit on the finance contract for this property is displayed here.
Vendor Type
Select the vendor type from the drop-down list. The options available are:
- C - Contractor
- N - Consultant
- P - Project Manager
Chosen By
Select by whom the property is chosen from the drop-down list. The options available are:
- B - Bank
- C - Customer
Code
Select the vendor code from the options list available.
Name
The name of the vendor is displayed here.
Account Value
Specify the value of the account here.
Date
Specify the date of the contract here.
Construction Start Date
Specify the date on which the construction of the property started.
Proposed Completion Date
Specify the proposed date of completion of the property.
If the asset type defined for the linked product is ‘Equipment Info’, then the following screen will be displayed on clicking ‘Multiple Asset’ button.
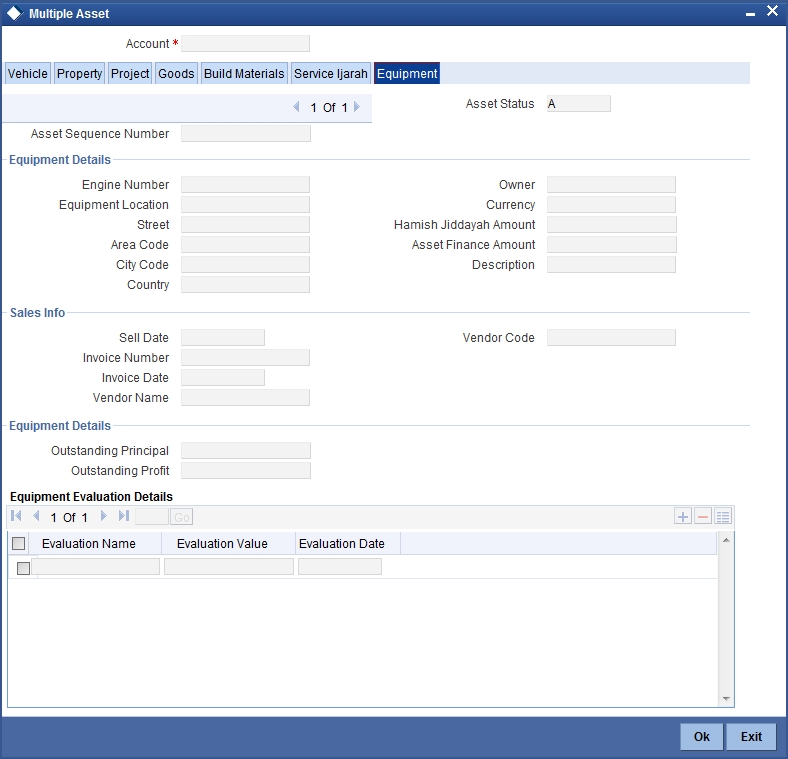
Here you can capture the following details:
Account Number
The account number is defaulted from the ‘Account Details - Main’ screen.
Asset Sequence Number
The system generates a sequence number for the asset and displays it here.
Status
The status of the asset is displayed here. The statuses available are ‘Active’ and ‘Settled’. During account initiation the status will be ‘Active’. Once the prepayment of the asset begins the asset will be completely settled. Then the status will change to ‘Settled’. An asset can only be completely settled. No partial payment is allowed.
6.2.27.9 Specifying Equipment Details
Engine Number
Specify the engine number of the equipment here.
Equipment Location
Specify the location where the equipment is.
Street
Specify the name of the street where the equipment is.
Area
Select the area where the equipment is from the option list. The different areas that you have maintained using the ‘Limits Type Maintenance’ screen will be listed here for selection.
City
Select the city where the equipment is from the option list. The different cities that you have maintained using the ‘Limits Type Maintenance’ screen will be listed here for selection.
Country
Select the country where the equipment is from the option list. The different countries that you have maintained using the ‘Limits Type Maintenance’ screen will be listed here for selection.
Owners
Specify the name of the person who owns the equipment.
Description
Enter a description for the equipment.
Currency
Specify the currency of the account.
Hamish Jiddayah
Specify the amount paid as down payment.
Asset Finance Amount
Specify the amount financed for the asset.
6.2.27.10 Specifying Seller Details
Vendor Code
Select the vendor code from the option list. All the vendor codes maintained using the ‘Vendor Maintenance’ screen is listed for you to select.
Vendor Name
The vendor name corresponding to the vendor code selected is displayed here.
Selling Date
Specify the date on which the equipment was sold.
Invoice Date
Specify the date on which the invoice was created.
Invoice Number
Specify the invoice number here.
6.2.27.11 Specifying Balance Details
Outstanding Principal
The outstanding principal on the account for this equipment is displayed here.
Outstanding Profit
The outstanding profit on the account for this equipment is displayed here.
6.2.27.12 Specifying Evaluator Details
Name
Specify the name of the evaluator here.
Value
Specify the evaluated value of the equipment.
Date
Specify the date of evaluation.
If the asset type defined for the linked product is ‘Project Info’, then the following screen will be displayed on clicking ‘Multiple Asset’ button.

Here you can capture the following details:
Account Number
The account number is defaulted from the ‘Account Details - Main’ screen.
Asset Sequence Number
The system generates a sequence number for the asset and displays it here.
Status
The status of the asset is displayed here. The statuses available are ‘Active’ and ‘Settled’. During account initiation the status will be ‘Active’. Once the prepayment of the asset begins the asset will be completely settled. Then the status will change to ‘Settled’. An asset can only be completely settled. No partial payment is allowed.
6.2.27.13 Specifying Project Details
Sector of Investment
Select the sector of investment from the option list. The different sectors of investment which you have maintained using the ‘Limits Type Maintenance’ screen will be listed here for selection.
Currency
Specify the currency of the account.
Feasibility Study Initiator
Specify the name of the person initiating the feasibility study.
Expected Profit
Specify the expected profit for the project here.
Hamish Jiddayah
Specify the amount paid as down payment.
Expected Expiry Date
Specify the expected expiry date of the project here.
Asset Finance Amount
Specify the amount financed for the asset.
6.2.27.14 Capturing Outstanding Details
Outstanding Principal
The outstanding principal on the account for this project is displayed here.
Outstanding Profit
The outstanding profit on the account for this project is displayed here.
Vendor
Select the vendor type from the drop-down list. The options available are:
- C - Contractor
- N - Consultant
- P - Project Manager
Chosen By
Select the entity that chose the project, from the drop-down list. The options available are:
- B - Bank
- C - Customer
Code
Specify the vendor code here. The option list displays all vendor codes maintained through the ‘Vendor Maintenance’ screen.
Name
The system displays the vendor name here based on the code specified.
Account Value
Specify the value of the finance here. This will be same as the total finance amount.
Date
Specify the date of the account here.
Construction Start Date
Specify the date on which construction had started.
Proposed Completion Date
Specify the proposed date of completion of the project.
If the asset type defined for the linked product is ‘Service Ijarah Info’, then the following screen will be displayed on clicking ’Multiple Asset’ button.

Here you can capture the following details:
Account Number
The account number is defaulted from the ‘Account Details - Main’ screen.
Asset Sequence Number
The system generates a sequence number for the asset and displays it here.
Status
The status of the asset is displayed here. The statuses available are ‘A’ (Active) and ‘S’ (Settled). During account initiation the status will be ‘A’. Once the prepayment of the asset begins the asset will be completely settled. Then the status will change to ‘S’. An asset can only be completely settled. No partial payment is allowed.
6.2.27.15 Specifying Goods Ijarah Details
Type of Goods
Select the type of goods here from the option list. The different types of goods which you have maintained using the ‘Limits Type Maintenance’ screen will be listed here for selection.
Brand
Select the brand of the goods here from the option list. The different brands of goods which you have maintained using the ‘Limits Type Maintenance’ screen will be listed here for selection.
Quantity
Specify the quantity of goods here.
Delivery Date
Specify the date on which the goods should be delivered.
Delivery Location
Specify the location where the goods have to be delivered.
6.2.27.16 Specifying Educational Ijarah Details
Course Name
Specify the name of the course here.
Beneficiary
Specify the name of the beneficiary here.
Start Date
Specify the date on which the course starts.
End Date
Specify the date on which the course ends.
6.2.27.17 Specifying Rent Ijarah Details
Rent Location
Specify the location of the rented building.
Unit Number
Specify the unit number of the rented building.
Description
Specify a description for the rented property.
Plot Number
Specify the plot number of the rented building.
Building Name
Specify the name of the rented building.
Project Name
Specify the project name of the rented building.
Area within Emirate
Select the area where the rented property is by clicking on the option list. The areas that you have maintained using the ‘Limits Type Maintenance’ screen will be listed here for selection.
Emirate
Select the Emirate where the rented property is by clicking on the option list. The Emirates that you have maintained using the ‘Limits Type Maintenance’ screen will be listed here for selection.
Total Area
Specify the total area of the rented building.
Built Up Area
Specify the built up area of the rented building.
Number of Storey
Specify number of storey the rented building has.
Start Date
Specify the date from when the building is taken on rent.
End Date
Specify the date till which the building is rented out.
6.2.27.18 Specifying Events Ijarah Details
Type
Specify the type of event.
Location
Specify the location where the event is conducted.
Plot Number
Specify the plot number of the building where the event is going to take place.
Description
Specify a description for the event.
Building Name
Specify the name of the building where the event is going to take place.
Area
Select the area where the building is. The areas that you have maintained using the ‘Limits Type Maintenance’ screen will be listed here for selection.
Emirate
Select the Emirate where the building is by clicking on the option list. The Emirates that you have maintained using the ‘Limits Type Maintenance’ screen will be listed here for selection.
Hotel Total Area
Specify the total area of the hotel where the event is going to take place.
Capacity
Specify the total seating capacity of the hotel.
6.2.27.19 Specifying Medical Ijarah Details
Description
Specify a description of the medical treatment.
Beneficiary
Specify the name of the beneficiary here.
Start Date
Specify a start date for the medical treatment.
End Date
Specify an end date for the medical treatment.
6.2.27.20 Specifying Common Information
Hamish Jiddayah
Specify the amount paid as down payment.
Asset Finance Amount
Specify the amount financed for the asset.
Description
Enter a brief description for the Ijarah.
Vendor Code
Select the vendor code from the option list. All vendor codes maintained through the ‘Vendor Maintenance’ screen are available for selection.
Vendor Name
The name of the selected vendor is displayed here.
Currency
Specify the currency of the account.
While savings the record, the system will add up the asset value and verify the total asset cost against the range maintained for the product. If the asset cost exceeds the range maintained for the product, the system will display an override message. If the asset currency is different from the currency in which the product level range is maintained, the system will use the standard mid-rate for conversion.
6.2.28 Multifinance Button
Click ‘Multi Finance’ button to invoke the ‘Multi Finance Company’ screen. You can capture details of individual borrowers here.

You can maintain the following details here:
Borrower Id
Specify the Borrower ID. For an existing customer you can selected from the available option list.
Borrower name
Specify the Borrower name.
Currency
Specify the financed currency. The adjoining option list displays all valid currency codes maintained in the system. You can select the appropriate one.
Amount
Specify the financed amount.
Rate
Specify the Profit Rate.
Value Date
Enter the Value date of the finance using the date button.
Maturity Date
Enter the maturity date in this field.
Remarks
Specify the remarks, if any.
6.2.28.1 Fields Tab
UDFs are additional fields that are available for use depending on the bank’s requirement. You can define UDFs in the ‘UDF Details’ tab. In the ‘Fields’ tab of the screen, you can associate these custom fields with the product.
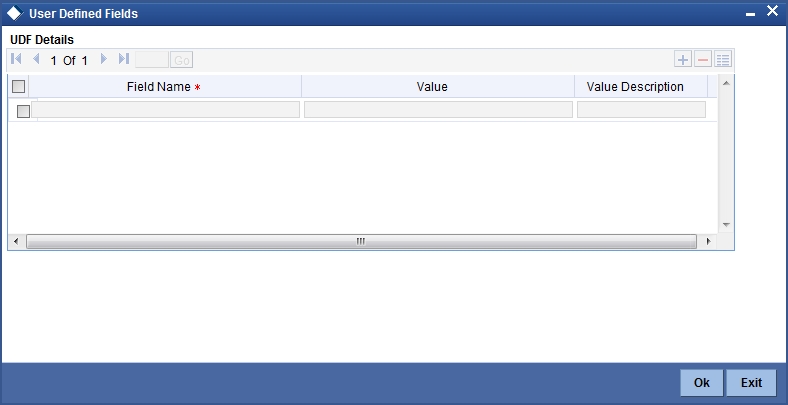
The UDFs are segregated based on the ‘Field Type’, into the following:
- Character Fields
- Number Fields
- Date Fields
When you select an UDF from the option list, the description is also displayed in the adjacent field.
6.2.29 Viewing Summary for CL Accounts
You can view the summary of the CL accounts using ‘Accounts Summary’ screen. You can invoke the ‘Account Summary’ screen by typing ‘CISACCNT’ in the field at the top right corner of the Application tool bar and clicking the adjoining arrow button. A screen giving all the details of the accounts is displayed.

6.3 Ar Rahnu Account Details
This section contains the following topics:
- Section 6.3.1, "Maintaining Ar-Rahnu Account Details"
- Section 6.3.2, "Rollover Tab"
- Section 6.3.3, "Viewing Ar-Rahnu Account Details"
6.3.1 Maintaining Ar-Rahnu Account Details
Ar-Rahnu transaction represents a collateral based financing. The customer provides gold as collateral against which the bank provides finance at no profit. However, Bank collects charges periodically towards safekeeping of the collateral.
Oracle FLEXCUBE facilitates maintenance of collateral and booking of the financing transaction using ‘Ar-Rahnu Account Input’ screen. You can invoke ‘Ar-Rahnu Account Details’ screen by typing ‘CIDARANT’ in the field at the top right corner of the Application tool bar and clicking the adjoining arrow button.

You can maintain the following parameters here:
6.3.2 Rollover Tab
Click ‘Rollover’ tab to maintain rollover details.

You can maintain the following rollover details here:
Ar-Rahnu Extensions
Specify the number of extensions or rollovers you want to allow for the Ar-rahnu account.
For details about the remaining fields in the tabs and buttons of ‘Ar-Rahnu Account Input’ screen refer ‘Account Main Details/Light Finances’ section of the ‘Account Creation’ chapter of this module.
The system validates the following parameters while saving an Ar-Rahnu account:
- The Linked % of the linkage types ‘New Collateral’ and ‘Collateral’ should be 100. If not 100, then the system displays the error message as ‘The Linked % of the linkage type ‘New Collateral’ and ‘Collateral’ should be 100’.
- The Amount Financed and the Linked Amount of the Collateral Linkage Details Block should be equal. If not equal, then the system displays the error message as ‘The amount financed should be equal to the sum of linked amount of collateral linkage details’.
- The number of schedules for the principal disbursement must be maintained as ‘1’. If not, then the system displays the error message as ‘For Arrahnu Account the Principal Disbursement schedule should be 1’ while saving the product.
- The liquidation mode of the principal component is maintained as Manual. If it is maintained as auto, then the system displays the error message as ‘The liquidation mod of PRINCIPAL component should be manual for Ar-Rahnu products’.
- The number of rollovers should be less than or equal to Ar-Rahnu Extensions. If the number of rollovers is greater, then the system displays the override message as ‘The number of Ar-Rahnu extensions exceed the Ar-Rahnu extensions maintained at account level’ while saving the rollover.
- The ‘Allow Rollover’ must be maintained as 'Yes'. If maintained as 'No', then the system displays the following error message as ‘For Ar-Rahnu products the Rollover Allowed must be selected’ while saving the account.
- The ‘Rollover Mode’ must be maintained as 'Manual'. If maintained as 'Auto', then the system displays the error message as ‘For Ar-Rahnu the rollover should be manual’ while saving the account.
- You can maintain SDEs and UDEs specific to Ar-Rahnu accounts at ‘Islamic Financing Product’ level.
While manually disbursing an Ar-Rahnu product category account, the system validates if the disbursement amount is equal to the amount financed. If the they are not equal, then the system displays the error message as ‘For ARRAHNU accounts the full amount financed should be disbursed’.
Ar-Rahnu extensions or re-pledge are processed through account rollover, because when a part of the financed amount is paid, the remaining amount is converted as a new financing account.
6.3.3 Viewing Ar-Rahnu Account Details
You can view details related to Ar-Rahnu accounts using ‘Accounts Summary’ screen. You can invoke the ‘Account Summary’ screen by typing ‘CISARANT’ in the field at the top right corner of the Application tool bar and clicking the adjoining arrow button. A screen giving all the details of the accounts is displayed.
You can query a record using the following options:
Account
Specify a valid account based on which you need to view record from the adjoining option list.
Branch
Specify a valid code of the branch based on which you need to view record from the adjoining option list.
Customer ID
Specify a valid customer ID based on which you need to view record from the adjoining option list.
Product Code
Specify a valid code of the product based on which you need to view record from the adjoining option list.
Value Date
Specify a valid value date based on which you need to view record from the adjoining calendar.
Maturity Date
Specify a valid maturity date based on which you need to view record from the adjoining calendar.
Currency
Specify a valid code of the currency based on which you need to view record from the adjoining option list,
Amount Financed
Specify a valid amount financed based on which you need to view record from the adjoining option list.
User Defined Status
Specify a valid status defined by the user based on which you need to view record from the adjoining option list
Alternate Account Number
Specify a valid alternate account number based on which you need to view record from the adjoining option list
Account Status
Select an authorization status of the Ar-Rahnu accounts based on which you need to view record from the adjoining drop-down list. This list provides the following options:
- Active – Select this option to view records which are active.
- Liquidated – Select this option to view records which are liquidated.
- Reversed – Select this option to view records which are reversed.
- Hold – Select this option to view records which are on hold.
- Inactive – Select this option to view records which are inactive.
- Uninitiated – Select this option to view records which are uninitiated.
Authorization Status
Select an authorization status of the Ar-Rahnu accounts based on which you need to view record from the adjoining drop-down list. This list provides the following options:
- Authorized – Select this option to view records which are authorized.
- Unauthorized – Select this option to view records which are unauthorized.
Click ‘Search’ button. The system identifies all records satisfying the specified criteria and displays the following details for each one of them:
- Account
- Branch Code
- Customer ID
- Product Code
- Value Date
- Maturity Date
- Currency
- Amount Financed
- User Defined Status
- Alternate Account Number
- Account
- Authorized Status
6.4 Event Checklist
This section contains the following topic:
6.4.1 Maintaining Event Checklist
Event checklist is a list of items that pops up when an online function is triggered. You can invoke the ‘Check List Maintenance’ screen by typing ‘CLDCHKMT’ in the field at the top right corner of the Application tool bar and clicking the adjoining arrow button.

6.5 Down Payment Details
This section contains the following topics:
- Section 6.5.1, "Processing Down Payments"
- Section 6.5.2, "Details Button"
- Section 6.5.3, "Events Button"
6.5.1 Processing Down Payments
You can maintain details of the down payment given by the customer, after the account is booked in the Oracle FLEXCUBE. You can also capture down payment details for an existing account using the ‘Islamic Hamish Jiddayah Details’ screen. You can invoke this screen by typing ‘CIDDPMNT’ in the field at the top right corner of the Application tool bar and clicking the adjoining arrow button.
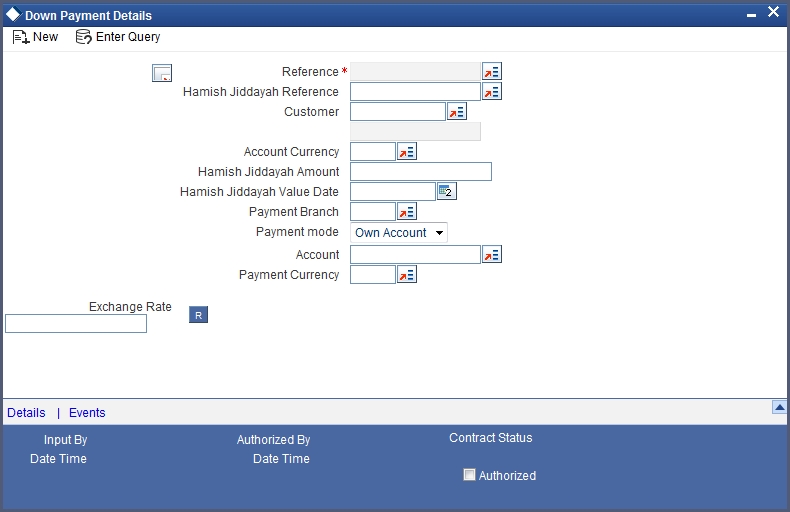
Here you need to specify the following details:
Process Ref No.
The system defaults the process reference number here. You cannot modify it.
Hamish Jiddayah Reference
You can specify the reference number of down payment from the option list. The option list displays all the uninitiated accounts.
Customer
Based on the ‘Down payment ref no.’ captured, the system populates the customer name. You cannot modify it. However, you can select the ‘Customer’ from the option list, if the down payment reference number is not captured.
Account Currency
Based on the ‘Down payment ref no.’ captured, the system populates the currency of the account. You cannot modify it. However, you can select the ‘Account Currency’ from the option list, if the down payment reference number is not captured.
Hamish Jiddayah Amount
You can enter the down payment amount received from the customer in this field.
Hamish Jiddayah Value Date
Here the value date of down payment will get defaulted to application date.
Payment Mode
You can select one of the following payment modes for the down payment of a finance from the drop down list:
- Own Account
- Account to Account
- GL
Note
For each of these payment modes a retail teller product is mapped in a factory shipped table and the ‘Track Receivable’ option is unchecked from the ’Retail Teller Product Preference’ screen for these Retail Teller products.
For more details about Retail Teller Products refer ‘The Retail Teller Module –An Overview’ chapter in the Retail Teller User Manual.
Payable GL/Account
You can select payable account from the option list. The option list displays all the accounts/ GLs based on the payment mode selected.
GL/Account Currency
Here the system defaults the account currency for the accounts. You cannot modify it. However for the payment by GL mode, you can select the account currency from the option list.
Exchange Rate
If the customer’s account currency is different from the CL account currency the system defaults the standard exchange rate. You can modify it.
6.5.2 Details Button
Click ‘Details’ button in the ‘Down Payment Details’ screen to get the ‘Down Payment – Payment Details’ screen. Using this screen, you can view the down payments details received against a Down Payment Reference Number.

6.5.3 Events Button
Click ’Events’ button in the ‘Down Payment Details’ screen and view the ‘Accounting Entries’ screen.
On saving the payment, the system will pass the following accounting entries:
| Accounting Role | Amount tag | Dr/Cr | |||
|---|---|---|---|---|---|
| CUSTOMER/GL | TXN_AMT | Dr | |||
| DPRCVDGL | OFS_AMT | Cr |
Note
While reversing the down payment, accounting entries will also be reversed with the negative values. However the reversal of down payment is not allowed, if the payment is already linked to an account and if the disbursement event of that account is already triggered.
6.6 Inactive Account Details
This section contains the following topic:
6.6.1 Capturing Finance Details
During Finance processing, it is required to capture finance details and not initiate till verification of documents, etc. This module creates a finance account in an inactive state. Inactive finances are input by a separate screen similar to the Accounts screen or by Uploads. After manual verification the account is entered as an inactive account. The account is activated once the requisite documents are received. You can invoke ‘Inactive Accounts’ screen by typing ‘CIDINADT’ in the field at the top right corner of the Application tool bar and clicking the adjoining arrow button.

The system captures the following details and generates an inactive account:
- Finance Reference Number
- Schedule Dates
- Charges
- Installment Amounts
Modifications are allowed on inactive finances even after authorisation and there are no restrictions on inactive finances modifications. Finance details are handed off to other systems. Messages such as Finance advice or Promissory Notes can also be generated.
6.6.1.1 Operations on Inactive Finances
It is possible to modify an inactive finance and save it even after authorisation. When the account is activated it will be an unauthorized account and behaves like an account directed created /uploaded into the system. It is possible to delete the same too. The user can change all finance account properties.
Click ‘Active Account’ button to activate the finance. This changes the funded status of the finance. Once activated, the account cannot be deleted after authorisation and cannot be unlocked after one save.
Accounting entries and limit updates are not called when the finance is inactive. Accounts queries do not display inactive accounts and Inactive accounts views do not show active accounts.
If an account is created after its value date, it behaves as a Back valued finance entry. If it is created after its maturity date, it behaves like an overdue account.
Inactive finances are created with a sequence that is different from the account mask maintained. Upon activation, the account mask is used to create a new account. Hence the account number of an activated account differs from its inactive version.
6.6.1.2 Activating Finances and Limit Earmarking
Inactive finances are activated by clicking on Activate Account button or through an upload. Upon finance activation, Limits Utilizations are updated. Accounting entries are passed for disbursement and for any upfront changes as defined in the product.
The earmarked amount field shows the total earmarking and an earmarking reference number is captured. Upon the actual finance initiation, utilization is made on the line and real entries passed.
6.6.1.3 Deleting Inactive finance
Inactive finances can be deleted even after the authorisation of Inactive finance account. In Bank Parameters, Site specific parameters are provided to control the automatic deletion of Inactive finances. An Inactive Finance processing supports this deletion.
6.7 Finance Simulation
This section contains the following topics:
6.7.1 Simulating a Finance
You can simulate finances to answer customer queries especially for new finances and pre-paid finances. The payment schedules of any type of Finance Products can be generated while negotiating with clients during the Presale stage.
You can use the ‘Account Simulation’ screen to simulate a finance. This screen is similar to the ‘Account Details’ screen. You can invoke this screen by typing ‘CIDSIMDT’ in the field at the top right corner of the Application tool bar and clicking the adjoining arrow button.

Simulation will function in exactly the same way as a regular finance input. All warnings and overrides associated with an actual contract save will come in a simulation. For e.g. if the finance results in the overdrawing of the customers finance line, then an Override will be thrown up. However, no data will be stored in Oracle FLEXCUBE.
Click on ’Create Active Account’ button to create a finance directly from the simulator. Only users with rights to invoke Oracle FLEXCUBE finance creation function will be allowed to create finances from the simulation function. The sequence of the Finance account thus created is based on the branch level account mask maintained.
Similarly, click on ’Create Inactive Account’ button to actually create an inactive account based on the simulated data.
A separate Sequence number is provided to create reference numbers for Simulations. These are one time reference numbers for simulation purposes only and are not used for final finance. The User Defined Reference Number facility of Oracle FLEXCUBE is used to create Finance Simulation Sequences.
If the simulator is launched from Oracle FLEXCUBE, simulations can be run several times to examine the impact of different parameters on the finance. If the simulator is invoked from a channel, all parameters should be specified afresh for each invocation.
Finance advices can be printed from the screen based on the finance account simulated. This is allowed for finance accounts created in the system prior to their being initiated. Subsequently, advices configured through the events screen will be triggered.
6.7.2 Ijarah Button
Click ’Ijarah’ button in the ‘Account Simulation - Main’ screen and invoke the ‘Ijarah’ screen.

The following details can be captured in this screen:
- Dealer
- Asset Cost
- Residual Value Basis
- Residual Value
- Residual Amount
- Lease Type
- Lease Payment Mode
6.8 Sales Confirmation
This section contains the following topics:
6.8.1 Triggering Details of Sale Confirmation
Using this screen the system can trigger the Sale Confirmation (CONF) event for an account. To invoke ‘Sale Confirmation Details’ screen from the Application Browser. You can invoke this screen by typing ‘CIDTSALE’ in the field at the top right corner of the Application tool bar and clicking the adjoining arrow button.
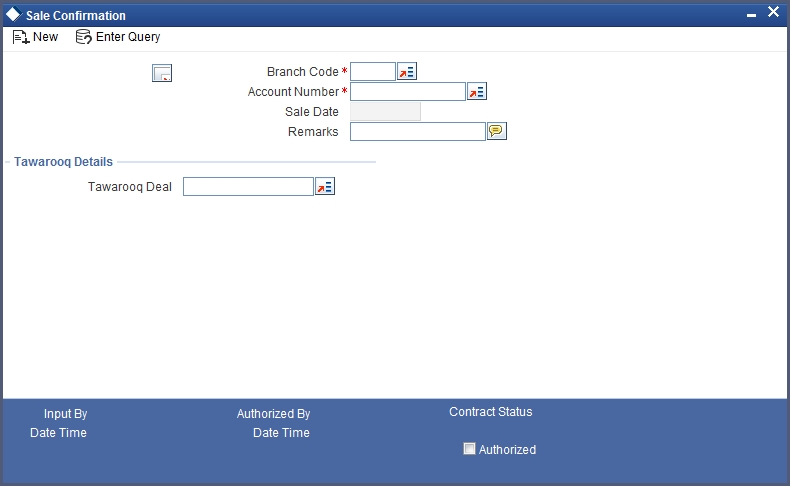
You can maintain the following details:
Branch Code
You can specify the branch code from the option list.
Account Number
You can specify the account number of the customer from the option list. The option list displays all the authorized, uninitiated accounts of the product whose ‘Sale Confirmation Required’ option is checked in the ‘Preference’ screen.
Sale Date
In this field the current application date will get defaulted.
Remarks
You can specify the remarks for the sale confirmation. This field is applicable only for the accounts under the product whose ‘Sale Confirmation Required’ option is checked in the ‘Preference’ screen.
Note
After authorizing the Screen, the CONF (Sale Confirmation) event will get triggered. However, if the value date of the account is on or before the application date then CONF (Sale Confirmation) event will trigger the Initiate or disbursement events.