9. Operations
This chapter explains the various operations that can be performed on a finance account; the most prominent being payments and amendments, funding, status change, simulation of payments, rollover etc.
This chapter contains the following sections:
- Section 9.1, "Finance Payments"
- Section 9.2, "Payments Simulation"
- Section 9.3, "Asset Closure"
- Section 9.4, "Finance Amendments"
- Section 9.5, "VAMI Simulation"
- Section 9.6, "Version History View and Reversal"
- Section 9.7, "Inactive Rollover Input"
- Section 9.8, "Manual Status Change"
- Section 9.9, "Account Renegotiation"
- Section 9.10, "Account Reassign"
- Section 9.11, "Adhoc Charge Application"
- Section 9.12, "Liquidation Suspension"
- Section 9.13, "Collateral Take Over Processing"
- Section 9.14, "Partial Write Off"
- Section 9.15, "Collateral Takeover Processing Summary"
9.1 Finance Payments
This section contains the following topics:
- Section 9.1.1, "Financing Payments"
- Section 9.1.2, "Payment Details Tab"
- Section 9.1.3, "Compensation Rates Tab"
- Section 9.1.4, "Fields Tab"
- Section 9.1.5, "Check List Tab"
- Section 9.1.6, "Linkage Details Tab"
9.1.1 Financing Payments
The Finance Payments screen allows you to make payments towards a finance. You can invoke this screen by typing ‘CIDBKPMT’ in the field at the top right corner of the Application tool bar and clicking the adjoining arrow button.
9.1.1.1 Amount Dues and Payment Details
Islamic Financing module supports Multi Mode settlements. The various payment modes allowed are Cash/Teller, CASA, Clearing, Electronic Pay Order, Credit Card, Debit Card, External Account, Internal Check and Instrument. Multi mode settlement mechanism facilitates payment of finance installment.
Payment can be against any or all or a combination of the components due. Prepayments will attract a pre-payment compensation to be charged. The payment computed by the system can be overridden by the amount negotiated by the customer and a subsidy is captured as amount waived. The amount accepted is either waived or capitalized. Depending on the mode selected, additional payment details such as clearing house details, settlement products to be used if the settlement is through another product of Oracle FLEXCUBE, etc are captured.
Compensation on Payment
- Prepayment Compensation - The customer can choose to prepay the finance amount, either partly or as a whole before the due date. This may attract a Prepayment Compensation.
- Compensation on delayed payment - In case a customer defaults in paying back the finance amount in time, then the amount becomes an over due and a compensation may be applicable. However, the customer is allowed to negotiate with the bank in order to subsidize the amounts due. Once the bank and the customer decide upon a mutually agreeable amount, the actual payable amount is replaced by this new amount and will be used in lieu of the original amount due.
The ‘CI Payment Detailed’ screen captures payment details such as Payment Mode, Amount Settled, Settlement Currency and Exchange Rate. The payment is against any of the finance components such as principal, profit, late fee etc. Note that you will not be able to make any pre-payment for a finance wherein the box ‘Recompute schedules on IRR’ is checked for the linked product. You can invoke the ‘CI Payment Detailed’ screen by typing ‘CIDPYMNT’ in the field at the top right corner of the Application tool bar and clicking the adjoining arrow button.
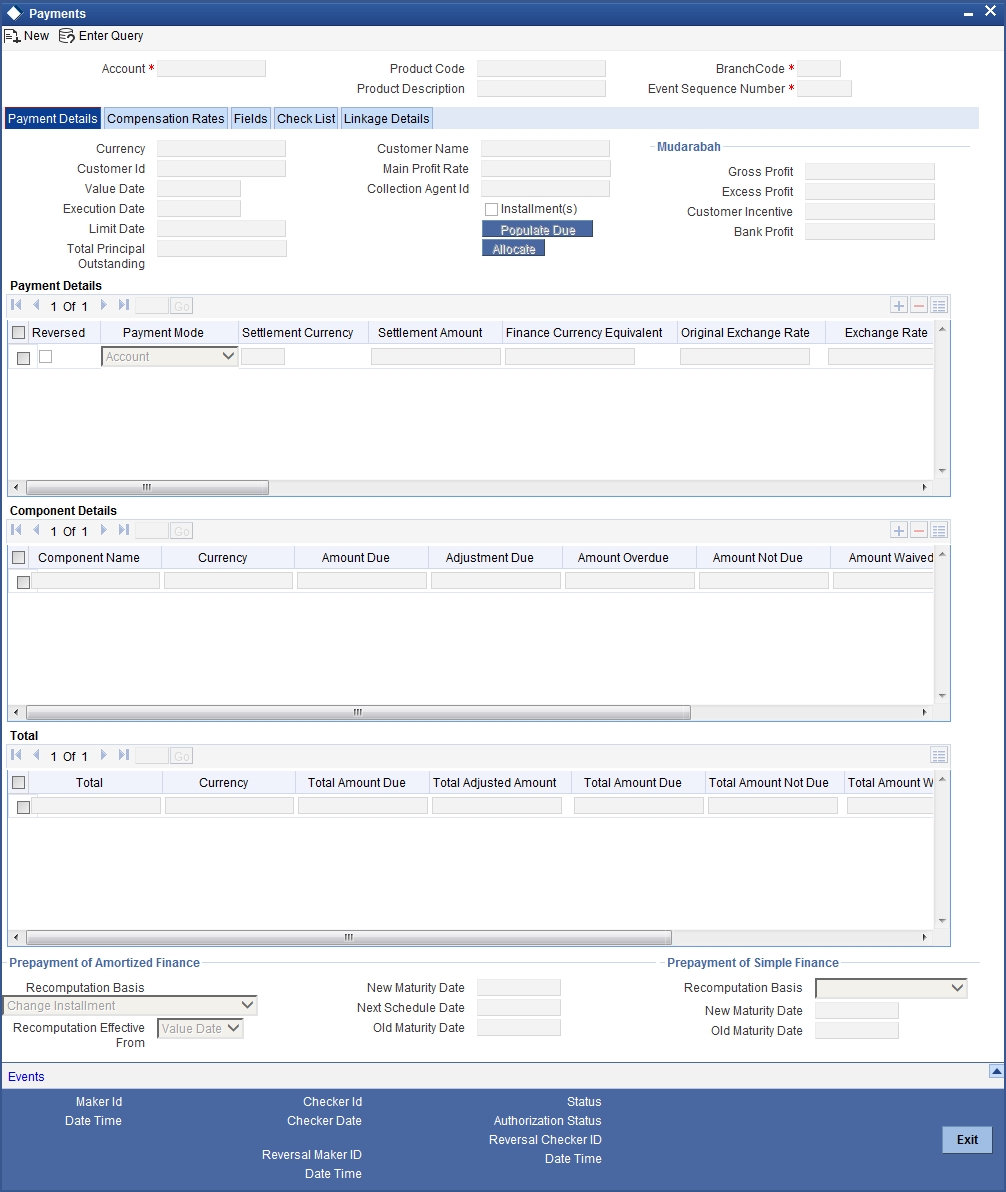
To make a payment, click on ‘New’ icon in the toolbar and then capture the ‘Branch Code’, ‘Account Number’, ‘Value Date’, ‘Limit Date’ and ‘Execution Date’.
Click on the ‘Populate Due’ button to populate the due amount component wise against the account. After this, you can enter the payment details. Alternately, you can also click on ‘Allocate’ button to allocate the settlement amounts across the various components based on the ‘Schedule Order’ and ‘Liquidation Order’.
In case of manual liquidations, on click of ‘Populate Due’ button, the system will default a settlement row with settlement account as service account maintained and settlement amount as the amount available in the service account and settlement currency is the service account currency.
The following details are captured here:
Branch Code
Click on the option list to select the branch code of the account towards which the payment is made. A list of branch codes is displayed. Click on a value to select it.
Account Number
Select the customer’s account number by clicking on the option list. A list of values is displayed. Click on a value to select it.
Event Sequence No
The system displays the event sequence number of the payment in the account’s life history.
9.1.2 Payment Details Tab
Value Date
Enter the date on which the payment affects the account balance in this field.
Note
The value date can be a Back Valued, Current or Future Date.
Execution Date
This is the application date on which the payment is entered into the system. If the Execution date is in the future, the payment will be tanked and released on the Future Value date of the payment; else, it is applied immediately as of the value date of the payment.
Note
By default it is the current system date, but can be modified.
Customer Id
The system displays the customer Id.
Installment(s)
If you select this option, it indicates that the amount due includes schedules till the limit date. If not, then the amount due will be the same as on the value date.
Note that the system will not recompute profit and schedules if you check this option.
Main Profit Rate
The rate value for the rate code maintained against the main profit UDE chosen is displayed here.
Limit Date
Select the limit date from the available schedules that can be included as amount due by clicking on the option list. A list of schedule due dates for the account is displayed. Click on a value to select it.
Note
This option is allowed only if the installment option is selected.
Collection Agent ID
System displays the collection agent Id for the asset; however you can modify this field on manual payment.
Prepayment of Amortized Finance
The following details are captured here:
Recomputation Basis
You can choose the recomputation basis for prepayment of amortized finance. The options available are:
- Change EMI: In this case the tenor remains constant.
- Recalculate Tenor: Here, the tenor is recomputed while the installment remains constant.
- Recalculate Installment with New Maturity Date: Here, the EMI is recomputed based on the new input maturity date. The new maturity date should be less than the current maturity date.
- Recalculate Installment with New Payment Holiday: Here the EMI is recomputed based on the holiday period. The Holiday period is considered as the period between the prepayment date and next schedule date.
- Advance Maturity with Equal Profit: In this case, the maturity date is reduced with equal profit for each schedule.
Choose the relevant basis from the list for recomputation basis. Note that partial payment for the schedule is not allowed if you choose this option. This is applicable for Murabaha Products only.
Note
If ‘Allow Re-Computation of Schedules’ option is unchecked at the product level, then the following options will be used for redistributing outstanding without re-computation of profit:
- Change EMI – In this case, the system will compute the profit based on new principal after payment and the difference of balance profit before prepayment and profit computed after prepayment will be adjusted equally among remaining payment schedules. The profit component of the finance will not be changed.
- Change Tenor – In this case, the system identifies the number of schedules that can be paid completely with the existing prepayment amount and remaining balance amount will then be adjusted against one bullet schedule. The profit will not be recomputed.
Recomputation Effective From
You can choose the date on which the prepayment becomes effective. You can start the prepayment on the Value Date or Next Installment.
Note
This option is disabled in the new payment mode.
Old Maturity Date
By default this field displays the current maturity date.
Next Schedule Date
Specify the next schedule date. The schedule date must be any of the existing payment schedule date. This field is enabled only if you have maintained ‘Recalculate Installment with New Payment Holiday’ as ‘Recomputation Basis’ for prepayment of amortized finance. The payment schedule is recalculated based this date. This dated is considered for all the future payments of the contract.
New Maturity Date
Specify the new maturity date. The new maturity date should be less than the current maturity date. This field is enabled only if you have maintained ‘Recalculate Installment with New Maturity Date’ as ‘Recomputation Basis’ for prepayment of amortized finance. The payment schedule is recalculated based this date. On this date the balloon principal is also liquidated.
Prepayment of Simple Finance
The following details are captured here:
Recomputation Basis
You can choose the recomputation basis for prepayment of a simple finance. The options available are:
- Reduce Maturity: In this case, the system maintains the schedules constant and advance the maturity
- Re-compute Schedules: In this case, the system will re-compute the schedules for the existing tenor
Note that partial payment for the schedule is not allowed if you choose this option.
Note
If ‘Allow Re-Computation of Schedules’ option is unchecked at the product level, then the following options will be used for redistributing outstanding without re-computation of profit:
- Reduce Tenor – In this case, the system identifies the number of schedules that can be paid completely with the existing prepayment amount and remaining balance amount (if any) will then be adjusted against one bullet schedule.
- Re-calculate Schedules – In this case, the system will compute the profit based on new principal after payment, and the difference of balance profit before prepayement and profit computed after prepayment will be adjusted equally among remaining payment schedules. The profit component of the finance will not be changed.
- Simple loans will also change to constant EMI type finances after pre-payment. This is applicable for Murabaha Products only
If ‘Allow Re-Computation of Schedules’ option is checked for Istisna UIDB profit B processing and the UIDB amount posted for profit period is more than the actual profit, then the system will post reversal entries with event UIDR to the extent of extra amount.
9.1.2.1 Processing for Istisna UIDB
The UIDB will be computed based upon the following settings:
- Ceiling rate for under construction period
- Nominal Disbursements
- Payment schedules
- The UIDB will be computed only once in the lifecycle of finance for both under construction period and post construction period
- The UIDB will fire on initiation of contract (INIT)
The UIDB will not be recomputed if any financial amendment happens in the finance contract. The system will not allow changes in nominal schedules once saved and authorized.
Processing for under construction period:
On construction end date:
- If UIDB computed is more than the actual profit then reversal of UIDB will fire
- If UIDB computed is less than the actual profit then the system will stop accruing profit once the total accrual to date is equal to unearned income total bucket
Processing for post construction period: Rebate can be given in two ways:
- Along with each payment schedules – In this case, the rebate component schedule frequency should match the payment frequency. Thus on each schedule rebate will be computed based upon ‘Rebate Rate’. The system will pass the rebate entries on each payment.
- At the maturity date – In this case, the rebate component will have only one bullet schedule on maturity. On each schedule due date rebate will be computed and accumulated. The rebate entry will fire only once at maturity date.
- If UIDB computed is less than the actual profit then the system will stop accruing profit once the total accrual to date is equal to unearned income total bucket
Old Maturity Date
The system displays the earlier maturity date of the account. This field will be updated only if the ‘Recomputation Basis’ selected is ‘Reduce Tenor’.
New Maturity Date
The system displays the current maturity date of the account after prepayment with reduce tenor basis. This field will be updated only if the ‘Recomputation Basis’ selected is ‘Reduce Tenor’.
Mudaraba Details
You can capture the following details for Mudaraba payment:
- Gross Profit
- Customer Incentive
- Excess Profit
- Additional Profit
For details about these fields, refer the section ‘Making Payments’ in the chapter ‘Defining Islamic Product Categories and Products’ in this User Manual.
Payment Details
The following details are captured here:
Reversed
This option indicates that the settlement is reversed.
Payment Mode
Specify the mode of finance payment by clicking on the option list. A list of payment modes is displayed. Click on a value to select it.
The payment modes are CASA, Cash/Teller, Instrument, External Account, Electronic Pay Order, Internal Cheque, Clearing, Debit Card, and Credit Card.
Comp CCY
Select the currency used for the specific payment mode by clicking on the option list. A list of currencies is displayed. Click on a value to select it.
Amount Settled
Enter the amount paid through the specified mode of payment in terms of the settlement currency in this field.
Note
The amount should be a valid amount and should not exceed the total amounts due; else it is treated as a prepayment.
Settlement Ccy
The system displays the amount settled in terms of the local currency in this field.
Original Exchange Rate
The base or actual exchange rate between the account currency and settlement currency gets displayed here.
Exchange Rate
For a customer availing any Relationship Pricing scheme, the customer specific exchange rate derived by adding the original exchange rate and the customer spread maintained for the relationship pricing scheme gets displayed here.
You can change the defaulted rate provided the change is within the variance level maintained for the underlying product.
If Relationship Pricing is not applicable, Exchange Rate will be the same as the Original Exchange Rate.
For more details on customer specific exchange rates, refer the section titled ‘Specifying Pricing Benefit Details’ in Relationship Pricing user manual.
Settlement Order
Each settlement is apportioned against a component due based on the Liquidation order. The order in which the settlements are picked is ordinal as entered in the screen.
Settlement Branch
The system will allow you to modify the settlement branch and account only if you have checked the option ‘Allow Corporate Access’ in the ‘Branch Parameters – Detail View’ screen. If you have not checked the option, the system will default it to the values maintained at the fund branch. You will not be allowed to modify this.
During liquidation, the system will check for availability of funds in the settlement account. If funds are insufficient, the system will scan the customer’s current accounts. If funds are still unavailable, the system will scan the customer’s savings accounts. If the funds are sufficient, the required amount will be liquidated.
However, if funds are insufficient in the customer’s accounts, the system will first scan the guarantor’s current accounts followed by the guarantor’s savings accounts for the availability of funds. The system will look up the relevant accounts based on the maintenance in the ‘Guarantor Details’ screen. For a guarantor CIF, if there are no accounts maintained in the ‘Guarantor Details’ screen, then system will process all the current and savings account of the guarantor CIF randomly.
Settlement Account
Specify the Settlement Account. The adjoining option list displays all the valid account number maintained in the system. You can choose the appropriate one.
Account description
The system displays the account description on selecting the Settlement Account. The account description is also displayed if you enter a valid account number and tab out.
Component Details
The following details are captured here:
Component Name
The system displays the component name in this field.
CCY
The system displays the currency of the component based on Finance currency and the account in this field. If the component is based on a flat amount UDE then the UDE currency is displayed.
Amount Due
The system displays the amount due for the component in this field. It is generated based on the account and component.
Amount Overdue
Here, the system displays the amount overdue for the component. It is generated based on the account and component.
Amount Not Due
For the principal amount, Amount not due is the rest of principal that is due after the value date. Hence any payment towards this constitutes a prepayment. This value is system generated based on account and component.
Amount Paid
The system displays the actual amount paid against the component dues in this field.
Note
When payments are allocated across dues, payment details are defaulted from the liquidation order. But these details can be modified as per your preferences.
Amount Waived
Enter the amount waived by the bank after negotiations with the customer in this field.
Amount Capitalized
Enter the amount capitalized in this field.
9.1.2.2 Settlement Details
Depending upon the mode of payment the following settlement details are captured:
For ‘CASA’:
- Settlement Branch
- Settlement Account
For ‘Credit Card’ and ‘Debit Card’
- Card No.
For ‘Clearing’
- Upload Source
- Instrument Number
- Clearing Product
- End Point
- Routing Number
- Clearing Bank
- Clearing Branch
- Sector Code
For ‘External Account’
- Upload Source
- PC Category
- Clearing Bank
- Clearing Branch
- External Account Name
- External Account Number
For ‘Electronic Pay Order’
- Upload Source
- PC Category
- Clearing Bank
- Clearing Branch
- External Account Name
- External Account Number
For ‘Internal Check’
- Instrument Number
- Settlement Branch
- Settlement Account
For ‘Instrument’
- Instrument Number
- Settlement Branch
- Settlement Account
For ‘Cash/Teller’
- Upload Source
- Settlement Product
- On saving a manual payment towards a finance component (s), the online liquidation against each such component follows the order of liquidation as specified through the ‘Component Liquidation Order’ screen.
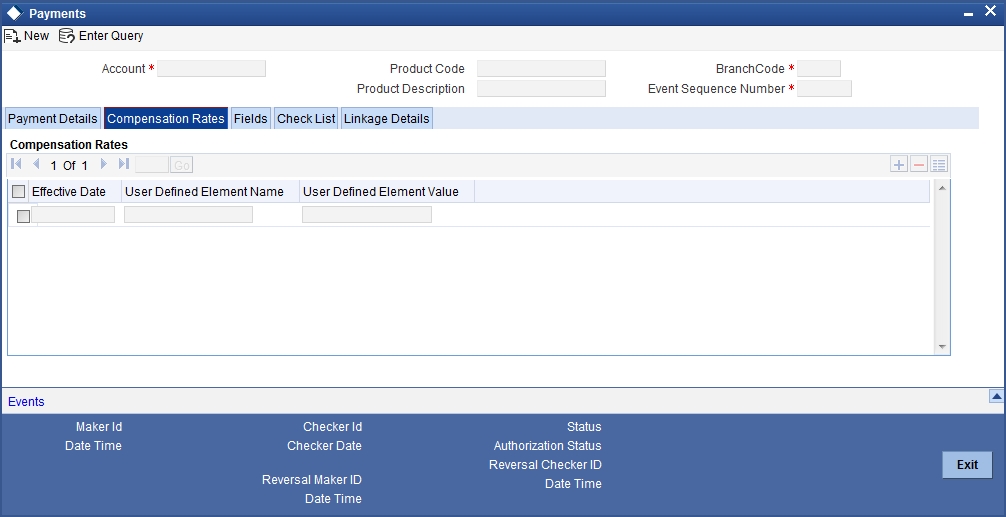
9.1.3 Compensation Rates Tab
You can maintain the compensation details of the product by clicking the ‘Compensation Rates’ tab in the ‘CI Payments’ screen. The screen is displayed below:
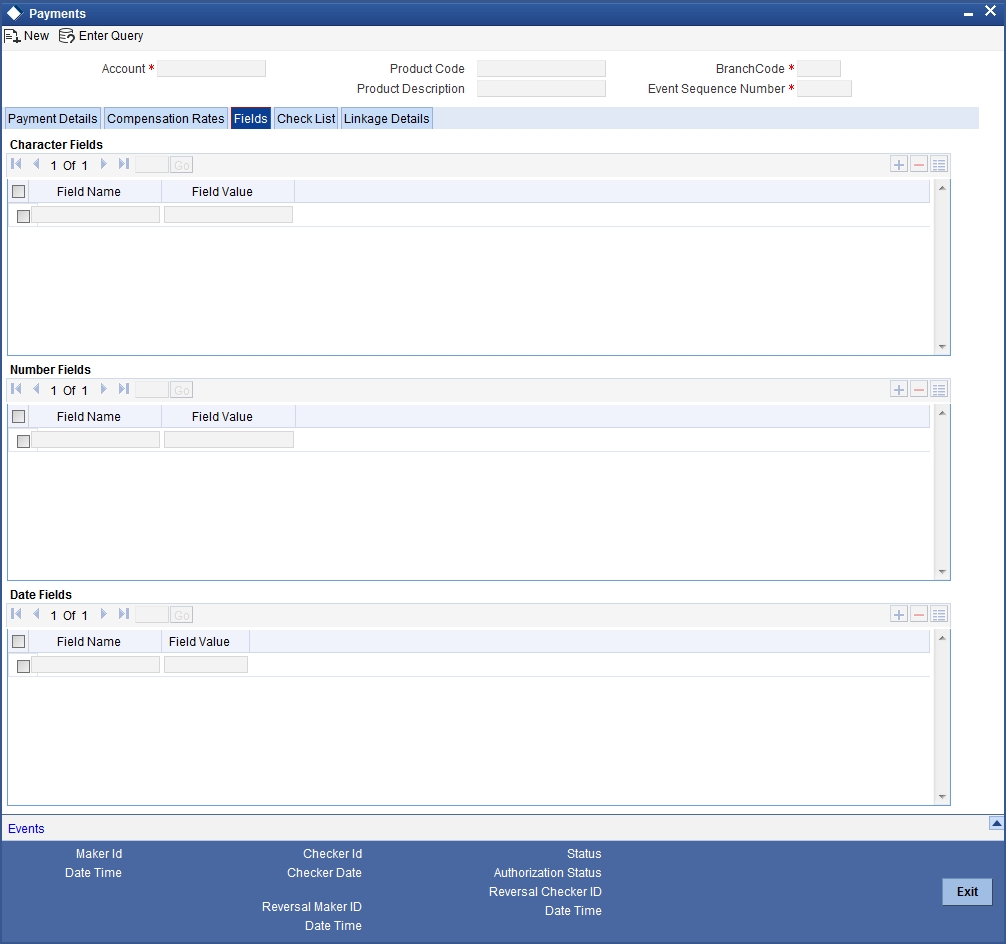
9.1.4 Fields Tab
You can maintain user defined fields for the product by clicking the ‘Fields’ tab in the ‘CI Payments’ screen. The screen is displayed below:
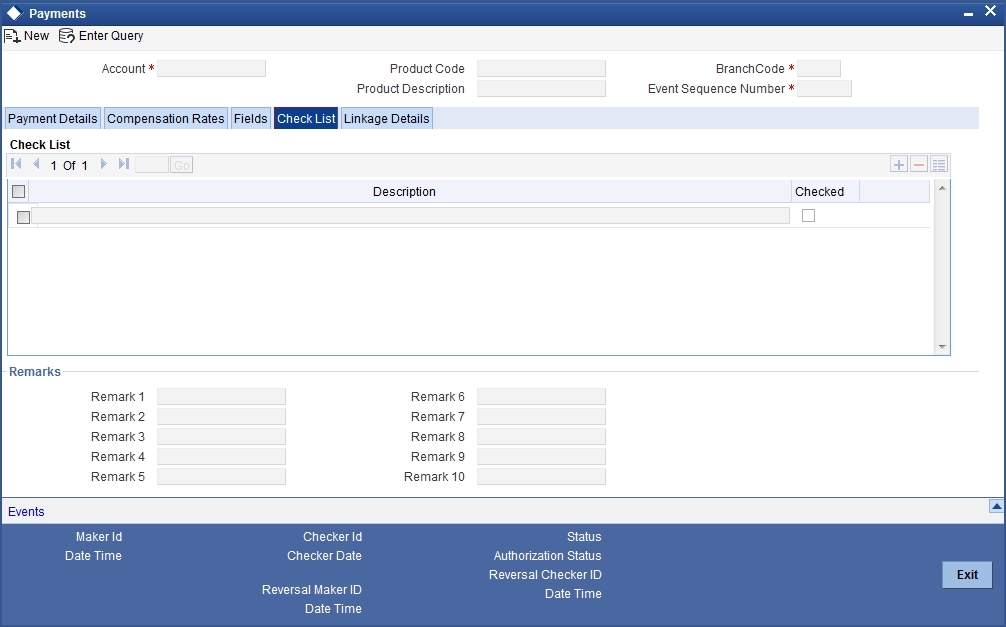
9.1.5 Check List Tab
Click the ‘Check List’ tab to maintain the check lists and remarks for the product. The screen is displayed below:
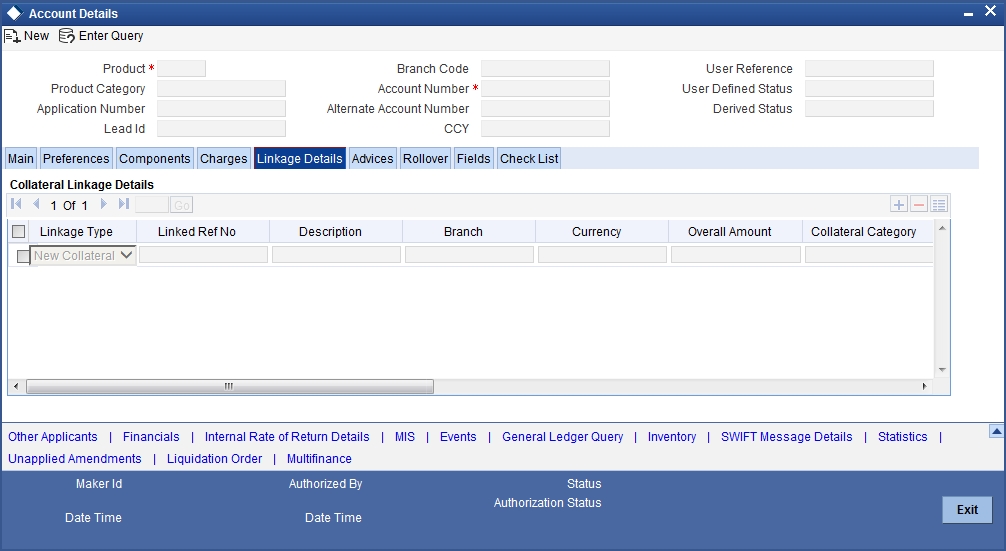
9.1.6 Linkage Details Tab
Click the ‘Linkage Details’ tab to maintain the linkage details and remarks for the product. The screen is displayed below:
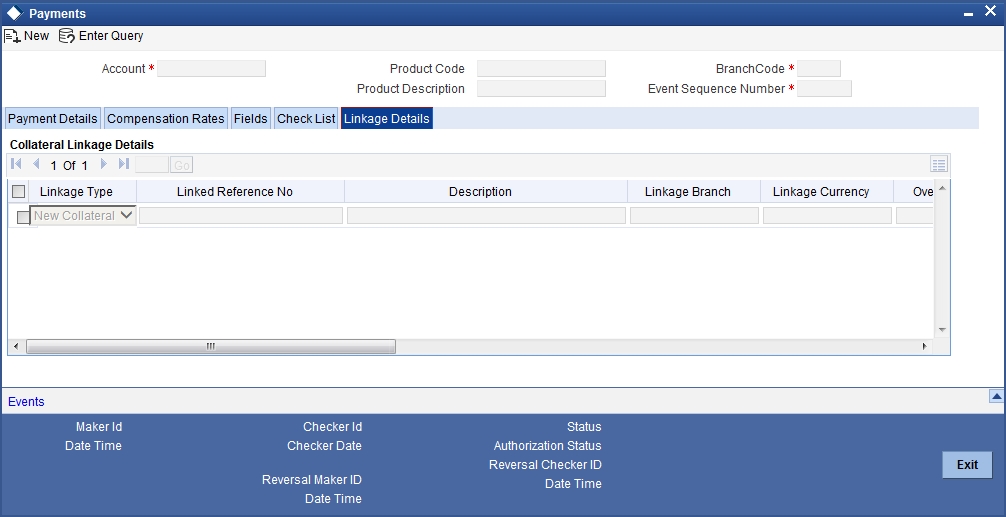
You can maintain the following parameters here:
Re-instatement Order no
Specify a valid order in which you need to re-instate the linkage linked to the account. The system re-instates the linkage in an ascending order.
Close Collateral
Check this box if you need to close the collateral automatically on full payment, during auto liquidation.
For more details on field explanation, refer to the section ‘Linkage Details Tab’ in ‘Account Creation’ chapter of this User Manual.
When you click on the ‘Populate’ button, the system displays the linkage details in ‘Linkage Details’ tab.
Note
When a principal component is paid,
- The system re-instates Collateral, Collateral Pool, Facility, and Liability for the amount settled (amount paid + amount waived), based on the ascending order of re-instatement order number maintained at ‘Linkage Details’ level.
- The system will utilize Collateral, Collateral Pool, Facility, and Liability for the capitalized amount, based on the ascending order of utilization order number maintained at ‘linkage Details’ level.
9.1.6.1 Partial Payment
Partial payment is required to parameterize partial liquidation during auto liquidation process.
This field specifies whether partial liquidation is allowed during auto liquidation or not. The same field in the ‘Account’ screen is defaulted from the product preferences screen. But this option is allowed only if Verify Funds is selected. Auto Liquidation will check this option before carrying out partial liquidation viz. before liquidating to the extent of availability during Verify Funds check.
If selected, the function proceeds with liquidation, else it is marked as unpaid.

9.2 Payments Simulation
This section contains the following topic:
9.2.1 Simulating Finance Payment
Finance payment simulation calculation function is used to arrive at an agreement with the client. The ‘Payment Simulation’ screen displays the effect of making payments across components across schedules. You can invoke this screen by typing ‘CIDSIMPT’ in the field at the top right corner of the Application tool bar and clicking the adjoining arrow button. The results are used to arrive at a negotiated amount that can be used to settle outstanding loss.
The Payment simulation screen is similar to the Finance Input and Finance Payments screens. New functions are provided for payment simulation.
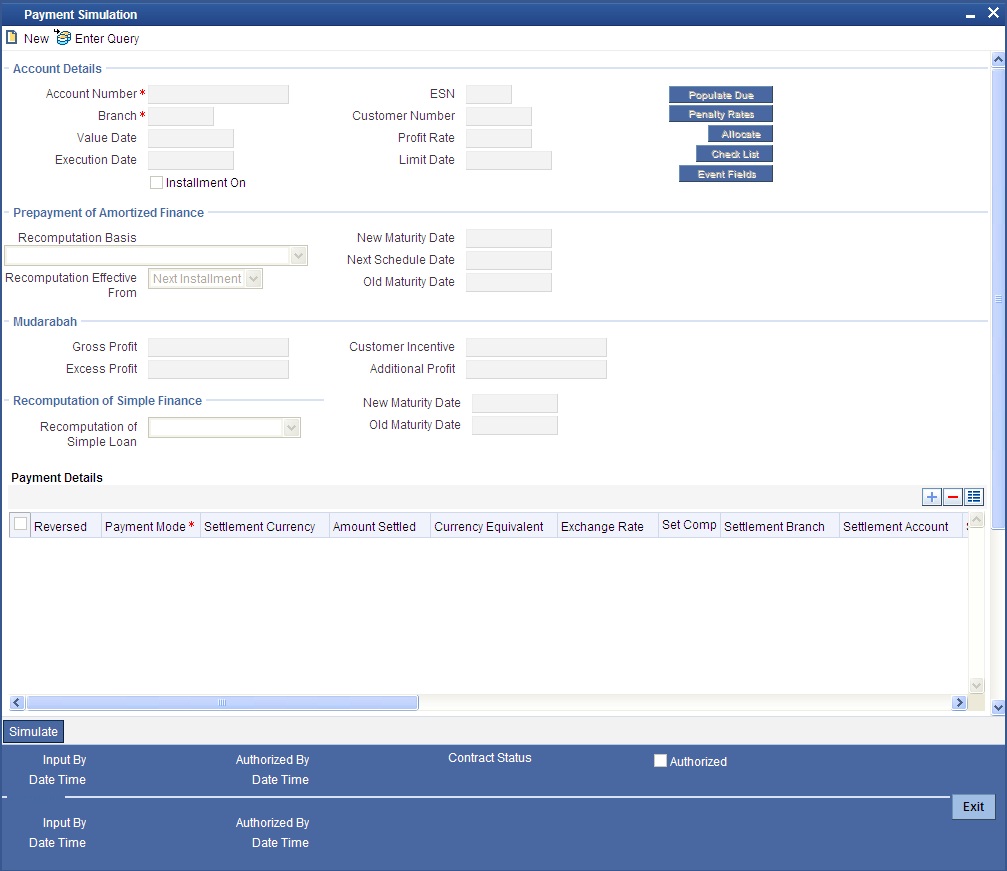
You can change specific UDE values to simulate the effect of changing prepayment compensation rates.
Payments can be saved from the simulator. Once the payment simulation is saved, if you enter simulation account number in the payments screen and click on the ‘Populate Due’ button then the system displays all the details entered in the payment simulation screen.
Old Maturity Date
By default this field displays the current maturity date.
Next Schedule Date
Specify the next schedule date. The schedule date must be any of the existing payment schedule date. This field is enabled only if you have maintained ‘Recalculate Installment with New Payment Holiday’ as ‘Recomputation Basis’ for prepayment of amortized finance. The payment schedule is recalculated based this date. This dated is considered for all the future payments of the contract.
New Maturity Date
Specify the new maturity date. The new maturity date should be less than the current maturity date. This field is enabled only if you have maintained ‘Recalculate Installment with New Maturity Date’ as ‘Recomputation Basis’ for prepayment of amortized finance. The payment schedule is recalculated based this date.
9.2.1.1 Prepayment of Simple Finance
Recomputation Basis Simple
You can choose the recomputation basis for prepayment of a simple finance. The options available are:
- Reduce Maturity: In this case, the system maintains the schedules constant and advance the maturity
- Re-compute Schedules: In this case, the system will re-compute the schedules for the existing tenor
Note that partial payment for the schedule is not allowed if you choose this option.
Note
If ‘Allow Re-Computation of Schedules’ option is unchecked at the product level, then the following options will be used for redistributing outstanding without re-computation of profit:
- Reduce Tenor – In this case, the system identifies the number of schedules that can be paid completely with the existing prepayment amount and remaining balance amount (if any) will then be adjusted against one bullet schedule.
- Re-calculate Schedules – In this case, the system redistributes outstanding EMI equally among the existing schedules
- Simple loans will also change to constant EMI type finances after pre-payment. This is applicable for Murabaha Products only
Old Maturity Date
The system displays the earlier maturity date of the account. This field will be updated only if the ‘Recomputation Basis’ selected is ‘Reduce Tenor’.
New Maturity Date
The system displays the current maturity date of the account after prepayment with reduce tenor basis. This field will be updated only if the ‘Recomputation Basis’ selected is ‘Reduce Tenor’.
Compensation amount is calculated using CL payments process based on the outstanding principal and tenor:
- Prepayment Compensation is calculated schedule wise by considering the full prepayment amount as the basis until the first schedule date after the prepayment date and you can subtract the schedule level principal paid to arrive at the prepayment amount for each schedule to be considered for Compensation. If the resultant of the schedule level principal being subtracted from the prepayment amount becomes negative, zero principal is considered for the Compensation calculation.
- The UDE Value assigned for the UDE ID ‘PREPAY_RATE1’ is taken as the Compensation rate and based upon this value, prepayment Compensation will be calculated.
- Prepayment Compensation is calculated based on the UDE value of ‘PREPAY_RATE1’ provided the UDE value of the UDE ID ‘PREPAY_RATE2’ is zero.
- If the UDE value of the UDE ID ‘PREPAY_RATE2’ is greater than zero, then this value will be return as the prepayment Compensation amount.
- The ‘Days in Month’ and ‘Days in Year’ are taken from the currency definition provided the ‘Int method Default from CCY definition’ is checked for the component.
- The Compensation amount is re-calculated if any changes in the Compensation rate
- Compensation amount calculated will be positive in nature
Note
Only users with rights to input payments are allowed to save payments from the simulator.
Click on ’Simulate’ button to view the account details after the current payment. An account screen is launched to view the updated account after the payment. You can also print an advice from the simulation screen.
9.2.1.2 Back Dated Payments
Oracle FLEXCUBE supports back value dating only upto the last payment date from the current date if the option ‘Allow Back Period Entries’ is not checked at the product level. In other words, only those back dated payments whose value date is before the last payment date are allowed.
If the box ‘Allow Back Period Entries’ is checked at the product level, then the following functionalities will apply:
- Oracle FLEXCUBE supports back dated payments till the Finance Initiation / Value date.
- Whenever a back valued event such as Principal Increase, Rate Change or Payment Reversal is made, the system recalculates Profit based on the new conditions and passes the difference as back valued adjustments.
- Back valued Adjustments (accruals and Liquidations) are passed on the same day.
- Entries passed will be as follows:
- Accrual Adjustments (for a Component COMP)
Case 1: Favourable Adjustment (Income earned)
Dr Back valued Profit Adjustment GL COMP_BVADJ_INC
Cr Accrual Adjustment Income COMP_BVADJ_INC
Case 2: Unfavourable Adjustment (Expense)
Dr Accrual Adjustment Expense COMP_BVRADJ_EXP
Cr Back valued Profit Adjustment GL COMP_BVRADJ_EXP
- Liquidation Adjustments
Dr Settlement AC COMP_BVADJ_INC
Cr Back valued Profit Adjustment GL COMP_BVADJ_INC
Dr Back valued Profit Adjustment GL COMP_BVADJ_EXP
Cr Settlement Account COMP_BVADJ_EXP
- Back valued Adjustments are passed to the finance servicing account maintained at the finance level.
9.3 Asset Closure
This section contains the following topics:
9.3.1 Prepaying Asset Closure
You can perform prepayment on an Islamic Financing account, for complete settlement against a particular asset linked with multi-assets. You can perform this operation using the ‘Asset Closure’ screen. You can invoke this screen by typing ‘CIDASSDT’ in the field at the top right corner of the Application tool bar and clicking the adjoining arrow button.

The following details can be entered in this screen:
Account Number
Select the account number from the option list. All active accounts linked to multiple assets will be available for selection.
Branch Code
The branch where the chosen account resides is displayed here.
Customer
The name of the customer for the selected account is displayed here.
Event Sequence Number
The system displays a unique number to identify the event.
Asset Seq. no.
Select the sequence number of the asset linked to the account.
Principal
The outstanding principal for the selected asset in the account is calculated and displayed here.
Profit
The outstanding profit for the selected asset in the account is displayed here.
Currency
The account currency is defaulted here.
Value Date
The value date of the account is defaulted here.
Maturity Date
The maturity date of the account is defaulted here.
If you click on the ‘GET DUE’ button, the proportion of due of each asset in the contract is calculated. On saving, the settlement will be apportioned across all future unpaid schedules. Partial settlement against an asset will not be allowed. On authorization of payment from this screen the ‘Asset Status’ value will be changed to ‘Settled’ for all the assets of that contract. Deletion can be done only for unauthorized prepayments from this screen. Reversal of this payment and any future payments is not possible, if an asset is settled. Amendment of prepayment cannot be done.
9.3.1.1 Authorizing CI Payments
You have to authorise a CI payment before you run EOD batch. In the Islamic Financing Payment screen, query for the account number to be authorized. You can also search for the account number from the Islamic Financing Payment Summary screen. To authorize, click ‘Authorize’ icon on the screen toolbar. The Authorize screen is launched.
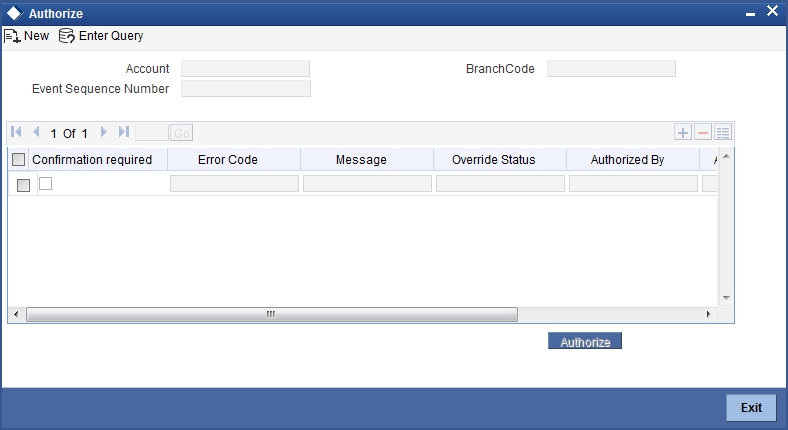
The system displays the following details:
Authorized By
The system displays the authorizer of the contract.
Authorization Date
The system displays the authorization date.
Error Code
The system displays the error code.
Message
The system displays the error message.
Override Status
The system displays the override status.
Account Number
The system displays the account number.
Branch
The system displays the branch code.
You can specify the following details here:
Remarks
You can enter remarks pertaining to the transaction.
Confirmation Required
Check this box to indicate that you have confirmed the stop payment instruction issued by the customer.
After entering the details, click the ‘Authorize’ button.
Note
You cannot authorise from the ‘CI Payments’ screen in the following cases:
- the contract has multilevel of authorization pending, the same will be done using the ‘Multilevel Authorization Detailed’ screen
- the level of authorization is greater than or equal to ‘N’
- the ‘Nth’ or the final level of the users authorisation limit is less than the difference between amount financed and sum of the limits of all the users involved in authorizing a transaction, this case holds good when the ‘Cumulative’ field is checked in the ‘Product Transaction Limits Maintenance’ screen
- the transaction amount is greater than the authoriser’s authorisation limit if the ‘Cumulative’ field is unchecked in the ‘Product Transaction Limits Maintenance’ screen.
9.4 Finance Amendments
This section contains the following topics:
- Section 9.4.1, "Amending Finance Details"
- Section 9.4.2, "Main Tab"
- Section 9.4.3, "Preferences Tab"
- Section 9.4.4, "Components Tab"
- Section 9.4.5, "Charges Tab"
- Section 9.4.6, "Linkage Details Tab"
9.4.1 Amending Finance Details
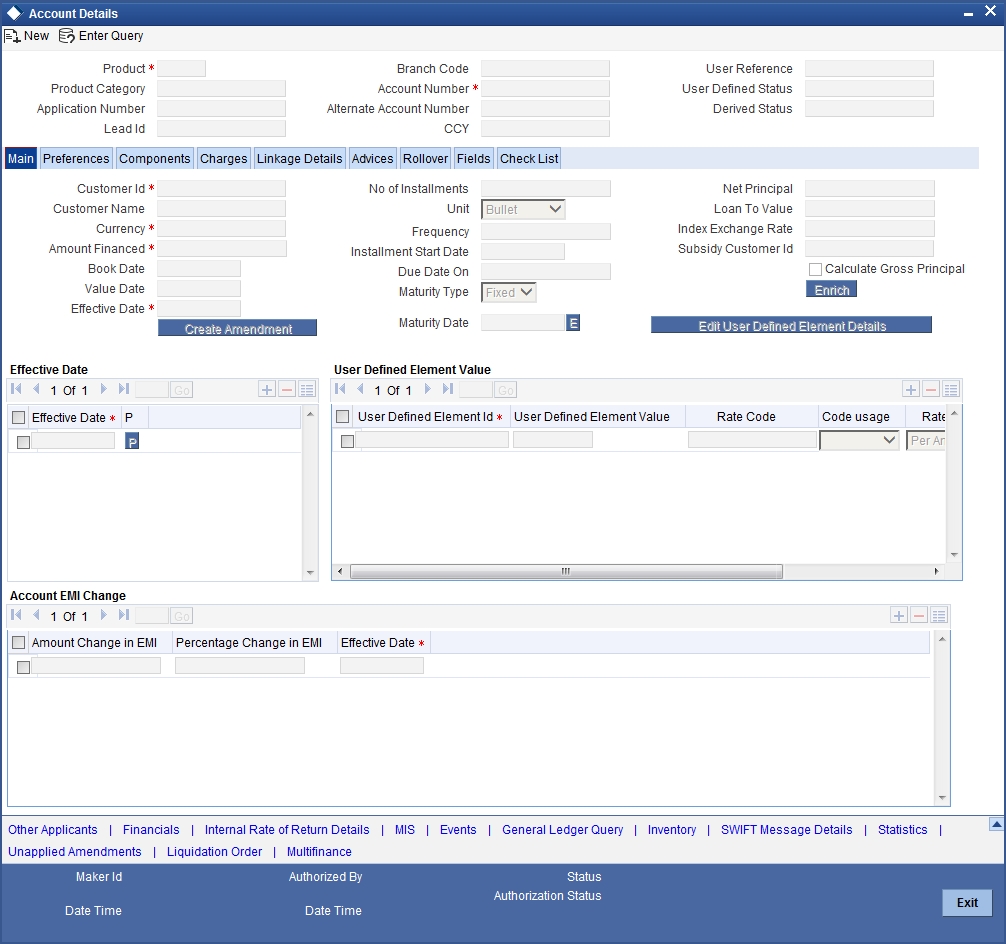
Once a Finance is entered and authorized, financial changes to the Finances can be done through the ‘Islamic Account Amendment’ screen. You can invoke this screen by typing ‘CIDACCVM’ in the field at the top right corner of the Application tool bar and clicking the adjoining arrow button. These amendments are based on an effective date and hence are called Value Dated Amendments (VAM).
Booking an amendment is called VAMB and Initiating is called VAMI. These are considered as events in the life cycle of the Finance.
- The Value Dated Amendments supports the following functions: Modification of currency between UF and CLP. The UF conversion on any date uses the effective date UF rate.
- When the above change in profit rate is completed, the accrual is recomputed. The difference in accruals is accounted for in the current period on the booking date of the change.
If these changes are required to be effective on a particular date, not maintained previously, a fresh set of rates for that day is required to be maintained.
You can pick any active account from the Islamic Account Amendment screen and apply the amendments for that account. You can also view or modify the amendments that are not yet applied for that account. Note that you will not be able save any amendments to a contract for which the box ‘Recompute schedules on IRR’ is checked for the linked product.
Note
If ‘Allow Re-Computation of Schedules’ option is unchecked at the product level, then the following options will be used for redistributing outstanding without re-computation of profit:
- Change of principal and profit rates are not allowed
- On change of maturity date: In this case, the system will compute the principal and profit based on new maturity date and then the difference of balance profit before amendment and profit computed after amendment will be adjusted equally among remaining unpaid schedules. The schedules after the VAMI effective date will only be modified. The paid or unpaid schedules before the VAMI effective date won’t be affected.
- On advancing the maturity date: In this case, the difference of profit i.e. before amendment and after amendment will be distributed equally among the new schedules and it will be added from new profit.
- On extending the Maturity date: In this case, the difference of profit i.e. before amendment and after amendment will be distributed equally among the new schedules. It will be subtracted from new profit.
This is applicable for all the type of finances like Amortized / Simple.
9.4.1.1 Viewing and Modifying Existing Amendments
In order to view or modify existing amendments, query for the required account number.
Select the corresponding effective dates of the amendment and click the ‘View/Modify’ button. The ‘Account Details’ tab is displayed where you can view/modify the existing amendments.
9.4.2 Main Tab
Specify the account number for which the amendment needs to be done and then ‘Unlock’ the record. In the New Amendment frame specify the Effective Date. Click the ‘Create Amendment’ button in order to make new amendments to finances. The ‘Accou nt Details’ tab is displayed where you can create the new amendment.
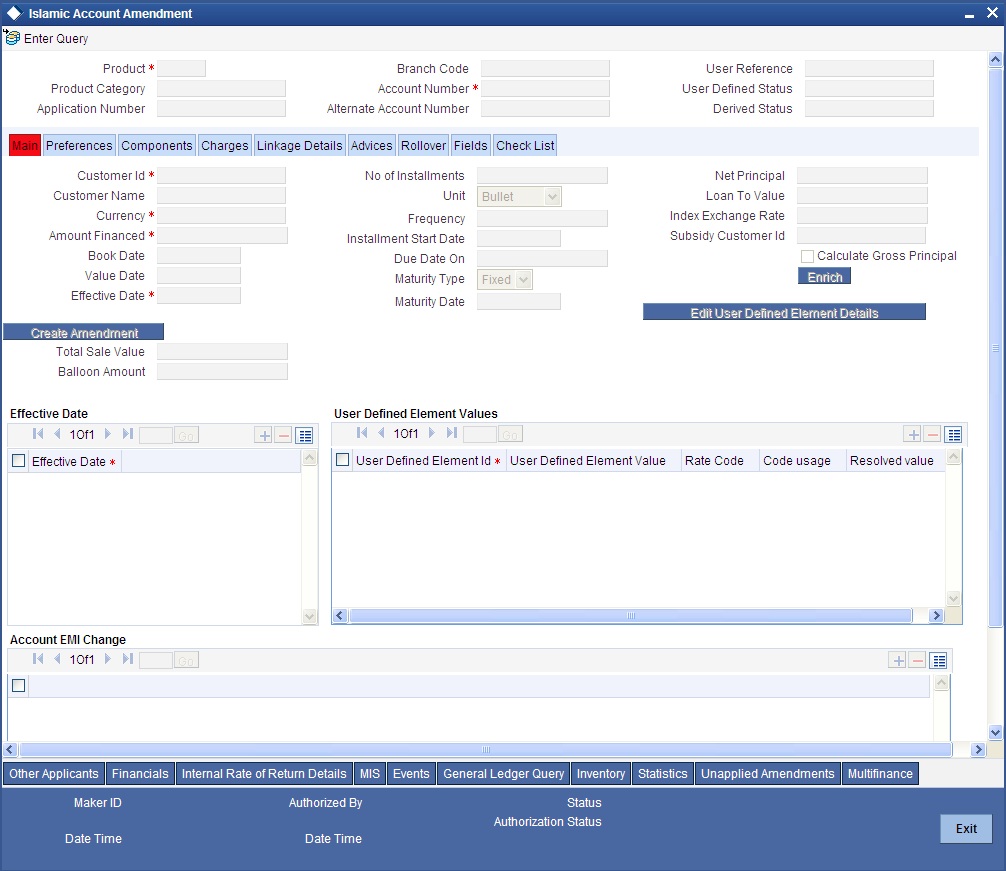
From this screen, you can modify the amount financed, which specifies the increase in amount, Rate or Principal effective a value date, and also the maturity date. Once you specify the amendments, the relative changes with regard to the same can be viewed in the other tabs of the Screen.
You can also select the re-computation basis for amendments from this screen. For example, if the re-computation basis is ‘Change Installment’, the amendments are applied by changing the Equated Monthly Installments keeping the tenor constant. If re-computation basis is ‘Change Tenor’, then the tenor is varied by keeping Installment constant.
Following are the amendments to the Value date effective finances accounts that you can perform through this screen:
- Value Date based changes to the Principal
- Value Date based changes to the Rates
- Value Date based changes to the Tenor of the Finance
- Changes to other parameters
You can change the Finance Tenor, Rate or Principal effective a Value Date from these screens. It also displays the schedules of the account.
Note that if the option ‘Installment Changes with Equal Profit’ has been chosen as the re-calculation basis for value dated amendments at the product level, the system will not allow you to perform any VAMI activities on the account.
The following information is captured:
Effective Date
This is the date as of which the changed values should be applicable. You can add a new effective date, when you make some amendment to the account. Click add button to enter the effective date.
Once you have entered the new effective date, click ‘P’ button. The system will default the latest UDE values maintained for the account. However, you may delete or modify the default UDE values.
Note
If you click the ‘P’ button after making some changes to the UDE values, the system will ignore your changes and default the UDE values from the product again.
Maturity Date
You can modify the maturity date and enter the new maturity date for the finance account.
Once you change the maturity date and click ‘E’ button next to the maturity date. The system updates the schedule date for the bullet schedule based on the new maturity date.
After the change in the maturity date, if the incremental tenor matches the frequency of the last schedule in all the components, then the system will generate the remaining schedules based on the new maturity date.
If the change in maturity date is not in multiples of the last defined frequency, then the system will update the bullet schedule only. The other schedules will not change. However, you can change the schedules from the ‘Schedule Definition’ frame of the ‘Components’ tab of this screen. You need to click ‘Edit Schedules’ and ‘Explode Schedules’ button to change the schedules.
Note
The system will automatically calculate the schedules only in case of extension of the maturity date. If the change in the maturity date results in reduction of the tenor, the schedules will not be calculated automatically. In such cases, you need to change the schedules manually.
The automatic schedule change is applicable only to the finance accounts that have schedules in uniform frequency for all components throughout the tenor. In case of flexible repayment schedules, you need to change the schedules manually.
9.4.3 Preferences Tab
Preferences maintained for the account are displayed here.
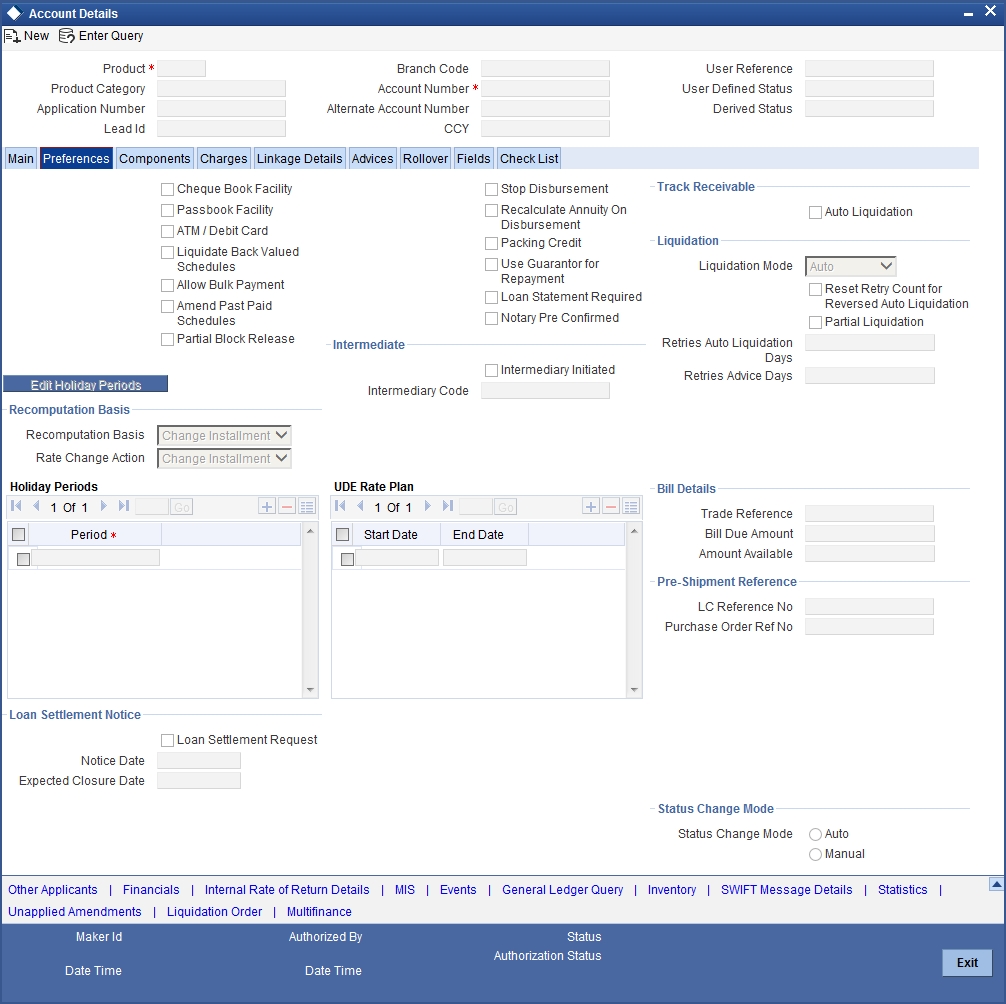
You can modify the following details:
Handover
This value is defaulted from the account. However you can change it. Check the box to indicate that property handover and final disbursement are applicable for the Ijarah account.
If this box is checked for an account with disbursement mode as ‘auto’ and the final disbursement date is less than or equal to the current date, the system will automatically process final disbursement on authorisation of the amendment record. Once the final disbursement is completed for the account, the system will not allow you to uncheck this box.
Handover Date
The date on which the property is handed over is defaulted from the account. However you can change it. If this date is not greater than the construction end date, the system will display an error message while saving. The first payment schedule date in the post construction period should be greater than this date.
If this date has not been specified for the account during creation, you will not be able to specify a date as part of amendment.
Maximum Renegotiations
The maximum number of renegotiation allowed for the account is defaulted here. However, you can modify the value if needed.
Note
System rejects the VAMI request if the new value of “Maximum Renegotiations” is lesser than the previous value.
Liquidation Mode
Specify the mode of liquidation from the drop-down list. The following options are available for selection:
- Auto
- Manual
- Component
Retries Advice Days
Number of retries for an advice is defaulted here from the product maintenance level; however, you can modify if needed. The value should be less than the value maintained for ‘Retries Auto Liquidation Days’.
Loan Settlement Notice
You can maintain the following loan settlement notice details here:
Loan Settlement Request
Check this option to indicate the request for loan settlement has been received. If you check this box, it is mandatory to specify the notice date and the expected loan closure date.
Notice Date
Specify the date on which the notice of loan settlement was received. By default, the system displays the current application date. However, you can modify this.
You can use the date button to choose an appropriate date from the calendar.
Expected Closure Date
Specify the expected date of loan closure. This date must be later than the notice date specified above. This must also be earlier than the original loan closure date.
You can specify the expected closure date only if the option ‘Loan Settlement Request’ is checked. In other cases, this date cannot be captured.
9.4.4 Components Tab
Components maintained for the account are displayed here.
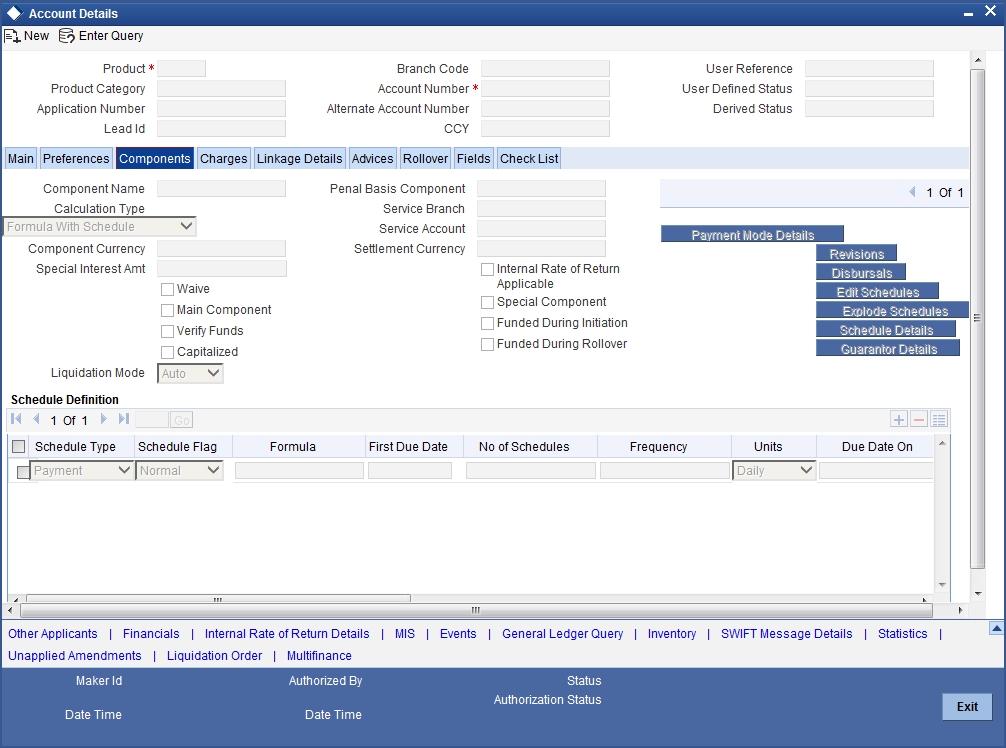
You can modify the following details:
Liquidation Mode
The system defaults the mode of liquidation from the product level. However you can modify the same to indicate the mode of liquidation of the component from the drop-down list. The following options are available for selection:
- Auto
- Manual
Note
This is applicable only if ‘Liquidation mode’ is selected as ‘Component’ at the account preference level.
9.4.5 Charges Tab
In order to calculate the charges that we would like to levy on an account, we have to specify the basis on which we would like to apply charges.
The ‘Charges’ tab allows you to view/modify the charges to be levied on the account.
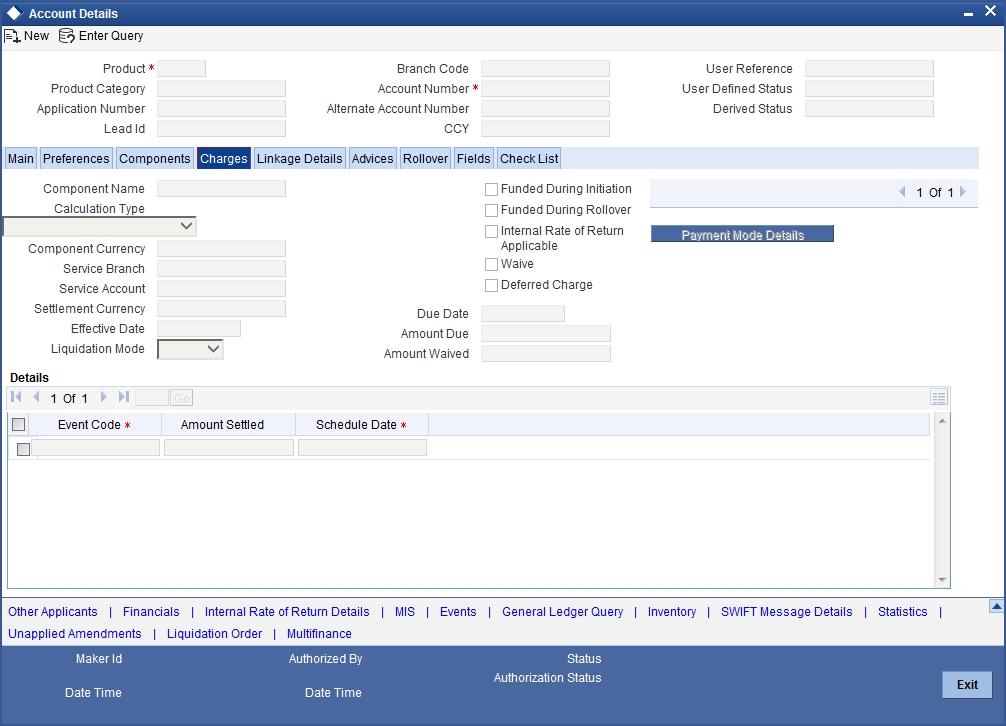
You can capture the following details in this screen:
Amt. Waived
The amount displayed here is the amount that needs to be waived as the discount offered to the customer.
9.4.6 Linkage Details Tab
Click the ‘Linkage Details’ tab to maintain the linkage details and remarks for the product. The screen is displayed below:
You can maintain the following parameters here:
Re-instatement Order no
Specify a valid order in which you need to re-instate the linkage linked to the account. The system re-instates the linkage in an ascending order.
Auto Close Collateral
Check this box if you need to auto close collateral during partial payment only if the partial payment is equal to the linked amount of the collateral.
Note
If the check box is checked during partial payment and the payment amount is not equal to the linked amount of the collateral, then the system displays an error message.
While saving an account amendment:
- If the ‘Linkage Type’ is ‘New Collateral’, then the system creates and authorizes the collateral with ‘Collateral Type’ as ‘Normal’ and assigns the Liability ID of the customer. However, you can manually create collateral with different type and link it to the account.
- The system validates if the sum of Principal Increased and Principal Outstanding Amount is greater than the Linked Amount maintained at collateral linkage details level. If the sum is greater, then the system tracks the remaining amount against the liability ID of the customer, automatically.
- If the Liability ID does not have sufficient available balance, then the system displays the override message as ‘The liability does not have enough available balance. Do you want to continue?’
While deleting an account amendment, the system re-instates the collateral if it is utilized by the account and closes the collateral, created new, automatically.
If the linked reference number is not utilized, you can delete the linkage details and modify the linked amount and linked percentage.
For further details regarding the fields in this screen please refer to Charges section under Account details.
9.5 VAMI Simulation
This section contains the following topic:
9.5.1 Simulating VAMI
Value Dated Amendment simulation calculation function is used to get the details of the VAMI charge before applying the same. You can invoke ‘Amendment Input’ screen by typing ‘CIDSIMVD’ in the field at the top right corner of the Application tool bar and clicking the adjoining arrow button.
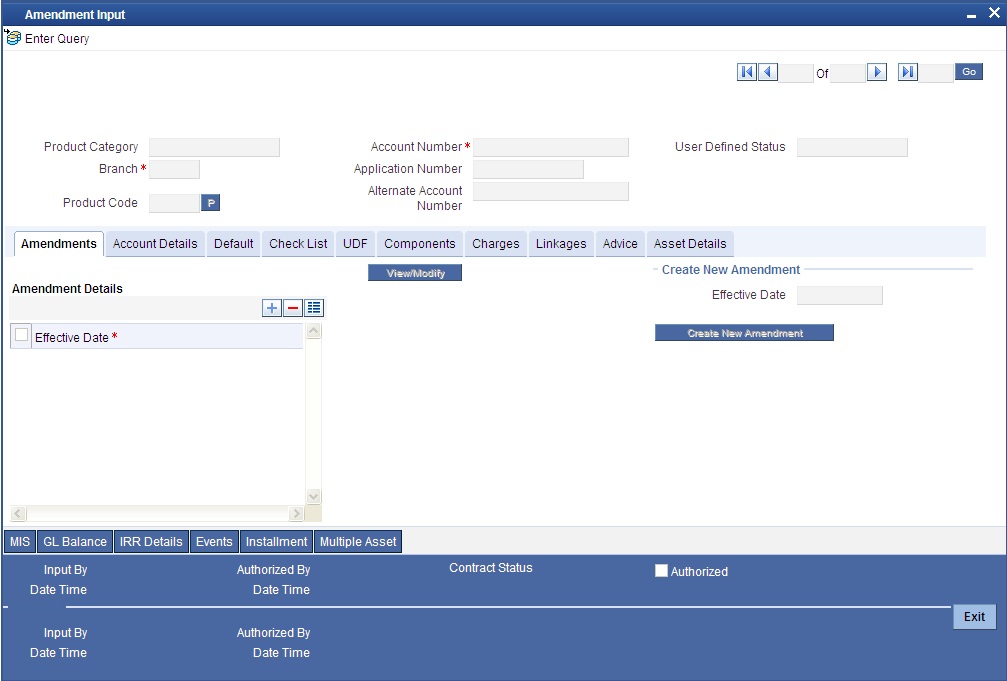
The Value Dated Amendment Simulation screen is similar to Value Dated Amendments screen.
9.5.1.1 Maturity Date Change
The Amendment of the Finance account maturity date, effective a certain date can be performed through this function. Future schedules are affected based on the effective date. This assists in providing schedules as per the customer’s choice. Hence, even if an extension is sought, the profit increase in the installment can be postponed until a certain period to facilitate customer’s liquidity situation. For Murabaha, Istisnaa and Musharaka accounts, you can only decrease the maturity date. No other form of amendment will be allowed. Similarly, for Mudaraba accounts, you can only effect a profit rate change. However, this change too can be made only on the maturity date of the account.
9.6 Version History View and Reversal
This section contains the following topic:
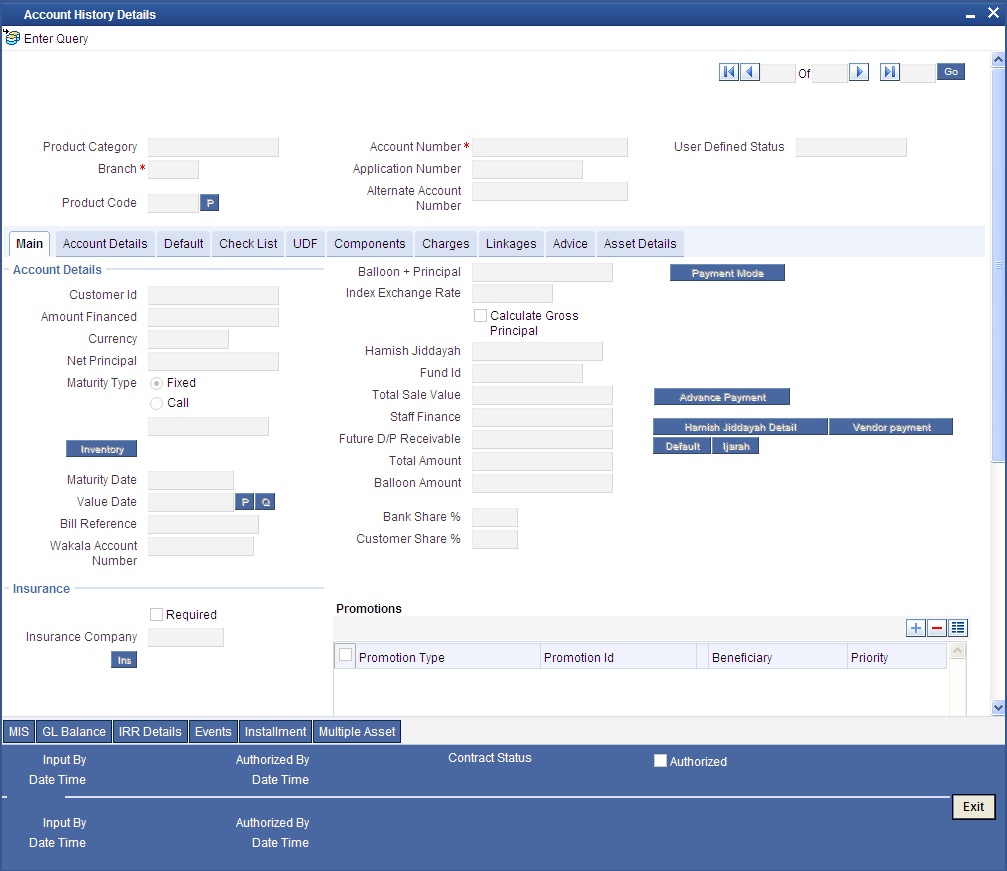
9.6.1 Viewing Account History Details
Version numbers are created for a finance account during any one of the following three instances:
- When amendments made to the Account parameters – Principal, Rate and Tenor
- Status change of the product
- Rollover of the Finance product
Multiple versions created for a finance account can be viewed through the ‘Account–View History’ screen. You can invoke this screen by typing ‘CIDACHST’ in the field at the top right corner of the Application tool bar and clicking the adjoining arrow button. Reversal of operations to previous version is supported for Rollovers, Manual Status Change and Amendments that create a new version.
The Islamic Financing module has the following features:
- Finance accounts have in-built versioning features
- Contract parameters and hence the finance behaviour are modified based on operations such as Value dated amendments, status changes, Contract amendments, Rollovers etc, thus creating a new version.
- Any version of the finance can be backtracked sequentially to a previous configuration by saving the versions in history and by changing the events diary appropriately.
- This can be viewed by scrolling to the appropriate version number.
- Oracle FLEXCUBE supports an incremental reversal of contract version. While reversing, all the events will be reversed and the balances are appropriately affected.
- When you click ‘Reverse’ icon in the toolbar, the options presented are Entire Contract and Current Version
- For a single step reversal, all authorized entries and maintenances are reversed through this operation. A new version is created and a new event REVV – Reverse Version is triggered.
- It is also possible to forward track the same changes after back tracking
- If the entire contract is to be reversed, REVC fires when the version to be reversed is the First version
- If the reversal is an account reversal, then the system will re-instate linked linkage for the equivalent of the amount disbursed.
- If the reversal is a payment reversal, then the system will utilize linked linkage for the equivalent of the amount paid.
Refer the ‘General Maintenances’ chapter of this User Manual for further information on the Account Details Screen and Version Control.
9.7 Inactive Rollover Input
This section contains the following topic:
9.7.1 Funding Status Details
This module creates a finance account in an Inactive state. This is required to generate various finance product scenarios. All these are input from the Application processing phase. All applications that have undergone the process of Application Entry and Underwriting can be viewed as APPROVED-BLANK. These are Finances that have been underwritten and manual check of documents etc. is being done.
The Finance Funding is triggered from the account details screen. However it has a Funding Status field which drives its operations. At this stage the application has been underwritten and is in APPROVED-BLANK Status. The CIF is created.
From APPROVED– BLANK, the application moves through to APPROVED-VERIFYING and APPROVED–VERIFIED status which are provided to enter the finance details and to verify the documents. Any aspects of the Finances can be changed but there is no version maintained. These Finance accounts are INACTIVE and even BOOK has not been fired on them. Now once the manual verifications are done the Application is moved to the Application-Verified status.
A final approval is made on the application in all respects and then it is moved to APPLICATION-FUNDED Status. This FUNDED status is the BOOK of the Finance account. At this time the Finance BOOK event entries are fired. If configured the Finance advice is sent to the Customer.
You can also roll over an inactive account using the ‘Inactive Rollover Input’ screen. You can invoke this screen by typing ‘CIDIMROL’ in the field at the top right corner of the Application tool bar and clicking the adjoining arrow button.
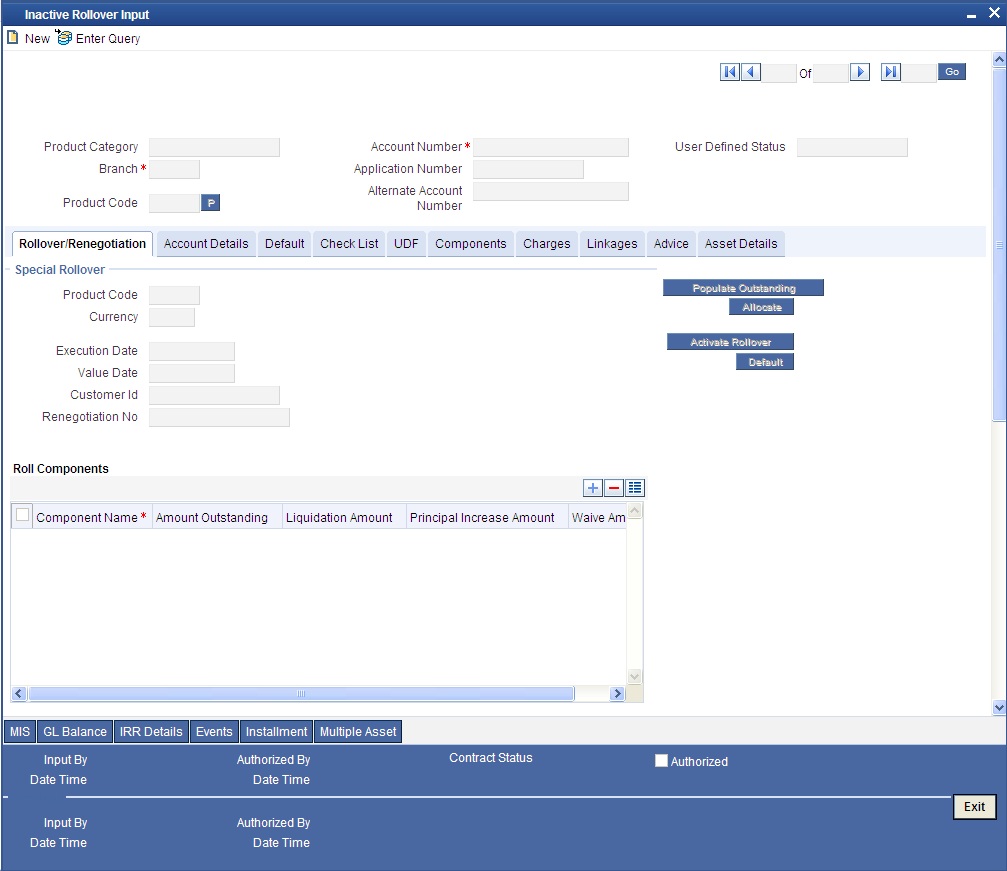
This screen is similar to the one used for manual rollover.
Refer the section ‘Rollover Operations’ in this chapter for details about rollover.
9.8 Manual Status Change
This section contains the following topics:
- Section 9.8.1, "Changing Status Manually"
- Section 9.8.2, "Rollover Operations"
- Section 9.8.3, "Linkage Details Tab"
9.8.1 Changing Status Manually
The status change can be triggered manually. The status change can be done with a value date of the past. You can invoke this screen by typing ‘CIDMSTCH’ in the field at the top right corner of the Application tool bar and clicking the adjoining arrow button.
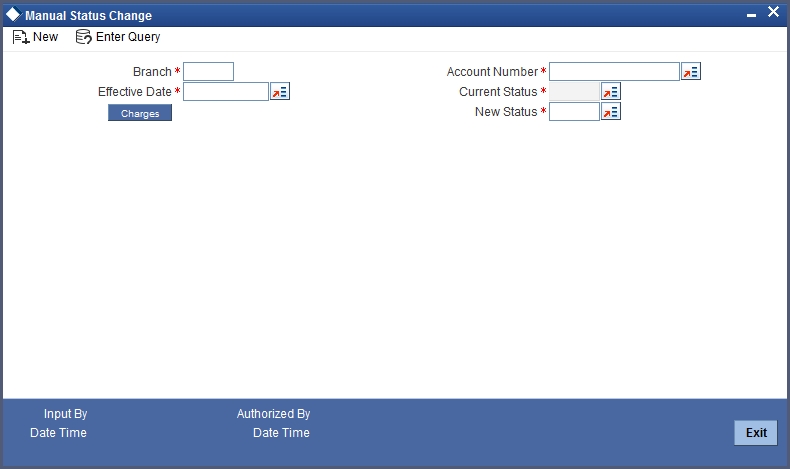
Branch Code
Specify the branch code of the account.
Account Number
Select the account number of the account from the adjoining option list.
Current Status
Select the current status of the account from the adjoining option list.
New Status
Select the new status of the account from the adjoining option list.
The valid values are active, dormant, closed and so on.
Note
This is a mandatory requirement.
Effective Date
Select the effective date from the adjoining option list.
Note
This is a mandatory requirement.
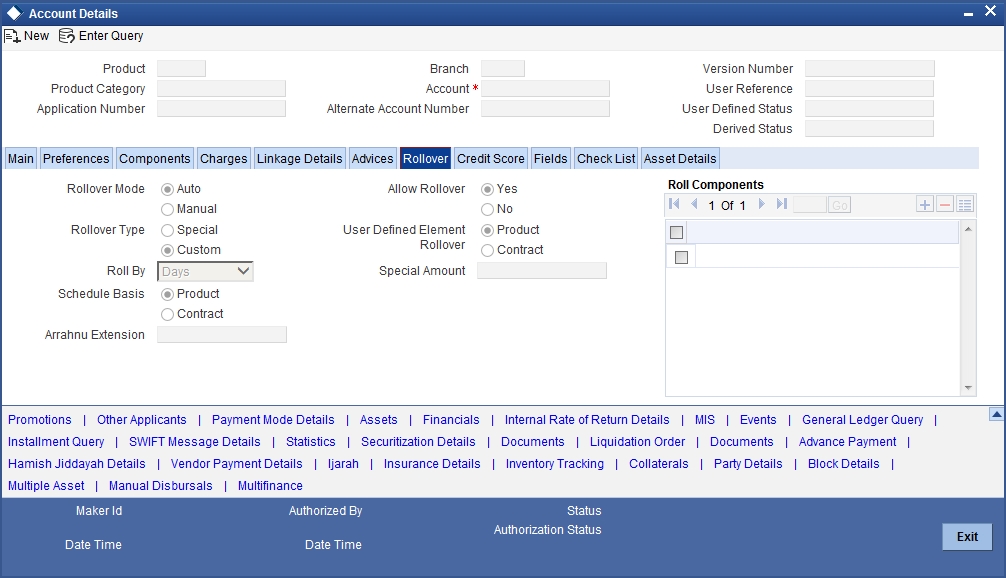
9.8.2 Rollover Operations
The rollover preferences and rollover type for a finance account are specified at the time of setting up a product. In the product screen, you have the option to rollover the account manually or instruct the system to do an automatic rollover. You can also specify the type of rollover; the options available are custom and special. When a finance is rolled over, a schedule is defaulted depending upon the UDE type and the schedule basis specified in the product screen.
Refer to the Products Chapter for more details on rollover specifications for finance accounts.
The rollover preferences specified at the product level are defaulted in the accounts screen at the time of finance account creation.
Refer to the ‘Account Creation’ chapter for more details on rollover specifications for finance accounts.
The Islamic Financing module has a special operations screen to support manual Rollover of accounts. This screen provides facility to pay off dues on the finance and also options to rollover the unpaid amounts for a new tenor with new finance terms.
If the Rollover is a simple maturity extension with or without components (Outstanding Principal, Profit etc) capitalized, then the ROLL event is fired. However, if the Rollover is a result of Renegotiation and Restructuring of the finance then the respective events are fired.
Special Rollovers involve a change in the Finance currency, reassignment of the Finance customer, creation of a new finance with same reference number as the original finance and waiver of outstanding finance. These are supported by events that fire the respective accounting entries.
The special Rollover Event is SROL and Renegotiation of a finance is RNOG. The event entries to be maintained are displayed in the product defaulting.
You can invoke ‘Rollover Input’ screen by typing ‘CIDMROLL’ in the field at the top right corner of the Application tool bar and clicking the adjoining arrow button.
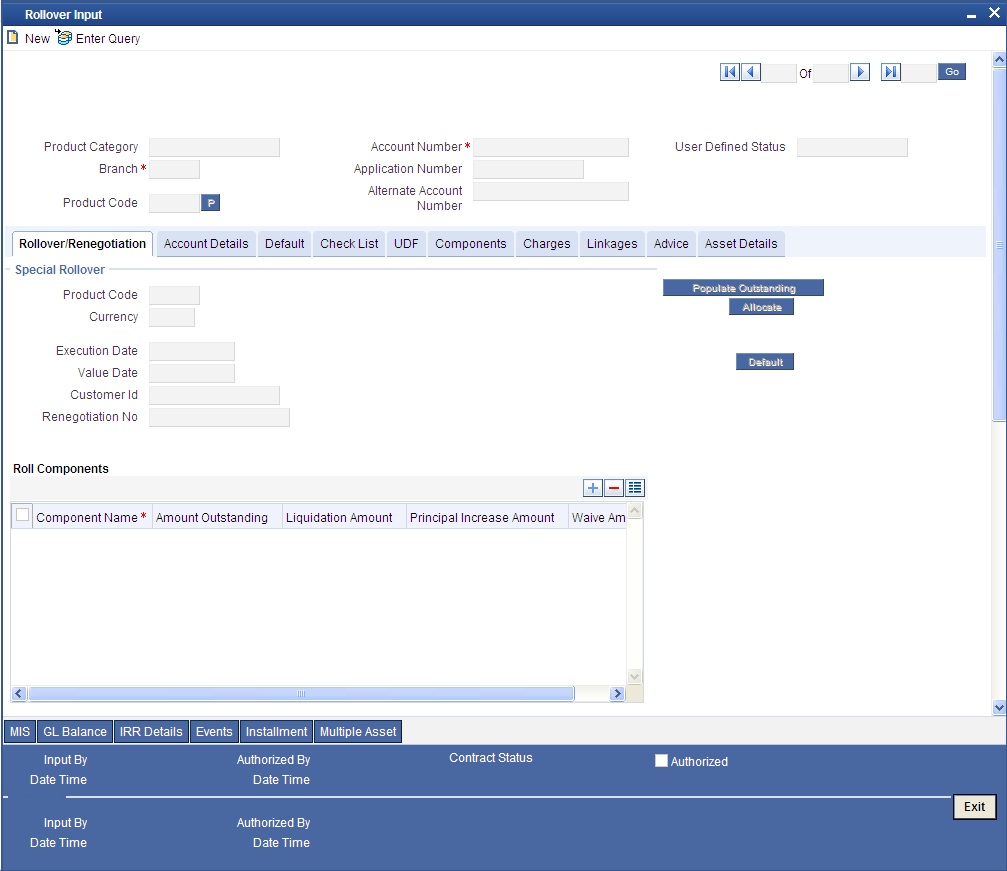
Query for the account number that needs to be rolled over and then click the new button on the Application toolbar. Then, click on the ‘Populate Outstanding’ button. The system will display the outstanding against each component for the account. You can then specify the rollover details such as ‘Liquidation Amount’, ‘Settlement Details’ etc. Then, click on ‘Allocate’ button to actually allocate the settlements against the components involved.
You can specify the following details in the Rollover Input screen:
Branch
Click on the option list to choose the branch in which the customer account resides. Double click on a branch to select it.
Account
Click on the option list to choose the account that is being rolled over. Double click on an account to select it.
Exec Date
Enter the transaction date of the rollover in this field.
Value Date
Enter the value date of the rollover in this field.
Product code
Click on the option list to select the new product of the account due to Special Rollover. Double click on a value to select it.
Currency
Click on the option list to select the new currency of the account due to Special Rollover. Double click on a value to select it.
Customer ID
Select the customer Id from the list of values provided. Double click on a value to select it.
9.8.2.1 Component Details
Component Name
The system displays the name of the component that is being rolled over / paid in this field.
Outstanding
The system displays the outstanding portion of the component in this field.
Liquidation Amount
Enter the amount that is paid as part of the Rollover in this field.
Principal INCR Amt
Enter the amount that is rolled over for the component in this field.
Waive Amount
Enter the amount that is waived for the component as part of the rollover in this field.
9.8.2.2 Settlement Details
Mode
Select the mode in which the settlement will be done from the list of options provided.
For Dr Settlements, the various modes are CASA, Credit Card, Clearing, Debit Card, External Account, Electronic Pay Order, Internal Check, Instrument, Cash/Teller and PDC
For Cr Settlements, the various modes are CASA, Clearing, External Account, Instrument, and Cash/Teller
Note
If the Debit Settlement mode is selected as PDC, then the other debit settlement details are not maintained.
If the debit Settlement is PDC then the liquidation mode of the component should be manual.
The Debit Settlement can be chosen as PDC only when contract is amortized.
Settlement Mode Ccy
Click on the option list to select the currency in which a particular settlement is to be made. Double click on a value to select it.
The options include list of currencies allowed for the product, branch and category.
Amount Settled
Enter the amount to be disbursed in this mode as a part of the disbursement.
Note
The amount should be less than the difference between Disbursement amount and the amount settled through other modes. The amount should be in terms of the mode currency.
Finance Ccy Equiv
The system displays the amount in terms of the finance currency in this field.
Original Exchange Rate
The base or actual exchange rate between the account currency and settlement currency gets displayed here.
Exchange Rate
For a customer availing any Relationship Pricing scheme, the customer specific exchange rate derived by adding the original exchange rate and the customer spread maintained for the relationship pricing scheme gets displayed here.
You can change the defaulted rate provided the change is within the variance level maintained for the underlying product.
If Relationship Pricing is not applicable, Exchange Rate will be the same as the Original Exchange Rate.
For Dr Settlement, the following details can be captured depending on the settlement mode:
For ‘CASA’
- Settlement Branch
- Settlement Account
For ‘Credit Card’ and ‘Debit Card’
- Card No.
For ‘Clearing’
- Upload Source
- Instrument Number
- Clearing Product
- End Point
- Routing Number
- Clearing Bank
- Clearing Branch
- Sector Code
- Clearing House
For ‘External Account’
- Upload Source
- PC Category
- Clearing Bank
- Clearing Branch
- External Account Name
- External Account Number
- Clearing House
For ‘Electronic Pay Order’
- Instrument Number
For ‘Internal Check’
- Instrument Number
- Settlement Branch
- Settlement Account
For ‘Instrument’
- Instrument Number
- Routing Number
- End Point
For ‘Cash/Teller’
- Upload Source
For Cr Settlement, the following details can be captured depending on the settlement mode:
For ‘CASA’
- Settlement Branch
- Settlement Account
For ‘Clearing’
- Upload Source
- Instrument Number
- Clearing Product
- End Point
- Routing Number
- Clearing Bank
- Clearing Branch
- Sector Code
- Clearing House
For ‘External Account’
- Upload Source
- PC Category
- Clearing Bank
- Clearing Branch
- External Account Name
- External Account Number
- Clearing House
For ‘Instrument’
- Instrument Number
- Routing Number
- End Point
For ‘Cash/Teller’
- Upload Source
The Islamic Financing Module supports the following rollover functions:
Special Rollover
Only manual product and/or currency modifications are allowed during rollover. This is termed as Special rollover.
The following two events are added for special rollover:
SROL – Special Rollover Liquidation
This event has normal liquidation entries as well as the entries to liquidate the amount to be rolled over into suspense.
New Amount Tag
<component_name>_SROL
New Accounting Role
SROL_SUSPENSE
The entries defined are:
| Dr/Cr | Role | Amount Tag | |||
|---|---|---|---|---|---|
| Dr | DR_SETTLE_BRIDGE | PRINCIPAL_LIQD | |||
| Cr | FINANCE_ACCOUNT | PRINCIPAL_LIQD | |||
| Dr | DR_SETTLE_BRIDGE | MAIN_INT_LIQD | |||
| Cr | MAIN_INTREC | MAIN_INT_LIQD | |||
| Dr | SROL_SUSPENSE | PRINCIPAL_SROL | |||
| Cr | FINANCE_ACCOUNT | PRINCIPAL_SROL | |||
| Dr | SROL_SUSPENSE | MAIN_INT_SROL | |||
| Cr | MAIN_INTREC | MAIN_INT_SROL |
REOP – Re-Opening of Finance Account with new product and/or currency
This event has entries to Dr Finance Account and Cr the Dr Settlement suspense. The PRINCIPAL amount tag is used for these entries.
The entries defined are:
| Dr/Cr | Role | Amount Tag | |||
|---|---|---|---|---|---|
| Dr | FINANCE_ACCOUNT | PRINCIPAL | |||
| Cr | SROL_SUSPENSE | PRINCIPAL | |||
| Dr | FINANCE_ACCOUNT | PRINCIPAL_INCR | |||
| Cr | CR_SETTLE_BRIDGE | PRINCIPAL_INCR |
The above two events are triggered whenever Product and/or currency is changed during manual rollover.
A manual rollover screen is provided to carry out special rollover. The current product code and currency are shown on the manual rollover tab. If any of this were modified then SROL event is triggered, which in turn triggers REOP, else, a normal ROLL event is triggered.
Note
In case of Product Change, SROL event of the previous product is triggered and REOP event of the new product is fired. Hence the SROL_SUSPENSE maintained should be same across all products.
Pre Mature Rollover
During manual rollover a Rollover Value Date is captured, which is a date prior to the maturity date to pre maturely rollover the finance. The profit is calculated up to the rollover value date. You can choose to liquidate or roll any component. Special Rollover is also allowed.
Back Value dated Rollover
The rollover value date may be used to input back valued rollovers.
Rollover Booking
The ROLB (Rollover Book) event facilitates processing of future dated rollover instructions. A manual rollover, to be executed in the future can be created by giving a future execution date. For such rollover instructions, the ROLB event is fired. The rollover instructions are applied on the execution date. All the settlement entries are passed on the execution date with the rollover value date.
Rollover Tenor
A new field, ROLL BY, is added to the Product Preferences for Rollover. The values are:
- Days – The Tenor for the Rolled Contract would be taken in terms of days.
Example: Value Date: 01-Jan-2005; Maturity Date: 01-Apr-2005; Tenor: 90 days
New Rolled Maturity Date: 30-Jun-2005
- Months – In Terms of Months
Example: Value Date: 01-Jan-2005; Maturity Date: 01-Apr-2005; Tenor: 3 Months
New Rolled Maturity Date: 01-Jul-2005
- Quarters – In Terms of Quarters
Example: Value Date: 01-Jan-2005; Maturity Date: 01-Apr-2005; Tenor: 3 Months (1 Quarter)
New Rolled Maturity Date: 01-Jul-2005
- Semiannual – In Terms of Semi Annuals
Example: Value Date: 01-Jan-2005; Maturity Date: 01-Apr-2005; Tenor: 6 Months (Semi Annual)
New Rolled Maturity Date: 01-Oct-2005
- Year – In Terms of Years
Example: Value Date: 01-Jan-2005; Maturity Date: 01-Apr-2005; Tenor: 12 Months (Year)
New Rolled Maturity Date: 01-Apr-2006
The same field is available on the Account screen and the values are defaulted from product. The defaulted values can be amended.
Inactive Rollover
This function is provided to save Inactive rollover instructions. Click on the ‘Activate’ button on the Inactive Rollover Input screen to activate the inactive rollover instructions.
When an Inactive instruction is saved, no events are processed. And when activated, all the applicable events are fired.
This screen captures payment details such as Value date of the payment, Amount Settled, Payment Mode, Related Payment Products and Settlement Account. The payment is against any of the finance components such as principal, profit etc.
You can invoke ‘Inactive Rollover Input’ screen by typing ‘CIDIMROL’ in the field at the top right corner of the Application tool bar and clicking the adjoining arrow button.
The procedure to create an Inactive Rollover is similar to the Manual Rollover process. However, you have the additional facility to activate the rollover by clicking on the ‘Activate Rollover’ button.
9.8.3 Linkage Details Tab
Click the ‘Linkage Details’ tab to maintain the linkage details and remarks for the product. The screen is displayed below:
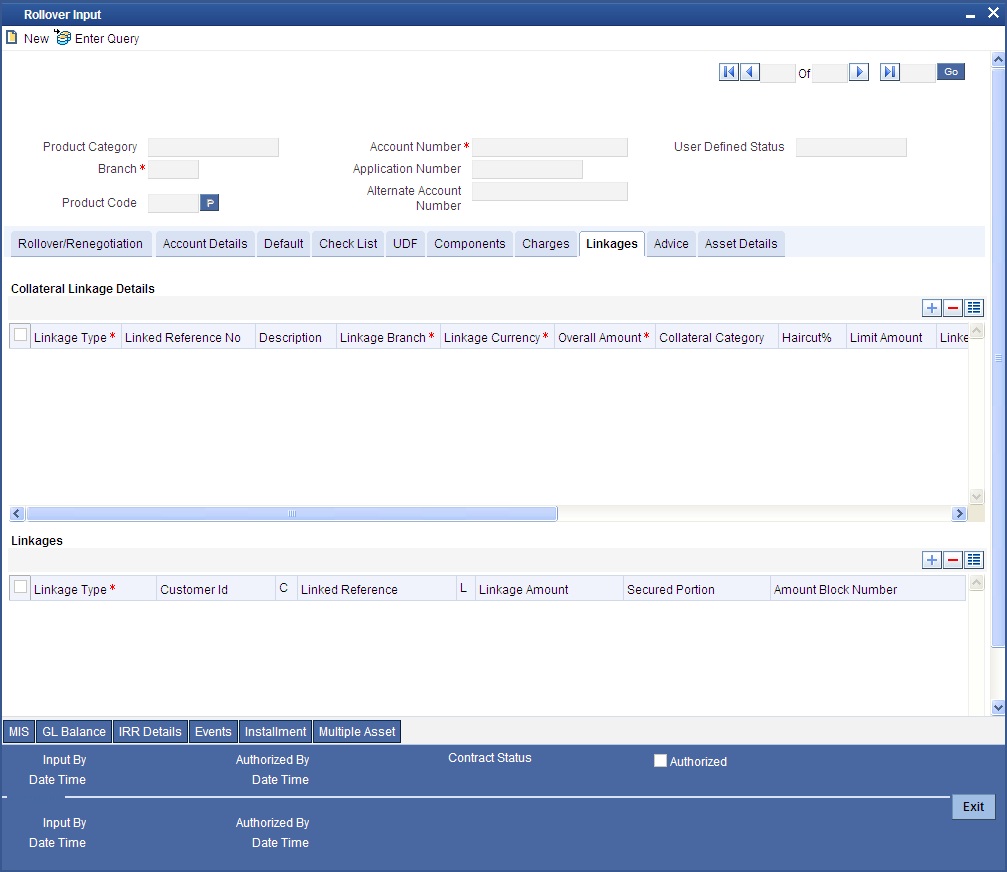
You can maintain the following parameters here:
Re-instatement Order no
Specify a valid order in which you need to re-instate the linkage linked to the account. The system re-instates the linkage in an ascending order.
For more details on field explanation, refer to the section ‘Linkage Details Tab’ in ‘Account Creation’ chapter of this User Manual.
Note
- You can delete linkage details and modify the linked amount or linked percentage, if the specified linked reference number is not utilized.
- During rollover, if the principal component increases, then the system will utilize the linked linkage amount for the increased amount based on the ascending order of utilization order number maintained in the linkage details section.
- During rollover, if the principal component decreases, then the system will reinstate the linked linkage amount for the decreased amount based on the based on the ascending order of re-instatement order number maintained in the linkage details section.
- During special rollover, if the customer is changed, then the system will reinstate the collateral/collateral pool/line of the old customer and utilizes the collateral/collateral pool/line of the new customer, for the amount equivalent of the principal outstanding.
9.9 Account Renegotiation
This section contains the following topics:
9.9.1 Renegotiating Account
The customer can ask for re-negotiation of the written-off finance. Or when an account becomes delinquent, the bank may negotiate with the customer. Negotiation may result in any of the following:
- The customer may repay the finance.
- The finance is negotiated completely. In this case a new finance may be opened.
- The customer may pay the partial finance amount and the bank may condone the rest.
- The customer and bank may renegotiate part of the finance and the rest may be condoned.
- In the worst case scenario, if the customer is unable to pay back any portion the finance amount, the bank may consider it as Condonation and close off the finance.
In Oracle FLEXCUBE, renegotiation is treated as a separate manual operation. Whenever a finance is renegotiated, it results in the creation of a new version of the existing finance. The system then recalculates the schedules. If the customer makes any payment towards the written-off finance, they are also considered.
Once the finance gets transformed into a new finance, it is affected by maintaining Bridge GLs.
Renegotiation can result in just varying profit rates or maturity dates of the original finance along with capitalization of the outstanding profit.
You can perform finance renegotiation through the ‘Account Re-Negotiation’ screen. You can invoke this screen by typing ‘CIDRENOG’ in the field at the top right corner of the Application tool bar and clicking the adjoining arrow button.
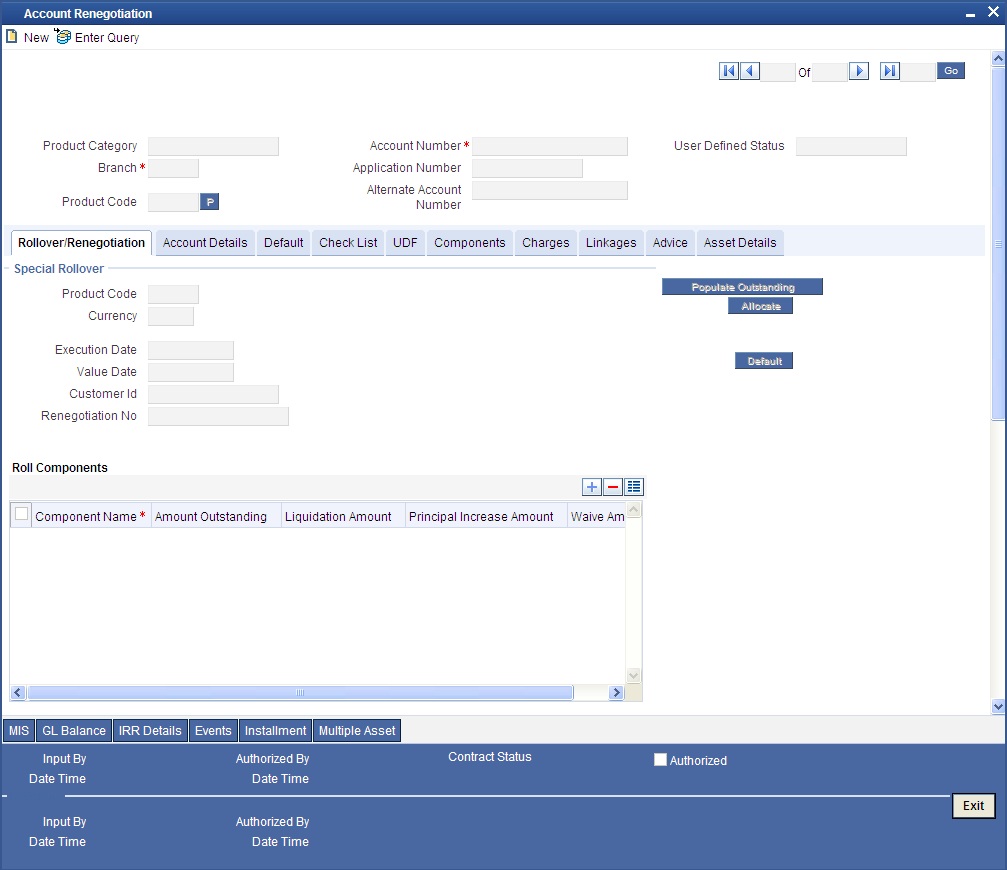
Renegotiation No
The system displays the number of renegotiations which have been already performed for the finance.
The system will validate for the maximum limit of renegotiation as follows, before saving the renegotiation:
- Collect the data for maximum Limit supported and the renegotiation count, for the corresponding account.
- If the maximum limit exceeds, then the system raises the override message ‘Renegotiation Limit is exceeded’.
You can however save the renegotiation request with override.
- If maximum limit is not maintained, then the system will suppress the validation and performs the renegotiation without any limitation.
This screen is similar to the one used for manual rollover.
Refer the section ‘Rollover Operations’ in this chapter for more details about rollover.
9.9.2 Linkages Tab
Click the ‘Linkage Details’ tab to maintain the linkage details and remarks for the product. The screen is displayed below:
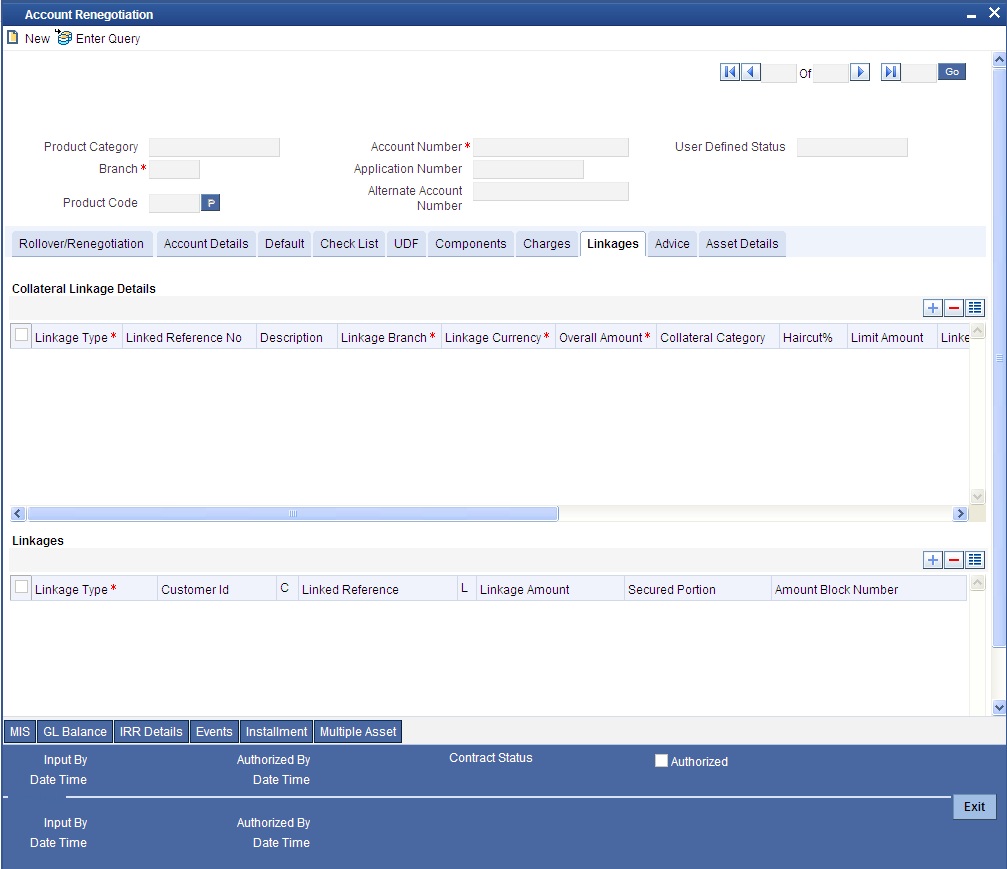
You can maintain the following parameters here:
Collateral Linkage Details
The following collateral details are maintained here:
Re-instatement Order no
Specify a valid order in which you need to re-instate the linkage linked to the account. The system re-instates the linkage in an ascending order.
Status
Status of the collateral is defaulted here.
Linkage Details
You can maintain the following linkage details here:
Amount Block Number
Specify a valid amount block number for the collateral you want to renegotiate.
During renegotiation, if the customer is changed, then the system will reinstate the collateral/collateral pool/line of the old customer and utilizes the collateral/collateral pool/line of the new customer, for the amount equivalent of the principal outstanding.
For more details on the field explanation of each tab, refer ‘Account Creation’ chapter of this User Manual.
9.10 Account Reassign
This section contains the following topics:
9.10.1 Reassigning Account
Oracle FLEXCUBE allows you to change the main debtor of a finance through the process of reassignment. You can achieve this through the ‘Account Reassign’ screen. You can invoke this screen by typing ‘CIDNOVDT’ in the field at the top right corner of the Application tool bar and clicking the adjoining arrow button.

In this screen, you need to clear all details by pressing F7. Then you can specify the account number and click on F8. The system displays all the account details of the chosen account. You can change the Customer Id of the primary applicant in the ‘Reassignment – Account Details’ screen.
Customer ID (Primary Applicant)
The CIF ID of the primary debtor of the finance account is displayed here. You can change it by selecting another CIF ID from the option list. This in effect means the debtor will be changed.
Customer ID (Other Applicants)
The CIF IDs of the co-applicants for the original finance are displayed here. You can change them by selecting other CIF IDs from the option list.
In the ‘Account Reassign – Linkages’ screen, you can change the following details:
- Linkage Type
- Customer ID
- Linked Reference Number
- Linkage Amount
- Secured Portion
All these details get displayed in the corresponding fields. You can modify the same.
9.10.2 Linkages Tab
Click the ‘Linkage Details’ tab to maintain the linkage details and remarks for the product. The screen is displayed below:
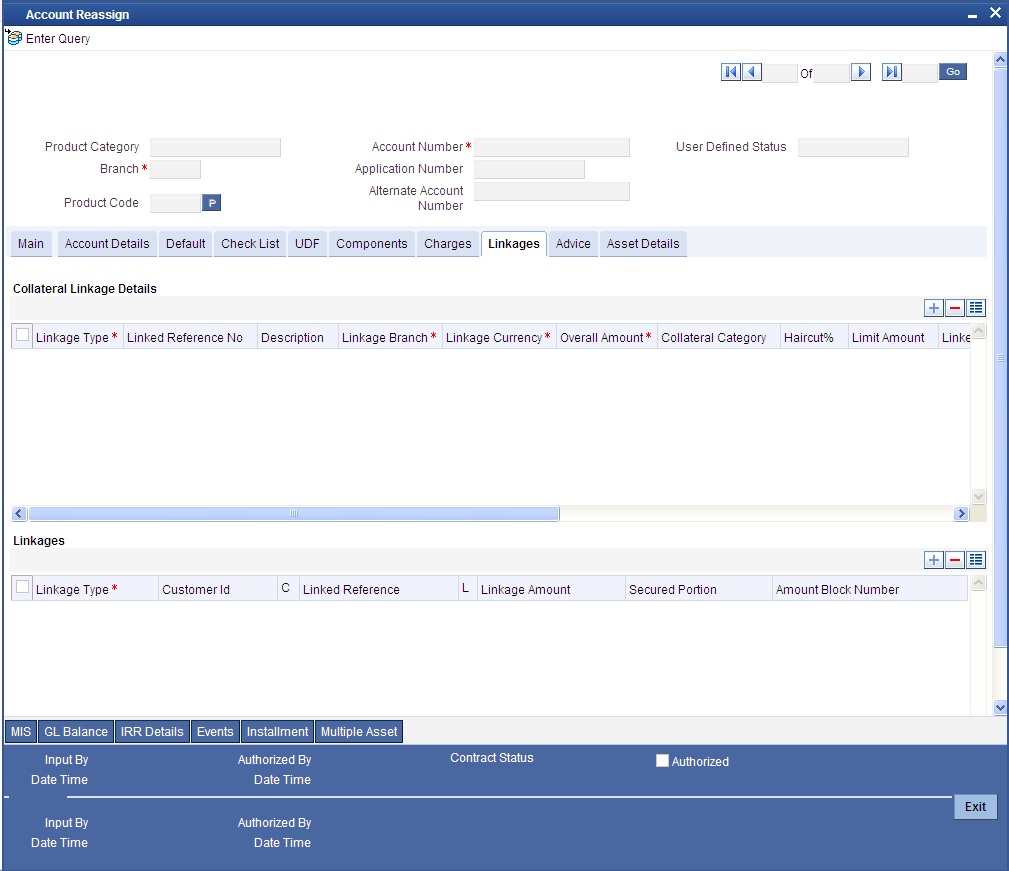
You can maintain the following parameters here:
Collateral Linkage Details
The following collateral details are maintained here:
Re-instatement Order no
Specify a valid order in which you need to re-instate the linkage linked to the account. The system re-instates the linkage in an ascending order.
Status
Status of the collateral is defaulted here.
Linkage Details
You can maintain the following linkage details here:
Amount Block Number
Specify a valid amount block number for the collateral you want to renegotiate.
During reassignment, the system will reinstate the collateral/collateral pool/line of the old customer and utilizes the collateral/collateral pool/line of the new customer, for the amount equivalent of the principal outstanding.
For more details on the field explanation of each tab, refer ‘Account Creation’ chapter of this User Manual.
During Value Dated amendments, you can also change the following data:
- Maturity Date
- Profit Rate
- Installment Dates
However, you cannot change the finance Account Number.
As a result of reassignment, limit utilizations against the old customer will be reduced and those towards the new customer will be increased by altering the utilizations.
9.11 Adhoc Charge Application
This section contains the following topic:
9.11.1 Applying Adhoc Charges
The adhoc charge can be applied by invoking the ‘Adhoc Charges’ screen. You can invoke this screen by typing ‘CIDADCHG’ in the field at the top right corner of the Application tool bar and clicking the adjoining arrow button.
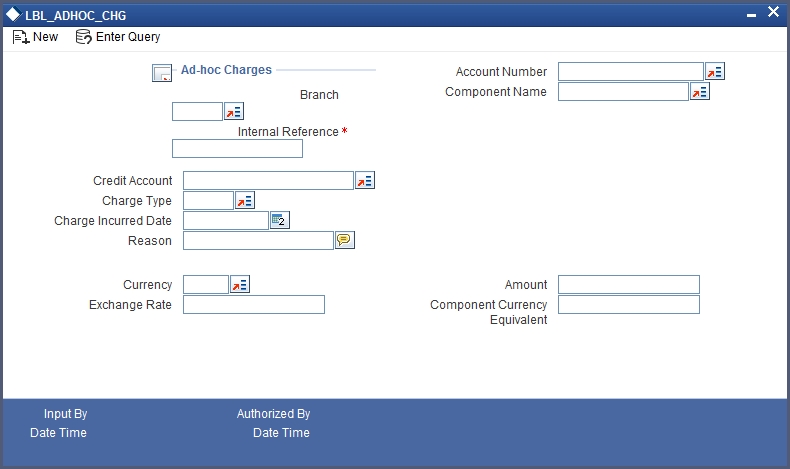
Account Number
Select the account number on which the charges are to be levied from the option list.
Internal Ref No
The system displays a unique identifier for the specific ad hoc charge.
Component Name
Select the component that is to be used to track the ad hoc charge from the option list.
Branch Code
The system displays the branch code of the bank that is servicing the finance.
Credit Account
Specify the account (GL) to which the ad hoc charges collected are to be credited from the option list. This in most cases is the account of the Collection Agency.
Charge Type
Select the charge type to be levied on a finance from the option list. The values in the option list are the charge types maintained using the Adhoc Charge Type maintenance.
Charge Incurred Date
Specify the date on which the charge is to be levied on the customer. This cannot be a future date. Also, it should pass the accounting for ad hoc charges with a back date.
Reason
Specify the reason for which the charge is being levied on the account.
Currency
Specify the currency.
Exchange Rate
Specify the exchange rate.
Amount
Specify the amount of the ad hoc charge to be levied on the customer account.
The Adhoc Charges enables you to keep track of the following:
- All charges to be recollected from the customer.
- The outstanding charges on the finance account if the customer desires to repay the finance.
- To consider an account ready for liquidation only if there are no pending charges.
9.12 Liquidation Suspension
This section contains the following topic:
9.12.1 Suspending Liquidation Process
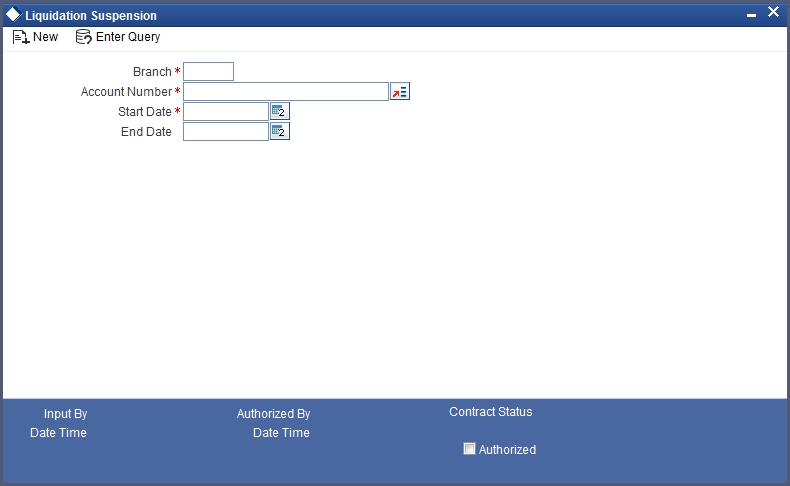
You can suspend liquidation process between specific periods using the ‘Liquidation Suspension’ screen. You can invoke this screen by typing ‘CIDLQSPN’ in the field at the top right corner of the Application tool bar and clicking the adjoining arrow button.
Here you can capture the following details:
Branch Code
This field displays the branch code of current branch.
Account Number
Specify the account for which you wish to suspend liquidation. The adjoining option list shows all the active accounts existing in that particular branch under the Islamic Financing module. You can select the appropriate account number.
Start Date
Specify the date from which the liquidation process has to be suspended.
End Date
Specify the date to which the liquidation process has to be suspended.
9.12.1.1 Multi Finance Button
Click ‘Multi Finance’ button to invoke the ‘Multi Finance Company’ screen. You can capture details of individual borrowers here.
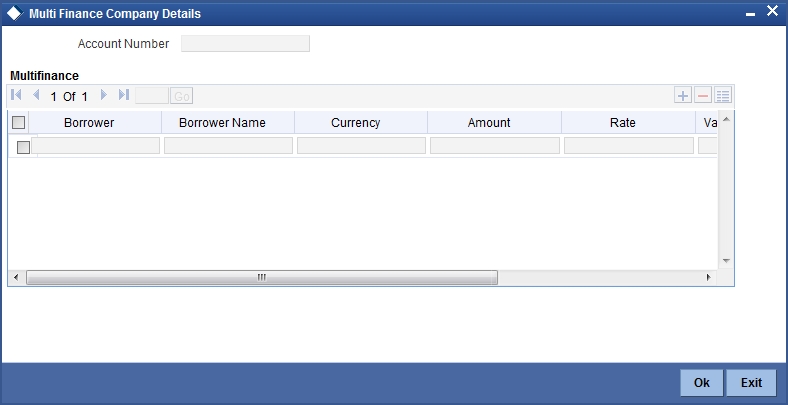
You can maintain the following details here:
Borrower Id
Specify the Borrower ID. For an existing customer you can selected from the available option list.
Borrower name
Specify the Borrower name.
Currency
Specify the financed currency. The adjoining option list displays all valid currency codes maintained in the system. You can select the appropriate one.
Amount
Specify the financed amount.
Rate
Specify the Profit Rate.
Value Date
Enter the Value date of the finance using the date button.
Maturity Date
Enter the maturity date in this field.
Remarks
Specify the remarks, if any.
9.13 Collateral Take Over Processing
This section contains the following topic:
9.13.1 Processing Asset Take Over
Oracle FLEXCUBE facilitates takeover of assets resulting in, liquidation of finance account and creation of fixed asset based on the details maintained for ‘Asset Category’, ‘Location Code’, and ‘Asset Product Code’. You can process take over of assets using ‘Collateral Take Over Processing’ screen. You can invoke the ‘Collateral Take Over Processing’ screen by typing ‘CIDASTOP’ in the field at the top right corner of the Application tool bar and clicking on the adjoining arrow button.

Liability ID
Select the liability ID for which collateral is linked from the adjoining option list.
Collateral Code
Specify the Collateral Code here.
You cannot take over the collateral:
- if the collateral is shared by other liabilities. The system displays the message as ‘This collateral is shared by other liabilities’.
- if the collateral is part of any collateral pool. The system displays the message as ‘Collaterals that are part of a pool cannot be taken over’.
- if the contracts which have linkage with collateral code does not belong to same customer, then the system displays the message as ‘Collateral has linkages with contracts of more than one customer. Cannot proceed with takeover’.
- if the contracts which have linkage with collateral code does not belong to same branch, then the system displays the message as ‘Collateral has linkages with contracts of more than one branch. Cannot proceed with takeover’.
- if the collateral is attached to contracts from CI and CL module, then the system displays the message as ‘The collateral belongs to contracts other than CI module.’
- If the collateral is marked as ‘Mortgage Initiated’, then the system displays the message as ‘Collateral is mortgage initiated’.
- If the collateral have linkages with any active securitized contracts with status ‘SECR’ that had utilized the collateral, then the system displays the message as ‘Collateral belongs to contracts with status SECR, and also the collateral has been utilized.’
Take Over Reference
The system displays the Take Over Reference number on save of collateral takeover process.
User Reference
Specify the User Reference Number
CI Account Number
Select the CL Account Number from the adjoining option list.
Collateral take over is triggered either by entering the collateral and liability code or Loan or Finance account number. If Account is entered, Collaterals linked to the account will be shown in Collateral code option list.
Collateral Details
For details regarding Collateral, refer ‘Collateral Maintenance’ section in ‘Limits and Collaterals’ chapter in the ELCM user manual.
CI Accounts with Linkage
CI Account Number
The system displays the CI Account Number here.
Product Code of Account
The system displays the product code of the account.
Linked Percentage
Linked percentage is defaulted here.
Linked Currency
The system defaults the Linked Currency.
Linked Amount
The system displays the Linked Amount.
Account O/S
The system displays the Account O/S.
Amount Utilized
The Amount Utilized is defaulted here.
To be settled
Select ‘Yes’ for the loan contract to be settled.
Amount Settled
Specify the amount to be settled.
The sum of the amount settled should not exceed the collateral available amount.
Customer Settlement Account
Select the customer settlement account from the adjoining option list.
Advice to be generated
Check this box to indicate whether advice is to be generated.
Available Amount after Take-Over
The system displays the available amount after take over.
On save of CI Account with Linkage screen a unique take over reference number is generated to keep track of the takeovers processed.
On Authorization:
- Fixed asset is created. Collateral value is credited into customer’s settlement account.
- The CI contract is settled to maximum amount input in amount settled by invoking manual liquidation event.
- The linkage between the collateral and the linked contracts are removed.
Note
If you select a loan without any overdue to be settled, then the system displays the message as ‘This Loan does not have any overdue. Still you want to takeover and settle the loan?’
Asset Details
For information regarding the fields under Asset details, refer ‘Capturing the details of the Islamic Asset’ section in ‘Processing Islamic Assets’ chapter in FI user manual.
The collateral is closed once the Islamic asset is created with the details provided in asset details. You cannot reverse the Islamic asset contract created through acquisition of collateral.
Islamic Asset contract reference number is generated on authorization of asset takeover process.
In the BOOK event of FI contract, the taken over GL is debited for the value of the collateral that is to be taken over and customer account is credited with the value of the collateral. The FI contract is created with asset value as full collateral value without haircut percentage is applied.
Note
During sale of Islamic asset, takeover GL is credited with the sale amount and customer account is debited with the same amount.
The loss that arises due to the sale of the asset would be debited from the loss GL.
The profit that arises due to the sale of the asset would be credited to the income GL.
9.14 Partial Write Off
This section contains the following topic:
9.14.1 Partial Write Off
A partial write off on a loan account is possible at any time during the life cycle of a CI contract irrespective of its status. You can manually initiate a partial write off for a loan account using the ‘Partial Write Off’ screen. You can invoke the ‘Partial Write Off’ screen by typing ‘CIDPWOFF’ in the field at the top right corner of the Application tool bar and clicking on the adjoining arrow button.
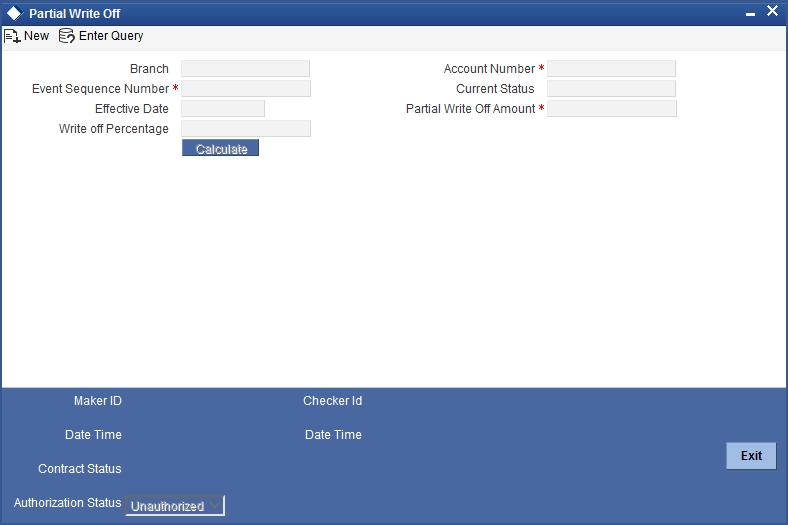
The following details are captured here:
Branch Name
The current branch code is defaulted here. You can initiate a Partial Write Off only from the current branch.
Account Number
Select the appropriate account number from the option list provided. The option list displays all the accounts belonging to the current branch.
Effective Date
This is the date from which the partial write off on the loan account should become effective. The current application date is defaulted here.
Current Status
The current status of the selected loan account is displayed here.
Write Off Percentage
Specify the percentage of loan amount that has to be partially written off and click ‘Calculate’ to allow the system to determine the write off amount basis the total outstanding amount. This is optional.
Partial Write Off Amount
Specify the loan amount to be partially written off. If you have already specified the write off percentage, then system will calculate the write off amount calculated based on the percentage provided on total outstanding.
Saving the write off transaction triggers the PWOF event and system passes accounting entries based on the accounting entries maintained at the product level in accordance with the account status. If the CI account currency and component currency are different, accounting entries are always passed in the component currency.
Upon executing a write off, the amount specified is split across components based on the liquidation order..The account entry is then passed for components with the latest severity respectively, so that such balance is picked up first if subsequent payment happens. For subsequent payments after a write off, system first considers the previously written off balance and then the written off amount for balancing.
Note
The write off amount is split across components and not schedules.
In the scenario of a status change after write off, balance movement happens in the Normal Asset GL and the Partial Write Off GL. If a Contingent GL accrual precedes a write off then the Contingent GL balance is moved to a Contingent Write Off GL as defined in the PWOF accounting entry definition. The real balances are in turn moved to the Real Write Off GL.
9.15 Collateral Takeover Processing Summary
This section contains the following topic:
9.15.1 Viewing Asset Take Over Processing Details
You can view the asset take over processing details in the ‘Asset take Over Processing Summary’ screen. You can invoke this screen by typing ‘CISASTOP’ in the field at the top right corner of the Application tool bar and clicking the adjoining arrow button.
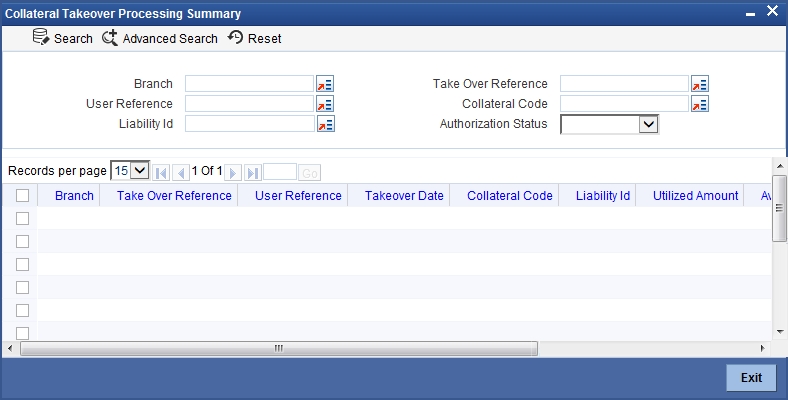
In the above screen, you can base your queries on any or all of the following parameters and fetch records:
- Branch Code
- User Reference
- Collateral Code
- Take Over Reference
- Liability ID
- Authorization Status
Select any or all of the above parameters for a query and click ‘Search’ button. The records meeting the selected criteria are displayed.
If you are allowed to query details for the asset take over, then system displays the following details pertaining to the fetched records:
- Branch Code
- Take Over Reference
- User Reference
- Takeover Date
- Collateral Code
- Liability ID
- Utilized Amount
- Available Amount before Take Over
- Advice to be Generated
- Authorization Status